Throw a rock in the air right now, and it will probably land on a course creator’s head. Everyone is creating courses right now.
And why wouldn’t they? Creating an online course is probably the easiest way to build a solid passive income stream.
Now, if you want to create an online course but are not sure where to start, then sit back. We have made the ultimate course creation guide for you that you can follow with a blindfold.
TL;DR
- To create a course, first, choose a course topic that you like, you’re good at, and that solves a problem.
- Check if your course idea has a demand in the market.
- Define the outcome and objective of your course and align it with your course structure.
- While creating your course content, keep it short, simple, and to the point.
- Before selling your course, hype it up on social media.
- Make sure to collect feedback from your students and improve your content continuously.
Step 01: Pick Your Course Topic
Choosing the right course topic sets the tone for everything that follows. When you pick a topic that fits your interests and your audience’s needs, you stay motivated as you build lessons and materials.
At the same time, your learners feel like they’re getting exactly what they came for, which keeps them engaged and helps your course get good feedback. If you rush this step or skip the homework on what people want, you might end up with a course that you love, but no one signs up for, and that’s a lot of time and effort down the drain.
So, the goal is to choose a course topic based on what you know, what you love, and what solves your audience’s problems.

Now, let’s get into the details on how you can choose the right course topic.
Find Out Your Strengths and Passions
To get going, find a quiet spot and set aside 15–20 minutes. Have a notebook or a simple document open, and try these steps:
- Free‑write your wins and skills: Start by jotting down everything you’ve ever done that felt easy or got praised. Maybe you’re great at explaining tech stuff without jargon, or you’ve helped friends organize events.
- List what you love talking about: Think about the last few times you got excited telling a story or teaching someone something new. Was it a work hack, a cooking trick, a fitness move?
- Ask for outside opinions: Talk to people who know you well. Ask them for opinions.
- Spot common themes: Look back at your free‑write and feedback. Do you see patterns? Maybe your friends say you’re patient and tech‑savvy, and your free‑write shows a lot of “explaining software.” That overlap hints at a course idea like teaching beginners how to use popular tools.
- Rate your passion and experience: For each item, give yourself a quick 1–5 score on how much you enjoy it and how confident you feel teaching it. High passion plus high confidence is your sweet spot, topics you’ll stick with and teach well.
Once you’ve done this, pick the top two or three items and sit with them for a day. Notice which ones you keep thinking about. That sense of excitement is a good sign you’ve found a strong foundation for your course.
Find Out Problems You Can Solve
After you’ve mapped out your own strengths and passions, the next step is to step into your potential students’ shoes and really feel what’s holding them back. Once you’ve got a clear picture of their challenges, imagine how your own skills and passion could make their life easier.
For example, if you’re a pro at organizing digital files, you might guide learners through a simple system; if you love cooking quick meals, you could show busy parents how to batch‑prep healthy dinners in under an hour, etc.
Finally, list down all the possible problems you can solve with your skill and passion.
Use AI Tools
Now that you have an idea of what you can do, what you love, and the problems you can solve, it’s time to generate some course topic ideas, and for this, we are going to use AI tools like ChatGPT.
Just go to ChatGPT and paste the following prompt:
“Hi ChatGPT! I’m an expert in [your top skill or topic], and I want to create a course for [your target audience]. They often face [key pain points].
1. Suggest 5 course topic ideas that address these pain points.
2. For each topic, give a catchy lesson title and a one‑sentence description.
3. Propose one short, hands‑on exercise or mini‑project for each lesson.”
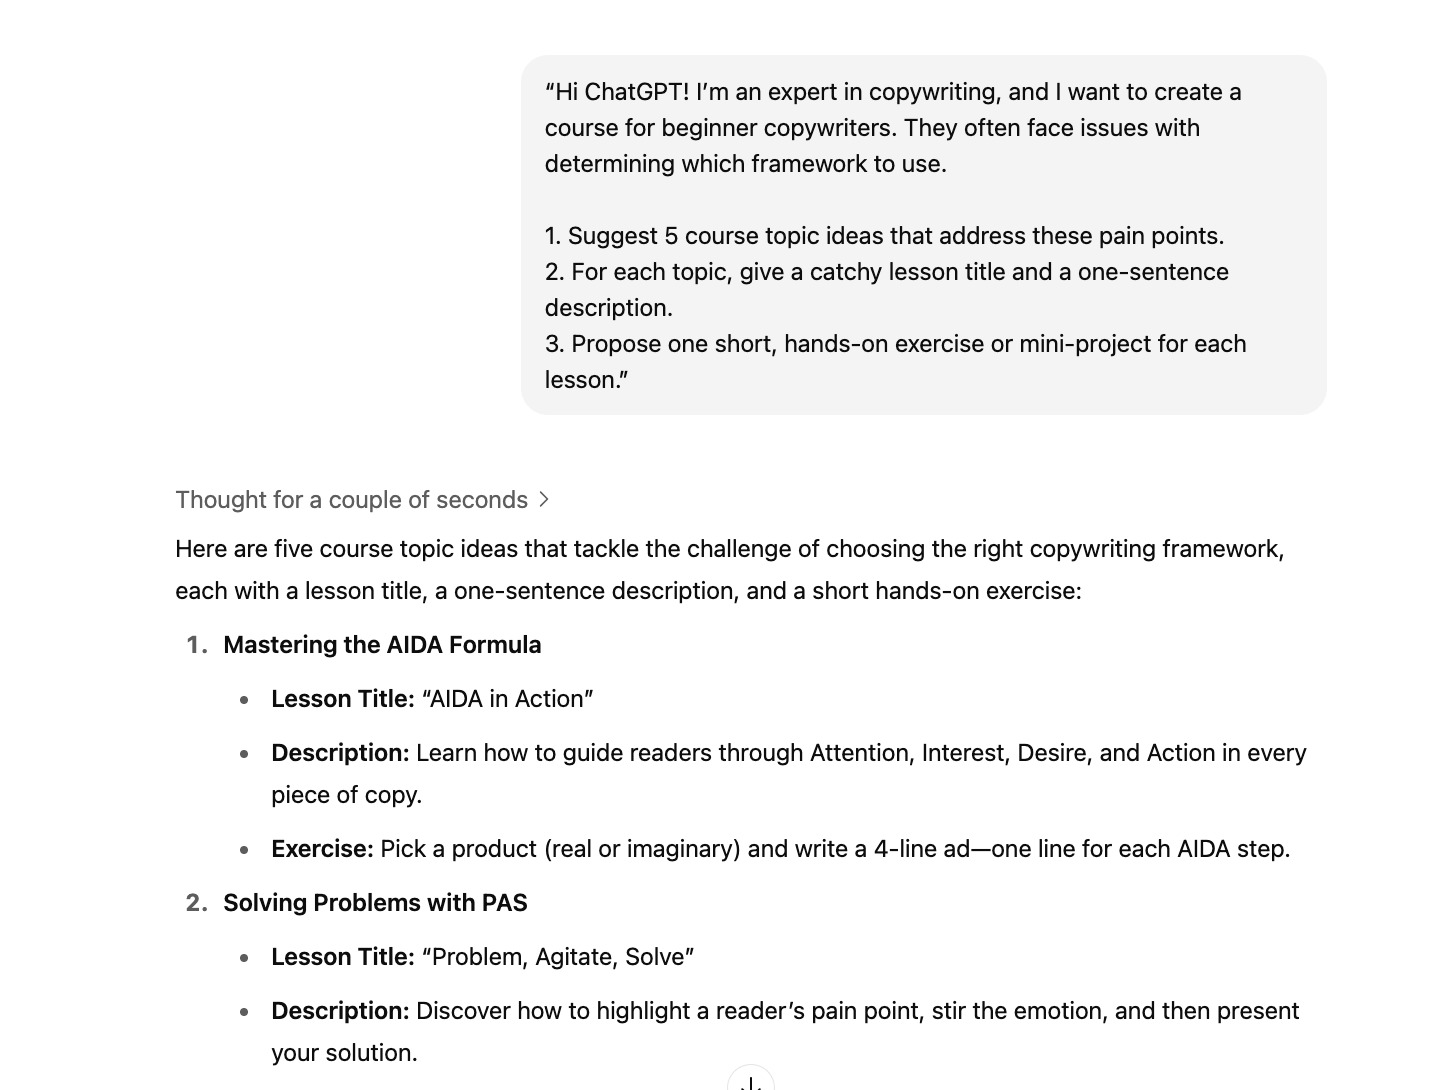
Use this ChatGPT prompt as a starting point, and based on the results you get, you can tweak any sections to match your own voice or add extra requirements (like preferred course length or format). You’ll get a rich set of ideas you can refine into your winning course.
Use Relevant Forums or Communities
If taking ChatGPT’s help was a no-go, then using relevant communities or forums, like Reddit or Quora, to browse through similar discussions can be a big help. If you can’t find any discussions that are relevant to your situation, then muster your courage and make a post. Be very detailed about what problem you’re going through and what kind of solution you would like.
Alternatively, you can also reach out to industry experts on LinkedIn and ask for their advice. While some of them may not reply, you’ll often find that the insights you get from those who do reply help you find your course idea.
Step 02: Validate Your Course Idea
Once you have a solid idea about your course topic, you need to test the waters to see if it’s worth getting into it. By checking early whether people are interested enough to sign up, pay, or even just ask questions, you make sure you build something that meets a real need. It also gives you feedback to shape your content before you invest in creating every lesson.
Now, let’s see the methods you can use to validate your course idea:
Create Gated Content
Start by choosing a small, useful resource that ties directly to your course topic, something like a one‑page checklist, a short PDF guide, or a simple template. Design a basic landing page with a clear headline like “Get your free [resource name]” and a brief sentence explaining what the download covers.
Add a simple form asking for name and email, and set it up so that once someone hits “Send,” they immediately receive the file by email or see a download link on a thank‑you page.
Share the landing page link in social groups, on your website, or through a newsletter. Track how many people visit the page versus how many actually sign up; that conversion rate tells you how interested folks are in your topic.
Host a webinar
If creating gated content is out of the question, then you can try to host a webinar.
Pick one clear topic that’s part of your course and plan a 30–45 minute session around it.
Choose a date and time that works for your audience, then set up a simple registration page where people can sign up with their name and email. The registration page doesn’t have to be technical; you can simply use a Google form.
Promote the event by sharing the link in your social networks and relevant online platforms. A day or two before the webinar, send a reminder email with the link and a brief outline of what you’ll cover.
During the session, teach the core concept step by step, showing examples or walking through a demo. Leave time for questions and answers so you can see where people get stuck.
Near the end, let attendees know about your full course and explain how it goes deeper on the same topic, and include a clear way for them to enroll or learn more. After the webinar, send a follow‑up email with a replay link and a brief survey asking what was most helpful and what else they’d like to learn.
The number of live attendees, replay views, and survey replies will help you understand if your topic really connects with people.
Engage in Relevant Communities
Communities and forums are goldmines for ideas. Just like when we used them for idea selection, we can also use them for validating the same idea.
First, find the online groups or communities where your potential students already gather. This could be a Facebook group for new writers, a subreddit about small business tips, a Slack channel for designers, or a forum for hobby gardeners.
Spend a little time each day reading through recent posts and comments, and keep a running note of any questions or problems that pop up more than once.
When you join the conversation, don’t pitch your course right away; instead, answer a question or share a short example that shows your approach.
After you’ve built a bit of trust, you can ask what kinds of paid help people might consider or even run a simple poll: “Would you join a short class on this topic?”
Pay attention not just to what they say, but how they say it, the exact words and phrases they use to describe their struggles. Over a week or two, you’ll start to see clear patterns in what people need help with and what language speaks to them.
Use those insights to shape your course title, description, and even a few sample lessons so they feel like a natural fit for that community.
Keyword Research
If all of the methods mentioned above are kind of hard to implement for you, then this one is a bit simpler. You can use keyword research tools like Google Trends, Semrush, Ahrefs, Ubersuggest, or Answer the Public to find out the demand for your course idea.
Start by writing down a few phrases someone might type into Google if they were looking for help with your course topic. These can be questions (“how to start a blog”), short phrases (“meal prep ideas”), or problems (“trouble focusing at work”).
Then, plug those into a free tool mentioned above and look at the search volume. If lots of people are searching for a phrase each month, that shows steady interest.
Also, look at the related terms the tool suggests, which can give you more specific ideas or better ways to word your topic.
If the phrases you expected don’t show much activity, it doesn’t always mean the topic has no audience. It might just mean people are using different words.
Try changing the phrasing or breaking the topic into smaller parts. The goal isn’t to chase big numbers, but to find language that matches how your audience actually talks and searches. That way, your course title and description will be easier to find and feel more familiar to the people you want to reach.
Study Your Competitors
Another simple method, like keyword research, would be researching the market and your competitors. Before creating your course, it’s helpful to analyze what’s already out there.
Start by checking online course platforms like Udemy, Skillshare, Coursera, or even individual creators’ websites to find similar courses. Pay attention to what topics are common, how courses are structured, and what they promise to teach.
Read through both high‑rated and low‑rated reviews, especially the one‑ and two‑star ones, to see what learners felt was missing. You might notice patterns, like people complaining about vague explanations, not enough examples, or no support after the course. These are signs of what learners still want but aren’t getting.
Also, make sure to pay attention to how other courses are priced, how long they are, what’s included (like templates, assignments, or community access), and how they’re marketed.
Do they offer live sessions? Office hours? Certificates? This kind of detail gives you clues about how to shape your own course to offer something slightly different or better.
You don’t have to reinvent the topic; sometimes, just adding a beginner‑friendly walkthrough or offering clearer examples is enough to stand out.
Step 03: Define Your Course Outcomes and Objectives
Before you build your course, it’s important to clearly define what your students will be able to do by the end of it. Having solid learning outcomes and objectives keeps your course focused.
It helps you decide what to include and what to leave out. It also makes it easier for students to understand what they’ll gain and whether the course is right for them.
Without clear goals, it’s easy for your content to become confusing or scattered. Students might finish the course not knowing what they actually learned or how to apply it. So taking the time to write clear, focused outcomes helps both you and your learners stay on track.
Focus on the Learner Transformation
Write your outcomes from the student’s point of view. Instead of saying what you plan to teach, describe what the learner will be able to do after the lesson or course.
Use phrases like “By the end of this course, you’ll be able to…” or “The learner will be able to…” This keeps the attention on their progress, not just your teaching.
Use Action Verbs (Bloom’s Taxonomy)
Avoid vague words like “understand” or “know.” These are hard to measure and don’t clearly show what the student should be doing.
Instead, use specific verbs that describe actions someone can take or skills they can demonstrate. You can pull verbs from Bloom’s Taxonomy, which sorts learning into different levels like remembering, understanding, applying, analyzing, evaluating, and creating.
For example, let’s say you’re creating a course on email marketing. Instead of writing a vague outcome like:
“Understand how to use email marketing tools.”
You can write:
“By the end of this course, students will be able to set up an automated email campaign using Mailchimp, including creating a welcome email and scheduling follow-up messages.”
Make Them SMART
Good outcomes follow the SMART framework: Specific, Measurable, Achievable, Relevant, and Time-bound. This helps both you and your students know exactly what should be accomplished by the end of the course. It also keeps the course focused and realistic for your audience.
Let’s take a vague outcome like:
“Learn how to build an email list.”
This is too broad. It doesn’t tell us what kind of marketing it is, how it’s learned, or how we’ll know if the learner succeeded.
Instead, try:
“By the end of the course, students will be able to create a basic 3-part email marketing campaign for a small business using Mailchimp.”
This is better because:
- It’s specific (a 3-part campaign)
- It’s measurable (did they build it or not?)
- It’s achievable for beginners
- It’s relevant to small business marketing
- It’s time-bound within the course duration
Align with Your Content and Assessments
Every learning outcome you write should connect directly to what you’re teaching and assessing in the course. If you claim that learners will be able to do something by the end, you need to actually teach that skill during the course and then test it in a clear way.
If there’s no lesson that covers it or no activity that checks for it, it doesn’t belong as a learning outcome.
For example, say your course promises this outcome:
“Solve basic coding problems in Python.”
To match that outcome, your course needs to include:
- Lessons that teach coding logic, syntax, and how to approach common problems.
- Practice exercises that let students apply what they’ve learned.
- Assignments or quizzes where they write or debug simple code.
If your course only teaches Python syntax (like variables and loops), but never shows students how to break down or approach real coding problems, then that outcome is misleading. A better outcome for that kind of course might be:
“Write Python code using variables, loops, and functions.”
That’s something your actual content supports, and something you can check with small assignments or a short project.
Keep Them Concise
Each learning outcome should be short and clear. One sentence is usually enough. If it feels too long or complicated, try breaking it into two simpler goals. The more direct you are, the easier it is for students to follow and for you to stick to it while building your course.
Here’s an example:
Instead of this one long example,
“Understand SEO principles and use different tools to audit websites and improve search engine rankings effectively.”
Split this into two short ones:
“Explain the basic principles of SEO.”
“Use SEO tools to audit a website and suggest improvements.”
Step 04: Choose Your Course Platform
By now, you should have your course idea and objectives ready and validated. So, it’s time we choose a suitable learning management system for your course.
When choosing an LMS platform for your course, think about what features you really need. Some platforms are all-in-one, letting you host videos, collect payments, run quizzes, and manage students in one place. Others are more flexible but require extra setup or tools.
Look for a platform that fits your course type, tech skills, and budget. If you’re teaching a simple course, a beginner-friendly option like Klasio or Teachable might be enough.
If you want more control or plan to scale, you might explore platforms like Kajabi or WordPress with LMS plugins.
Also, check how easy it is for students to navigate. If the platform feels clunky, they might not stick around. Try free trials, compare pricing, and see what support is available before you decide.
Step 05: Define Your Course Structure and Content Format
Before you start creating lessons, you need a clear structure for your course. A good structure helps your content stay organized and easy to follow. It also makes it easier for your students to build on what they’ve learned step by step.
Without a clear structure, it’s easy to jump around, miss important details, or overwhelm your learners with too much information at once. Taking time to plan the layout of your course keeps things focused and saves you time later when you’re building lessons or recording videos.
Begin by writing a basic outline of your entire course. This helps you map out the full journey from start to finish. Think of it like a table of contents; it shows the main ideas you want to cover and helps you stay on track.
You don’t have to write the full content yet. Just note the major topics you’ll cover and the order you’ll teach them in.
Some free course platforms like Klasio offer an AI assistant to help you structure your course.
Also, while structuring your course, make sure you maintain a logical sequence. That means building upon previously learned concepts. Start with foundational knowledge and gradually introduce more complex topics.
As for course content format, there are a lot of options to choose from. But you must choose the right content format based on your lesson content. Here’s a table that depicts which format is best for what type of lesson and when you should use it.
| Content Format | Best For | Use When |
| Video Lessons | Demonstrations, storytelling, visual walkthroughs | You want to show how something works or explain a process visually. |
| Slide Presentations | Structured explanations, theory, step-by-step breakdowns | You’re teaching concepts or frameworks using bullet points and visuals. |
| Screen Recordings | Tutorials, software demos, technical workflows | You’re teaching how to use tools or perform tasks on a computer. |
| PDFs and Downloadables | Worksheets, checklists, templates, reference material | Learners need to apply lessons, take notes, or access content offline. |
| Audio | Interviews, reflective topics, flexible learning | The lesson is concept-heavy and doesn’t need visuals; learners are mobile. |
| Text | Short lessons, reading-heavy topics, additional notes | Learners need to process info slowly or read instead of watch/listen. |
| Live Sessions | Q&A, real-time feedback, group interaction | You want direct engagement or to explain difficult topics interactively. |
Step 06: Create Your Course Content
Finally, it’s time to do the deed and start creating your course content. While you are creating course content, you’re not just doing it to earn some extra bucks or just to let people know some information. You are helping people learn things that may change their lives.
So, you should be very careful about curating your content. If the content is confusing, dull, or overwhelming, students are likely to drop out or finish without really gaining the skills they signed up for.
Well-made content gives structure to your teaching, keeps students interested, and helps them stay on track. It also supports different learning styles and keeps your course focused on the goals you’ve set.
Here are some best practices that you can use to create great content for your online course.
- Match content to learning outcomes: Every part of your course should support a specific learning goal. This keeps the course focused and avoids filler content.
- Break content into small pieces: Divide your course into short, focused lessons that build on each other. This helps learners stay engaged and track their progress.
- Keep it simple and clear: Use plain language and avoid long explanations. If needed, explain complex terms with examples or visuals.
- Mix up your formats: Use a mix of videos, text, images, and audio to support different learning styles. This makes the course feel more engaging and less repetitive.
- Add ways to interact: Include small tasks like quizzes or questions after lessons. Interaction helps learners apply what they’ve learned.
- Use real-world examples: Show how the content applies in everyday or work situations. This makes lessons feel more practical and relevant.
- Get learners involved: Ask students to practice through small projects or problem-solving tasks. Doing is better than just watching or reading.
- Use what you already have: Repurpose blog posts, talks, or other resources when they fit your goals. You can also link to trusted outside content.
- Be open to feedback: Ask learners for feedback and watch for repeated questions or confusion. Use their input to keep improving your content.
Step 07: Build Hype and Pre-sell Your Course
While you are still building your course, you need to think about how to market it. To that end, it’s better to create hype and pre-sell your course.
Doing so can boost your course sales, and hopefully, you can get some early cash, which may help you create an even better course. So, here’s how you can build hype and pre-sell your course.
Build an Email List Early
Remember how we told you to create gated content while validating your course idea. You can apply the same formula here to hype up your course.
You can offer small freebies like checklists, templates, or short guides, just make sure they provide actual value to your users. If you can give them a solid value, these people are likely to be your first buyers. So treat this list like a VIP community and keep them updated.
Build Your Course in Public
Post regularly about your course where your potential students hang out. You can share your successes, failures, ideas, short tips, ask questions, or just talk about the problems your course will solve. This helps you stay visible and build a relationship with potential learners.
Run Free Webinars
Live sessions give people a chance to see you teach. You can cover a small topic from your course, answer questions, and talk briefly about what’s coming. If they find your session useful, they’ll be more likely to buy the full course.
Talk About It on Podcasts
If it’s possible for you, then you can appear on a podcast as a guest and talk about your course casually. Talk about the problem it solves and who it’s for.
You don’t have to sell hard. Just make people aware it’s coming.
Offer a Beta or Pilot Group
Let a small group of students take your course early at a lower price or even for free. This gives you real feedback, early testimonials, and the chance to fix anything before the full launch.
It also helps you see how people are using the content in real life.
Step 08: Launch and Sell Your Course
Once your course is ready, it’s time to launch and sell it. To effectively sell your course, here are the steps you can follow:
- Start by announcing it to your email list and sharing it on social media. Highlight what the course offers, who it’s for, and how it helps.
- Use testimonials, videos, and clear calls-to-action to build trust and drive sign-ups.
- Offer limited-time bonuses or discounts to create urgency.
- Keep engaging with your audience throughout the launch period, answer questions, share behind-the-scenes content, and celebrate early enrollments.
Step 09: Collect Feedback and Build a Community
Now that you are selling your course and hopefully making a decent amount of money, don’t forget about your customers/students. You should keep communicating with them and get their feedback.
To communicate with your students on a regular basis, you should create a community where it’s easier to reach you. Communicate and engage with your students through that community.
Now, to collect feedback, start by using surveys, live sessions, or one-on-one chats to understand what learners like, where they struggle, and what could be better.
Tools like Google Forms or Typeform make it easy to gather this feedback at different points in the course. LMS platforms like Klasio offer built-in systems to collect student reviews and feedback, which makes your life easier.
This shows students you value their input by actually acting on it and letting them know what changes you’ve made.
Step 10: Continuous Improvement
Now that you are engaging with your students and collecting feedback, what should you do with it? You should take them into consideration and keep on improving your course.
Even if your students are satisfied with your course content, improving your course should be an ongoing process. Regularly review your content, ideally every few months, to update outdated examples, stats, or references.
Use analytics, student performance data, and direct feedback to identify areas for improvement. Keep your course modular, so updates can be made easily without redoing everything.
For minor changes, add short notes or updated guides instead of re-recording full videos. Repurpose strong content into new formats like infographics or audio, and introduce fresh materials based on industry trends or student needs.
Always inform your students when updates are made to keep them engaged. Use the Plan-Do-Study-Act (PDSA) cycle for structured improvement and consider microlearning for easy-to-update bite-sized lessons.
Ultimately, treat updates as a strategic opportunity, not a chore, to keep your course relevant, engaging, and competitive.
10 Mistakes to Avoid While Creating an Online Course
Here are 10 mistakes you must avoid while creating your online course:
- Don’t skip audience research – Without knowing your learners’ needs, your content may miss the mark.
- Don’t overload students with content – Too much information at once can confuse or overwhelm them.
- Don’t ignore student feedback – Valuable insights from learners help you improve and stay relevant.
- Don’t strive for perfection before launch – It’s better to start with a solid draft and improve later.
- Don’t make videos too long – Long, unedited videos can reduce engagement and retention.
- Don’t rely only on one content format – Different learners prefer different formats (text, video, audio, etc.).
- Don’t use unclear objectives – Students need to know what they’ll achieve from each module or lesson.
- Don’t make your course too broad – Covering everything leads to shallow learning; stay focused.
- Don’t neglect course structure – A poorly organized course confuses learners and reduces completion rates.
- Don’t forget to hype up the course – Even great content needs promotion to reach the right audience.
Create Your Online Course With Klasio Today!
With our detailed step-by-step guide, you should be able to create your online course with ease. However, if you still struggle with creating courses, you can choose Klasio as your learning management system.
Klasio is probably one of the simplest online course creators, where you can just sign up and upload your course content. Still, you can use their AI assistant to make it even easier.
With Klasio, you can offer the best learning experience for your students with their free mobile app, as most online learners learn from their mobile devices.
And when it comes to pricing, Klasio lets you test out the waters with their free forever plan, without any time limit or upfront cost.
So, now the only question remaining is, what’s stopping you from creating your first course with Klasio?
FAQs
How much does it cost to create a course?
Creating a course can cost anywhere from $100 to over $10,000, depending on tools, video production, platform fees, and whether you hire help. A lean solo creator can often get started with under $500.
Is making a course profitable?
Yes, making a course can be highly profitable if there’s demand and your content solves a real problem. Many creators earn anywhere from a few hundred to several thousand dollars per month.
How many hours does it take to create a course?
It typically takes 40 to 200+ hours to create a quality online course, depending on the depth, format, and your experience. Planning, recording, editing, and building the curriculum all add to the time.
How much money do course creators make?
Course creators can make anywhere from $500 to $100,000+ per year. Income varies based on niche, marketing, audience size, and course pricing.
Is it hard to create an online course?
Creating an online course isn’t hard, but it does take time, planning, and effort. With the right tools and clear structure, most people can do it—even without prior experience.


Leave a Reply