Klasio now allows you the ability to create and manage multiple course websites from a centralized site owner’s panel. With this feature, you can now create and manage all your sites under a single Klasio account.
This documentation will guide you through the process of creating new sites and managing existing ones with ease.
- First, log in to your Klasio account.
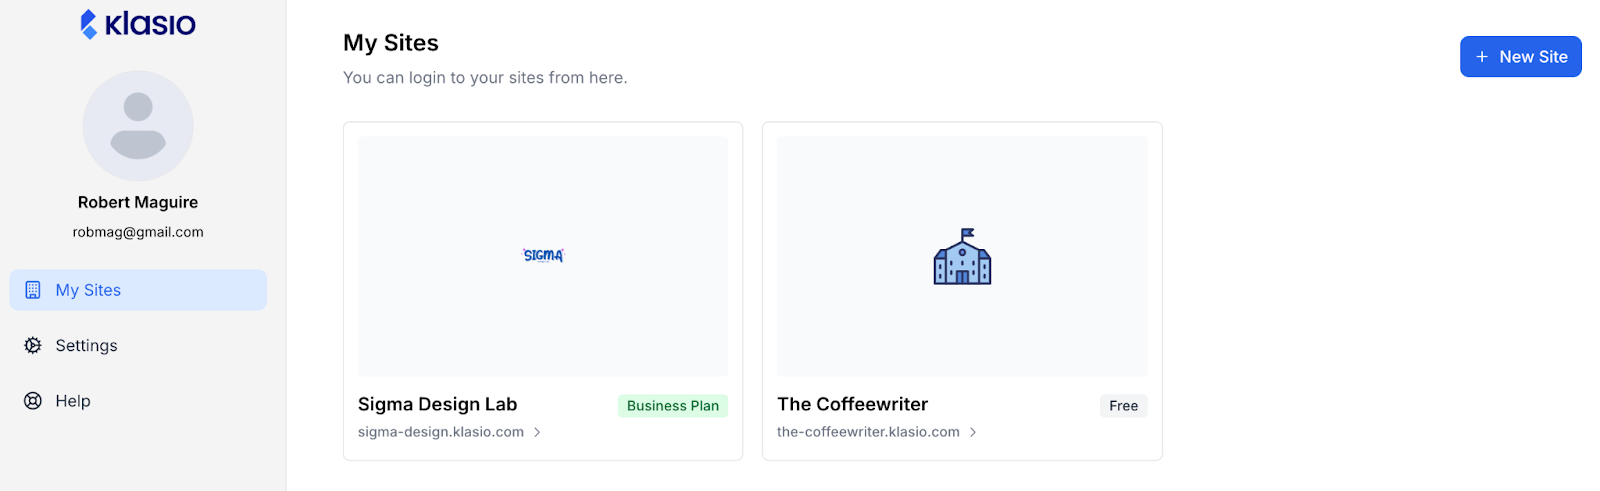
- After logging in, you will be directed to the site owner’s panel, where you can see your existing sites.
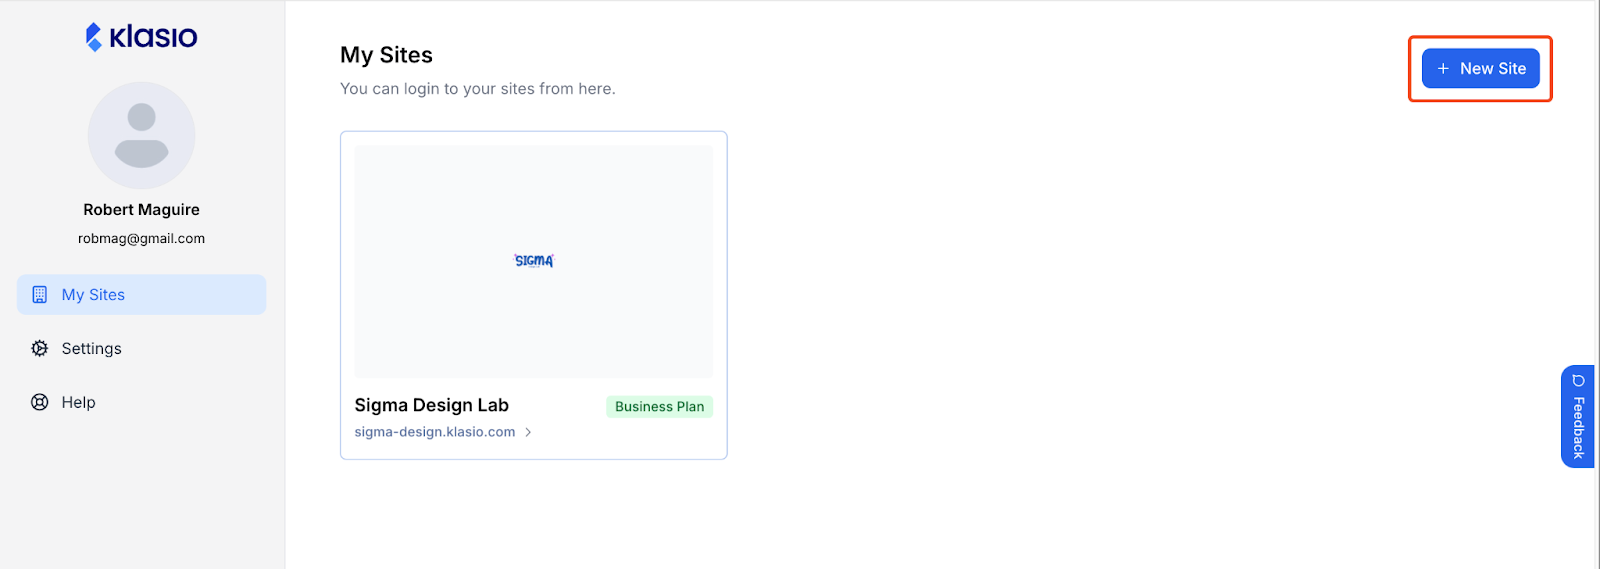
- To create a new site, click on the “New Site” button in the top right corner.
- At the next screen, you will be asked to name your new site. Based on your new name, the subdomain will be automatically created. But you can also change the subdomain. Once the site name and the subdomain are final, click on the “Continue” button.
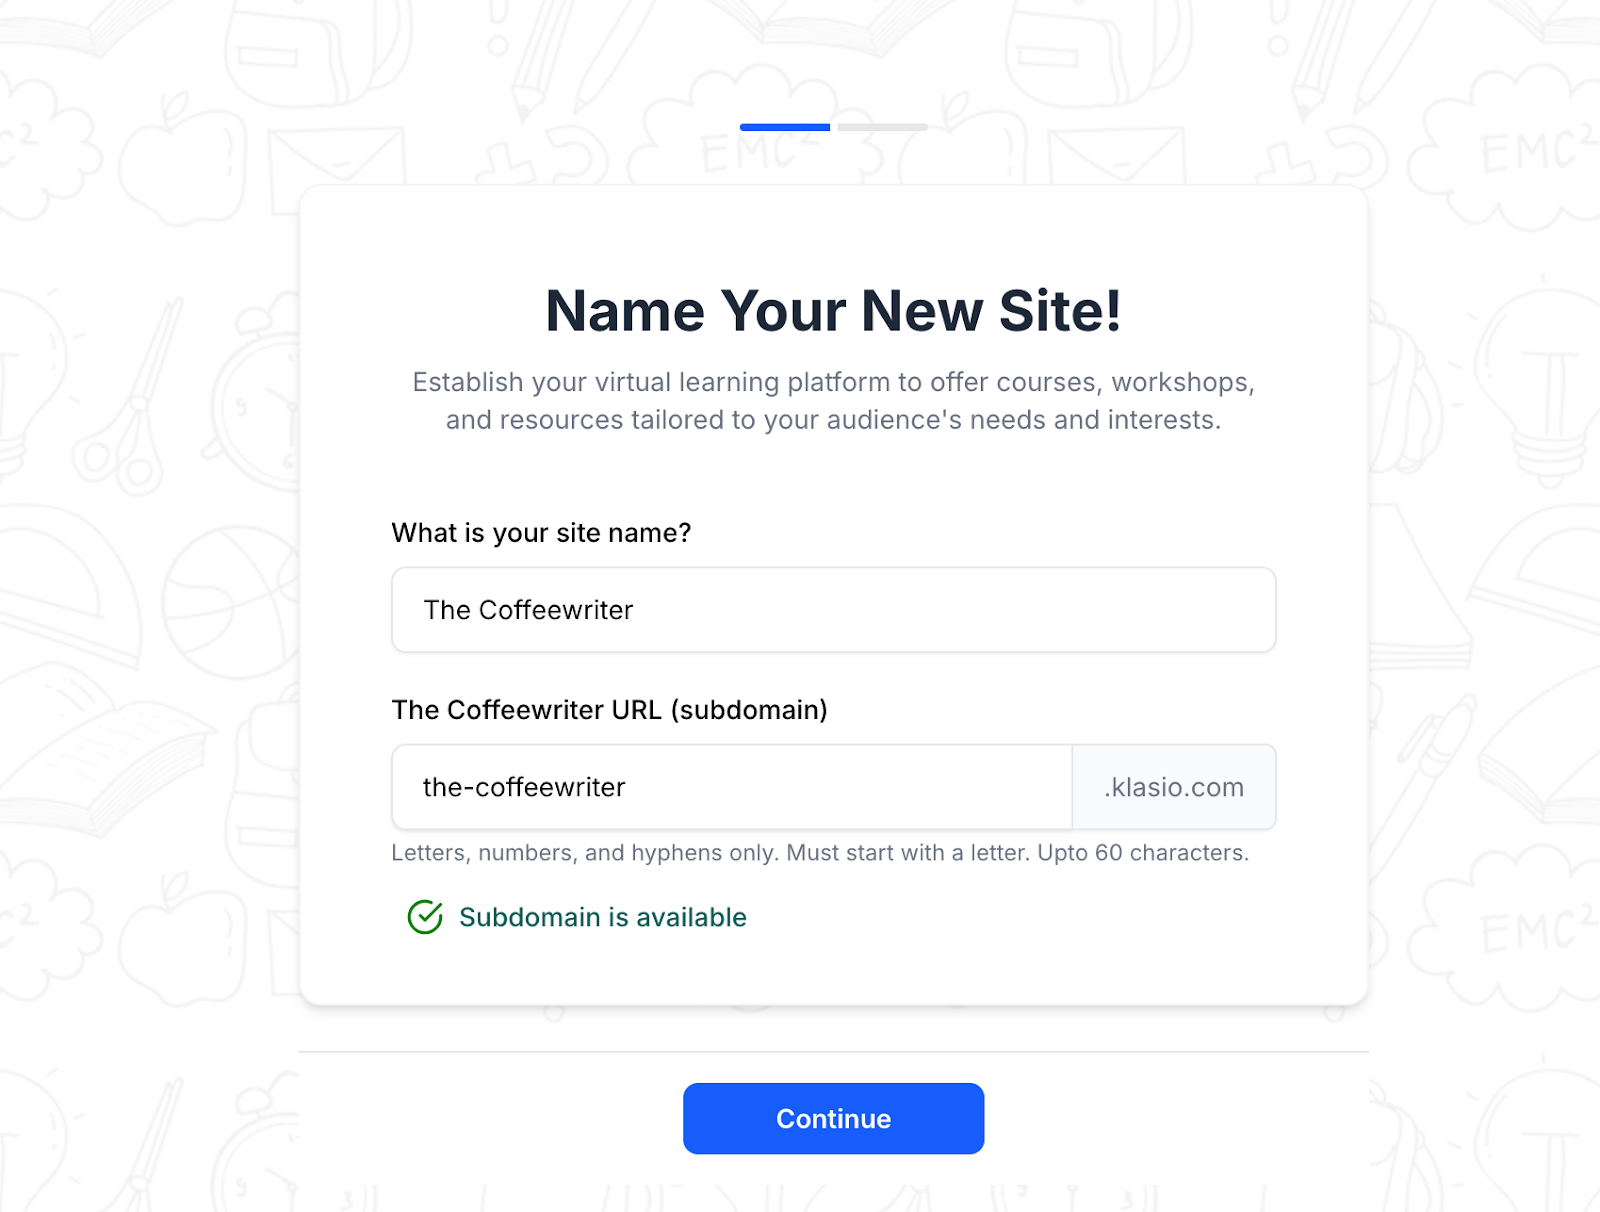
Keep in mind that once you hit “Continue,” you cannot change the site name or the subdomain. So, be very careful while choosing a site and subdomain.
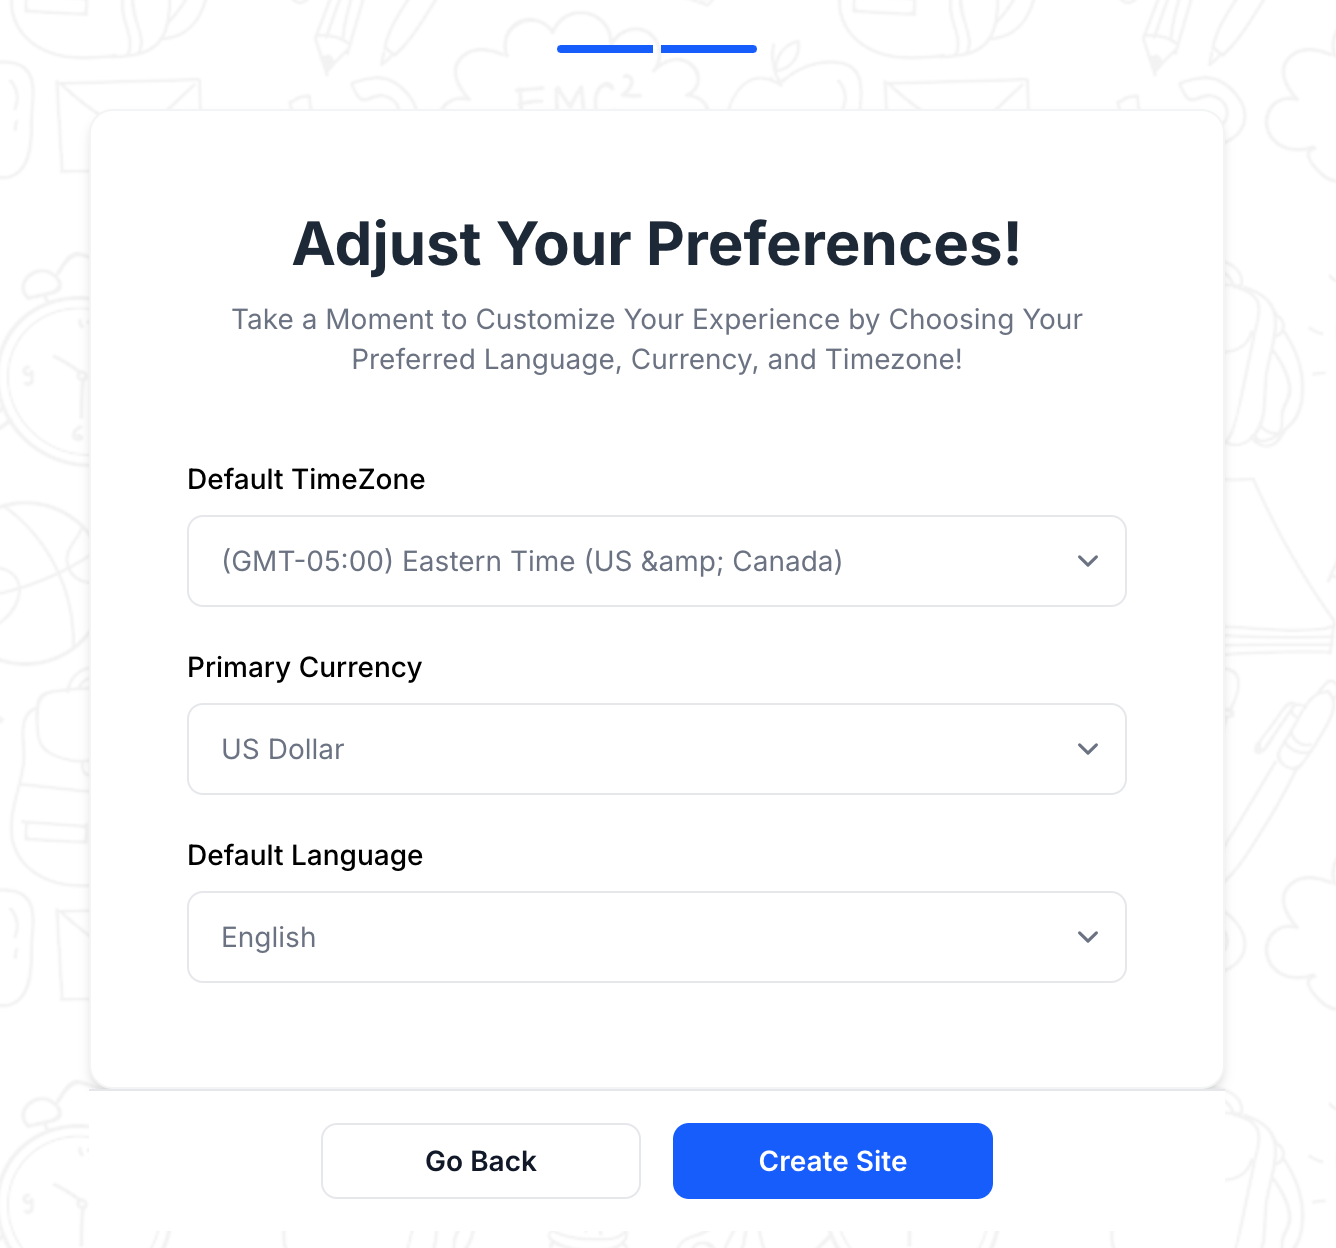
- On the next screen, you will have to choose your timezone, currency, and language. Click on the “Create Site” button once you are done choosing.
- It will take a couple of seconds to create your site, and then you will see the success message.

- Click on the “Visit Your Dashboard” to access the dashboard of your new site.

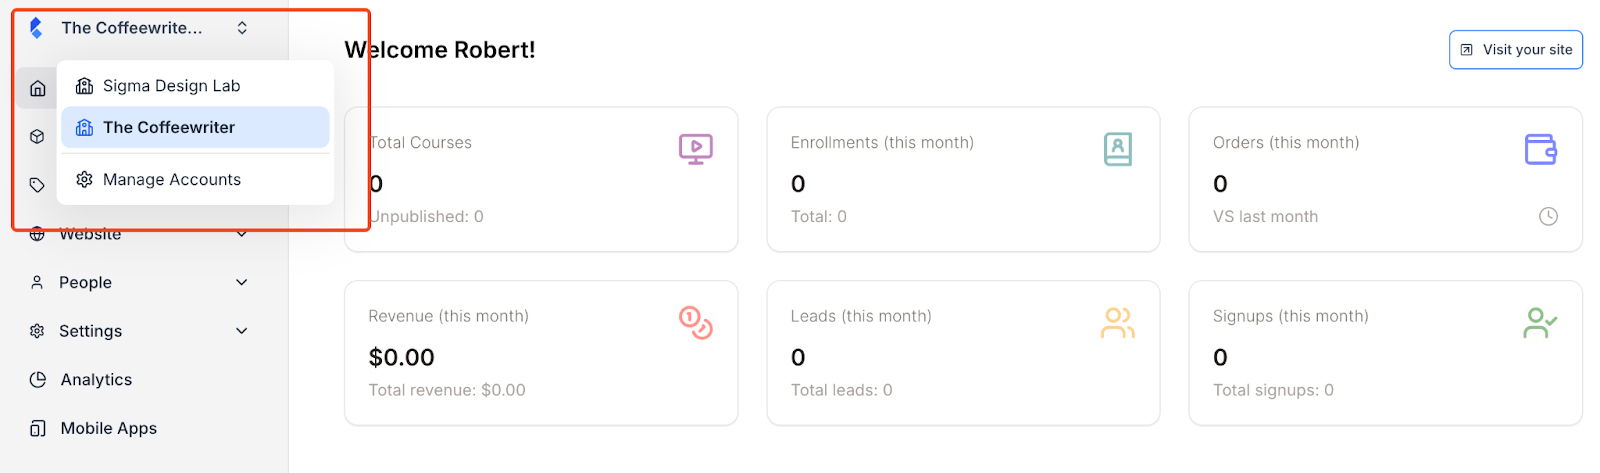
- Now, to switch to your other sites or to access the site owner’s panel from the dashboard, click on the site name at the top left corner of the admin bar. You will get a list of all your sites and the option to manage your accounts. Click on “Manage Account” to access the site owner’s panel, or click on the other site names to switch accounts.
- Your site panel will now show the site you just created.
If you want to add more sites to your Klasio account, you can follow the same process.