
Once your community is live, keeping it healthy matters just as much as setting it up. This guide covers how to manage members, set up moderation, and handle your community’s settings in Klasio.
Before you start, make sure you’ve already created a community. If you haven’t, follow How to Create and Set Up a Community in Klasio first.
How to Manage Members
The Members tab shows everyone who has joined your community.
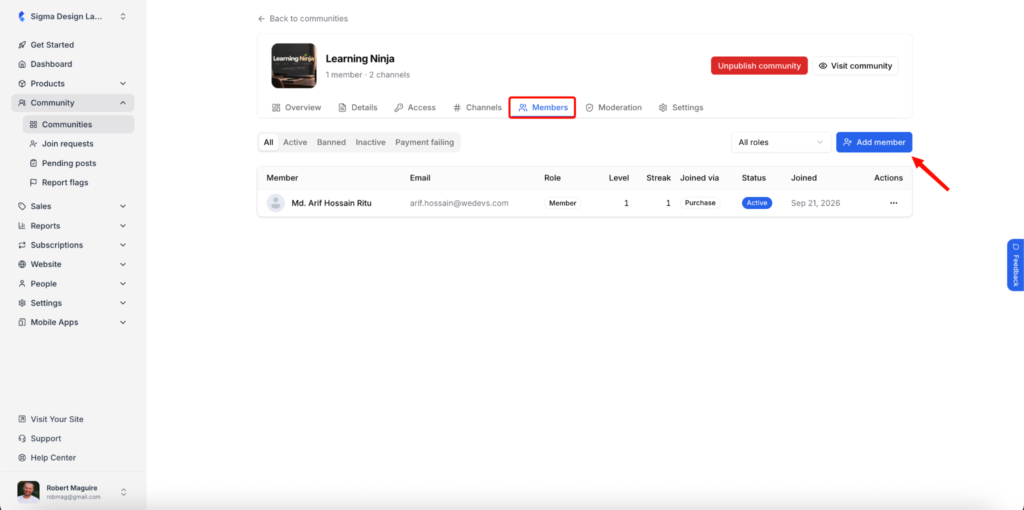
You can filter members by status using the tabs at the top: All, Active, Banned, Inactive, and Payment failing. There’s also a Role filter dropdown to narrow your view further.
The member table shows each person’s name, email, role, level, streak, how they joined, their current status, and the date they joined.
To add someone manually, click the + Add member button. This is useful when you want to give someone direct access without going through the normal sign-up flow.
To manage an individual member, click the three-dot icon in the Actions column. You’ll see three options:
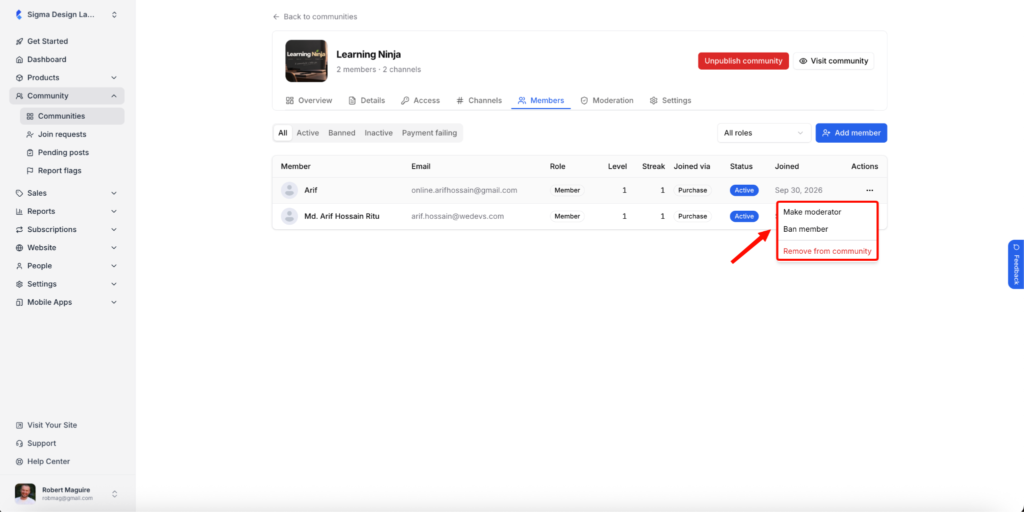
Make moderator – Gives the member moderator permissions so they can help you manage the community.
Ban member – Blocks the member from the community. Banned members show up under the Banned filter.
Remove from community – Removes the member from the community entirely.
The Payment failing filter is especially helpful if you’re running a paid community. It lets you quickly spot members whose payments didn’t go through so you can follow up or take action.
How to Set Up Moderation
The Moderation tab gives you control over how content gets published and managed inside your community.
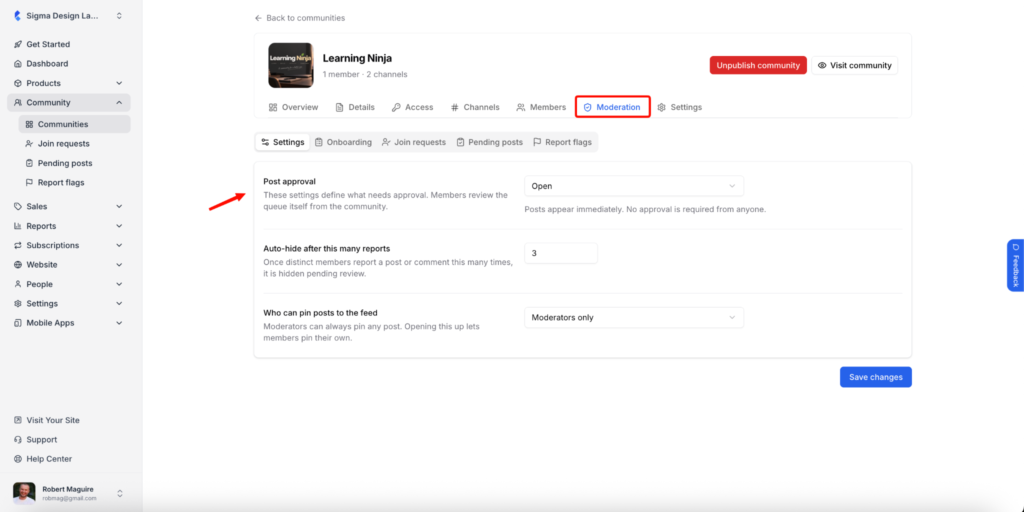
When you click the Moderation tab, you’ll see several sub-tabs: Settings, Onboarding, Join requests, Pending posts, and Report flags.
Moderation Settings
Under the Settings sub-tab, you can configure three things:
Post approval – Choose between Open (posts appear immediately with no approval needed) and other approval modes. Open works well for trusted communities. If you’re worried about spam or off-topic posts, switch to a moderation-first approach.
Auto-hide after this many reports – Set a number (the default is 3). When a post or comment receives this many reports from different members, it gets automatically hidden until you review it. This lets your community self-moderate to some extent.
Who can pin posts to the feed – The default is Moderators only, which means only you and your moderators can pin important posts. You can open this up to let members pin their own posts if you prefer a more relaxed setup.
Click Save changes when you’re done.
Onboarding
The Onboarding sub-tab is where you set up the welcome experience for new members. This is your chance to make a good first impression and help people understand how the community works.
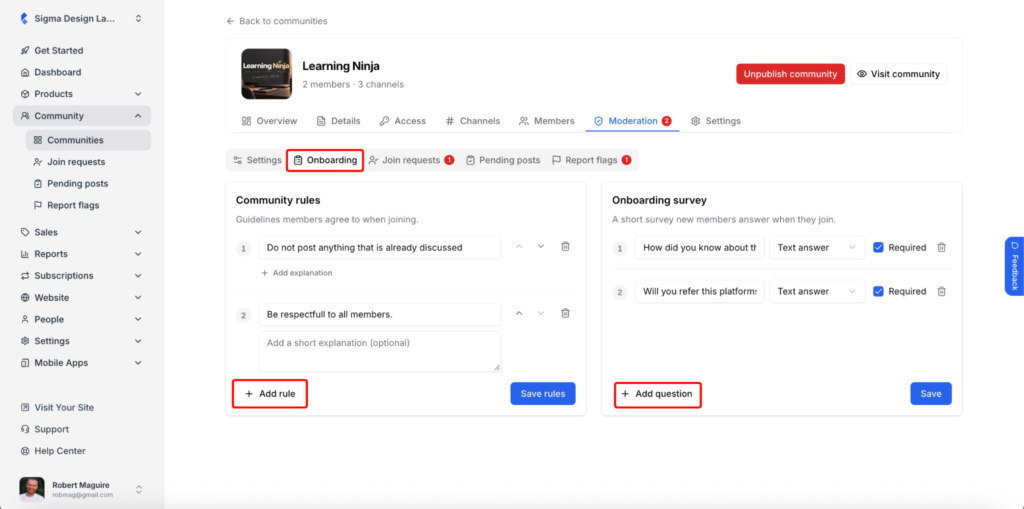
It has two parts:
Community rules – Guidelines members agree to when they join. Click + Add rule to write each rule, then click Save rules.
Onboarding survey – A short survey new members answer when they join. Click + Add question to build it, then click Save. If you require approval, these answers show up next to each join request so you can decide who to let in.
Join Requests
If you’ve enabled the Require approval toggle in the Access tab, join requests will appear here. You can review each request and approve or decline it.
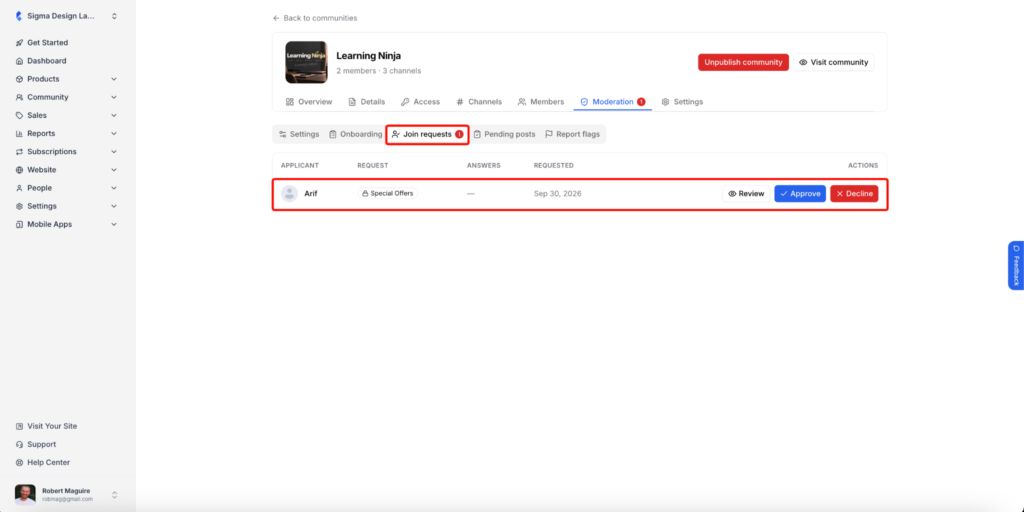
You can also access this page directly from the sidebar under Community > Join requests. The table shows the applicant’s name, their request, the community they want to join, their answers (if you’ve set up screening questions), the date requested, and action buttons.
Pending Posts
If your post approval setting requires moderation, submitted posts will queue up here.
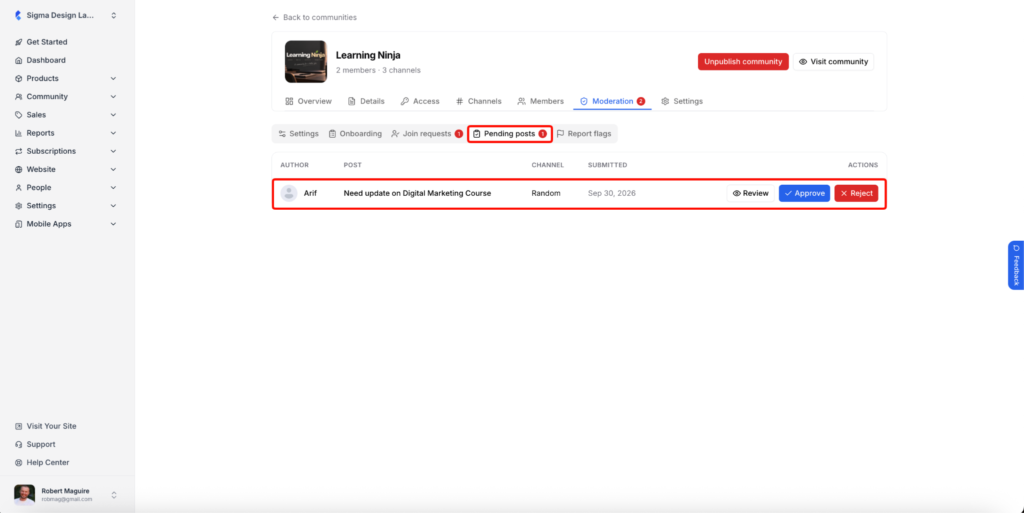
Each entry shows the author, the post content, the community and channel it was posted in, when it was submitted, and your approval options. You can also access this from Community > Pending posts in the sidebar.
Report Flags
When members report content, those reports show up on this page.
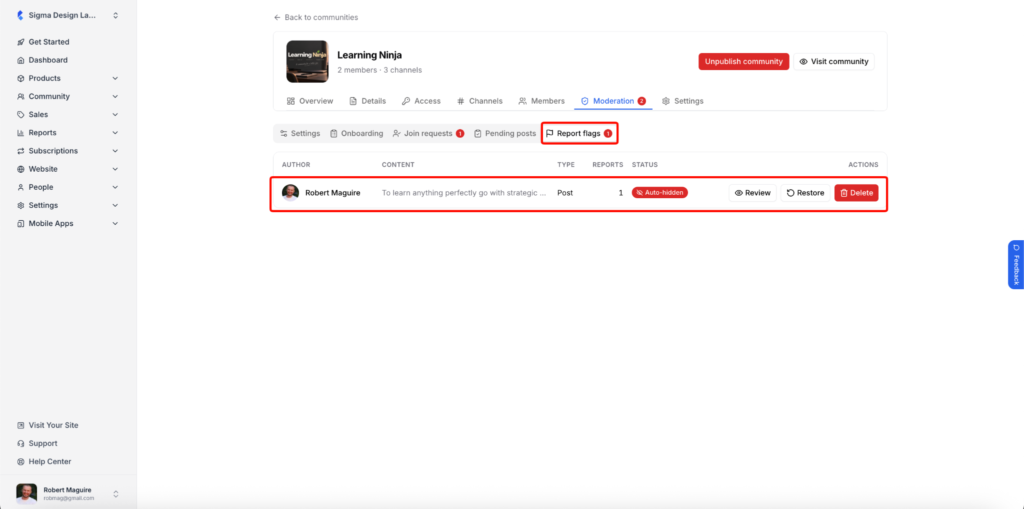
The table shows the author of the reported content, a preview of the content, its type, how many reports it has, and its current status. When the report count reaches your auto-hide limit, the status changes to Auto-hidden and the content is hidden from the feed until you act on it.
You have three actions for each report: Review to open the content in full, Restore to dismiss the report and make the content visible again, and Delete to remove it permanently. You can also access this page directly from Community > Report flags in the sidebar.
Community Settings
The Settings tab contains the Danger zone.
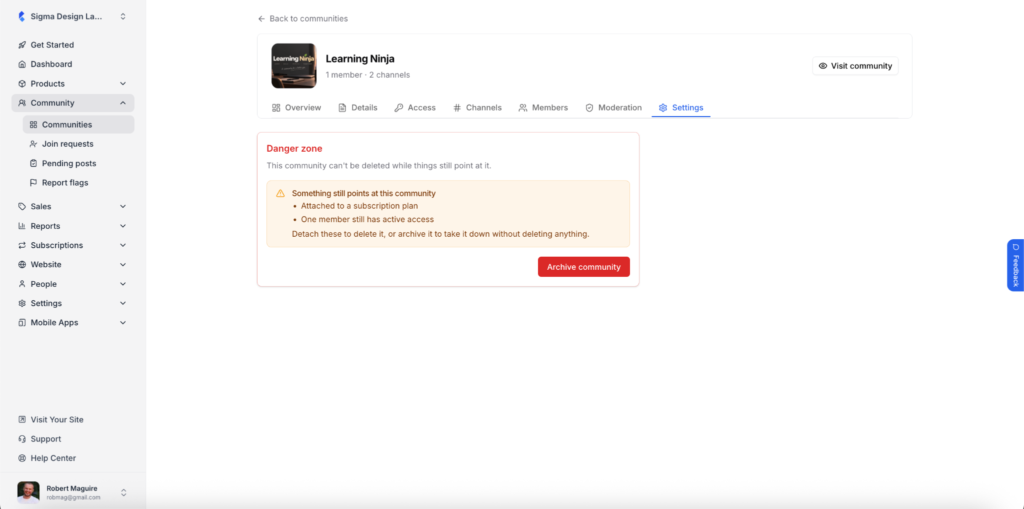
This is where you can permanently delete your community, but only if it has no members. If your community already has members, you can archive it instead. Be careful here: deleting a community removes all its posts, channels, and data, and this action cannot be undone.
Only use this if you’re absolutely sure you no longer need the community.