Klasio makes it easy to accept payments by integrating seamlessly with Stripe, one of the most trusted and secure payment gateways. With this integration, you can effortlessly collect payments for your online courses.
Before you get started, make sure to check Stripe’s list of supported countries and currencies to confirm it’s available in your region.
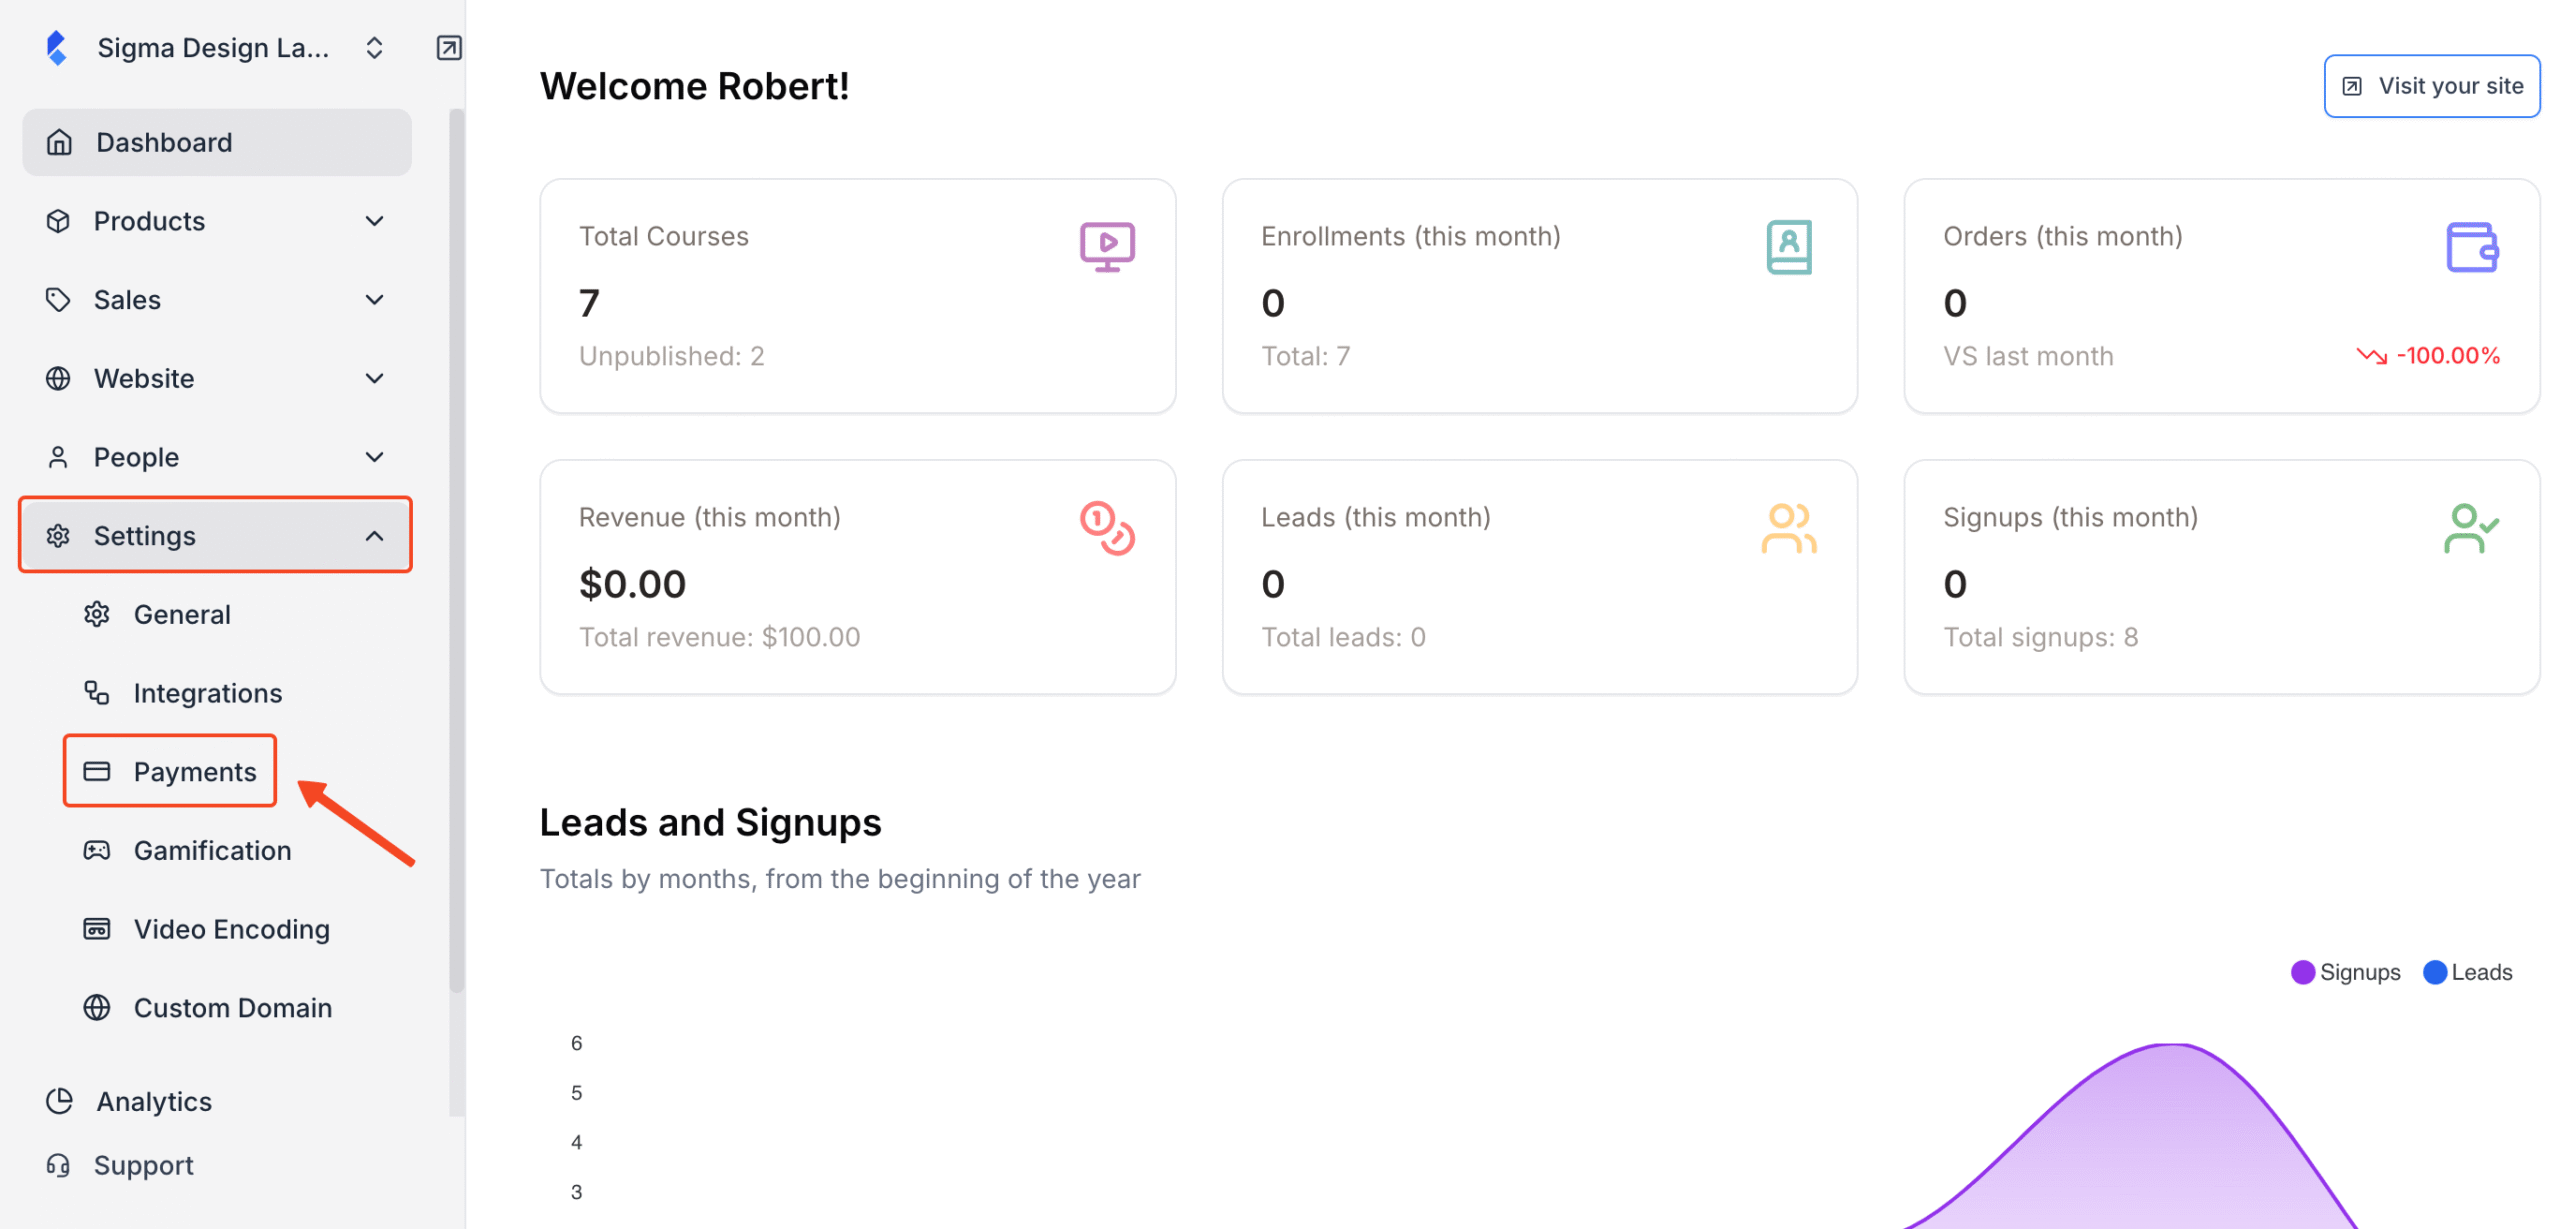
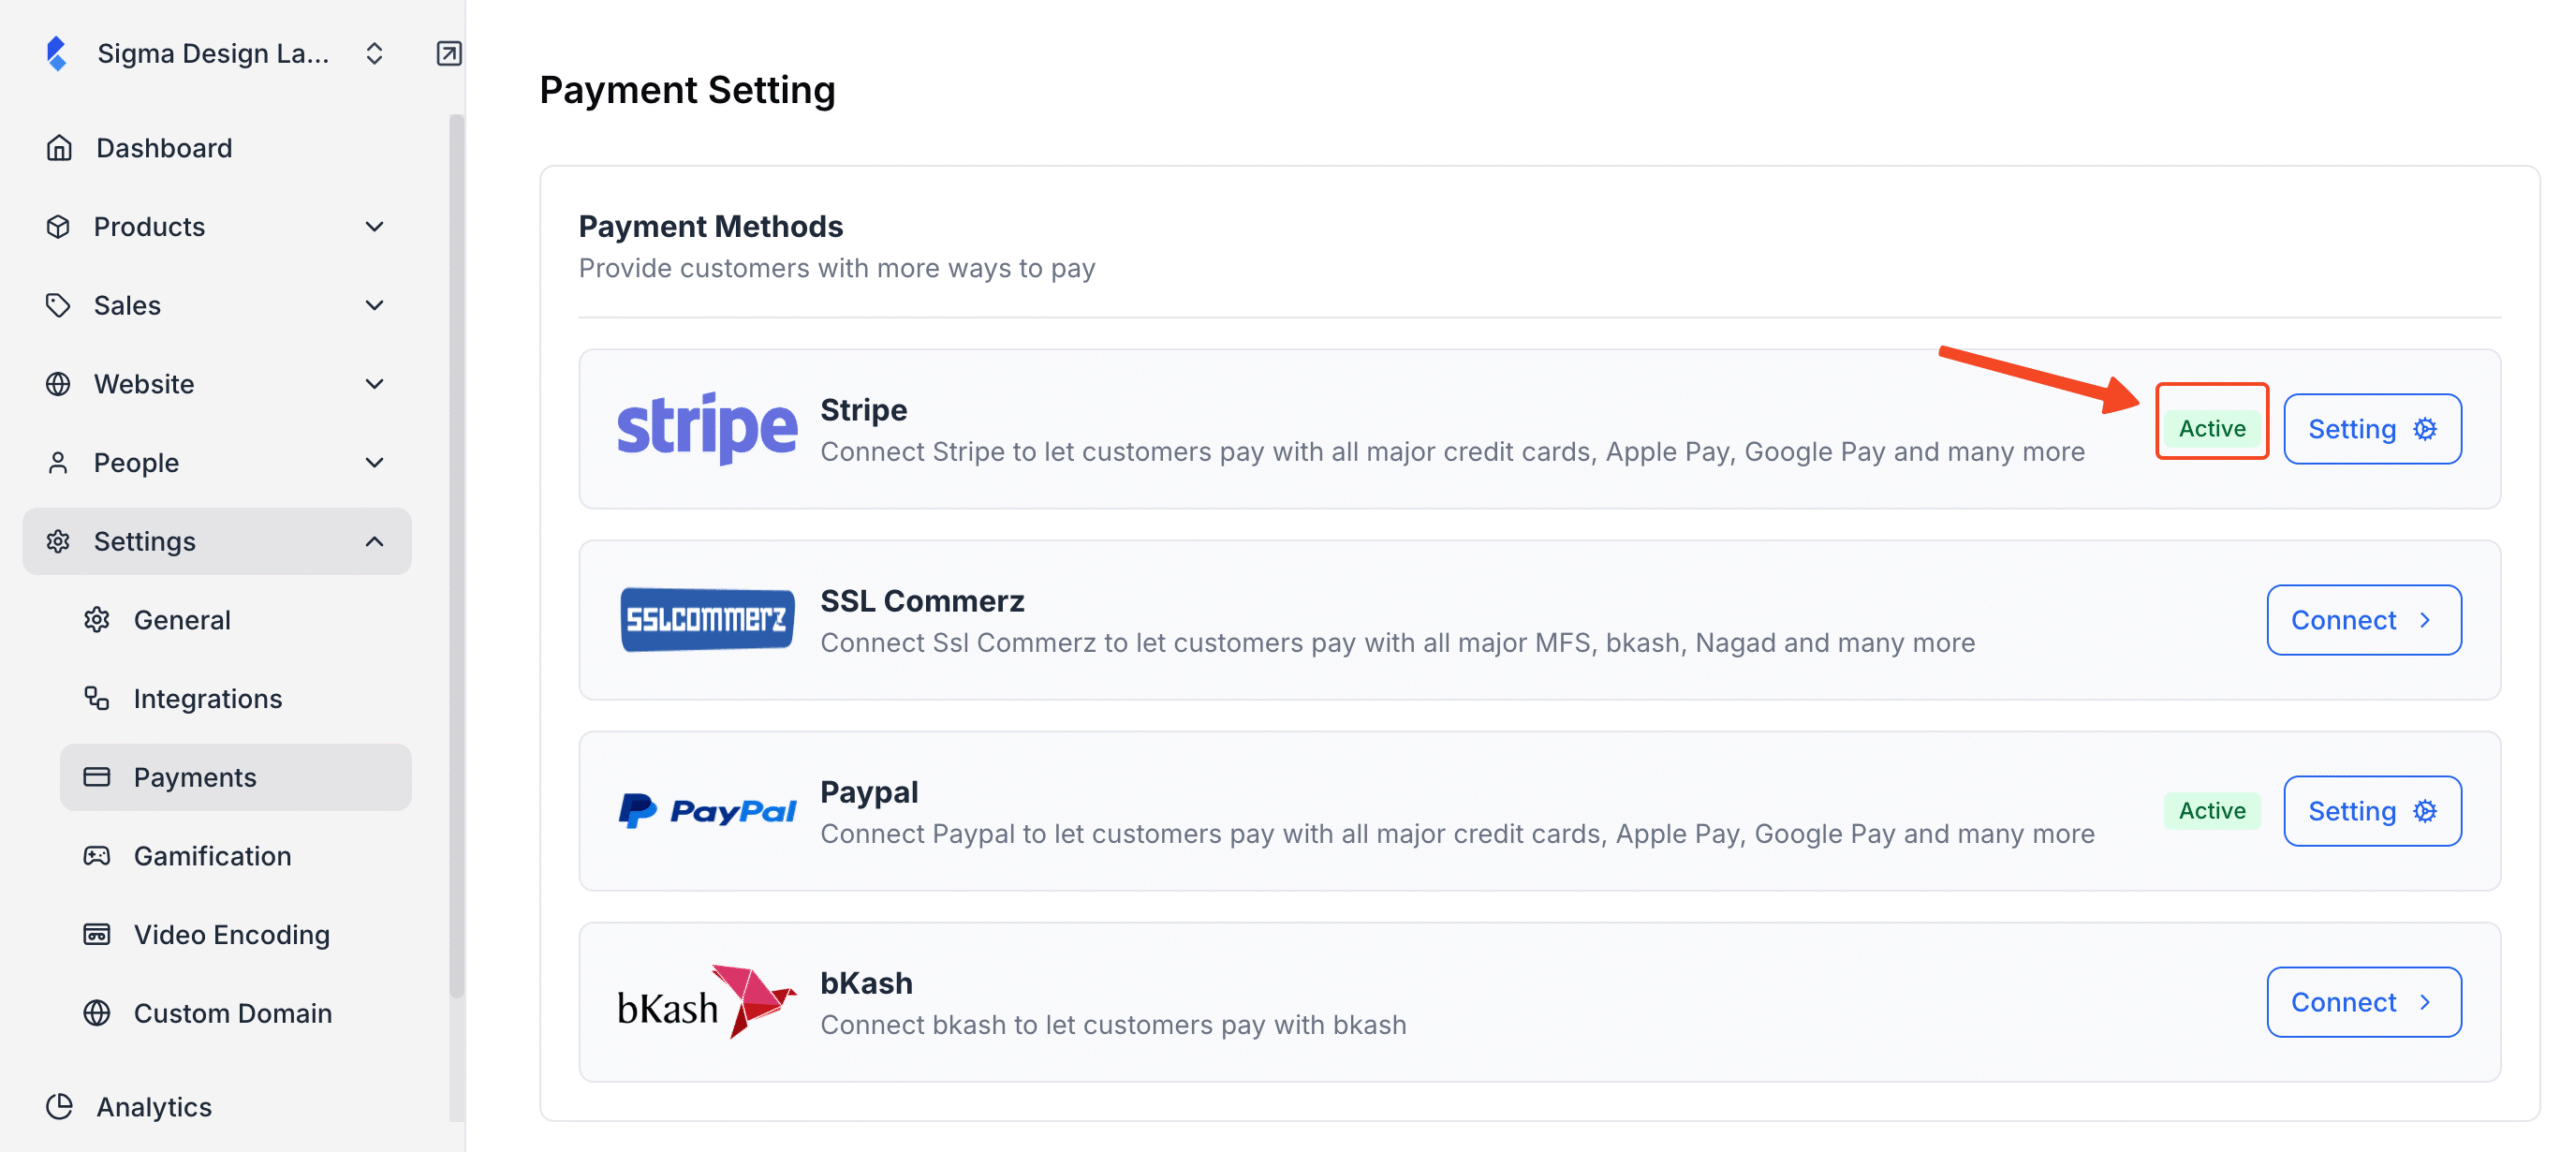
1. From the admin dashboard, go to Settings and then click Payments
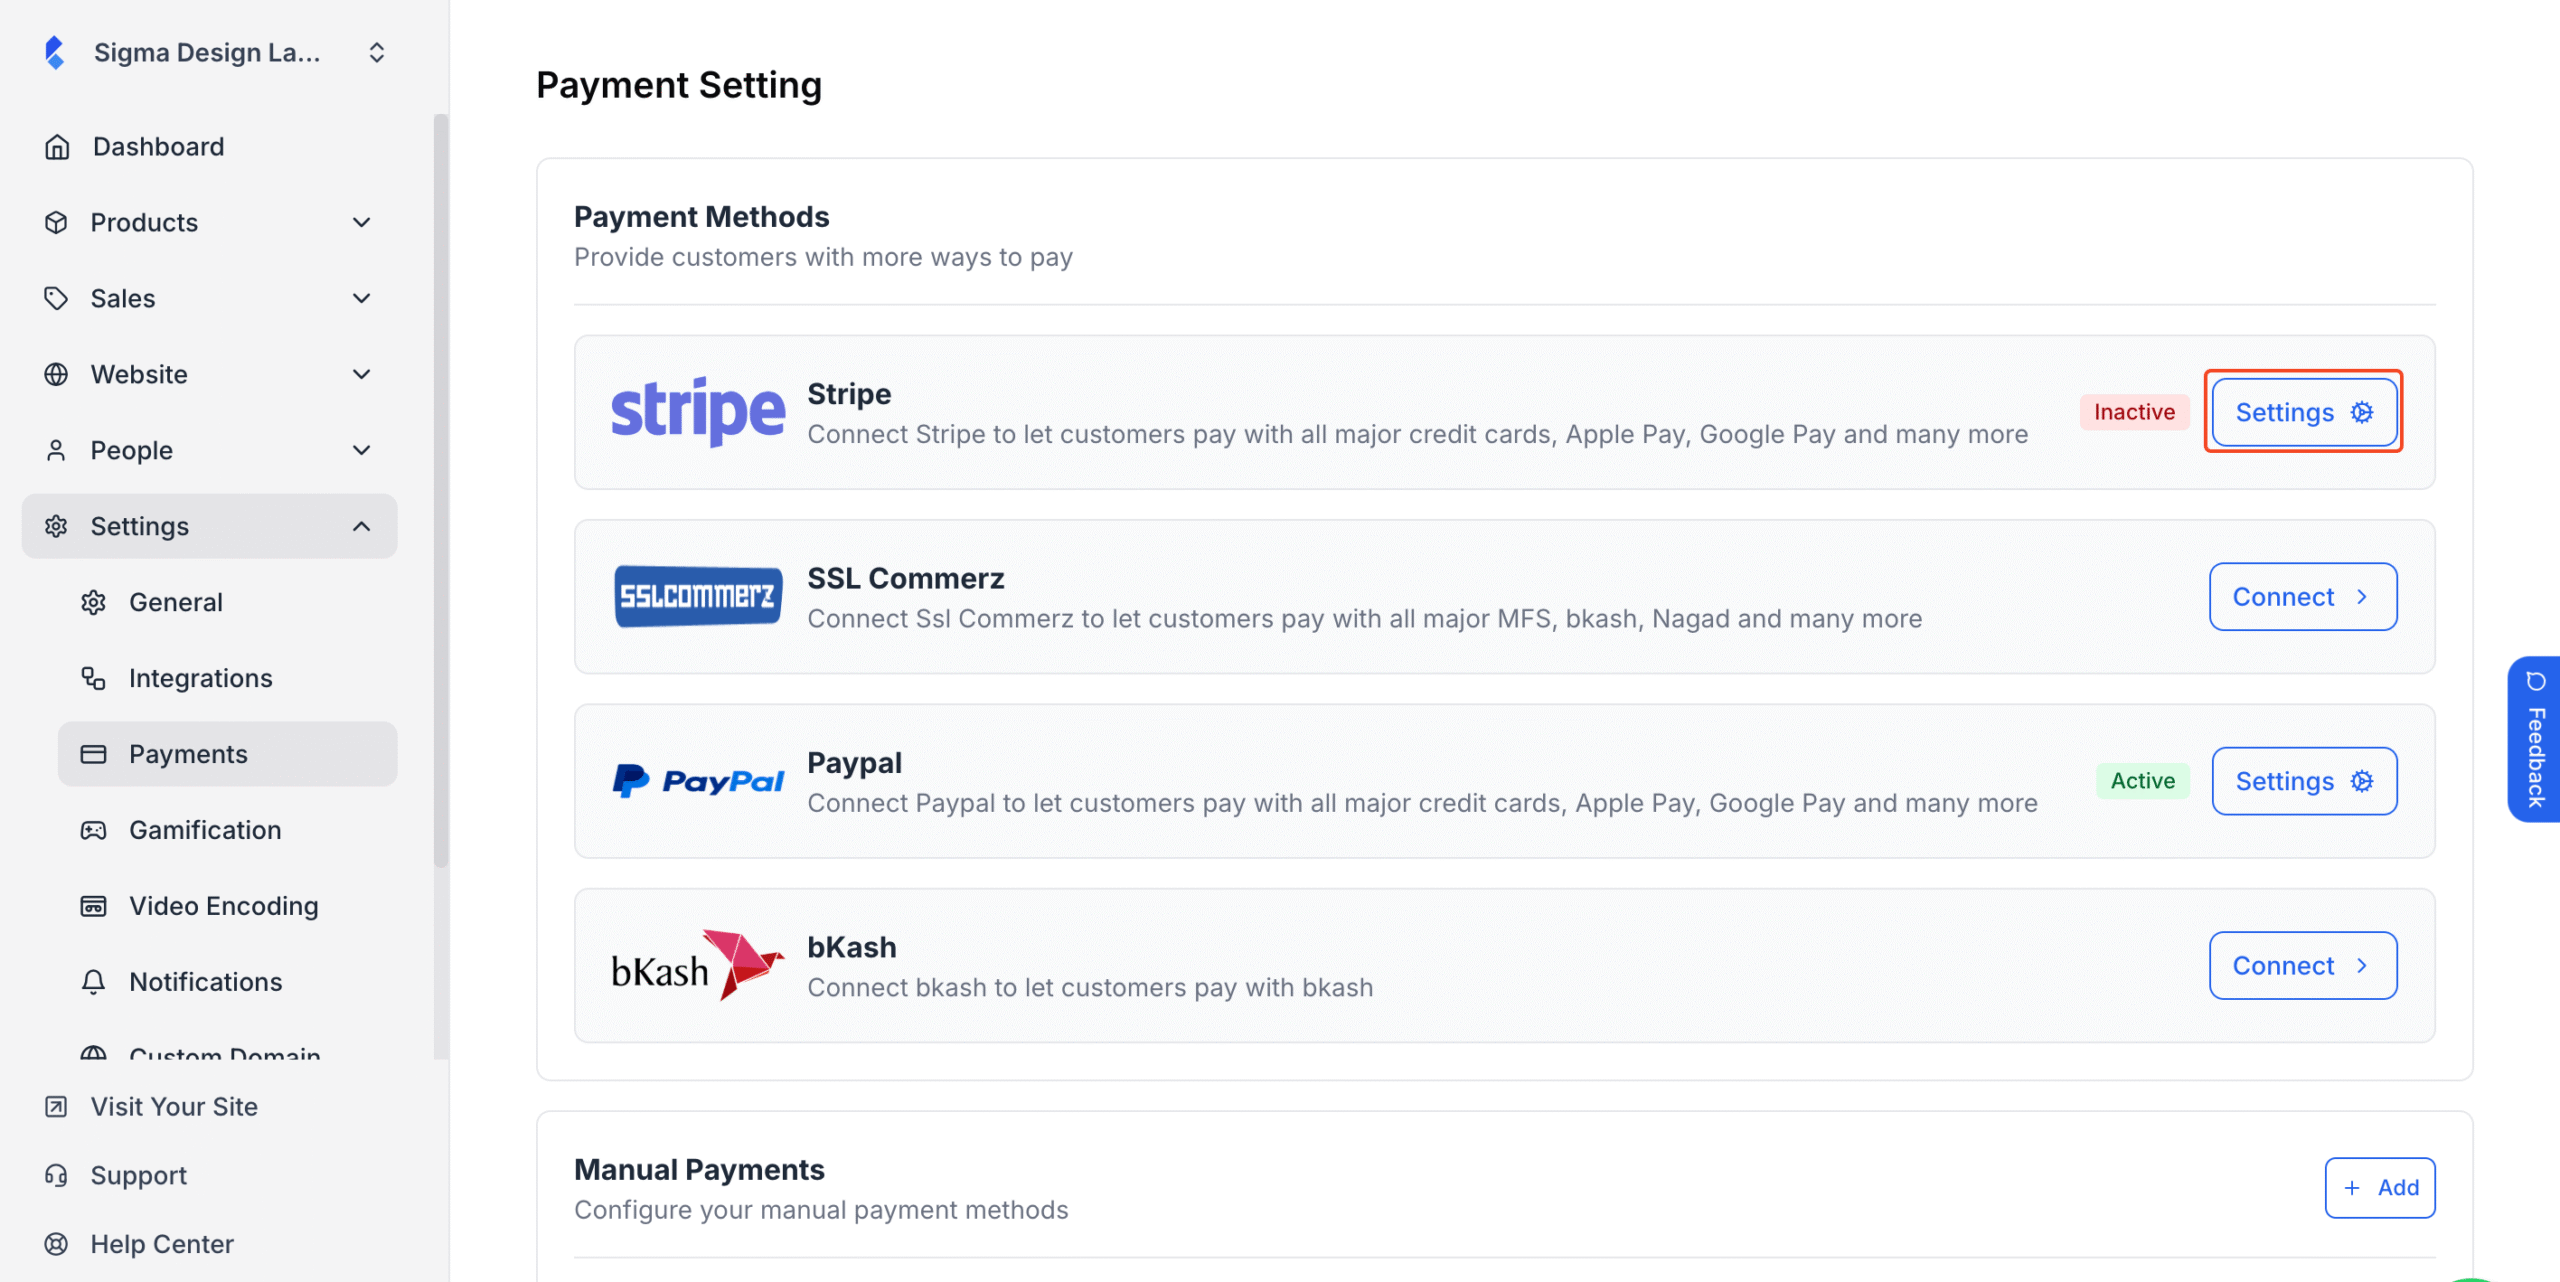
2. Next, locate the Stripe widget and click on Settings
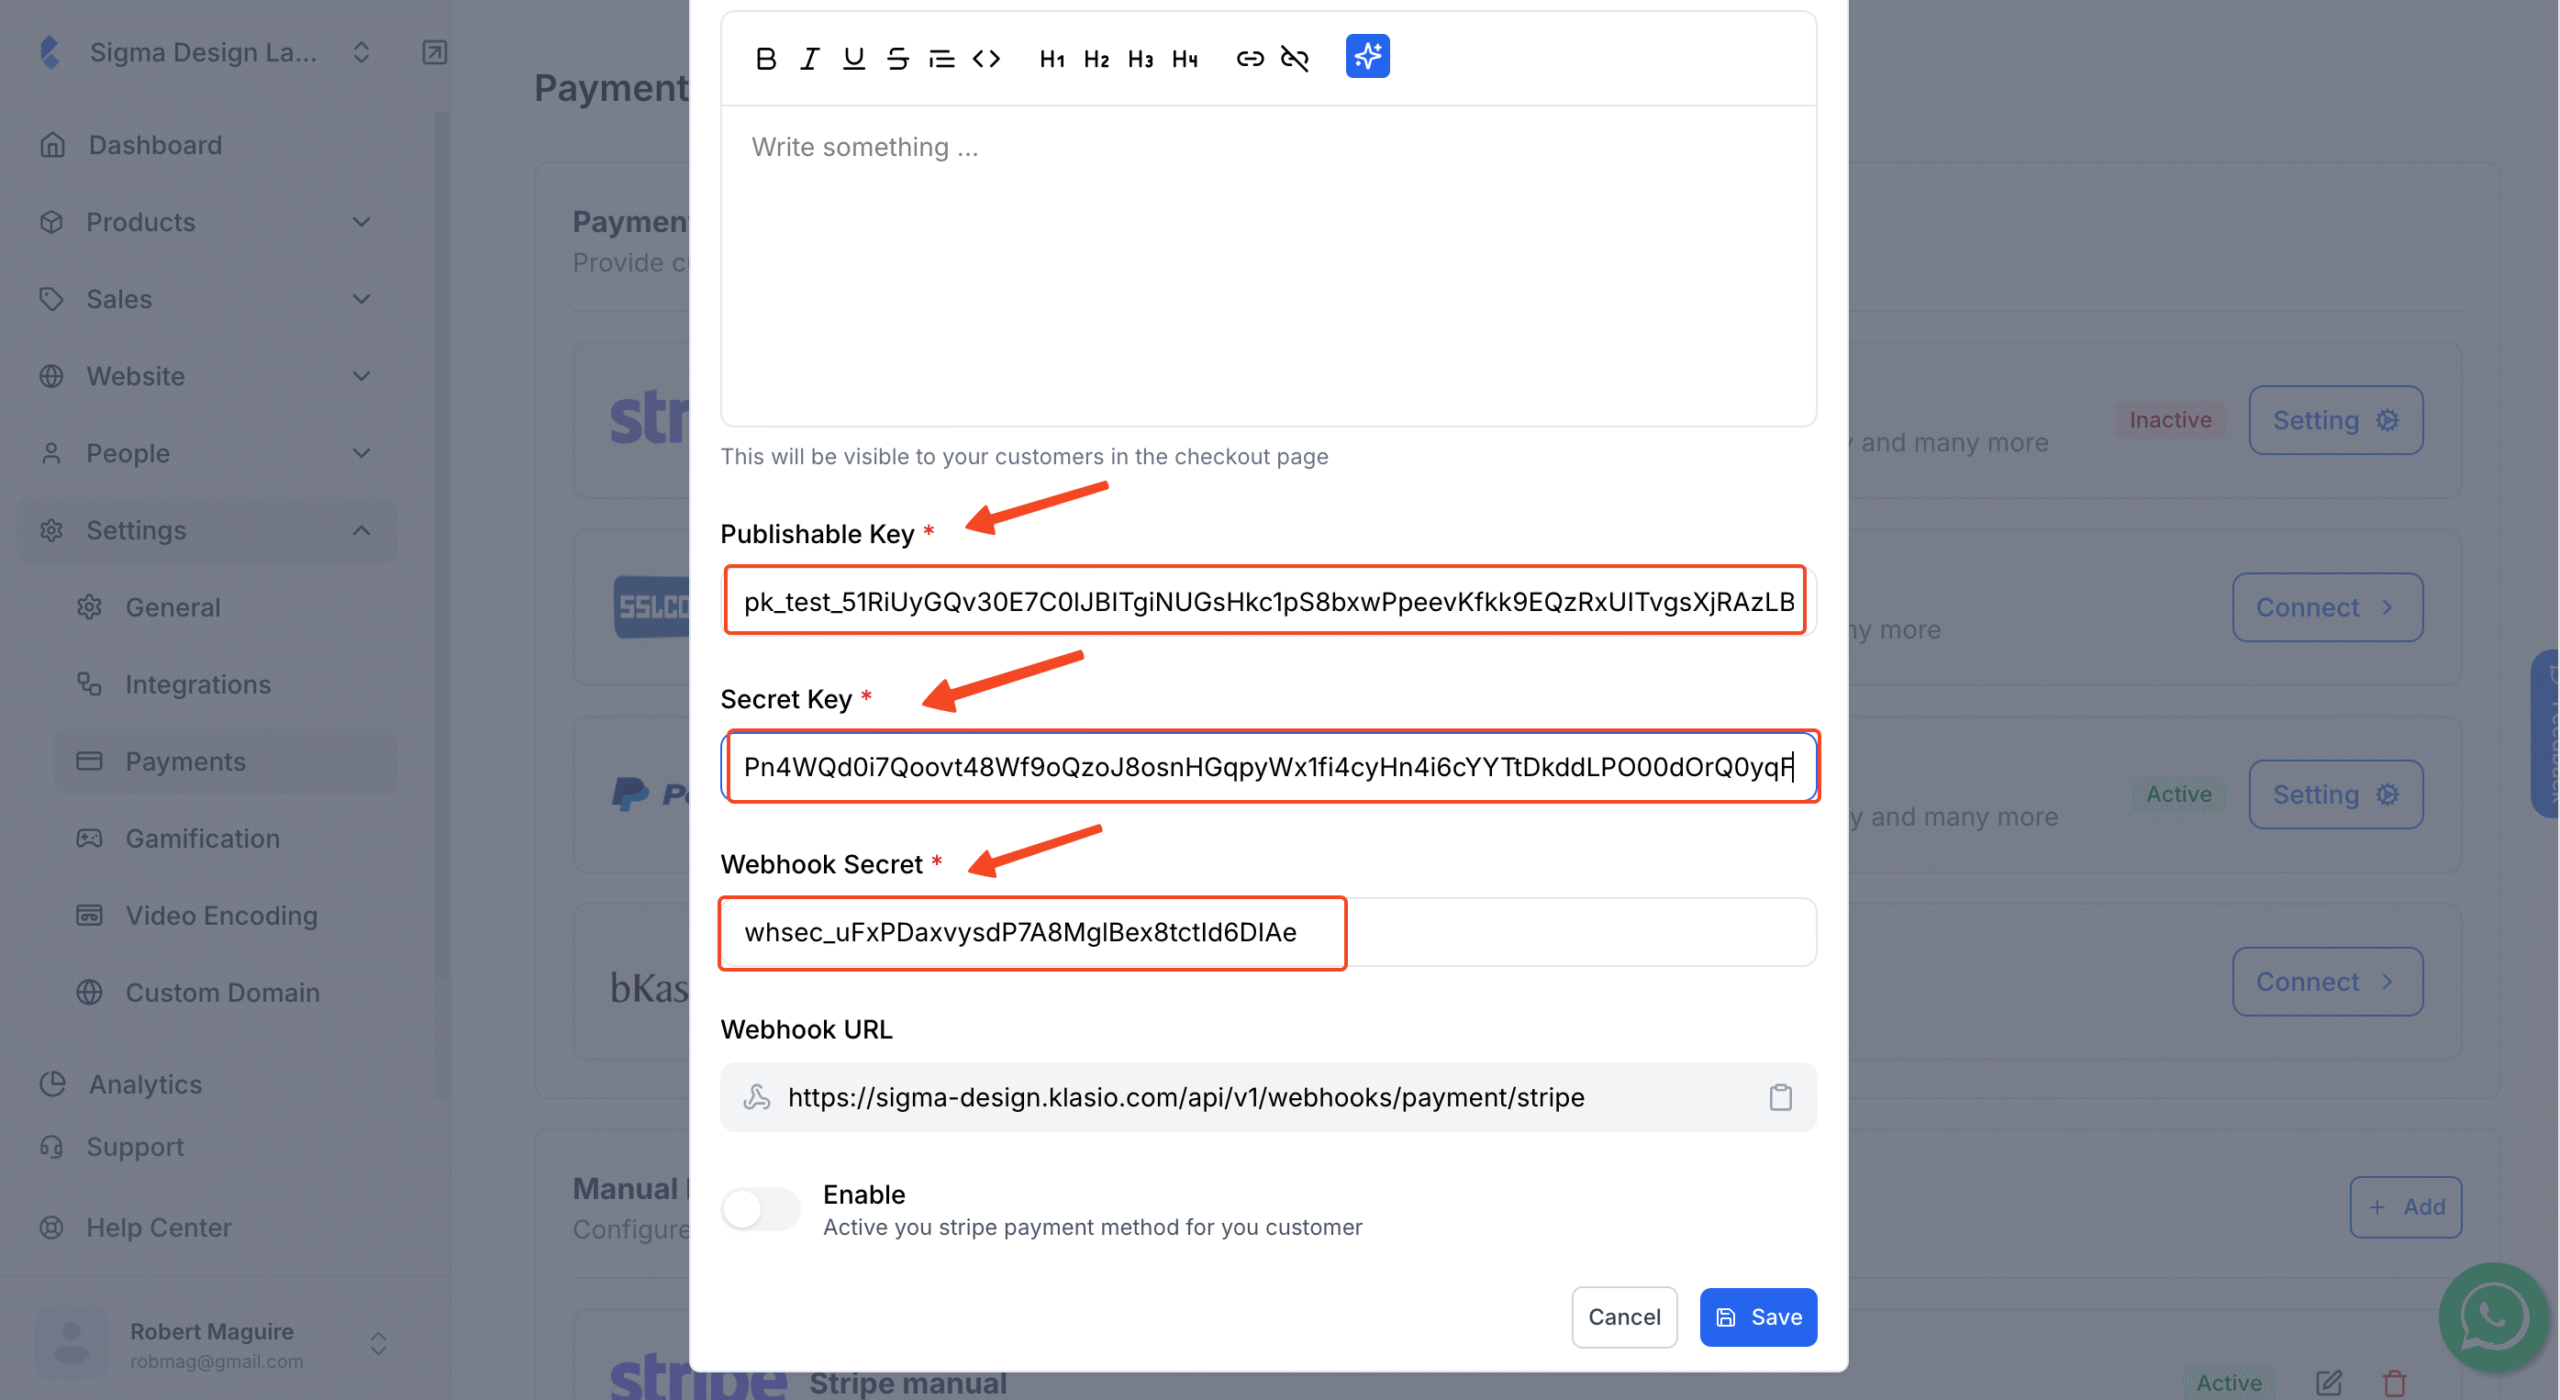
3. Type in the merchant name, add anything important in the description box if you want.
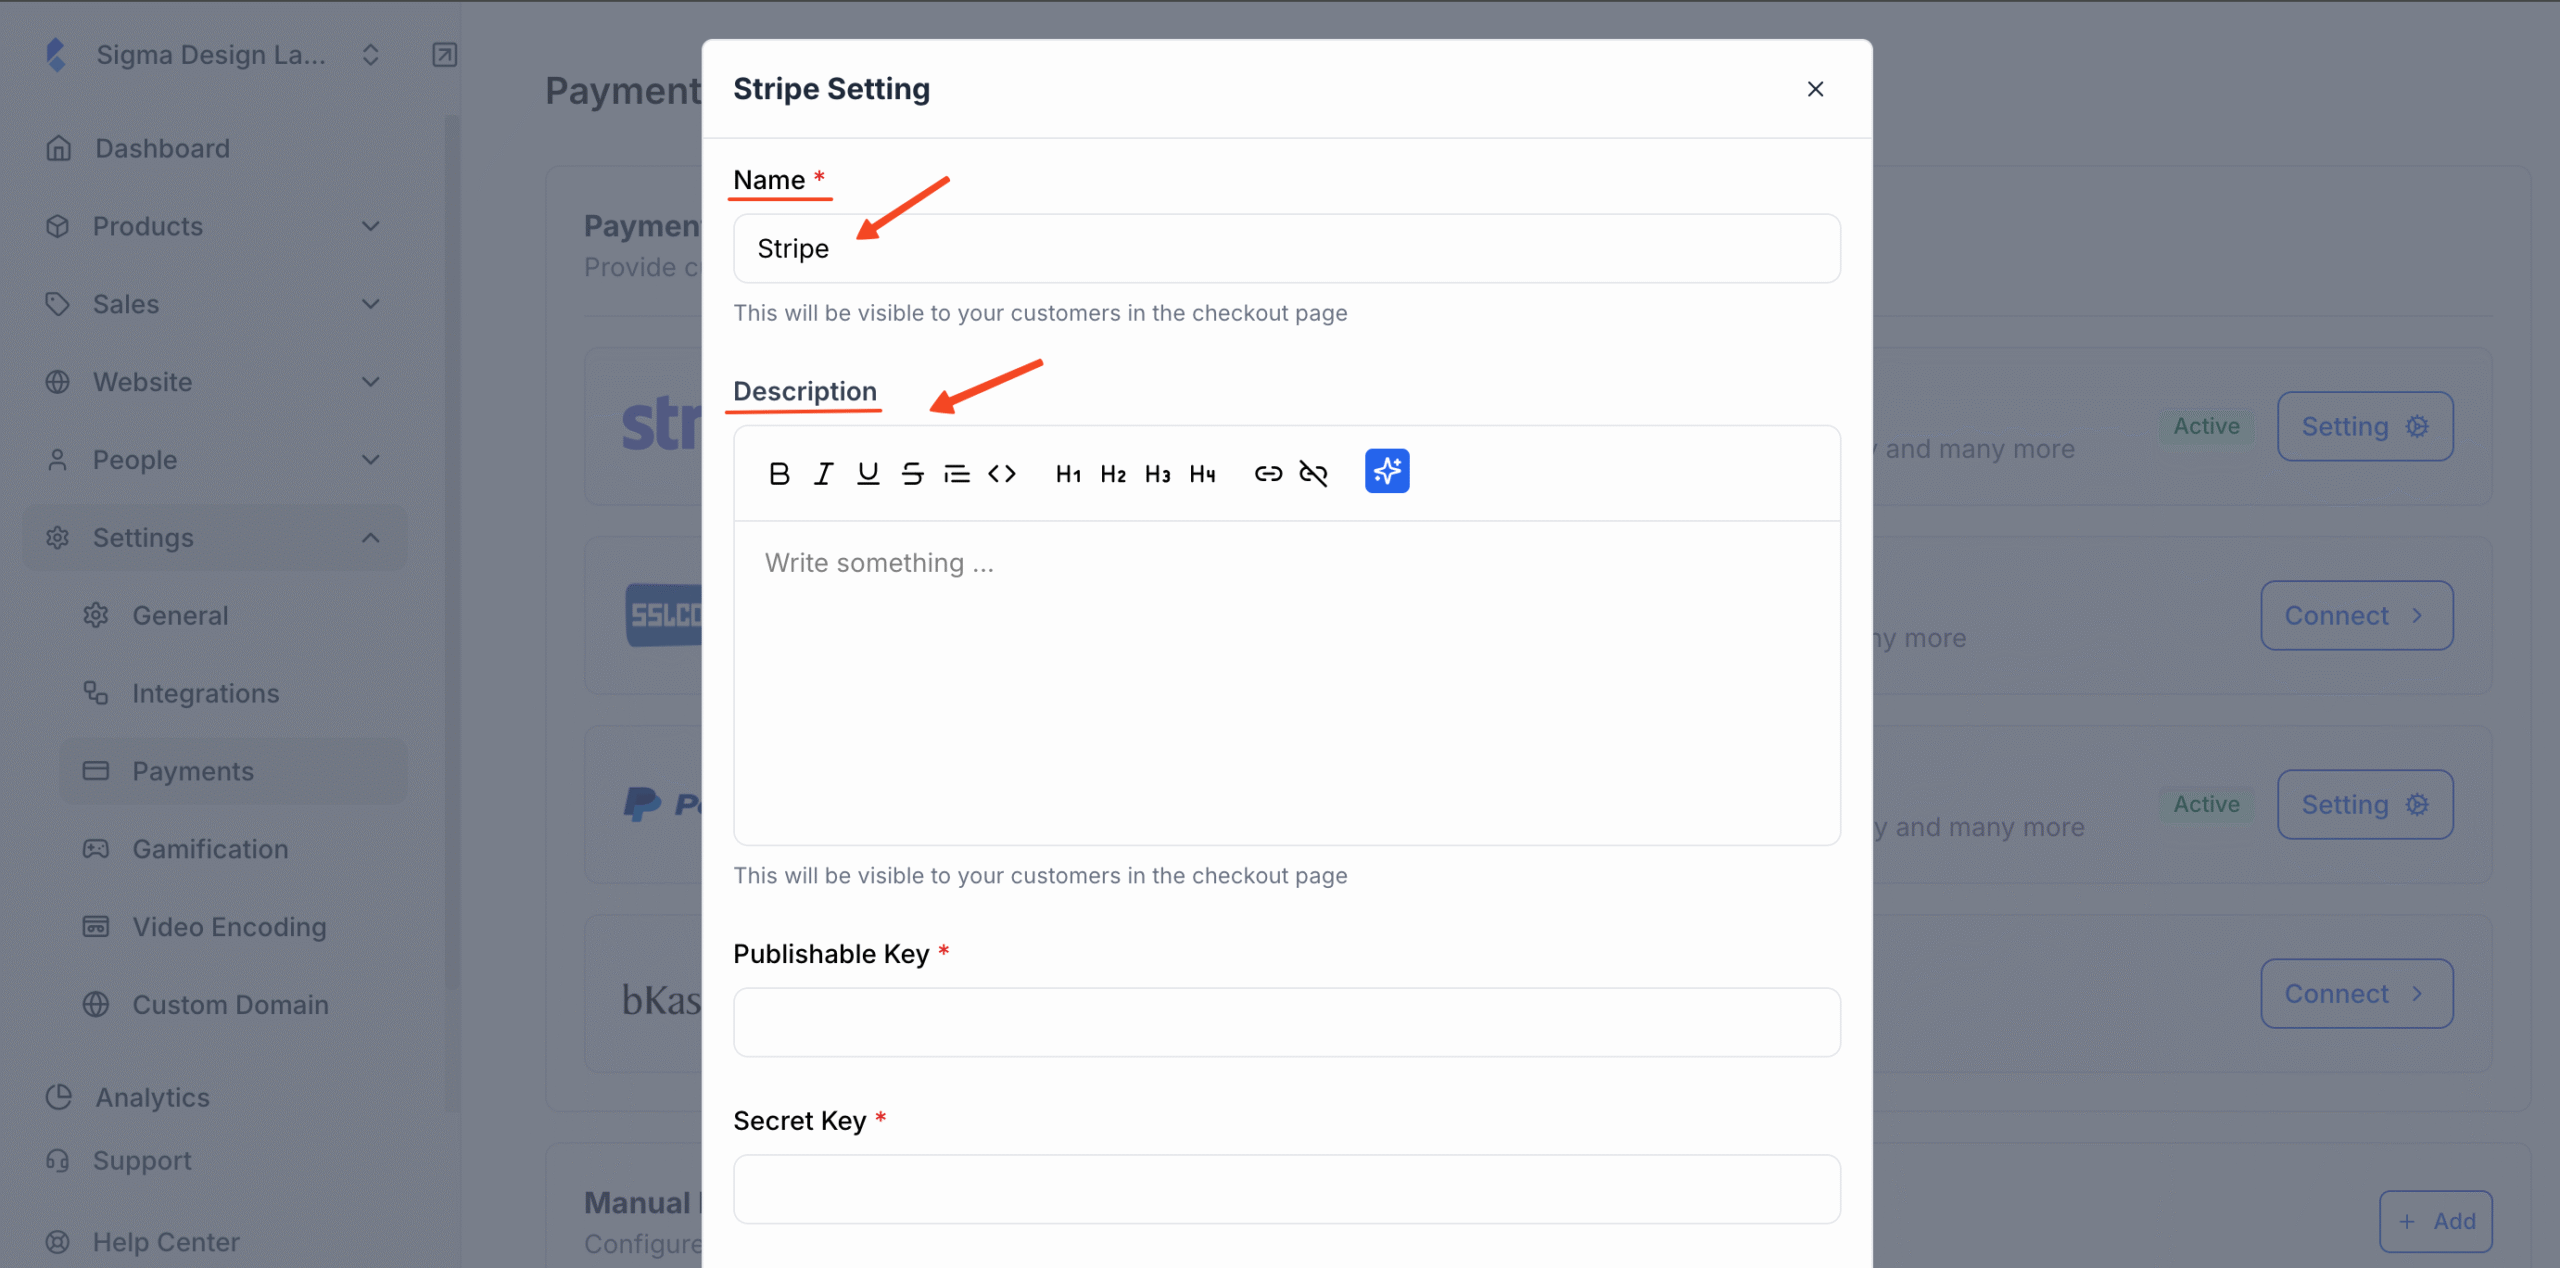
4. Next you’ll be asked to insert your Publishable Key, Secret Key and Webhook secret.

In order to get all these keys, you’ll be required to access your Stripe account and collect the key from there.
Payment Environment
Stripe has two modes for generating such keys. Start by choosing either “Test” or “Live”, depending on what you’re doing. Use Test mode to simulate payments, or Live mode if you’re ready to accept real transactions in your production environment.
How to Get Stripe Sandbox/Production Public & Secret Key
a. To get your secret key, log in to your Stripe account and head to the Developer Dashboard. On the lower-left menu, click on Developers, then choose API keys.
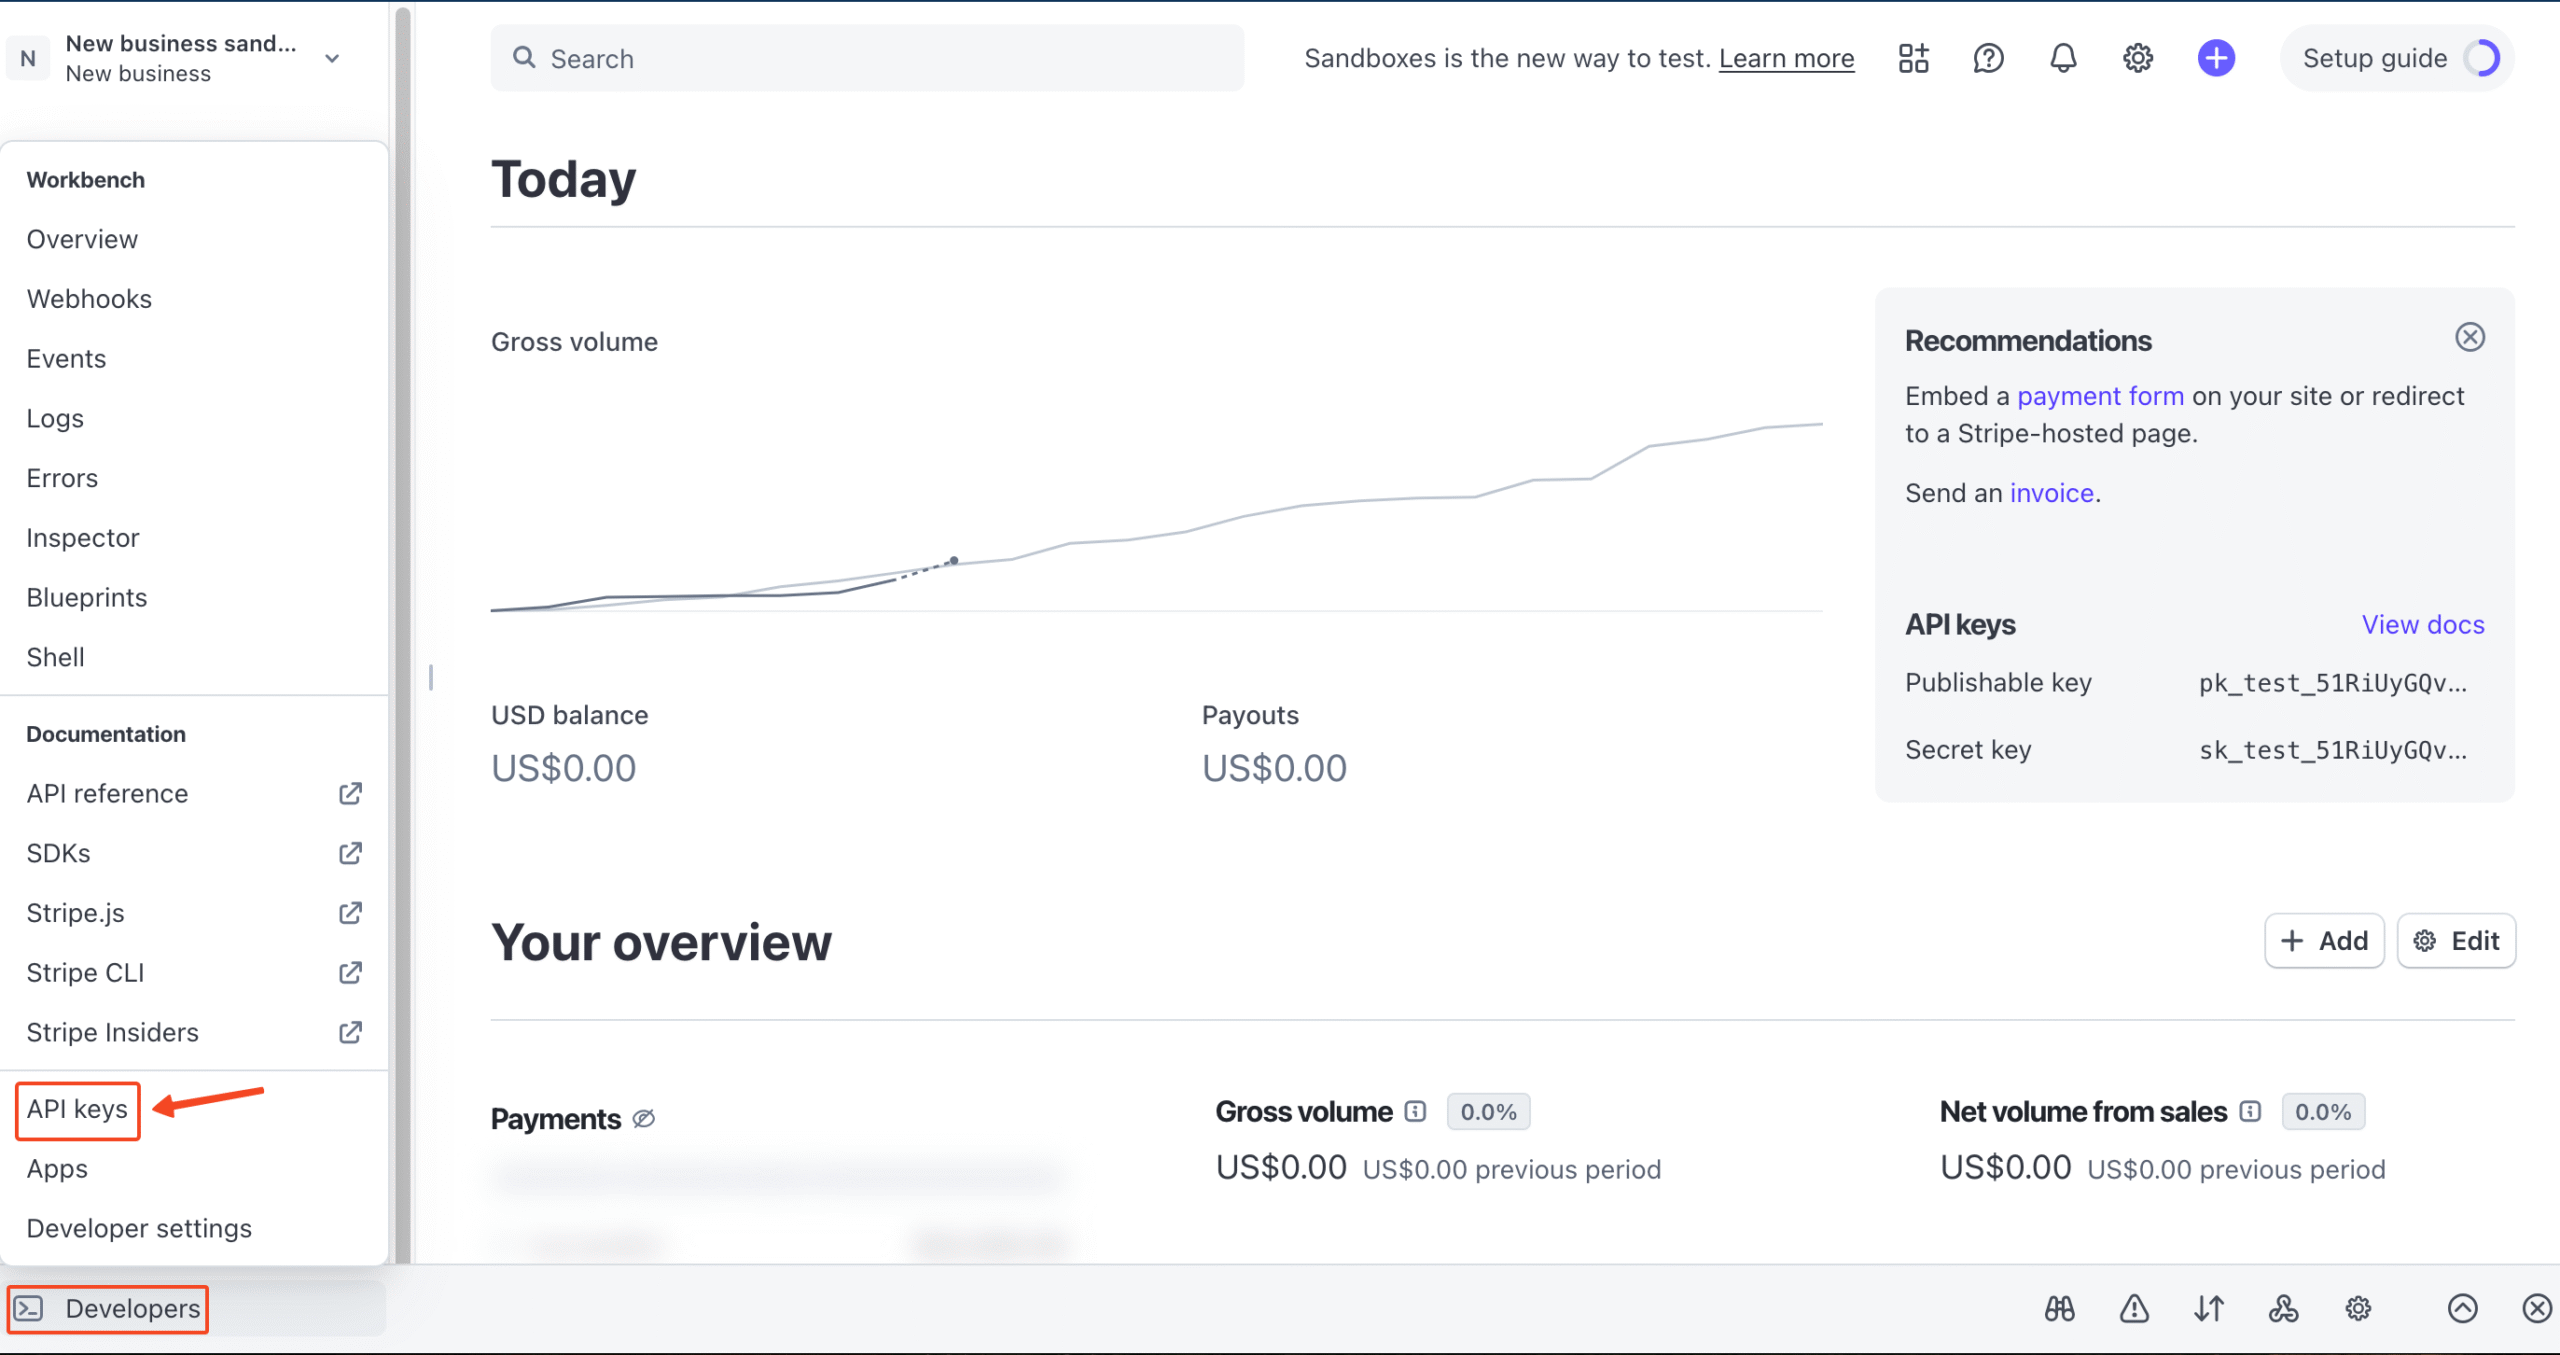
b. Here, you’ll find both the publishable key and the secret key
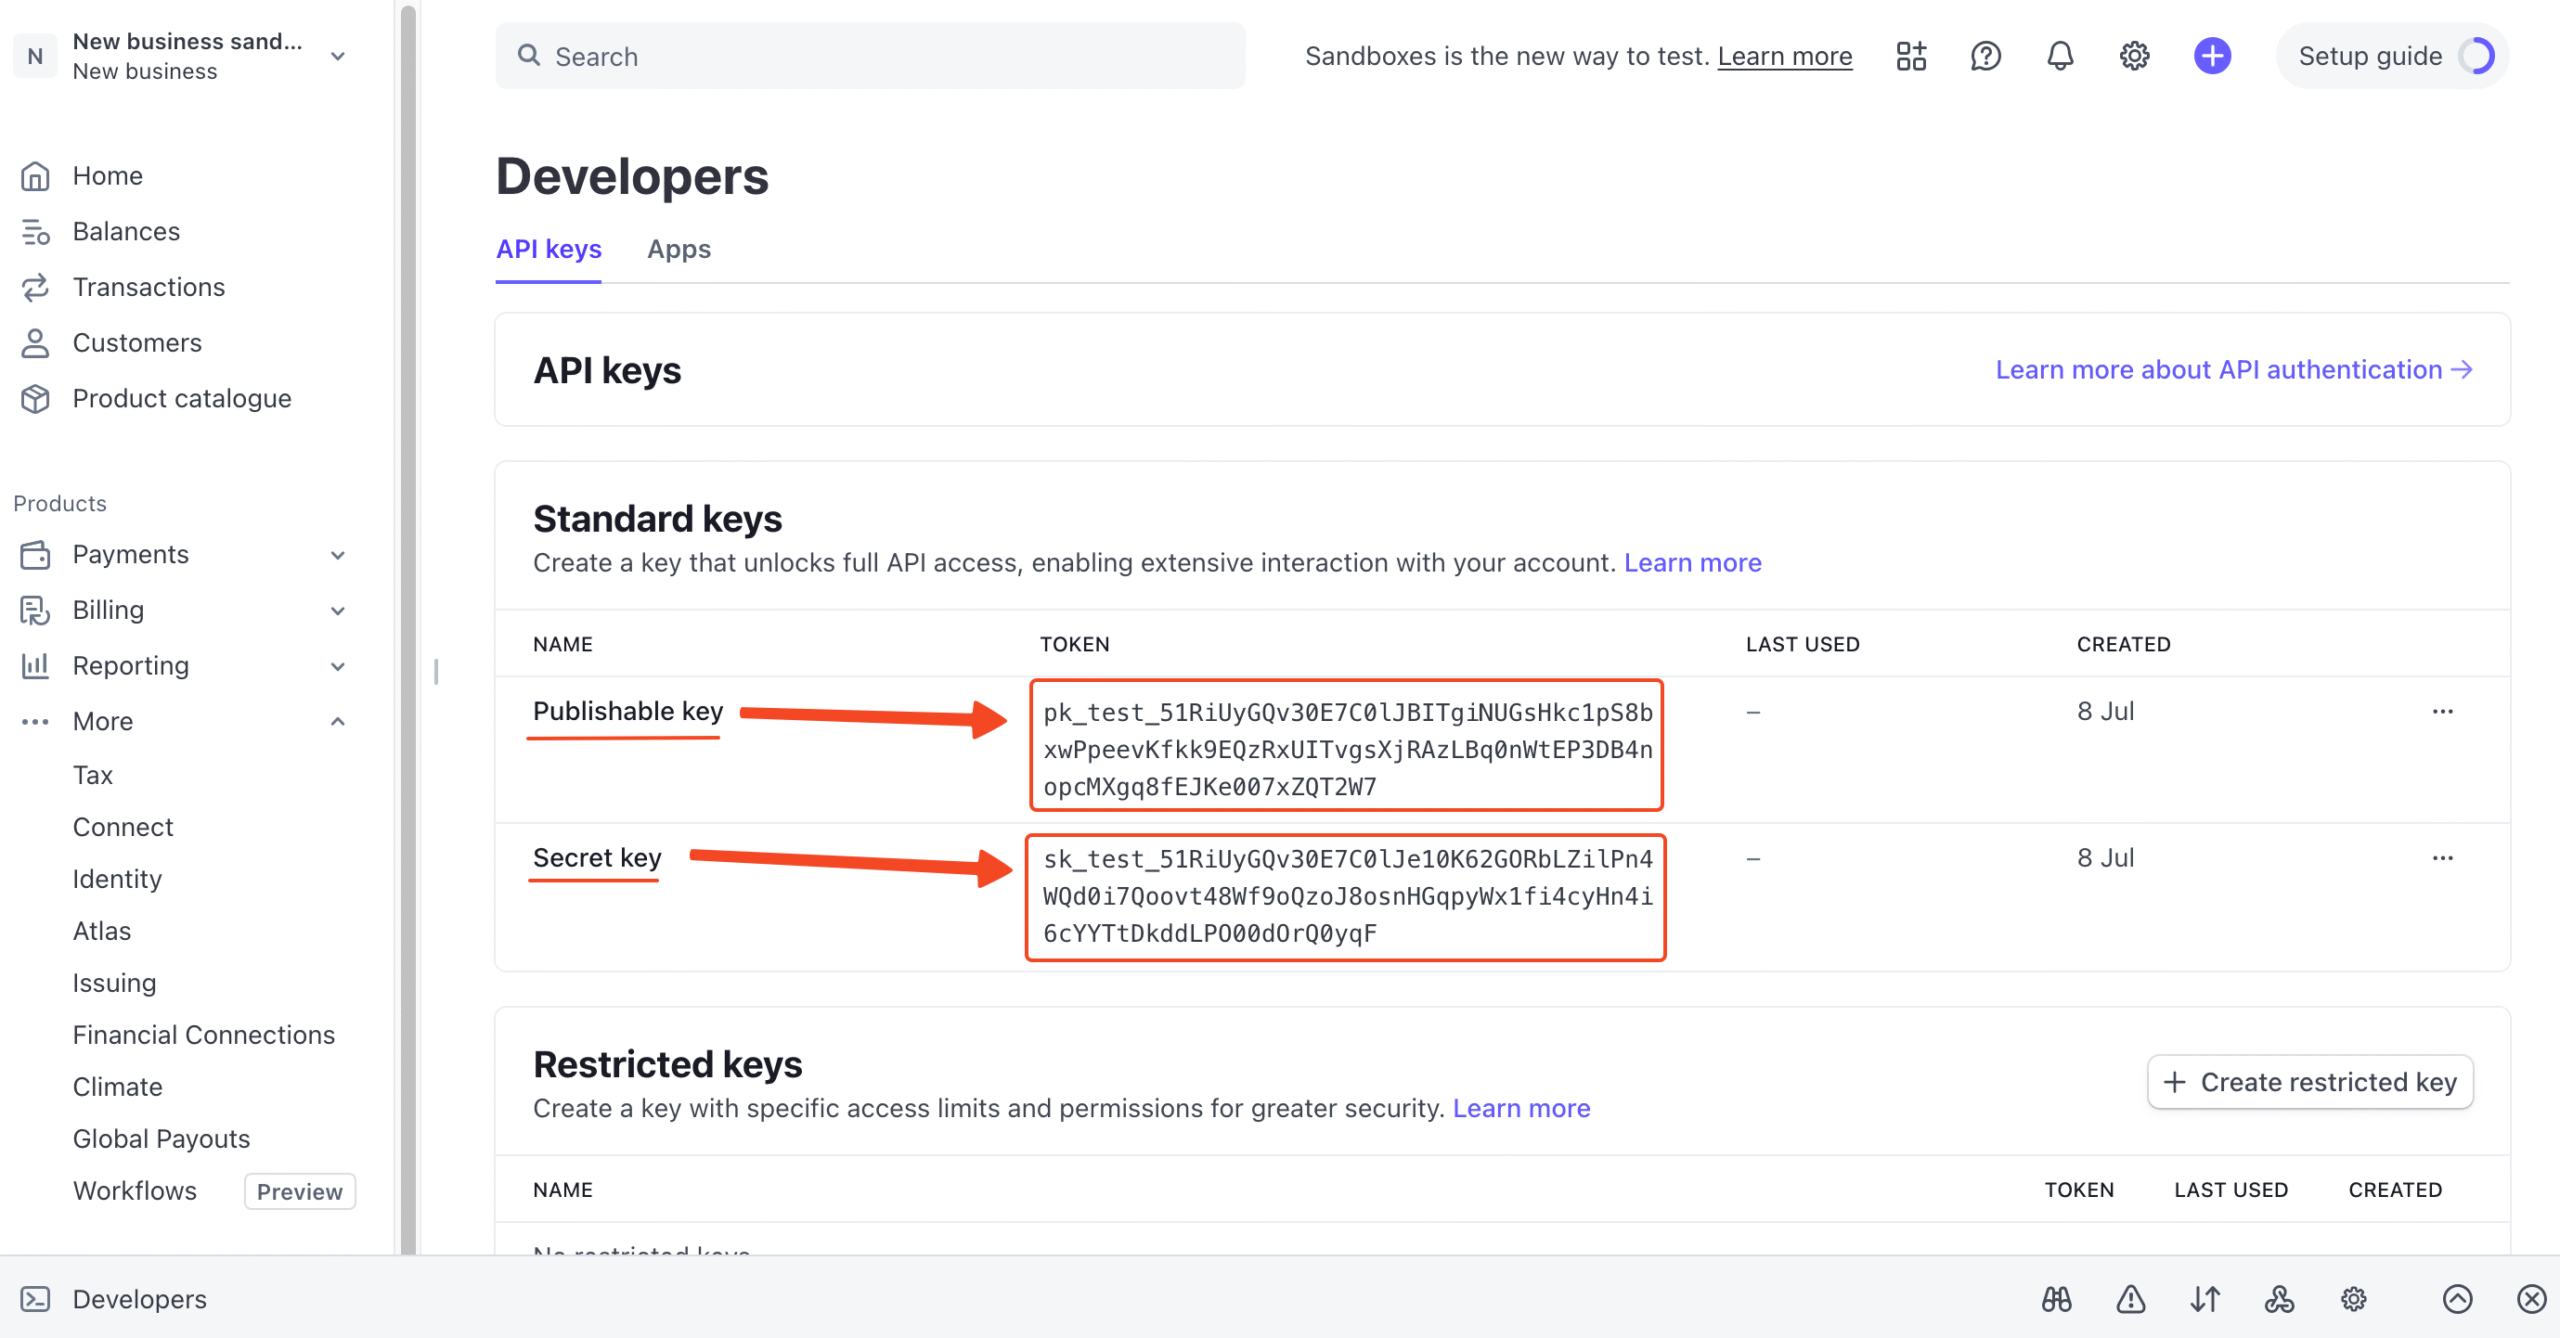
Just a heads-up: Test secret keys will start with sk_test, while Live keys will begin with sk_live — so you can easily tell them apart.
c. Copy the Publishable key and Secret key and simply paste them into the respective fields in Klasio Stripe setup pop up.
Stripe Webhook Signature Key
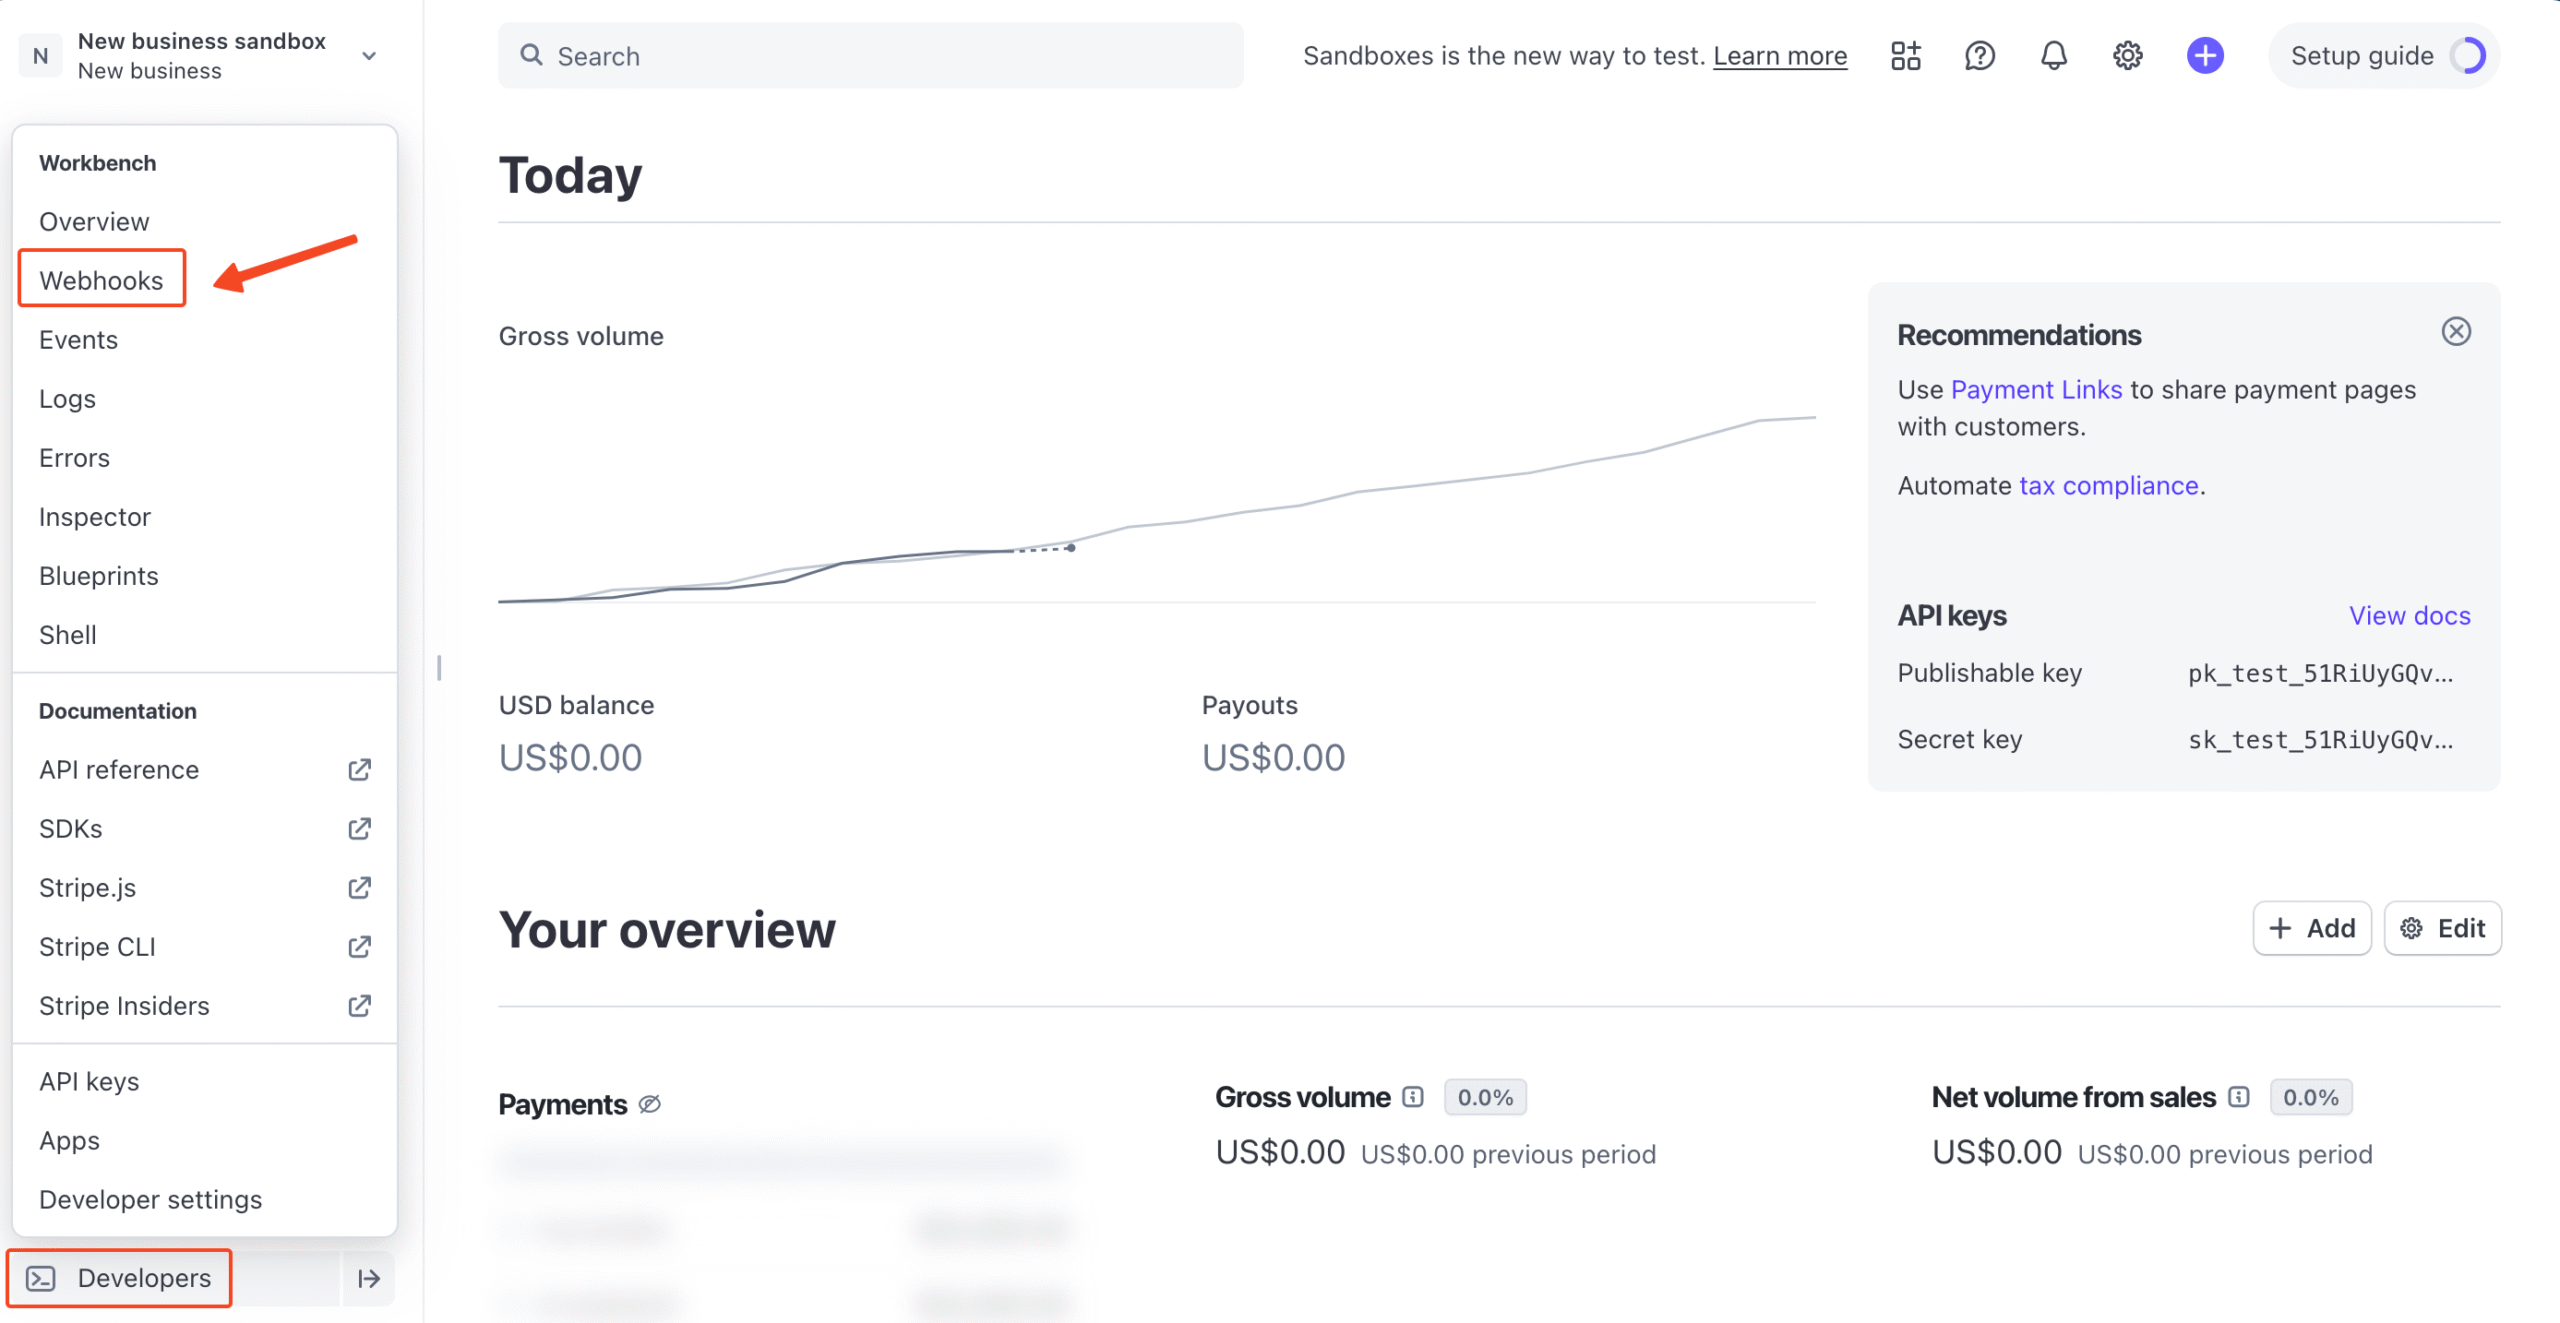
a. From the admin dashboard, click on Developers and then click Webhooks
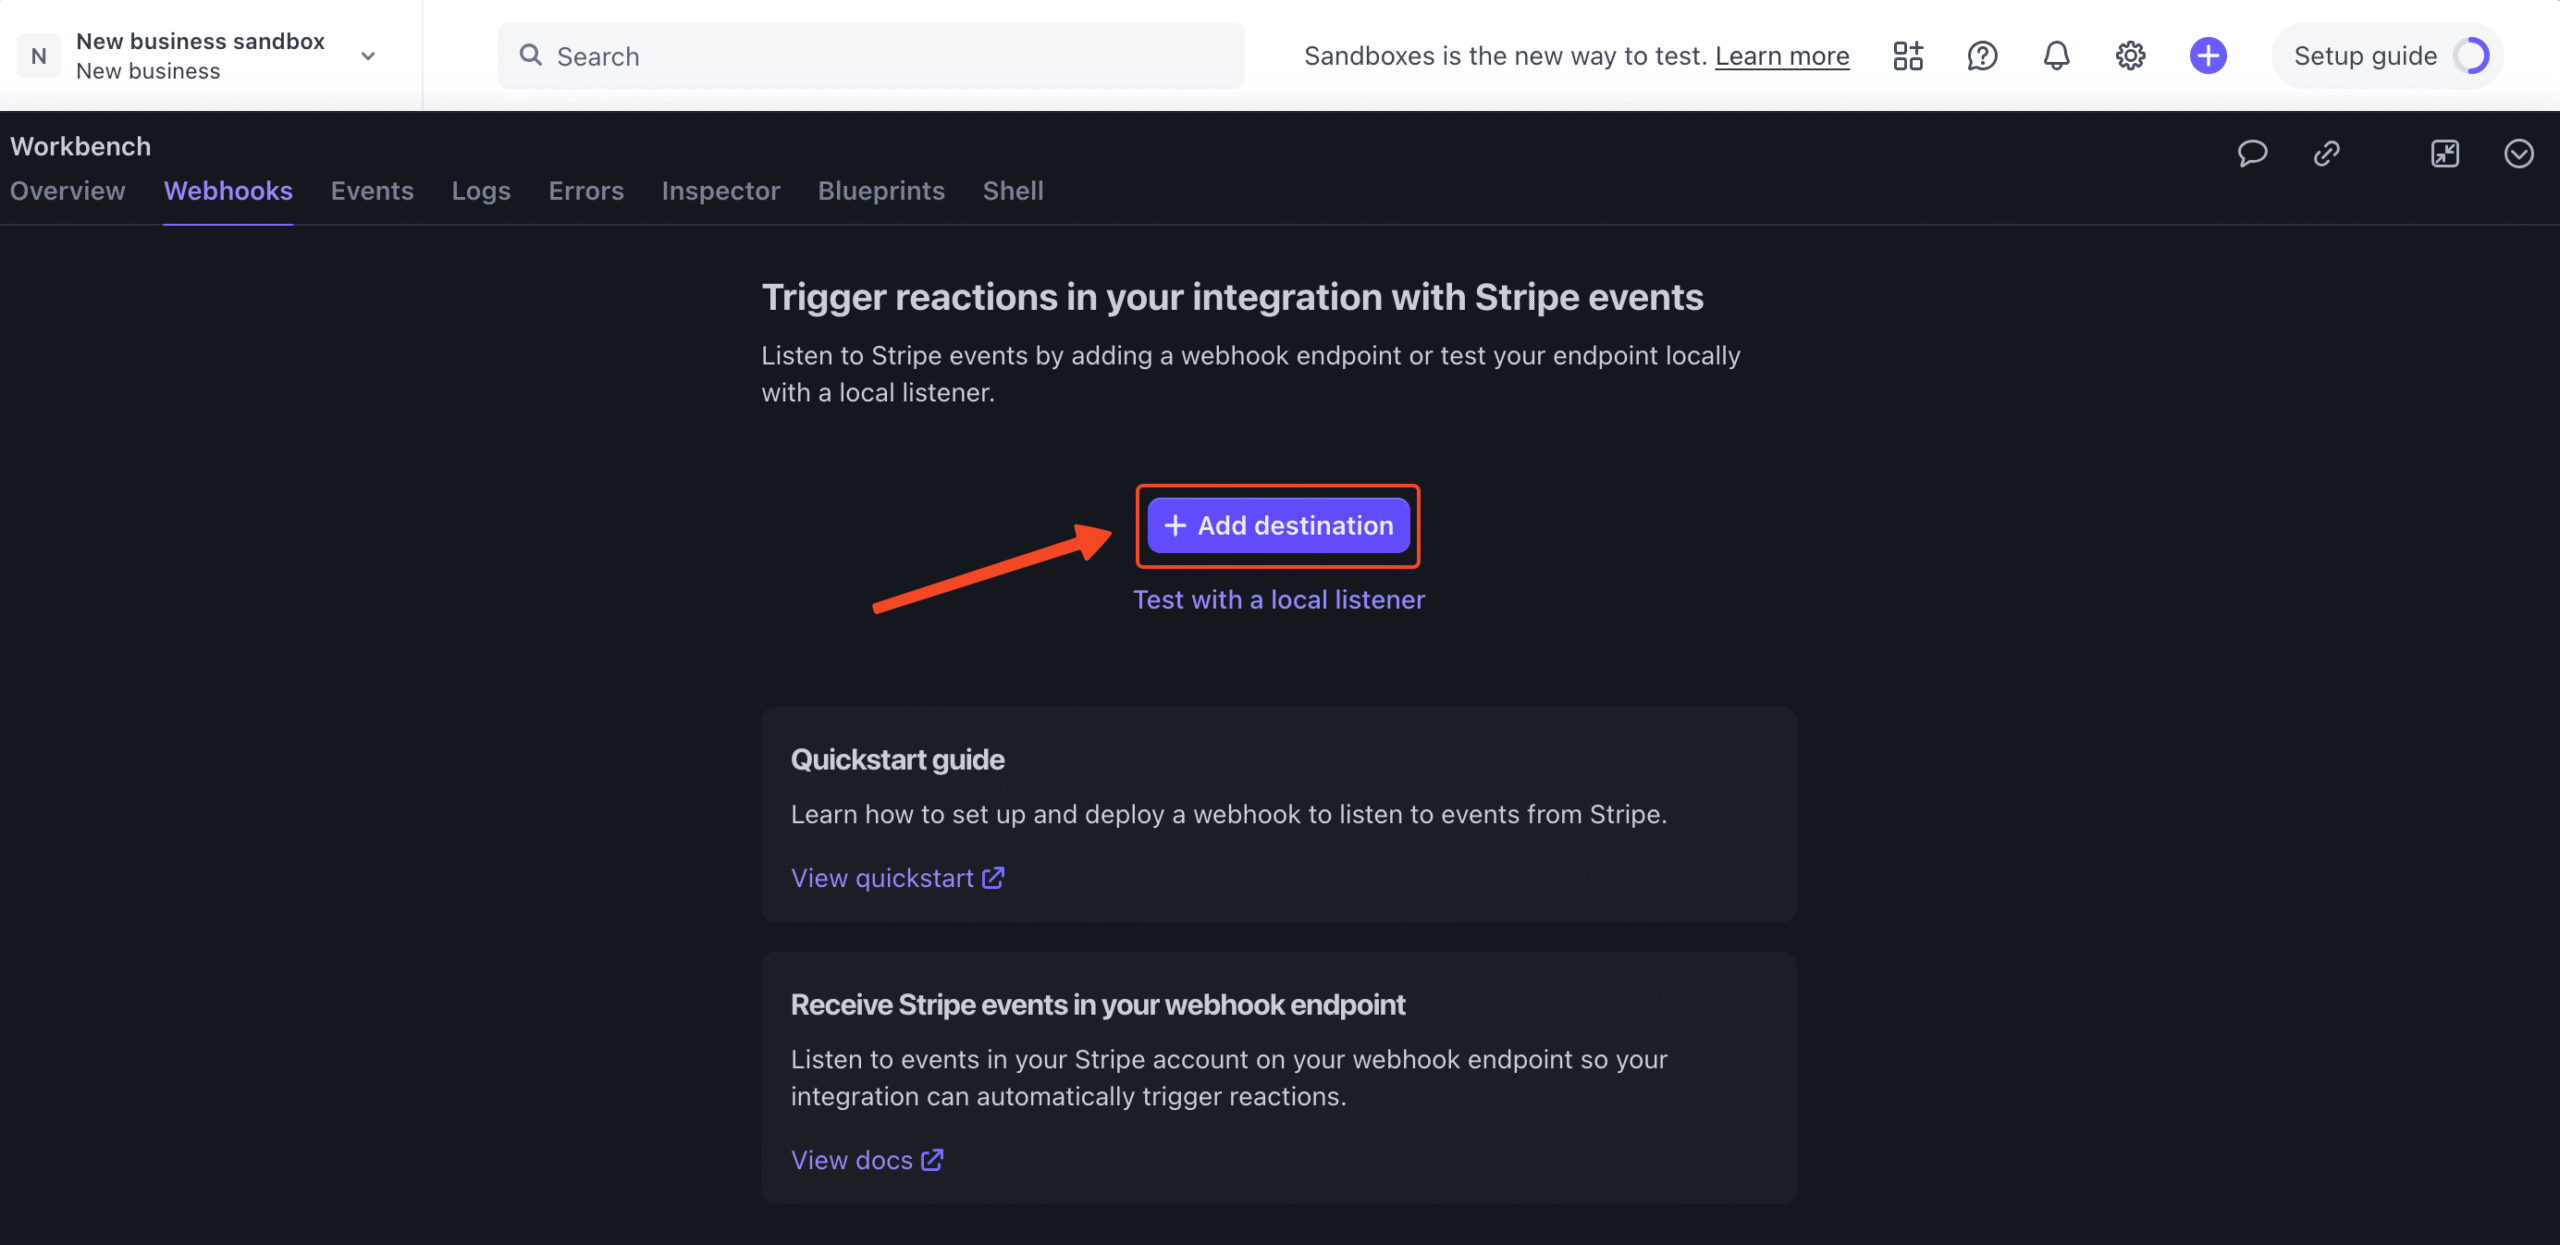
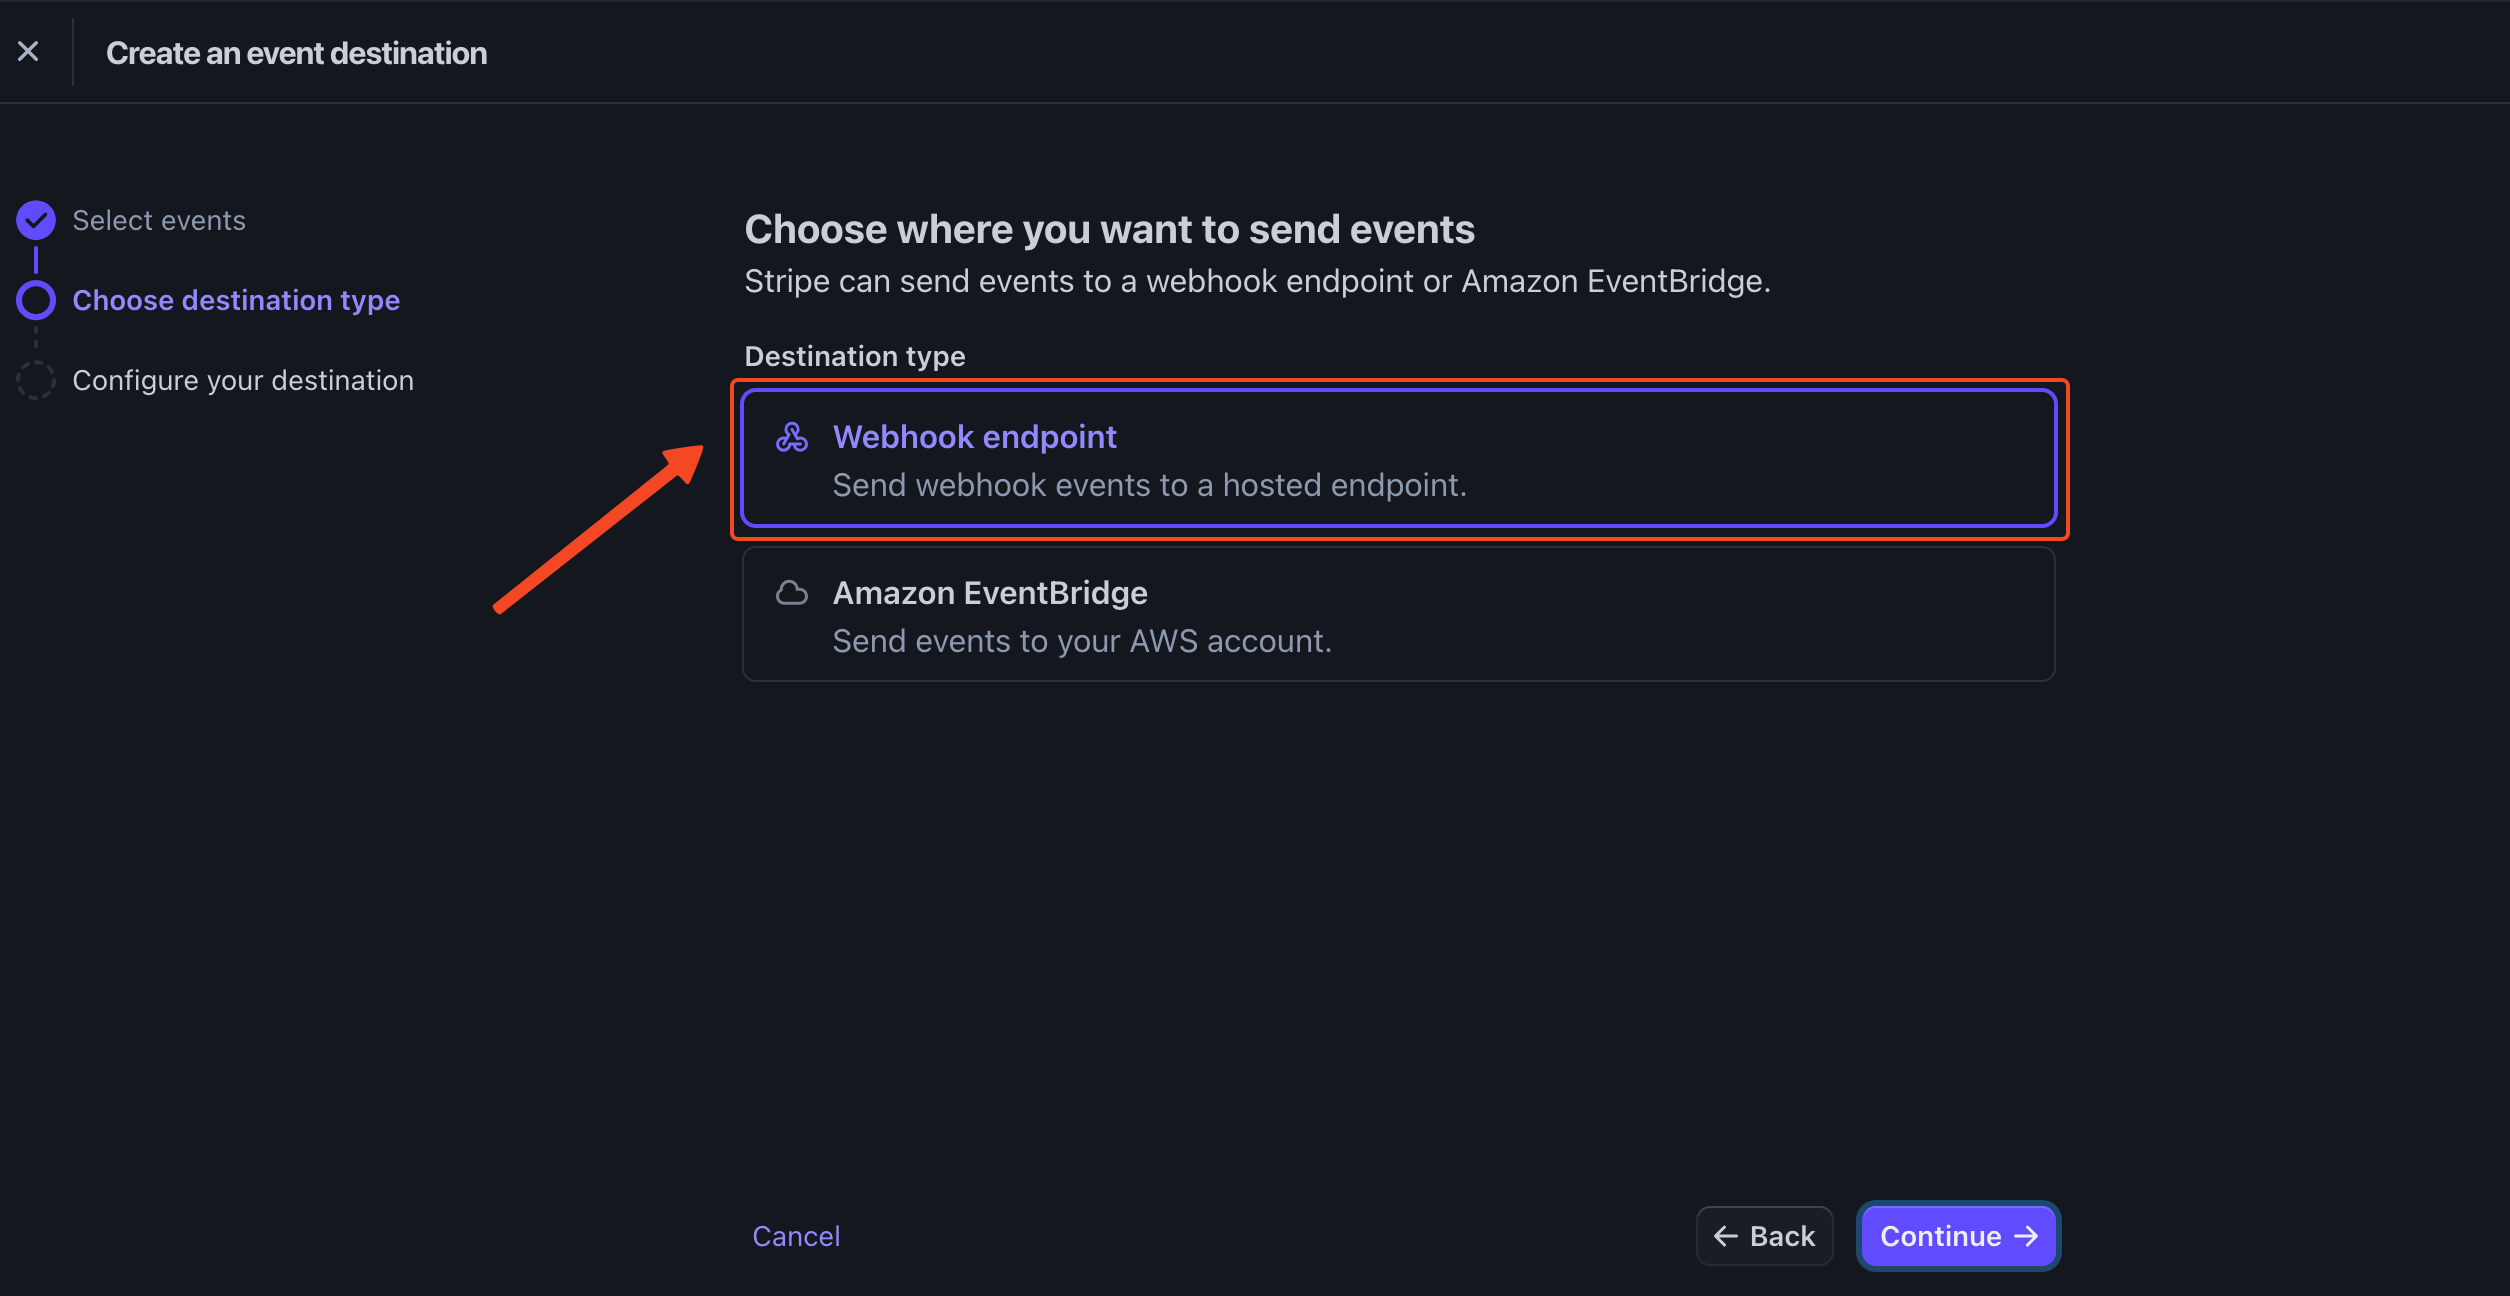
b. Then, click on Add Destination.
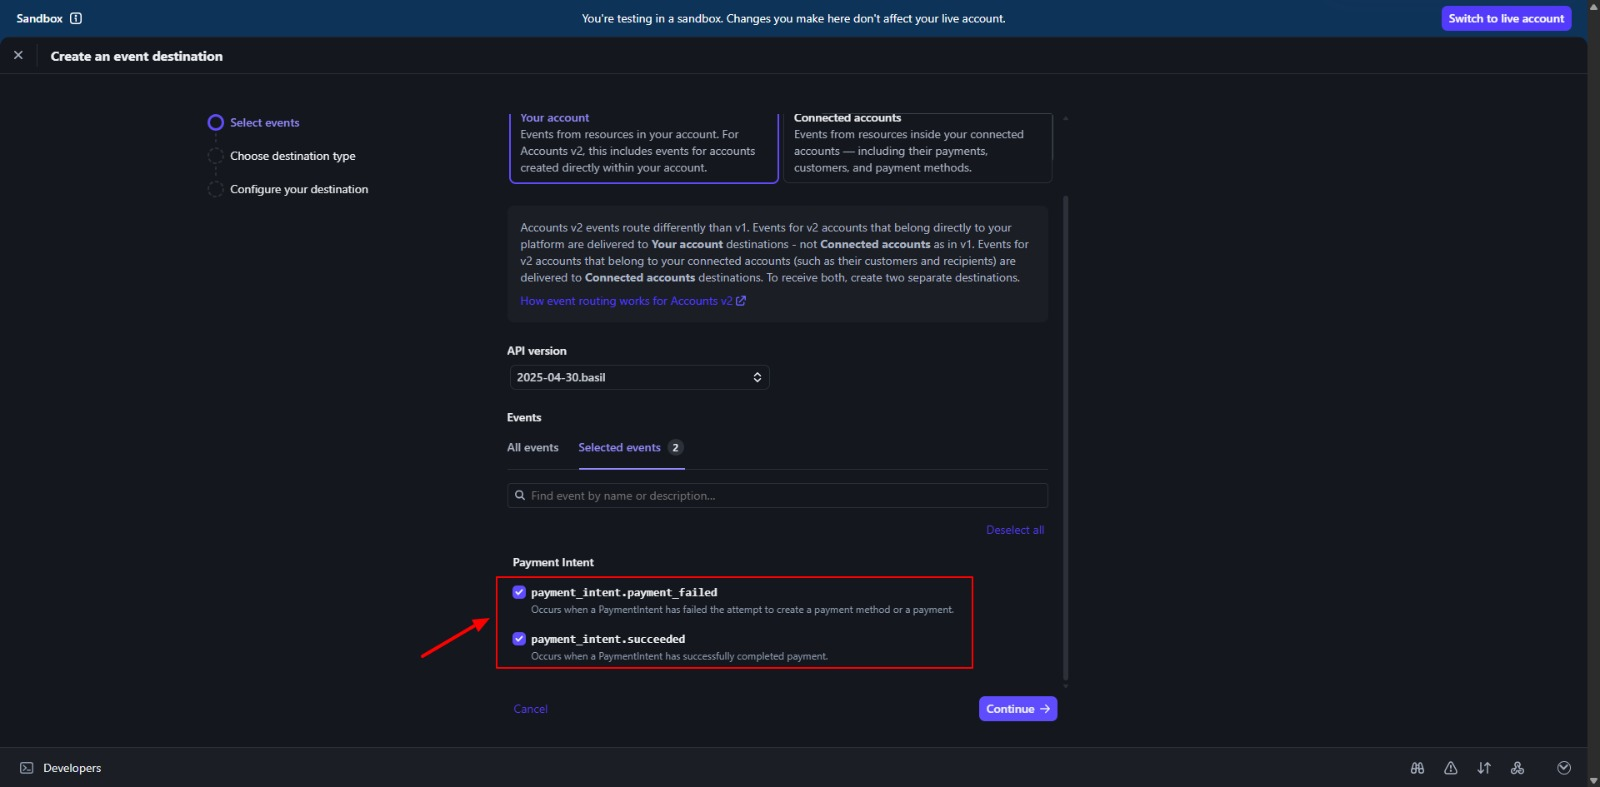
c. Choose the specific events you want to be notified about. For things to work smoothly, make sure you include these events:
1. payment_intent.succeeded
2. payment_intent.payment_failed
d. Then, click on Continue and select Webhook endpoint on the following step to add your webhook endpoint’s HTTPS URL.
e. Here, you have to enter the Endpoint URL
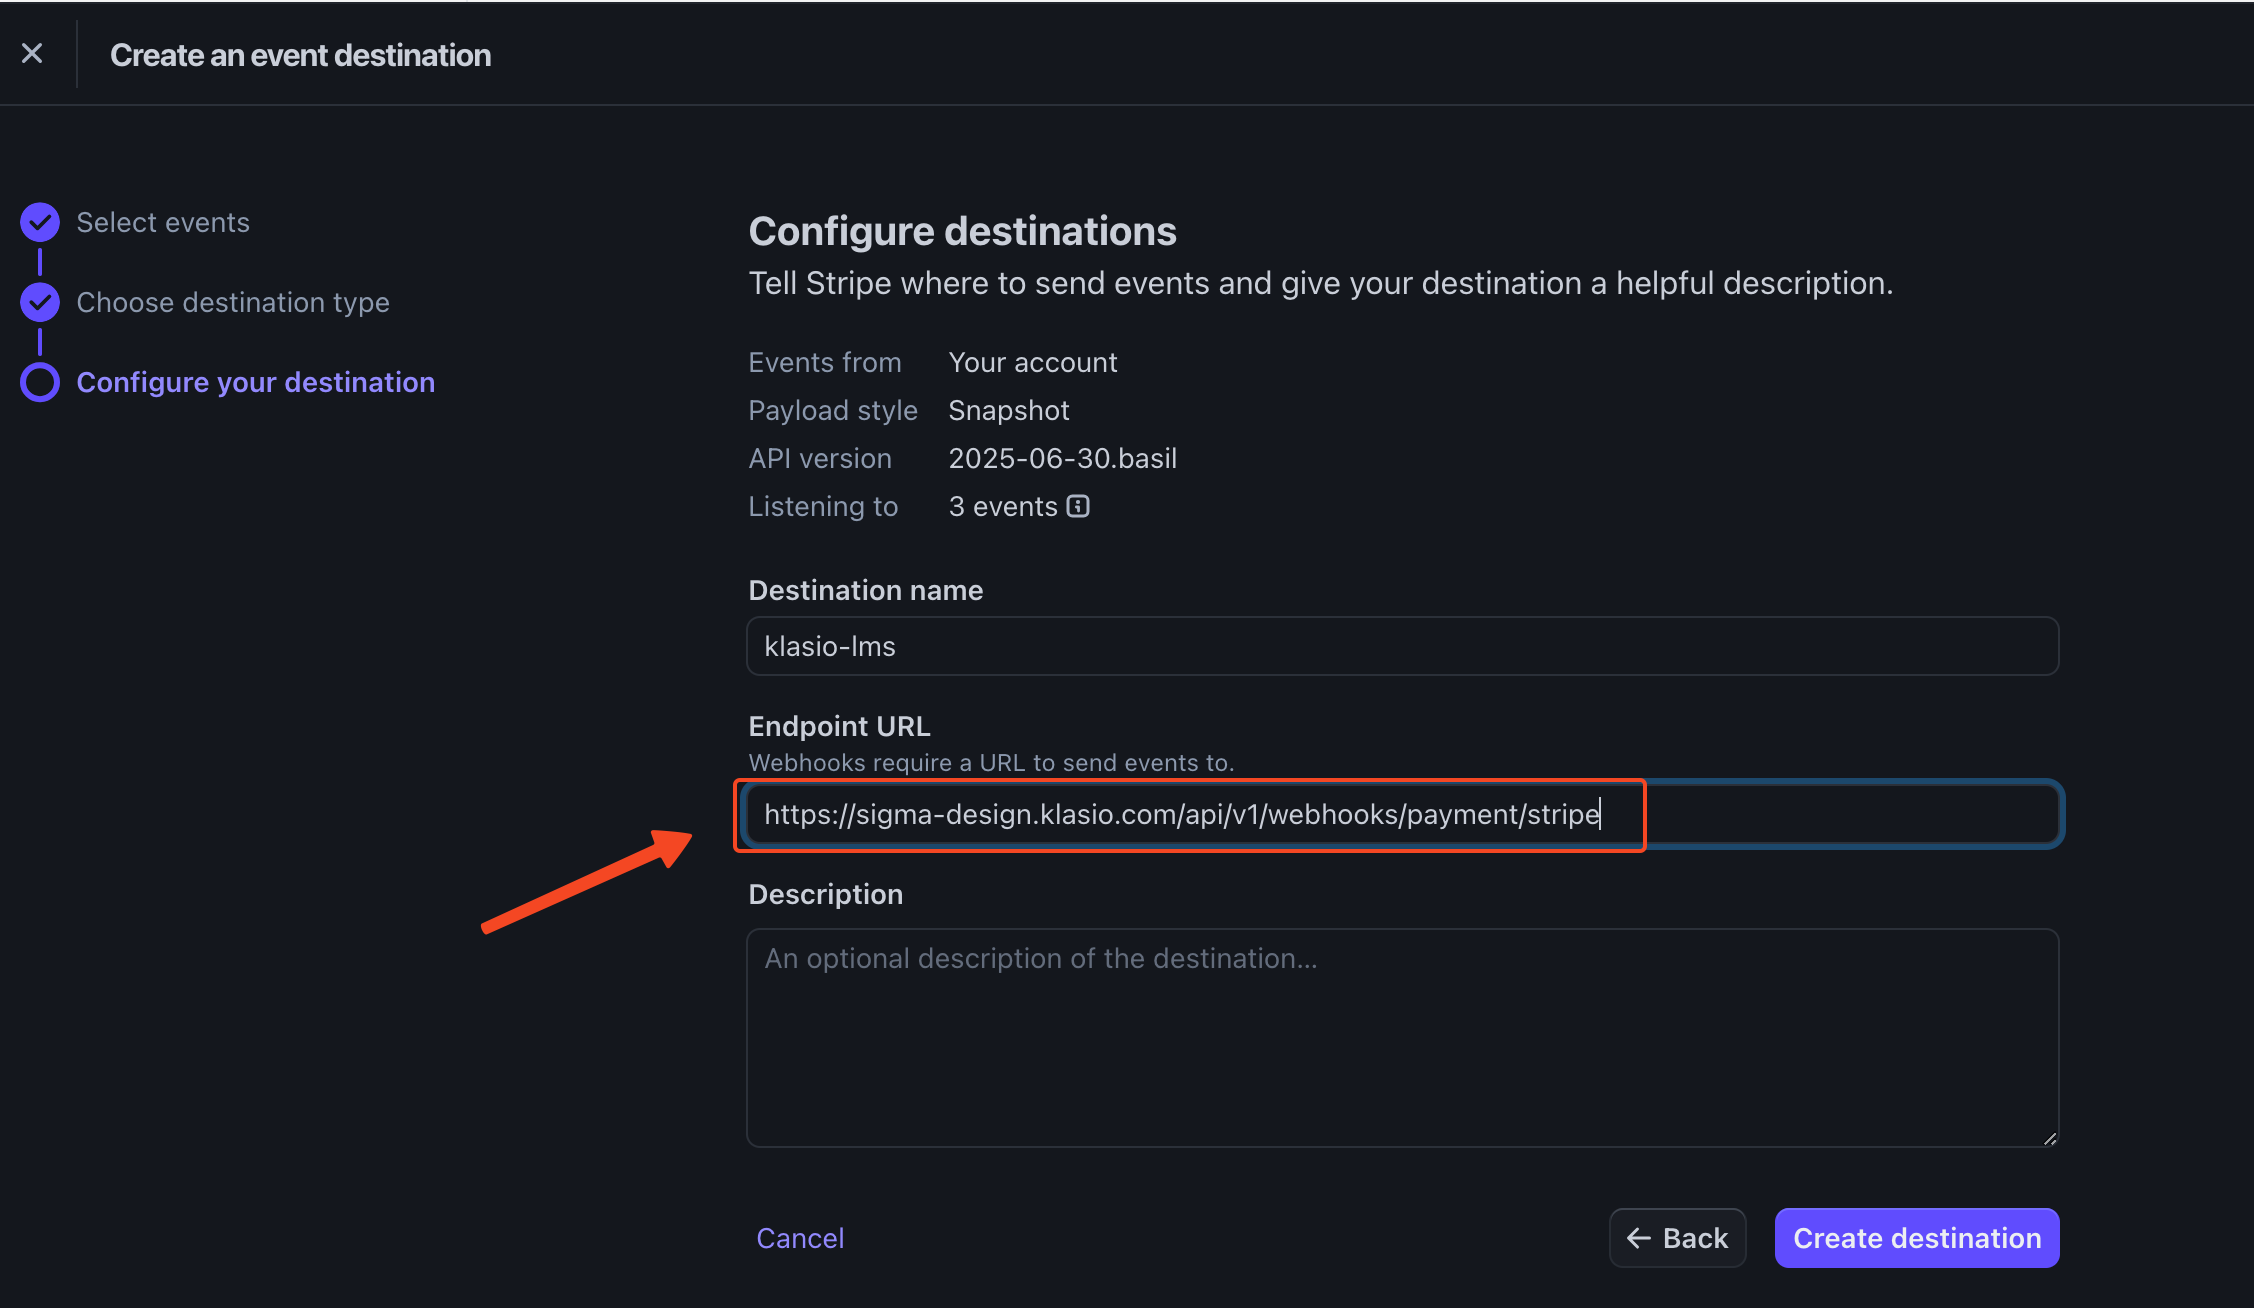
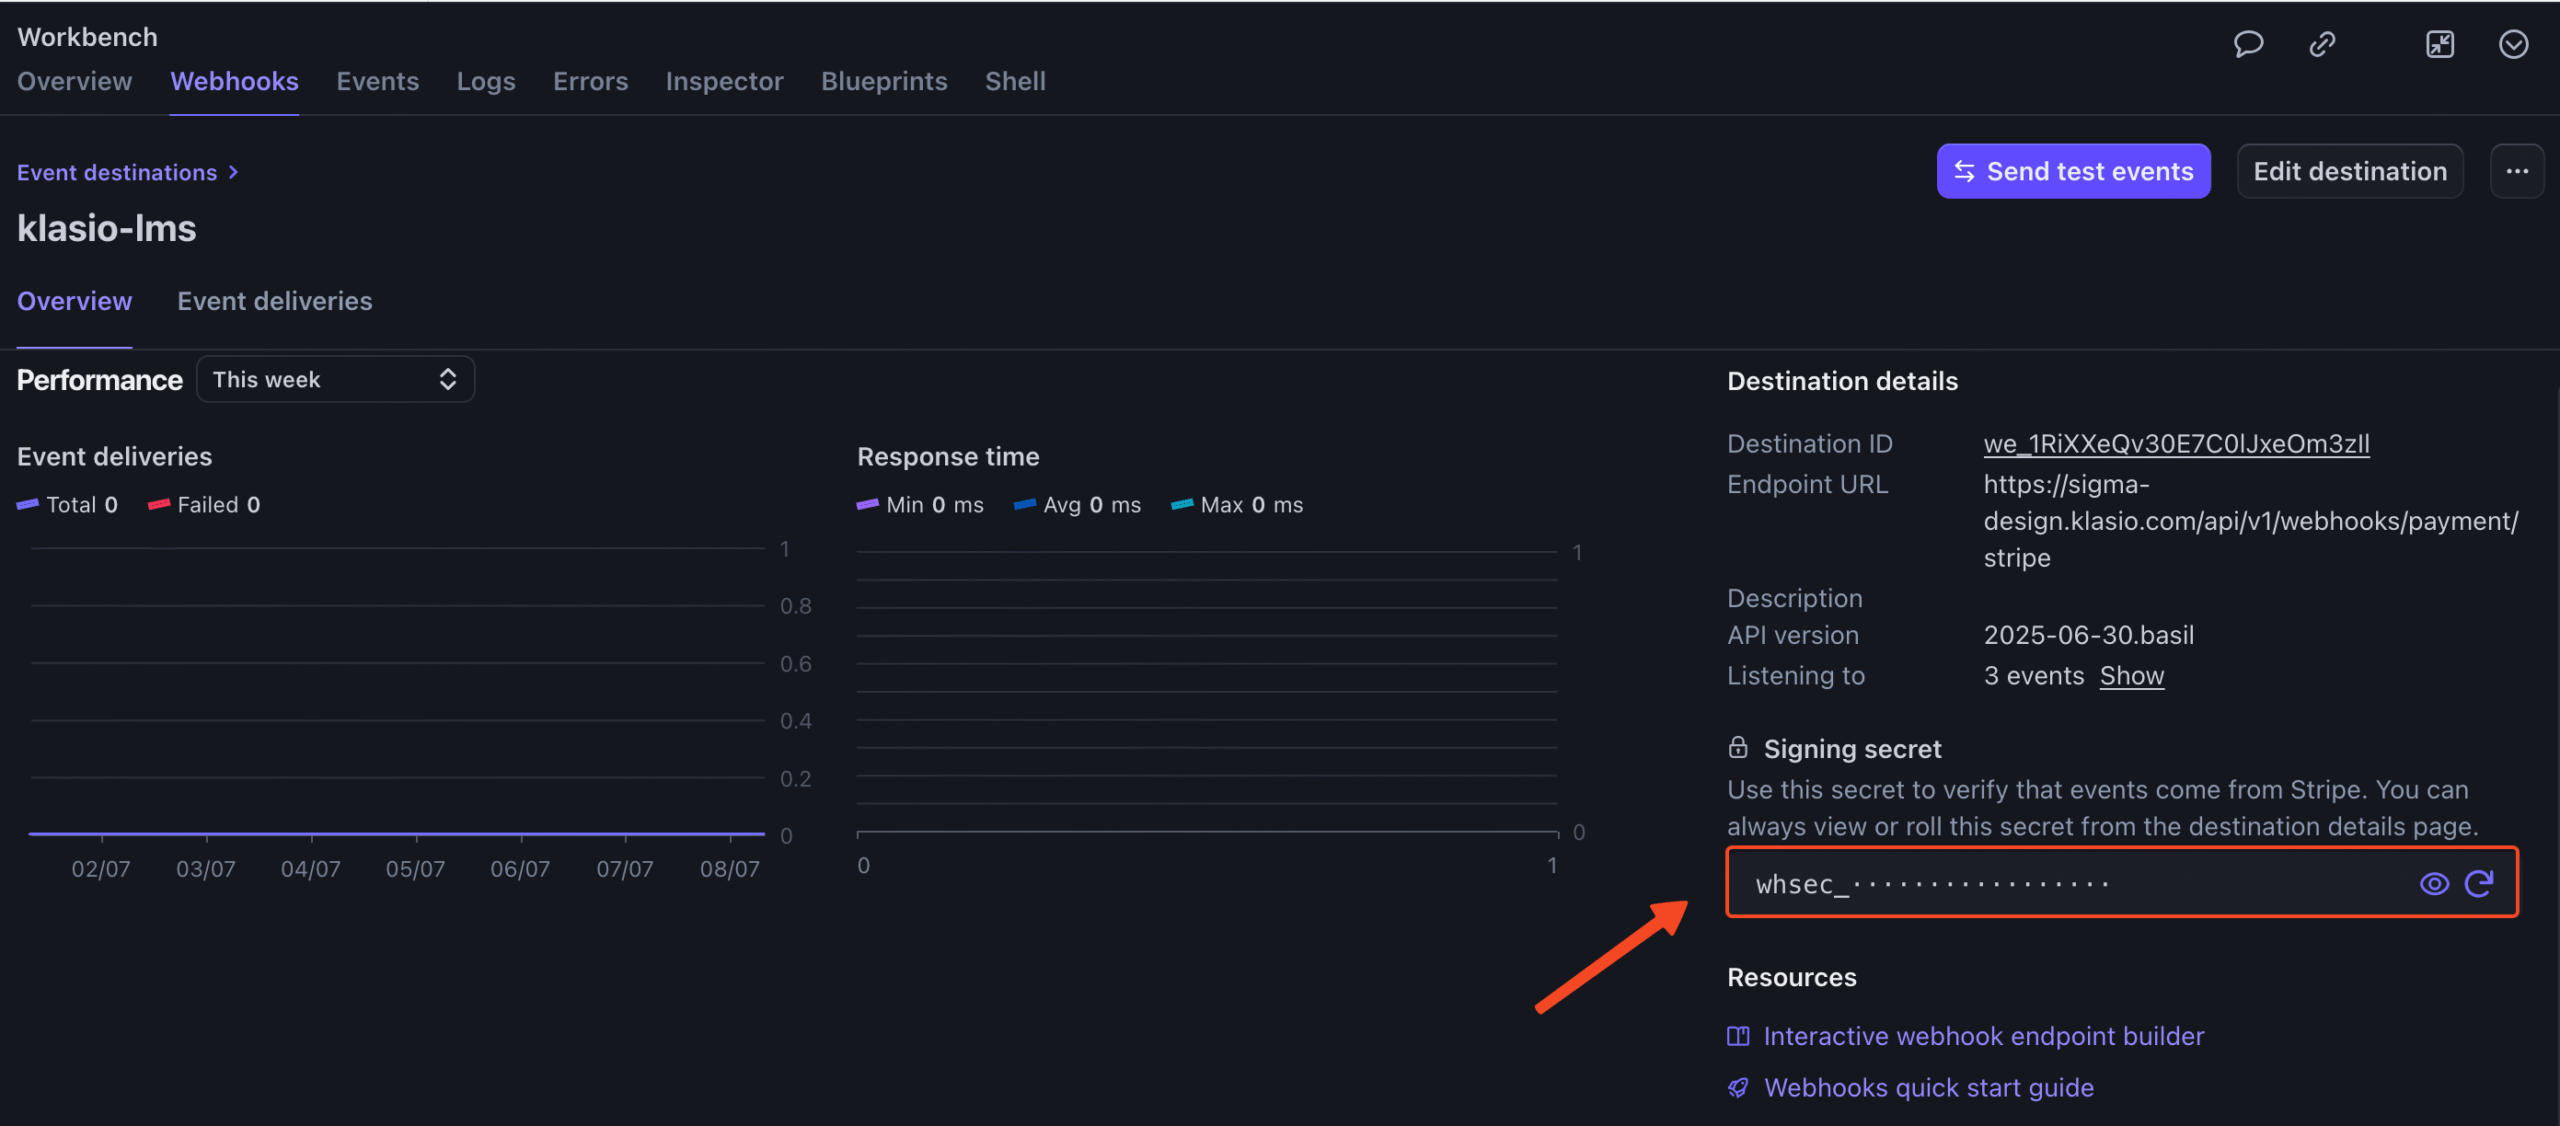
f. You can collect your webhook endpoint URL given from the Klasio Stripe set up pop up. Copy and paste that and then click on Create destination to find your ‘Signing secret’ key.
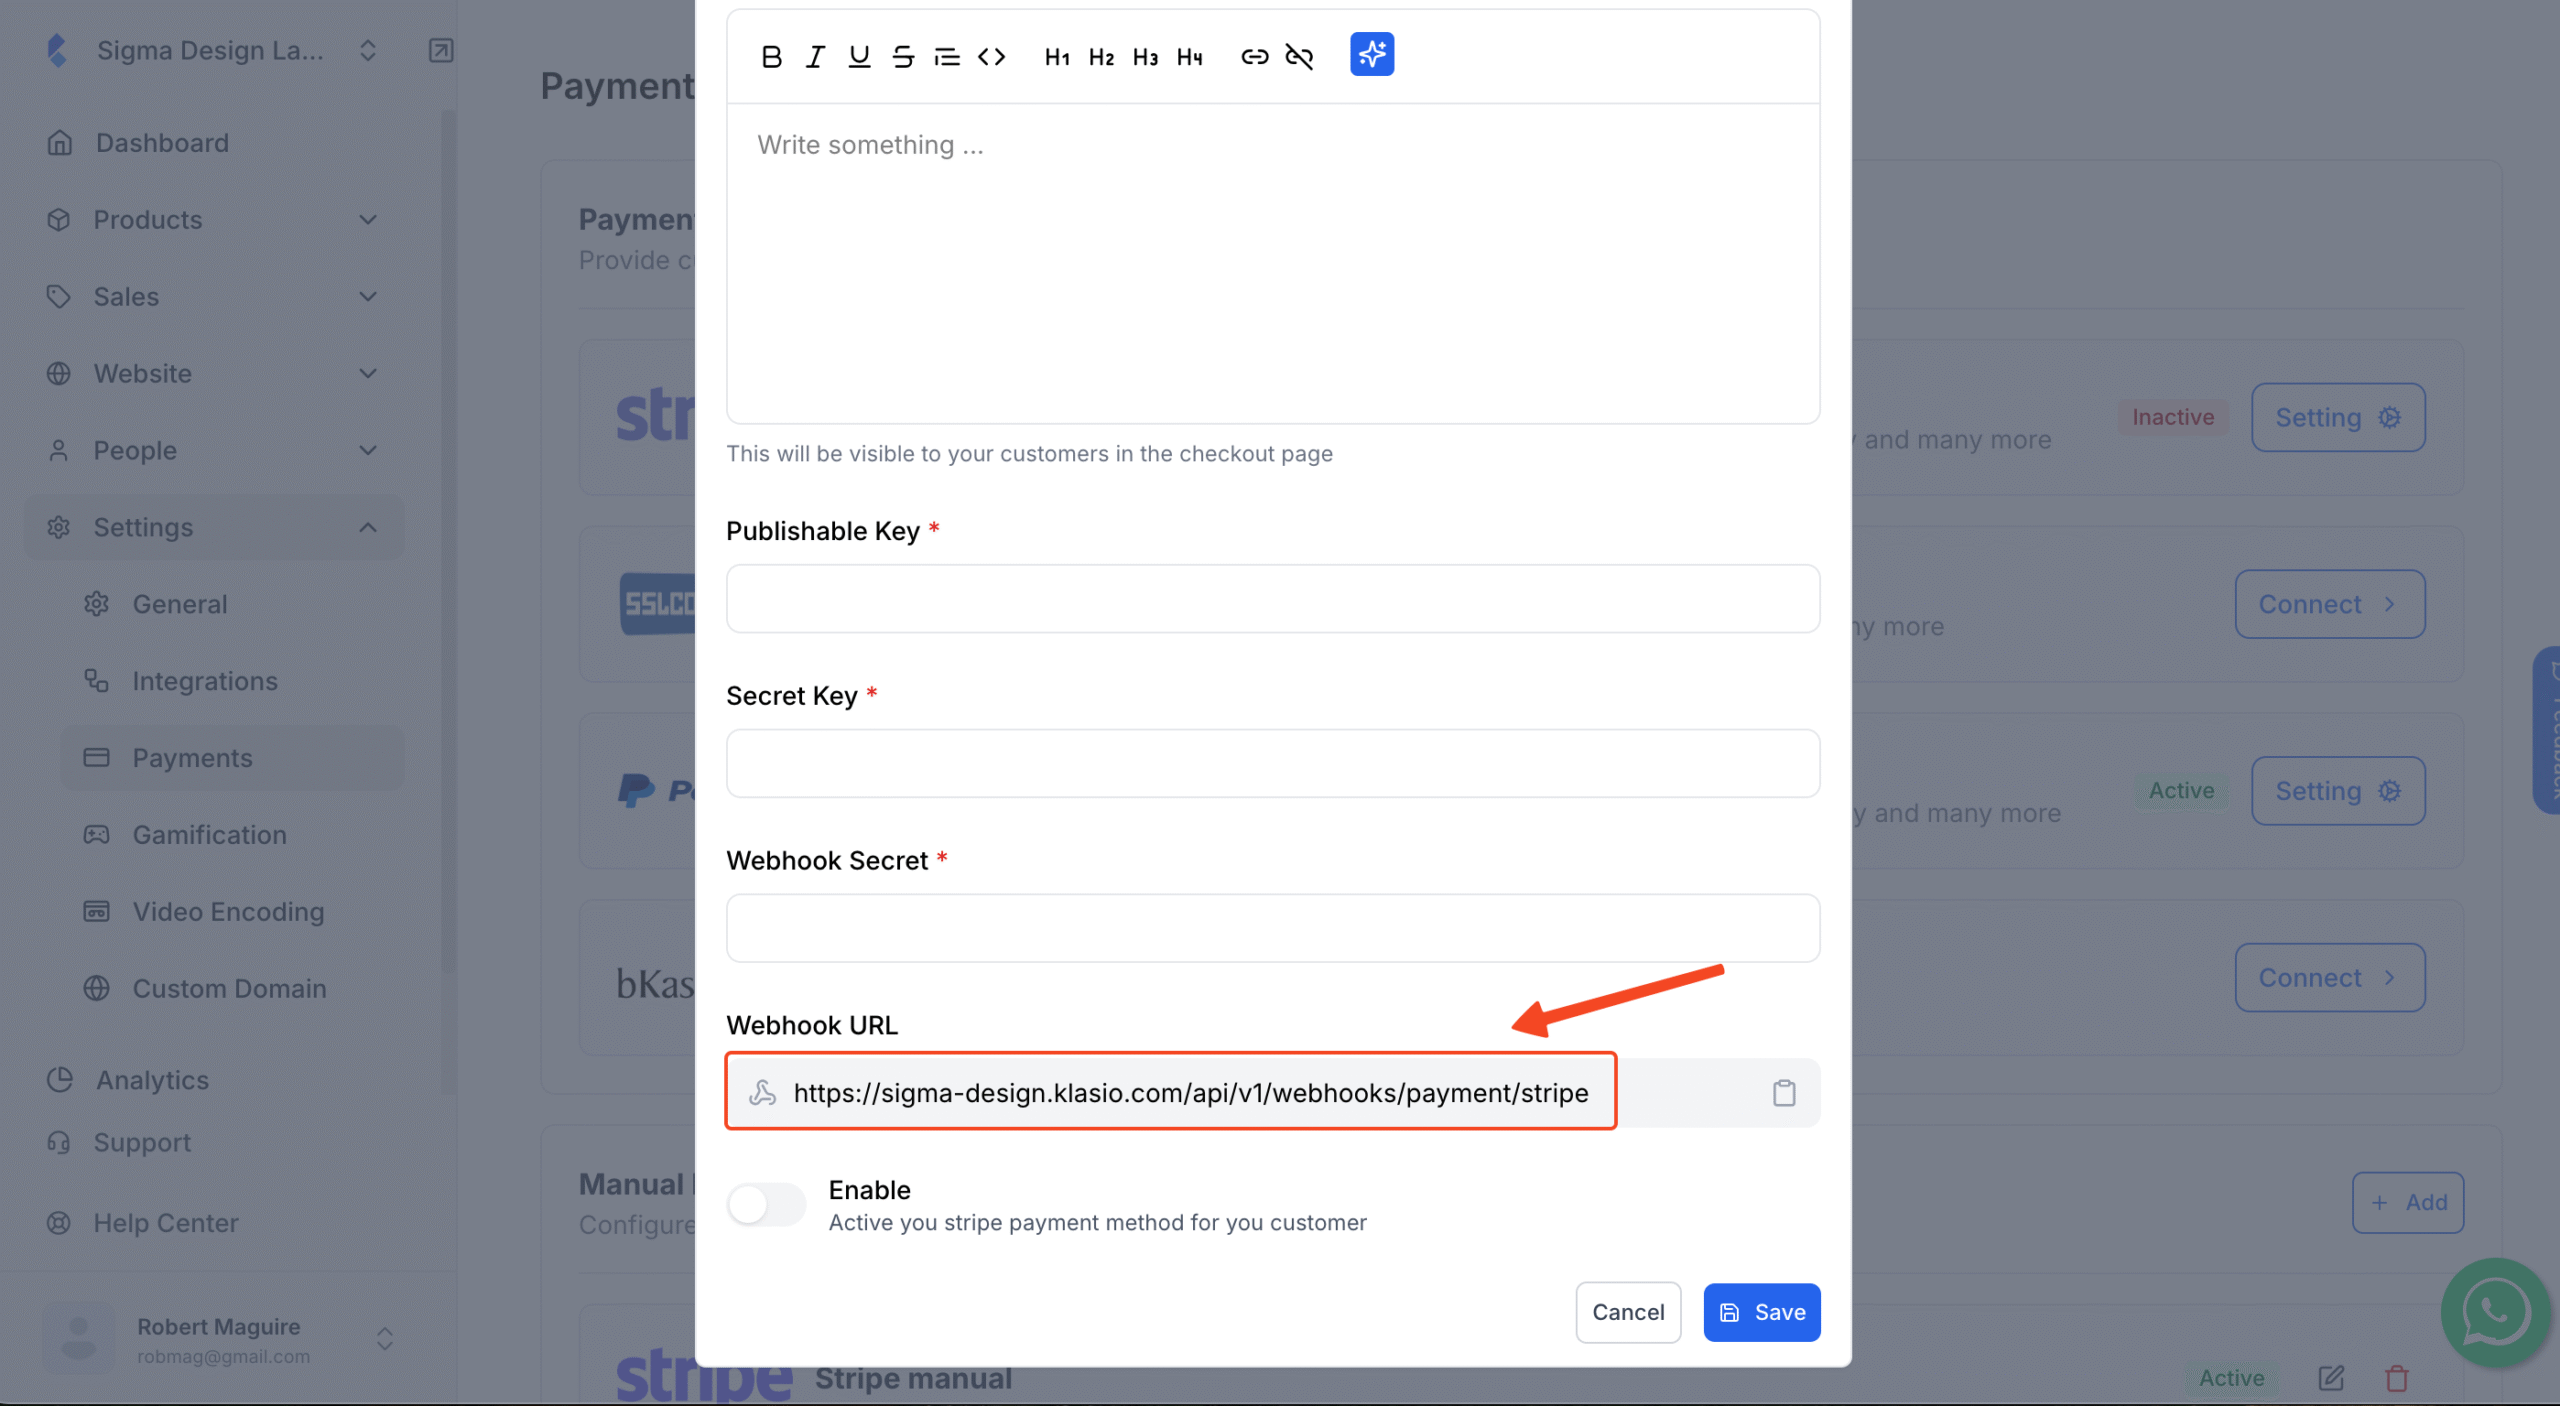
g. Next, copy the Webhook Secret Key from Stripe.
h. Then paste it into the Webhook Signature Key field inside Klasio Stripe setup pop up. After that, turn on the toggle to enable Stripe and click Save to complete the setup.
i. Stripe setup is complete for your academy, and you’ll now see the ‘Active’ status on the Stripe integration panel
You’re now ready to receive payments using Stripe from your course website.