Cloudflare Turnstile provides invisible, friction‑free bot protection for your course website, blocking spam sign‑ups and attacks without interrupting your learners. It also preserves privacy by avoiding user tracking, so you stay secure and compliant while keeping the user experience seamless.
In this documentation, we will explore the steps for integrating Cloudflare with Klasio.
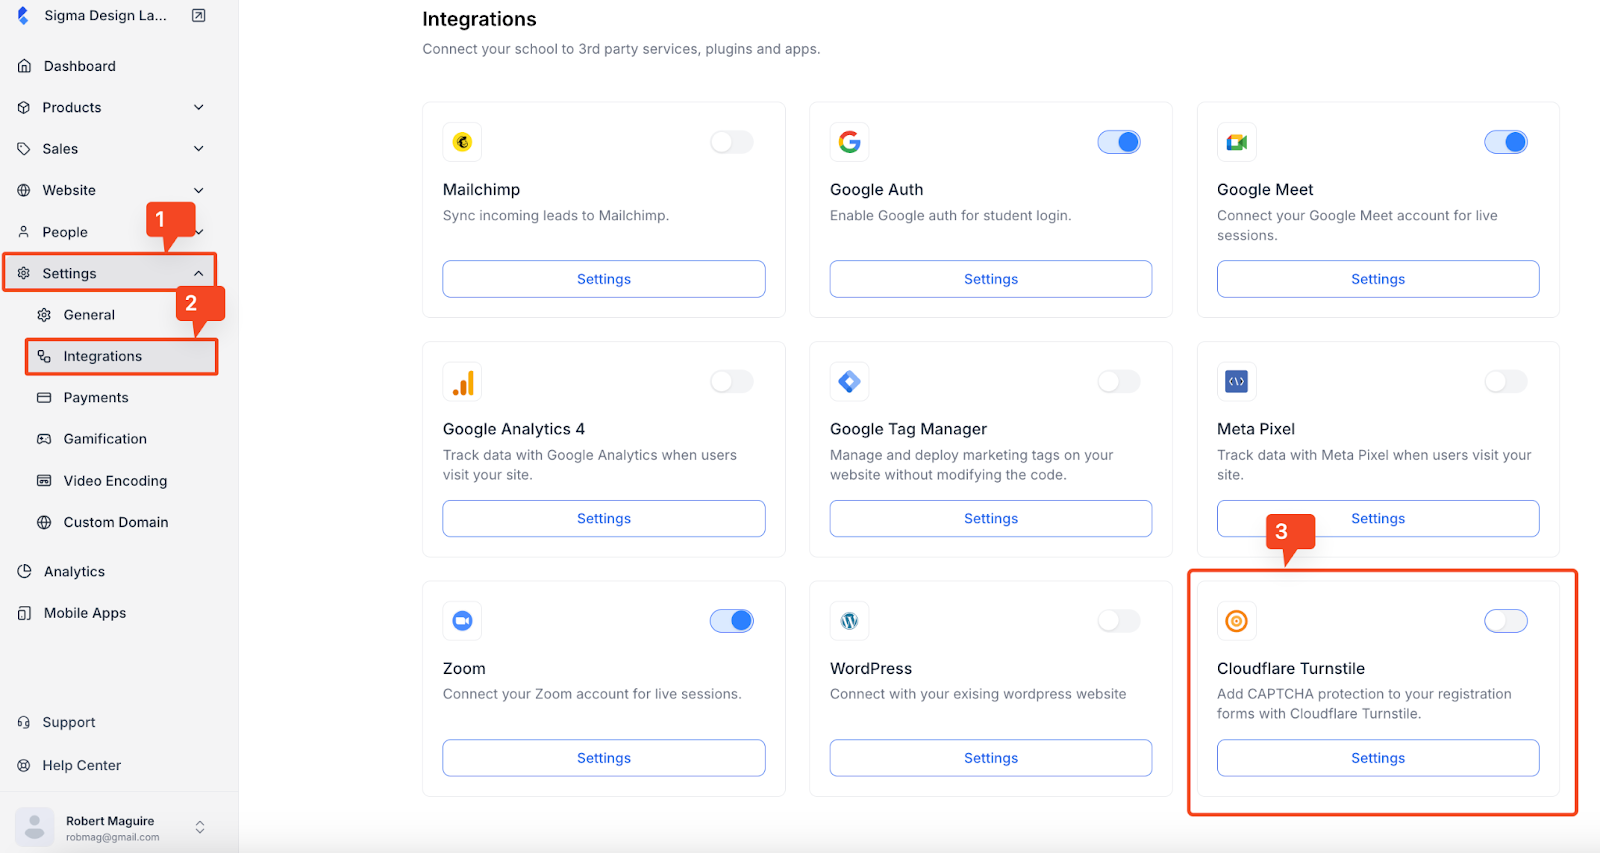
- First, from your dashboard, go to Settings > Integrations and find Cloudflare Turnstile.
- If you do not have a custom domain, you can just skip the integration and simply toggle it on to use it.

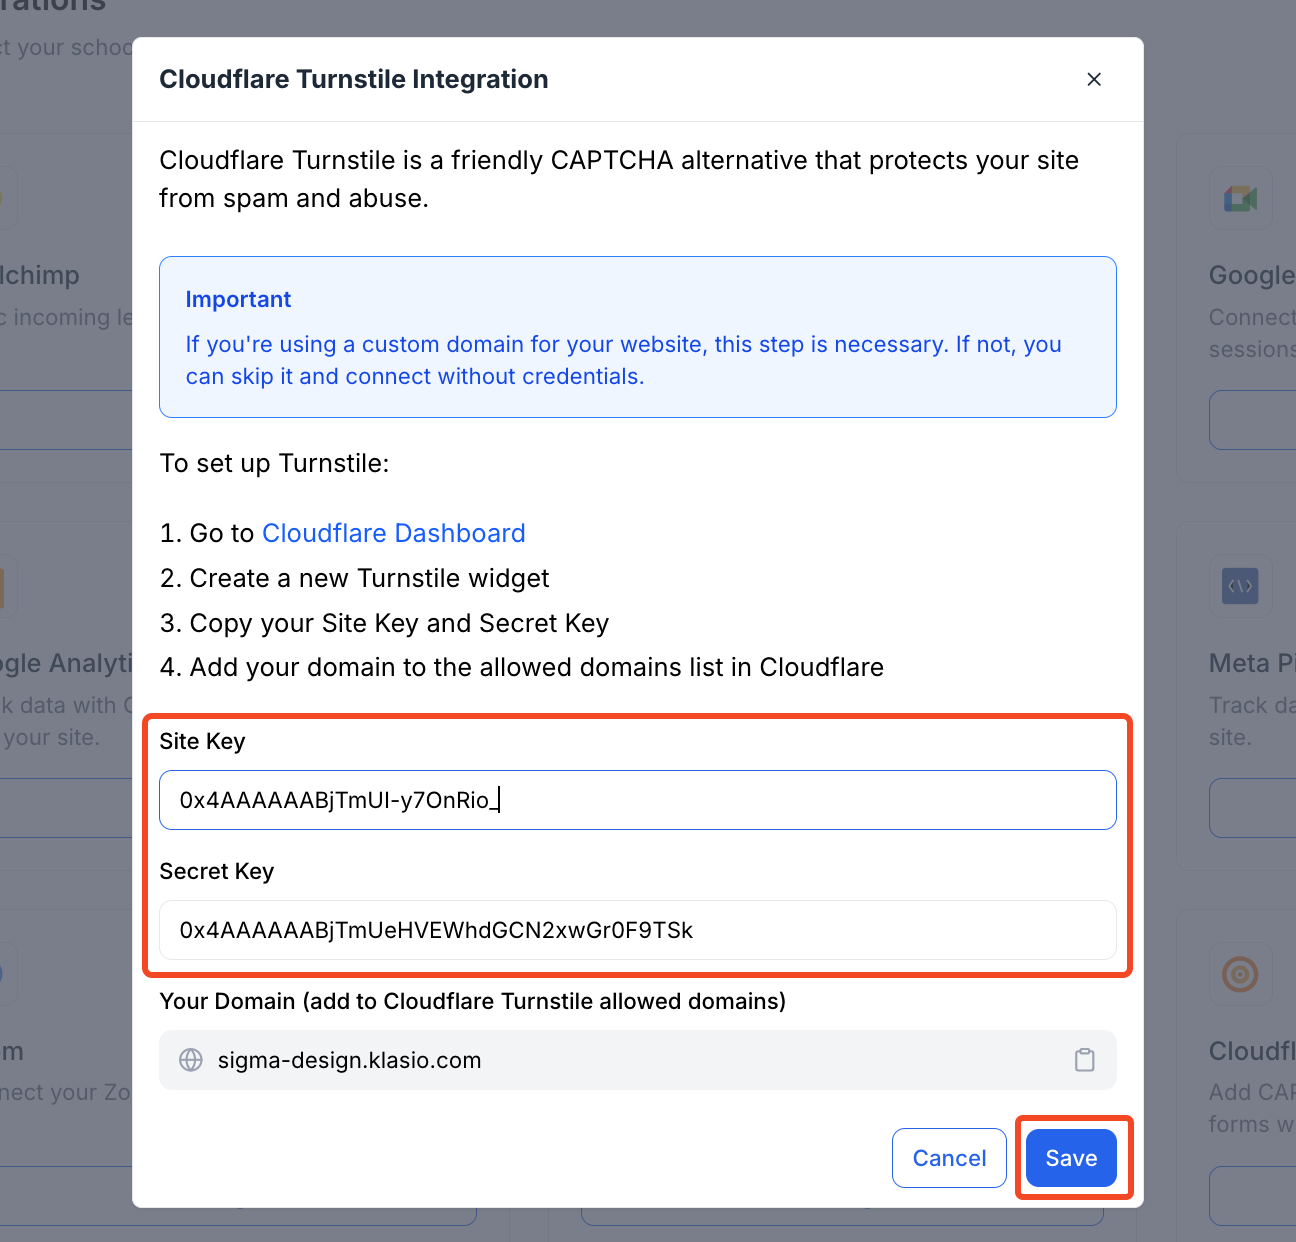
- If you have a custom domain, click on “Settings,” and this popup will trigger.
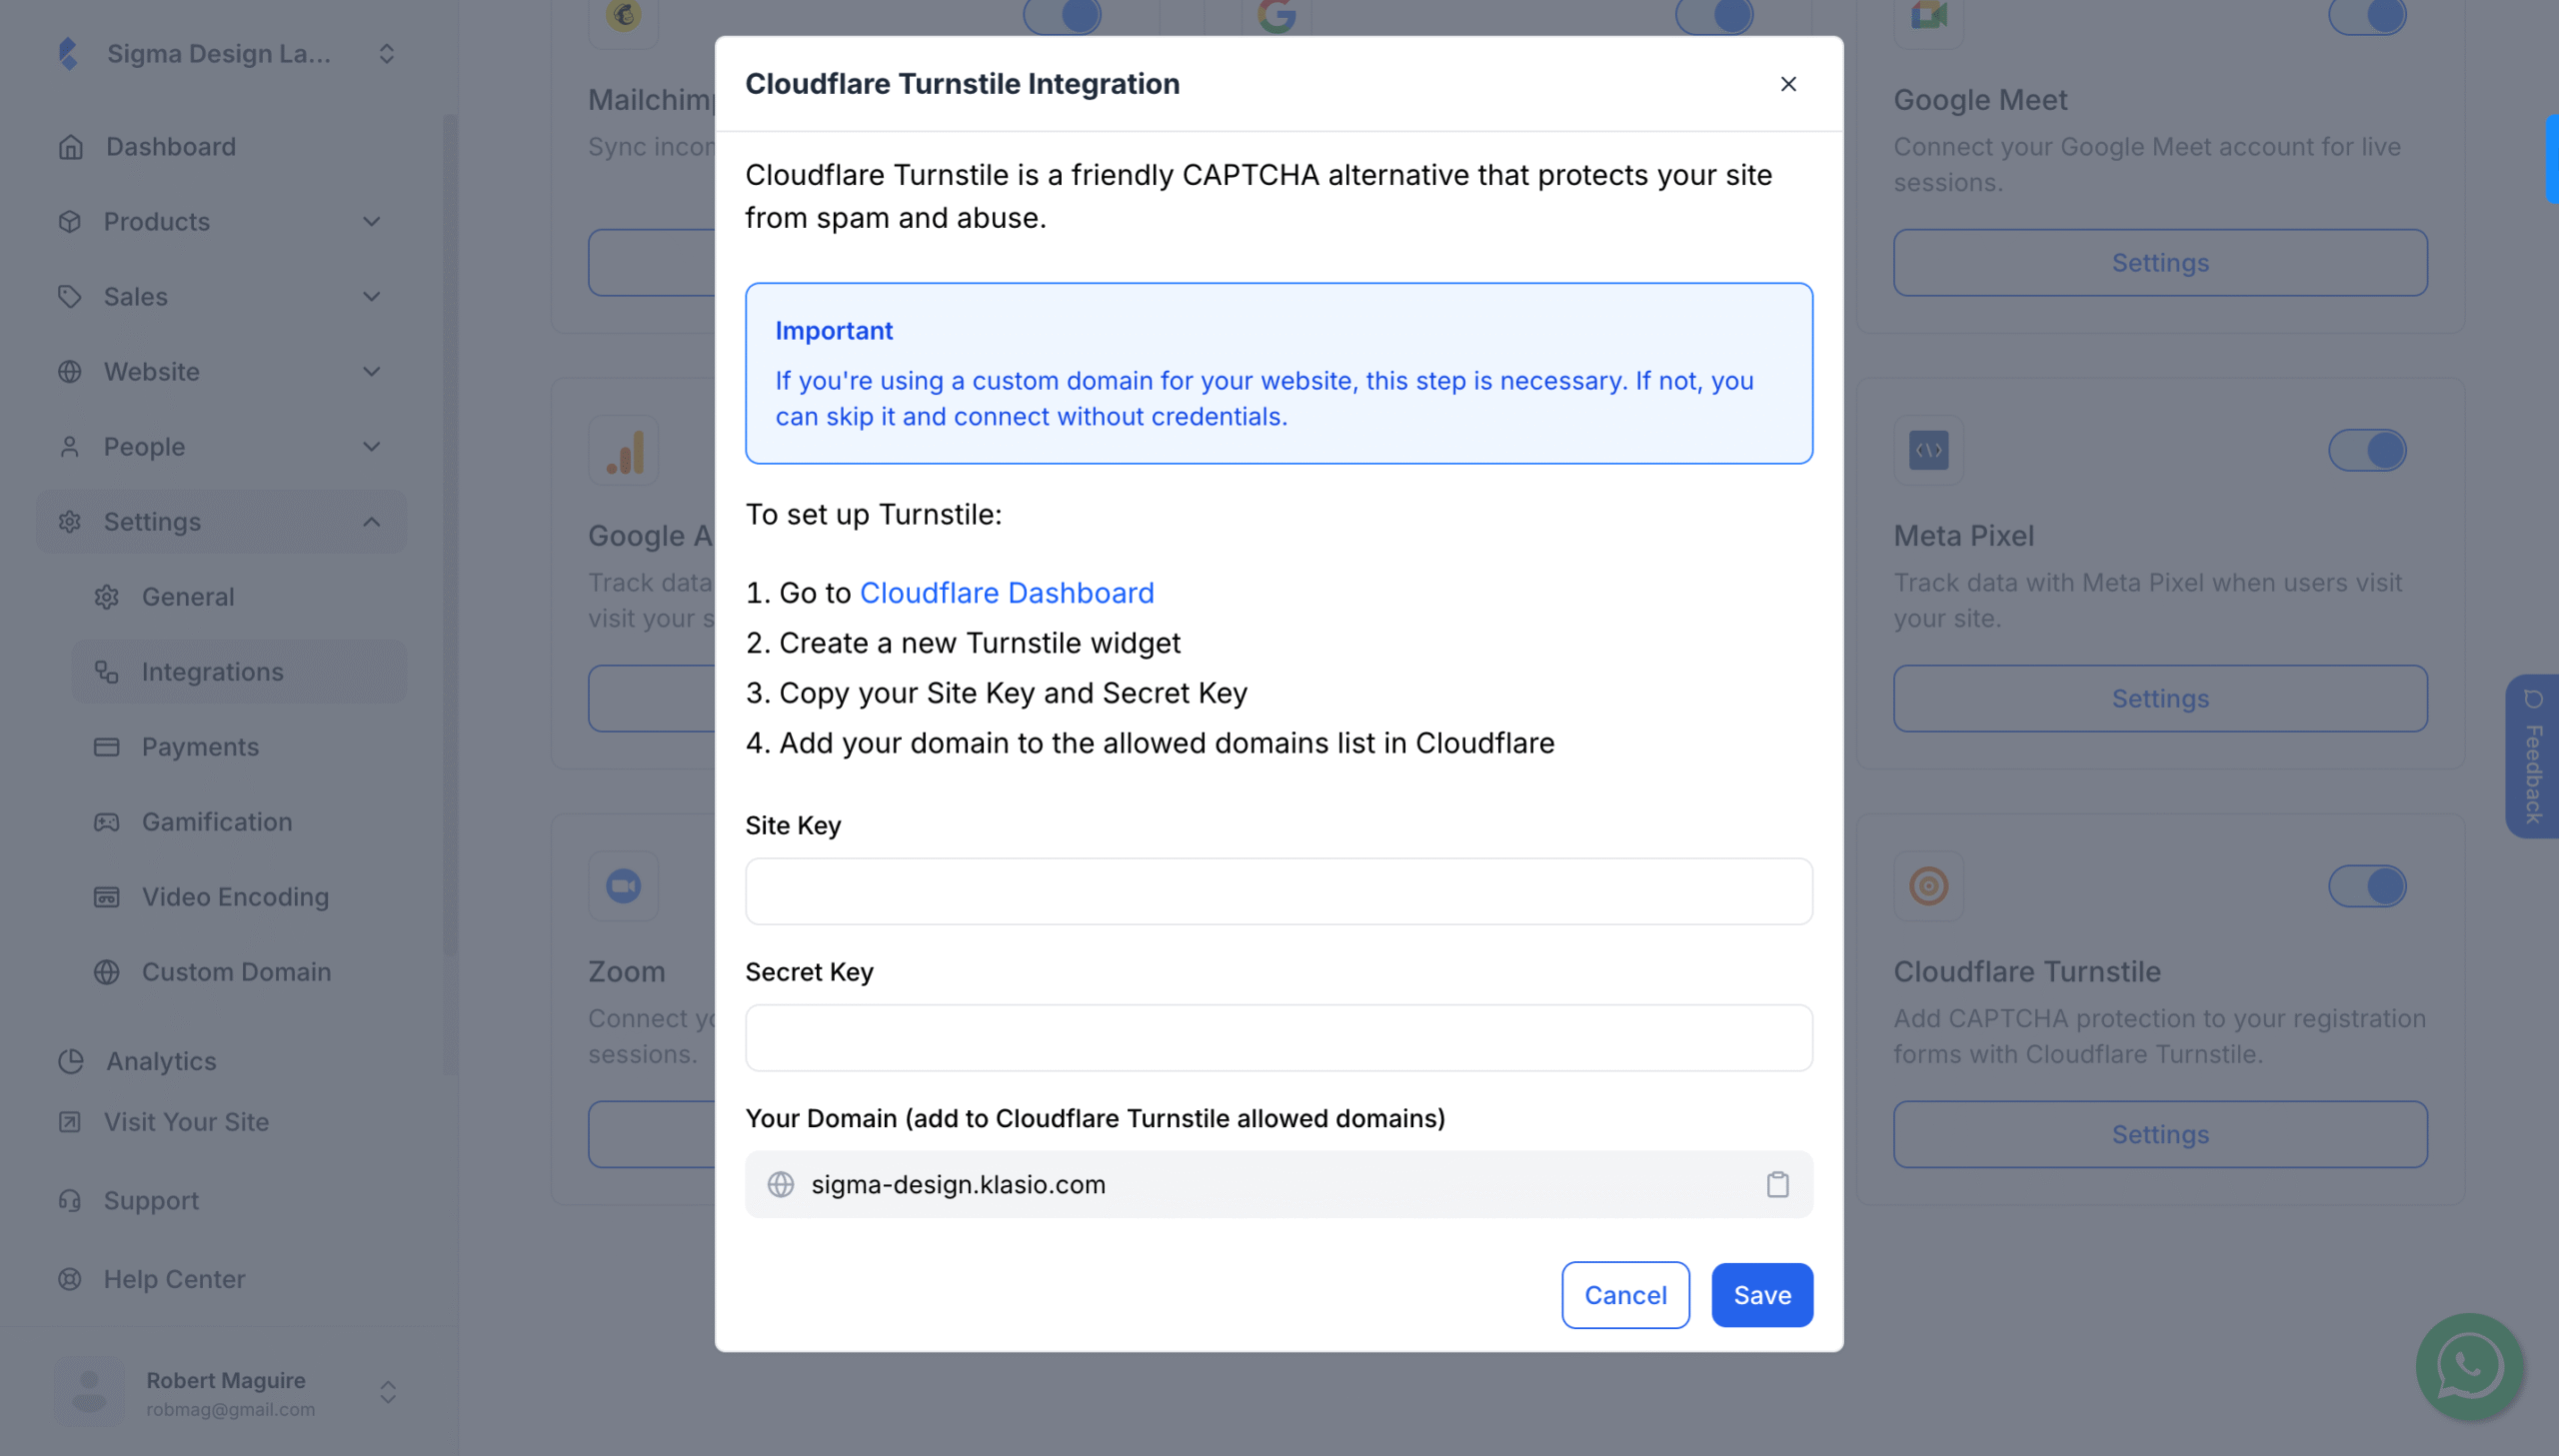
- As you can see, to integrate Cloudflare Turnstile, you will need to create a Turnstile widget, and then you will get a “Site Key” and a “Secret Key” from Cloudflare. To create a Turnstile Widget, you will need to sign up for Cloudflare and then log in to your account.
- After logging in to your Cloudflare account, from the navigation menu, click on Turnstile > Add Widget.

- On the next screen, you will be asked to input a name for your widget.

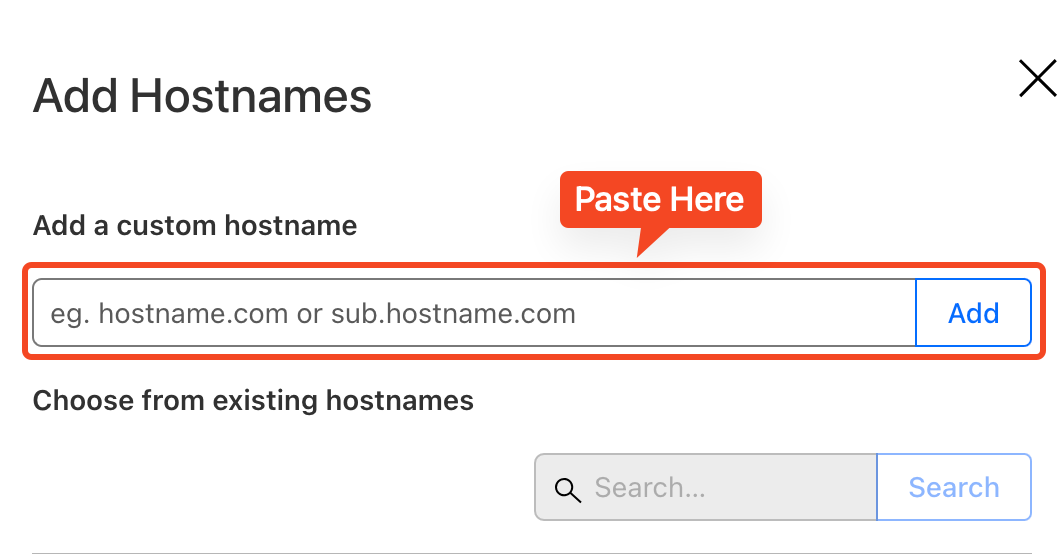
- Then, you will need to add your hostname. Click on the “Add Hostnames” button.
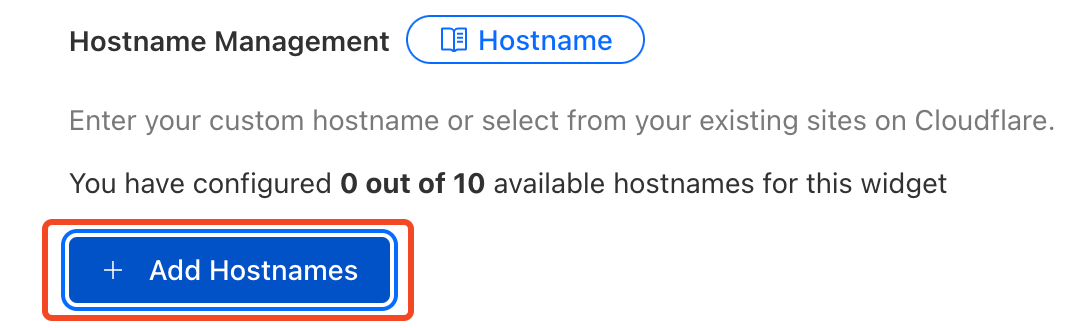
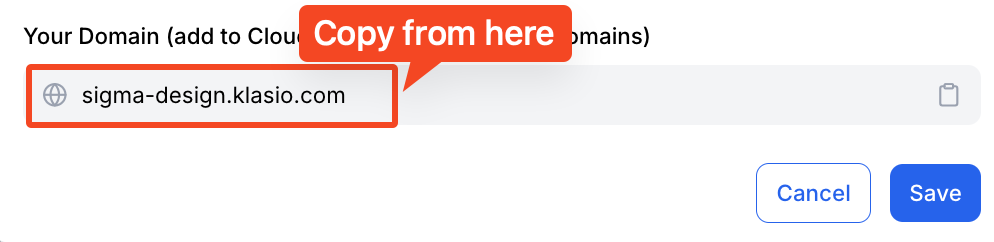
- A popup will trigger, which will prompt you to add the hostname. The hostname is your custom domain name, which you can copy from the Klasio app.
- Then scroll down and select the hostname you just provided and click on the add button. Remember, this process won’t work unless you have a custom domain.
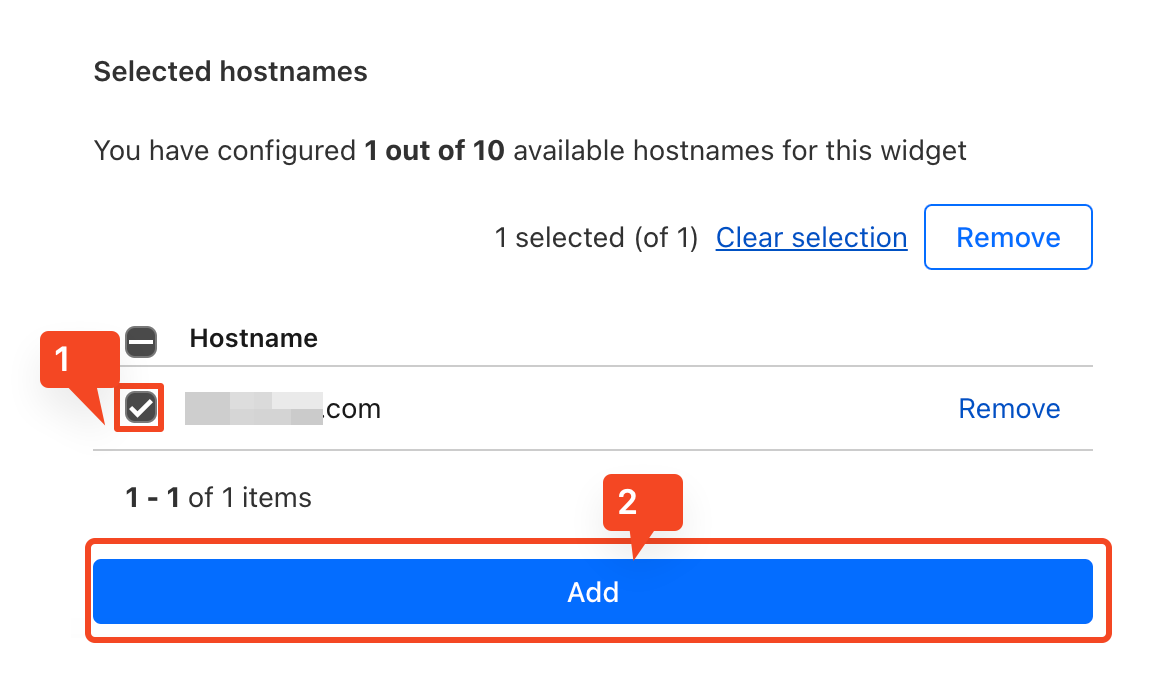
- Once you do, you will be taken to the previous screen, where you will have to select the hostname again.

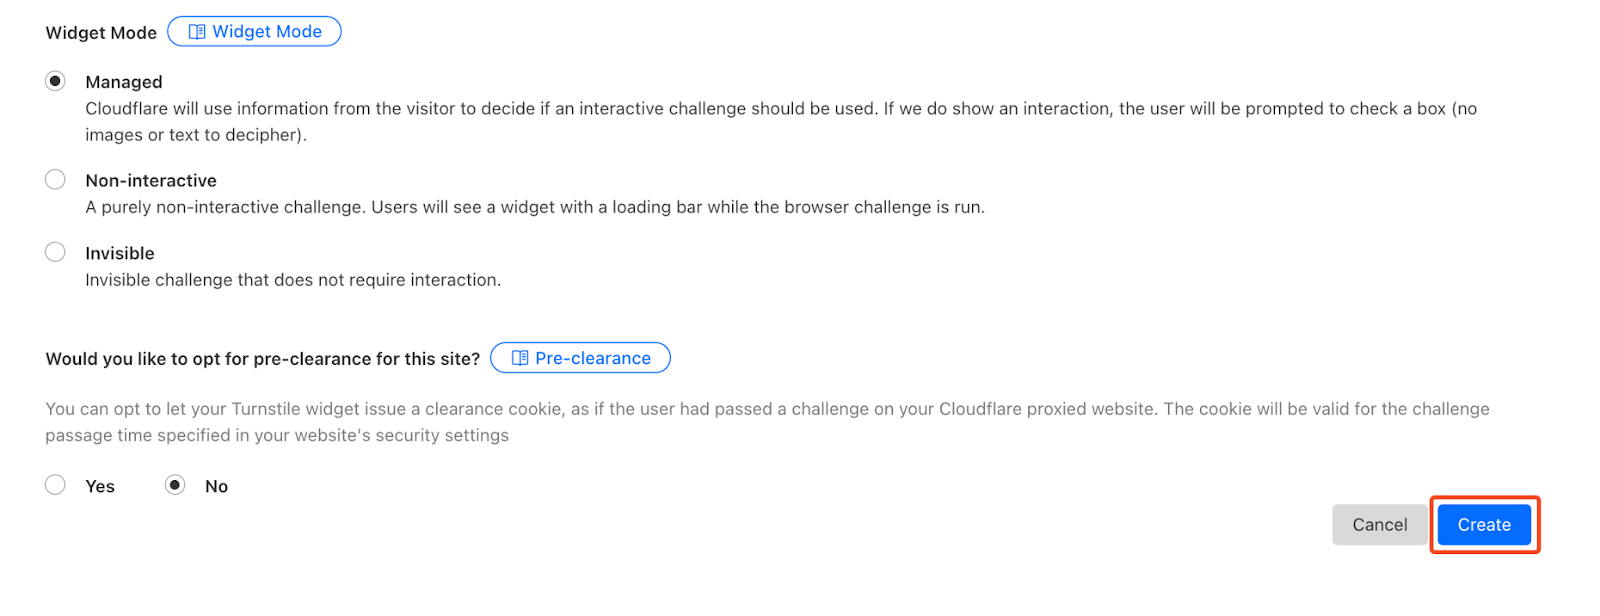
- Then, you will get to select the Widget Mode. The Widget Mode has three options for you: Managed, Non-interactive, and Invisible.
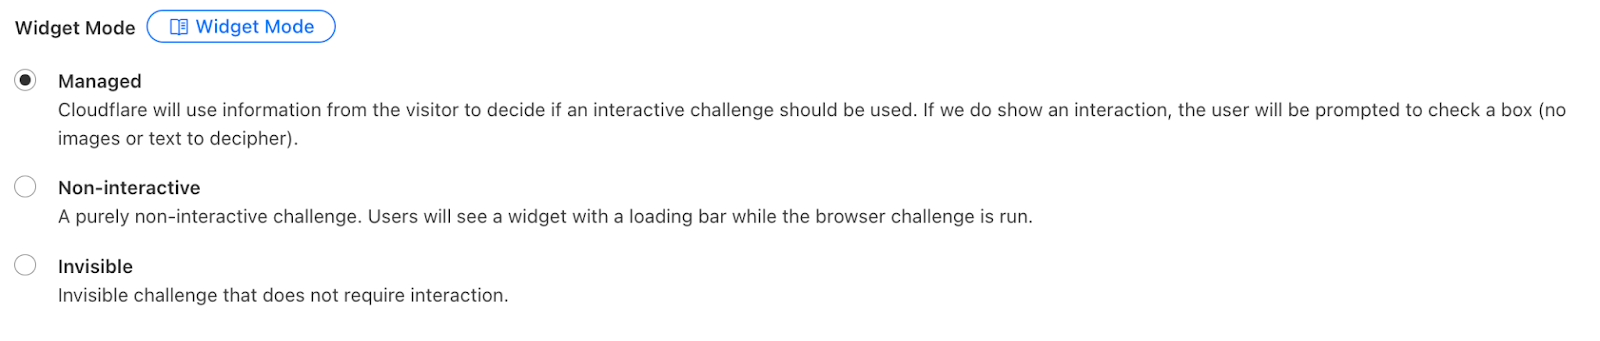
- Choose “Managed” if you want your users to check a box.
- Choose “Non-interactive” if you don’t want your users to check a box.
- Choose “Invisible” if you want CloudFlare to run a background check without displaying anything to your users.
- Under the “Widget Mode”, you will see a question that says, “Would you like to opt for pre-clearance for this site?”

- If you choose “Yes”, CloudFlare Turnstile will check each user once and give them a “clearance cookie” for the session.
- If you choose “No”, each page or form will run its own check independently, without shared clearance.
- Once you have configured everything, click on the “Create” button.
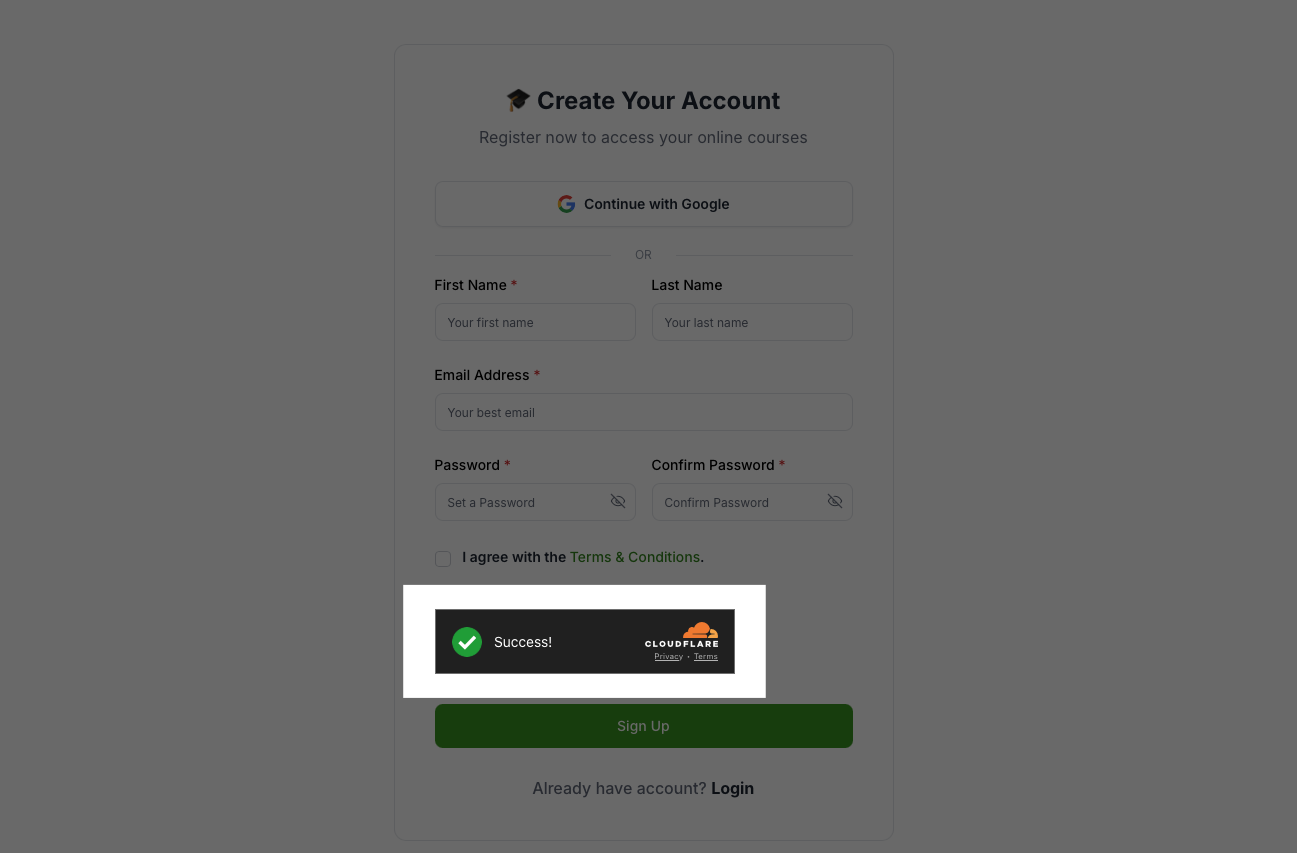
- Once you do that, you will be redirected to the success page, where you will be notified that the widget creation is successful, and you can copy the “Site Key” and “Secret Key” from here.
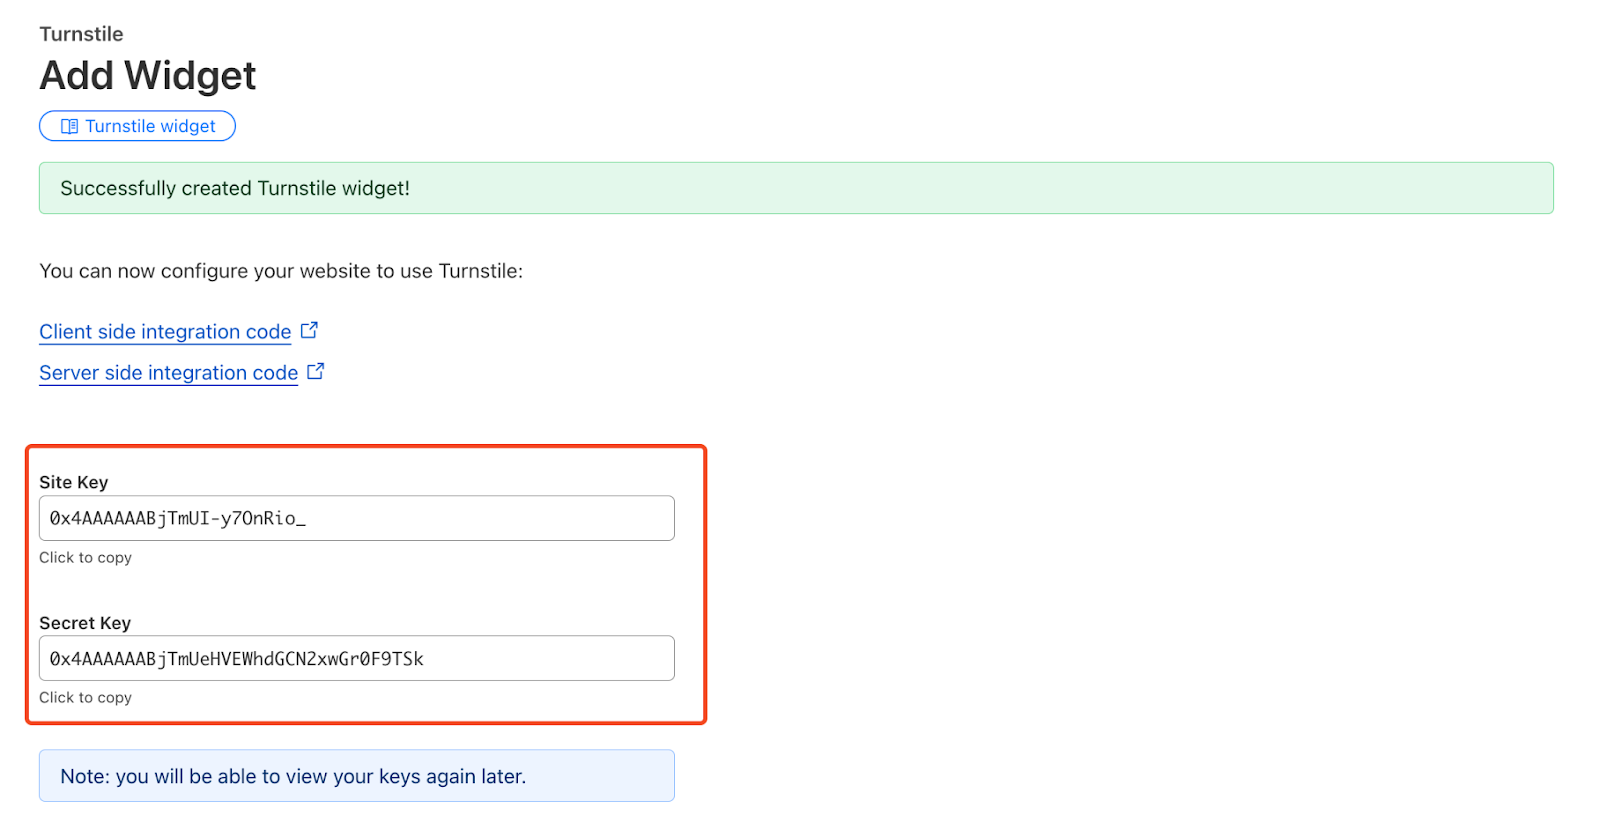
- Now, simply paste the keys to your Klasio app and click on the “Save” button.
- Once you do, you have successfully integrated Cloudflare Turnstile to your Klasio account. Now, every time your students or users sign in, their accounts are protected by enhanced security measures.