Setting up a custom payments gateway for your academy can give you more control and flexibility over how you process payments. This guide will walk you through the essential steps, from navigating your admin dashboard to configuring the gateway’s settings and finally, testing your setup to ensure it’s working properly.
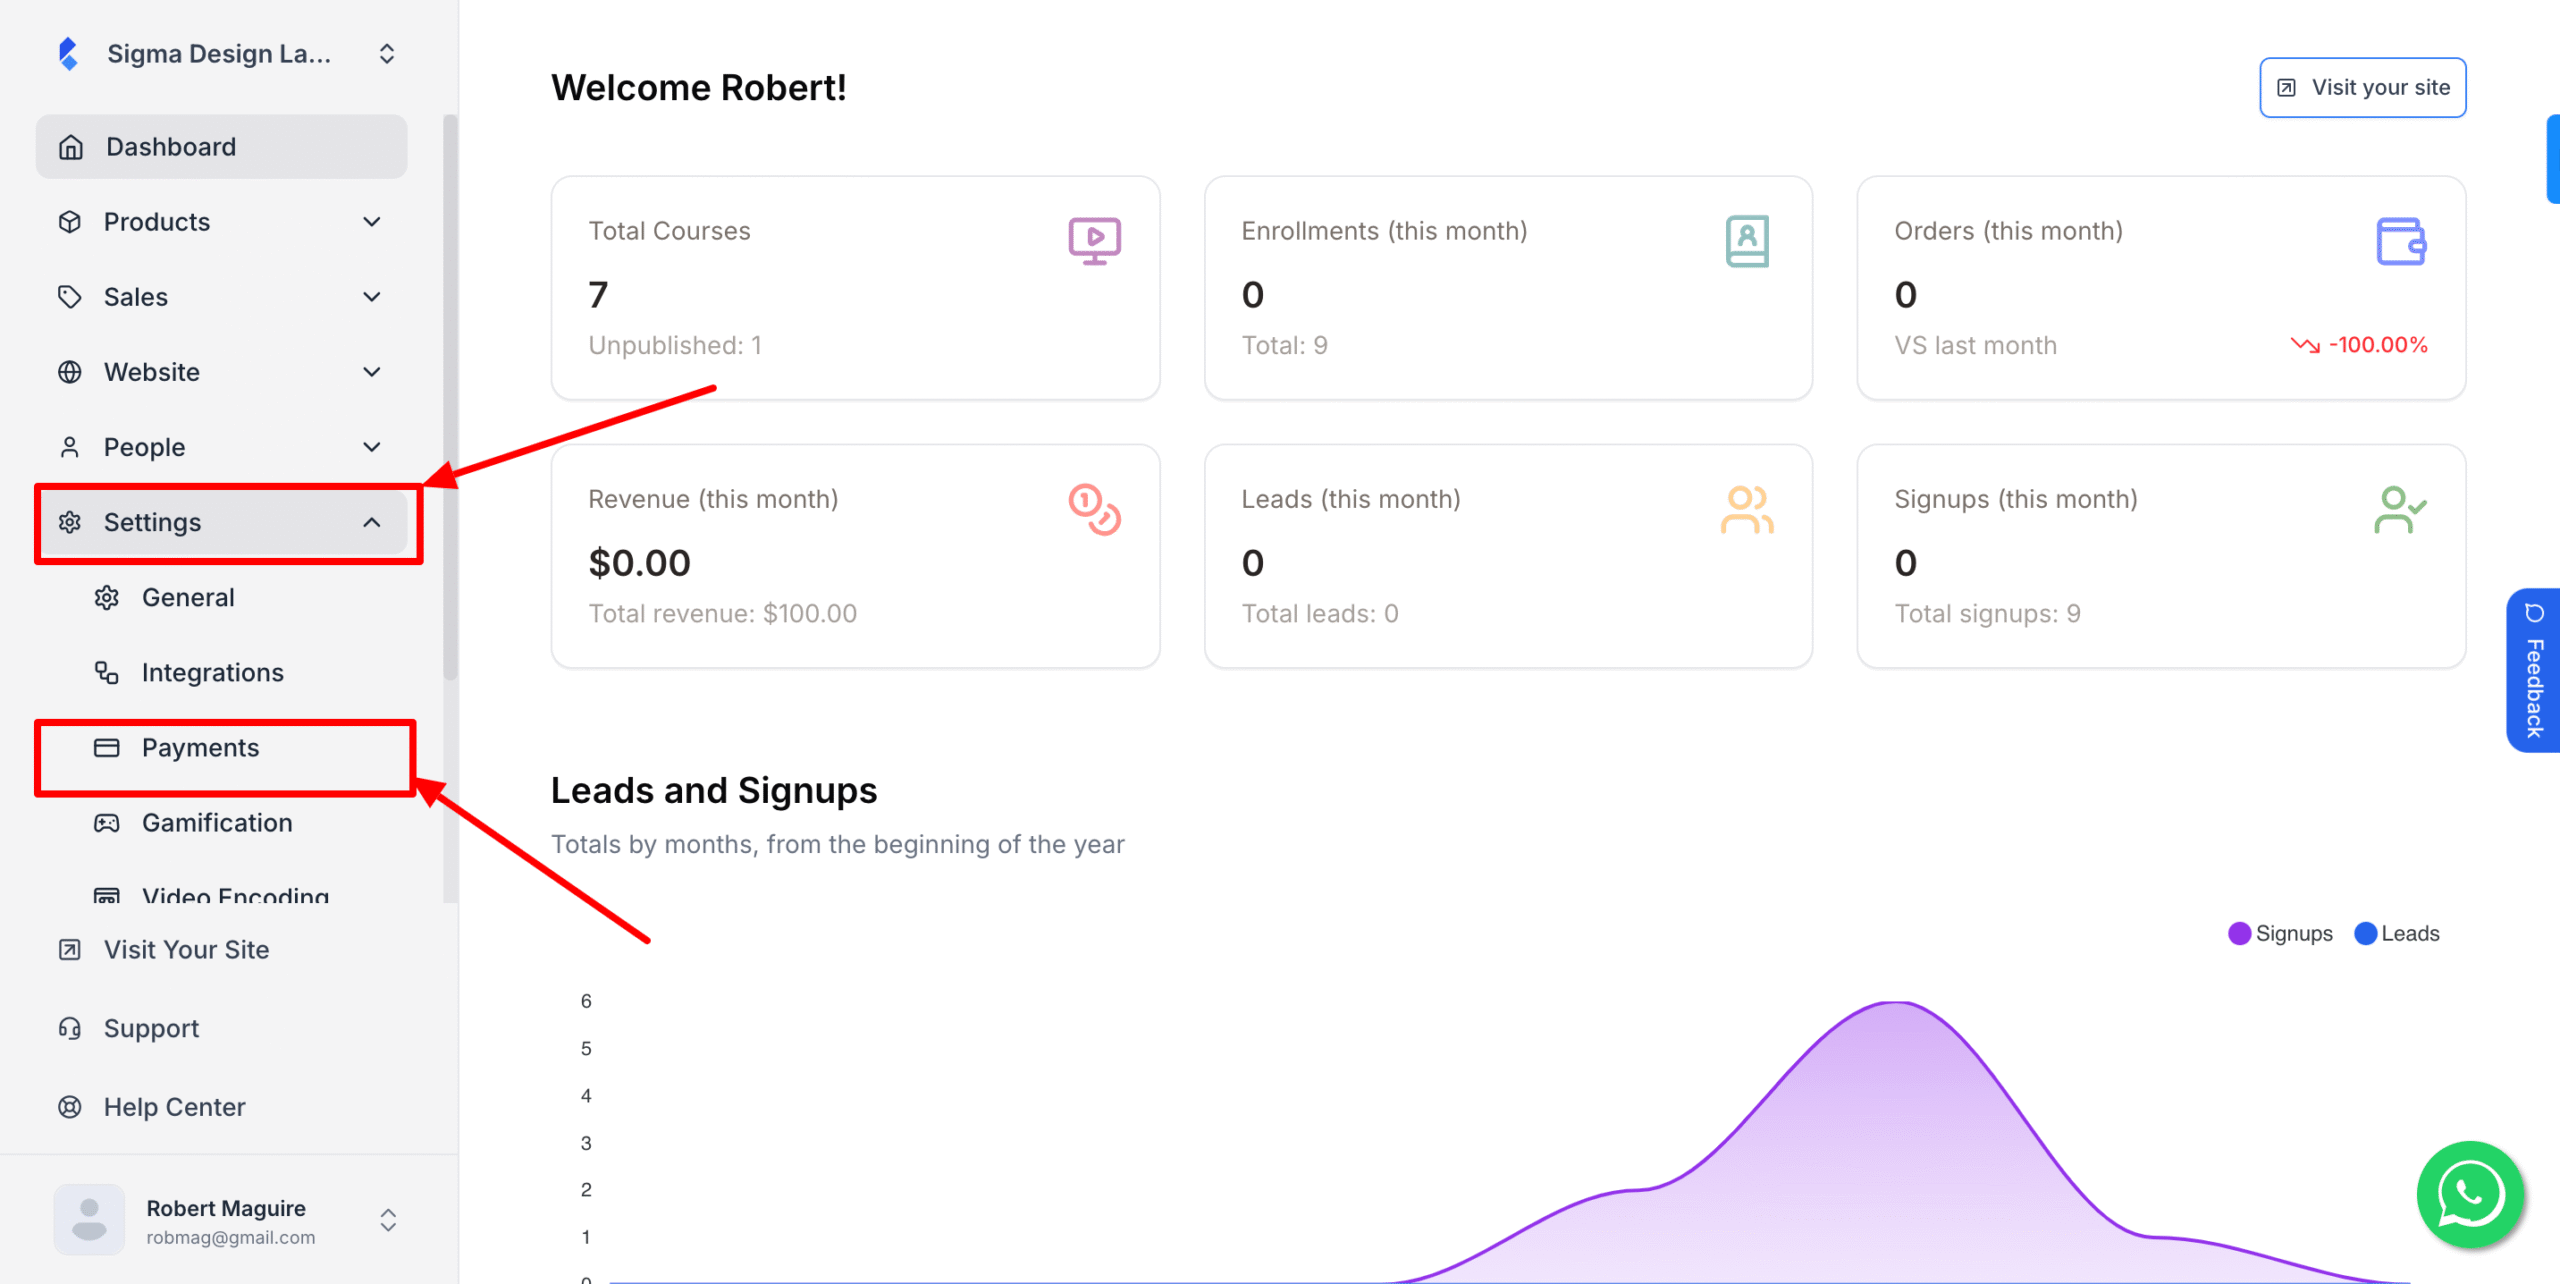
1. From the admin dashboard, go to Settings and then click Payments.
2. Now, click Add New Wallet
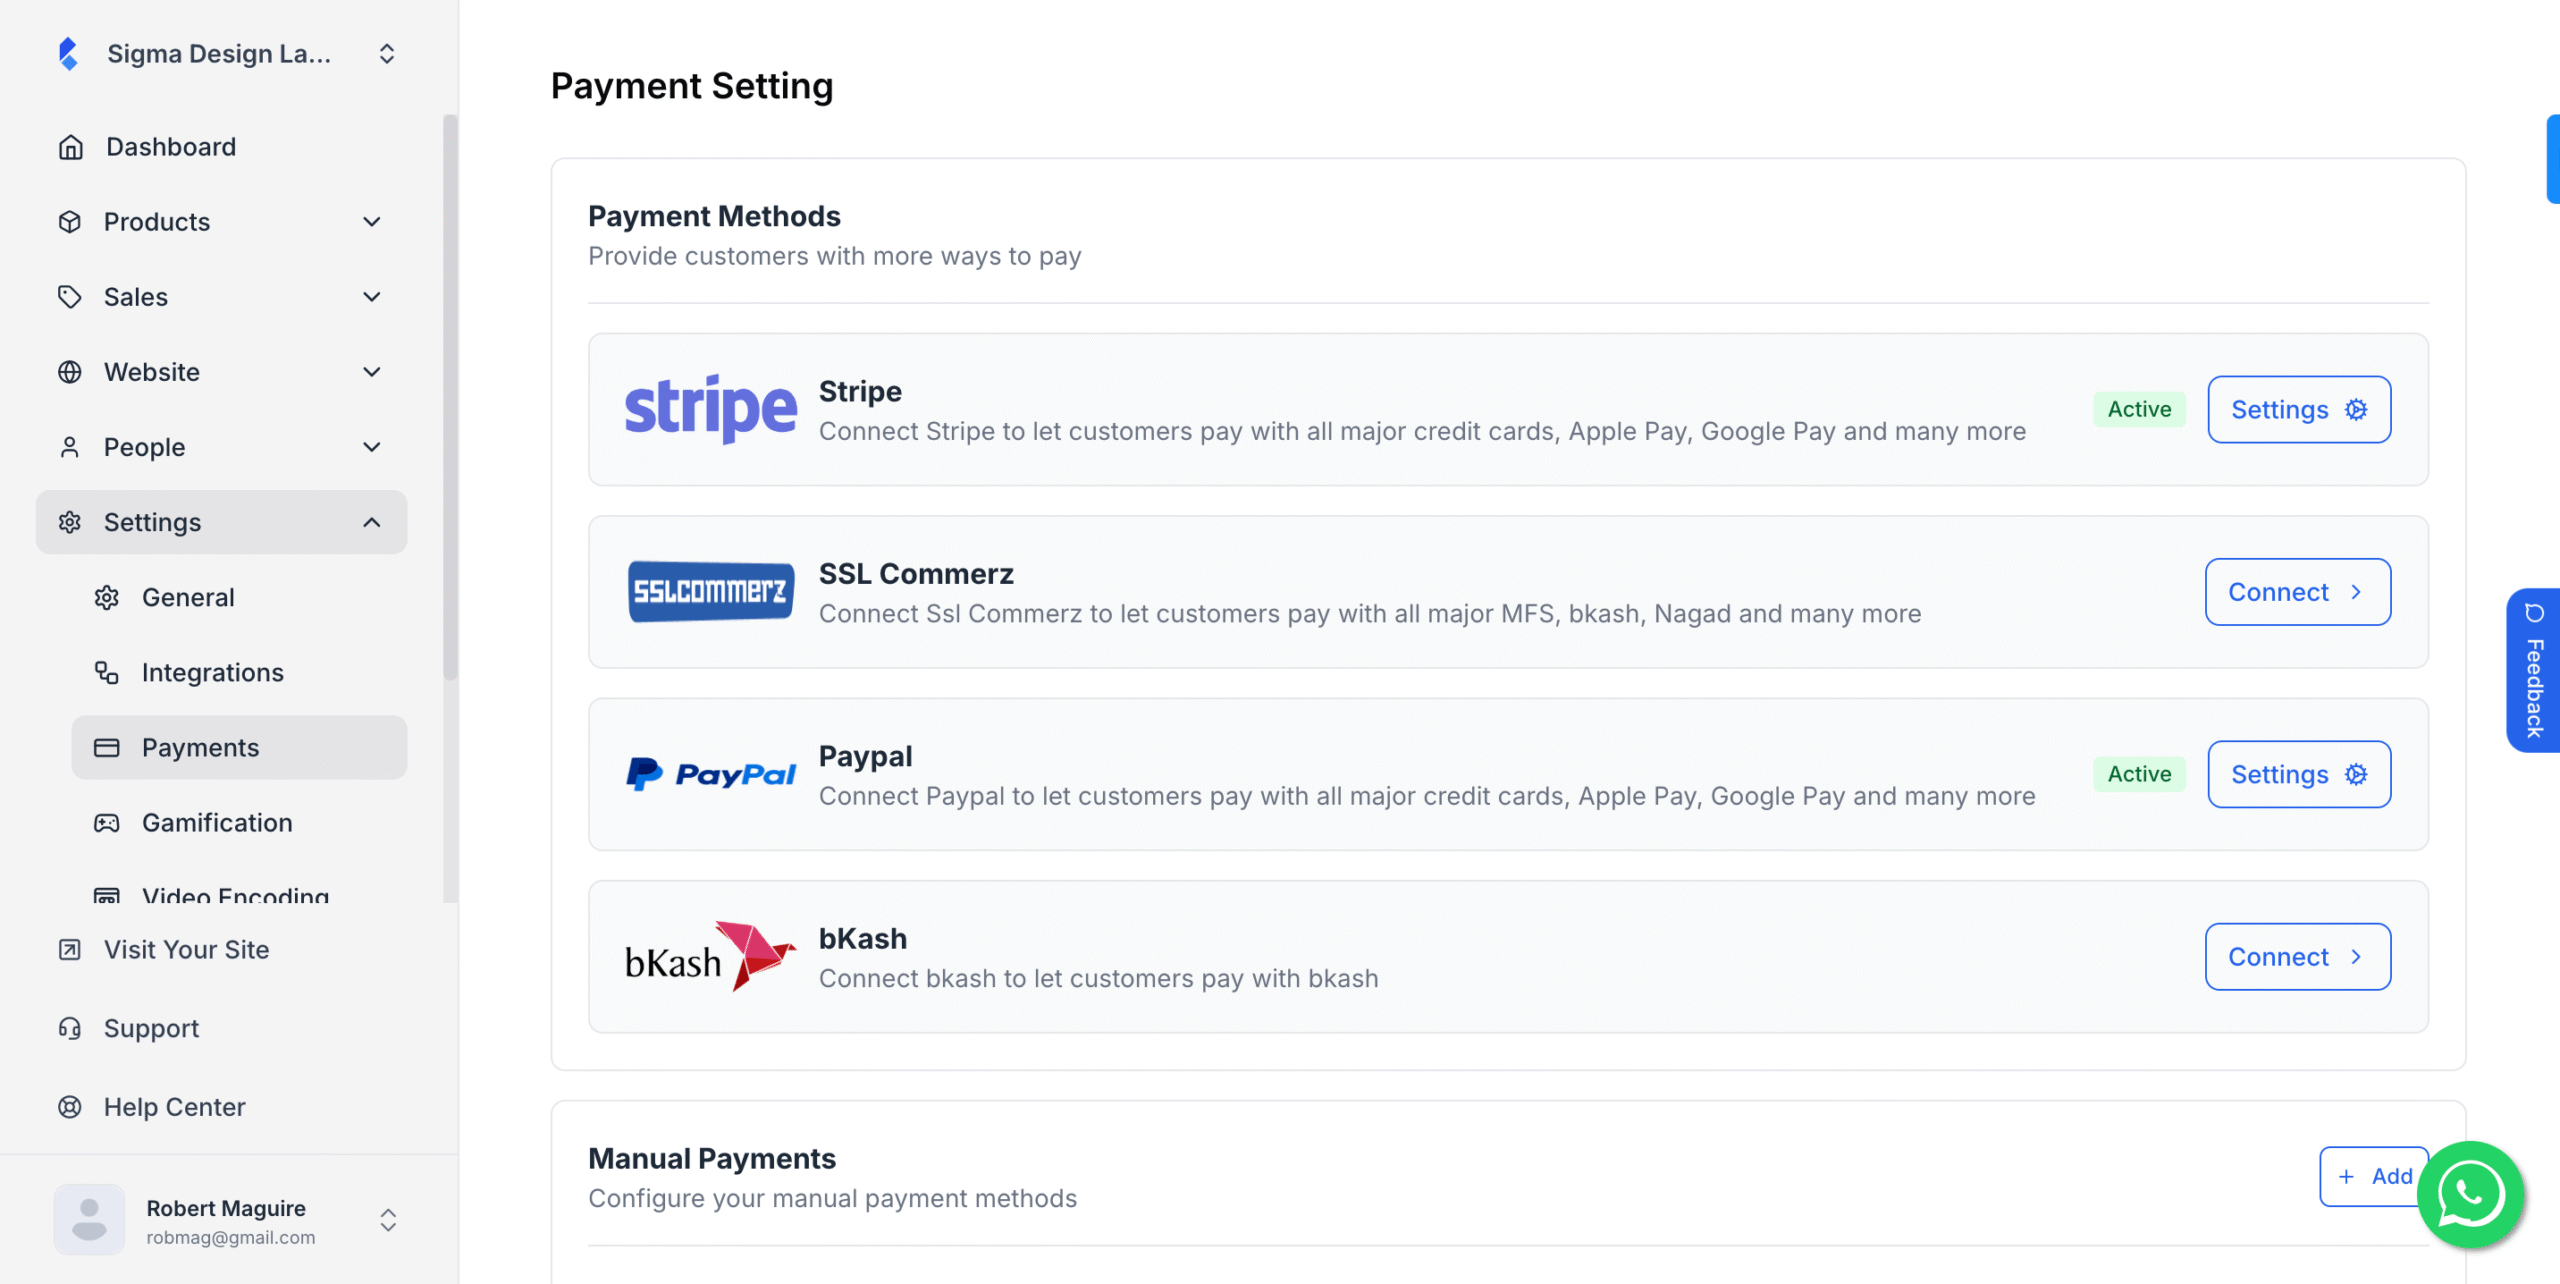
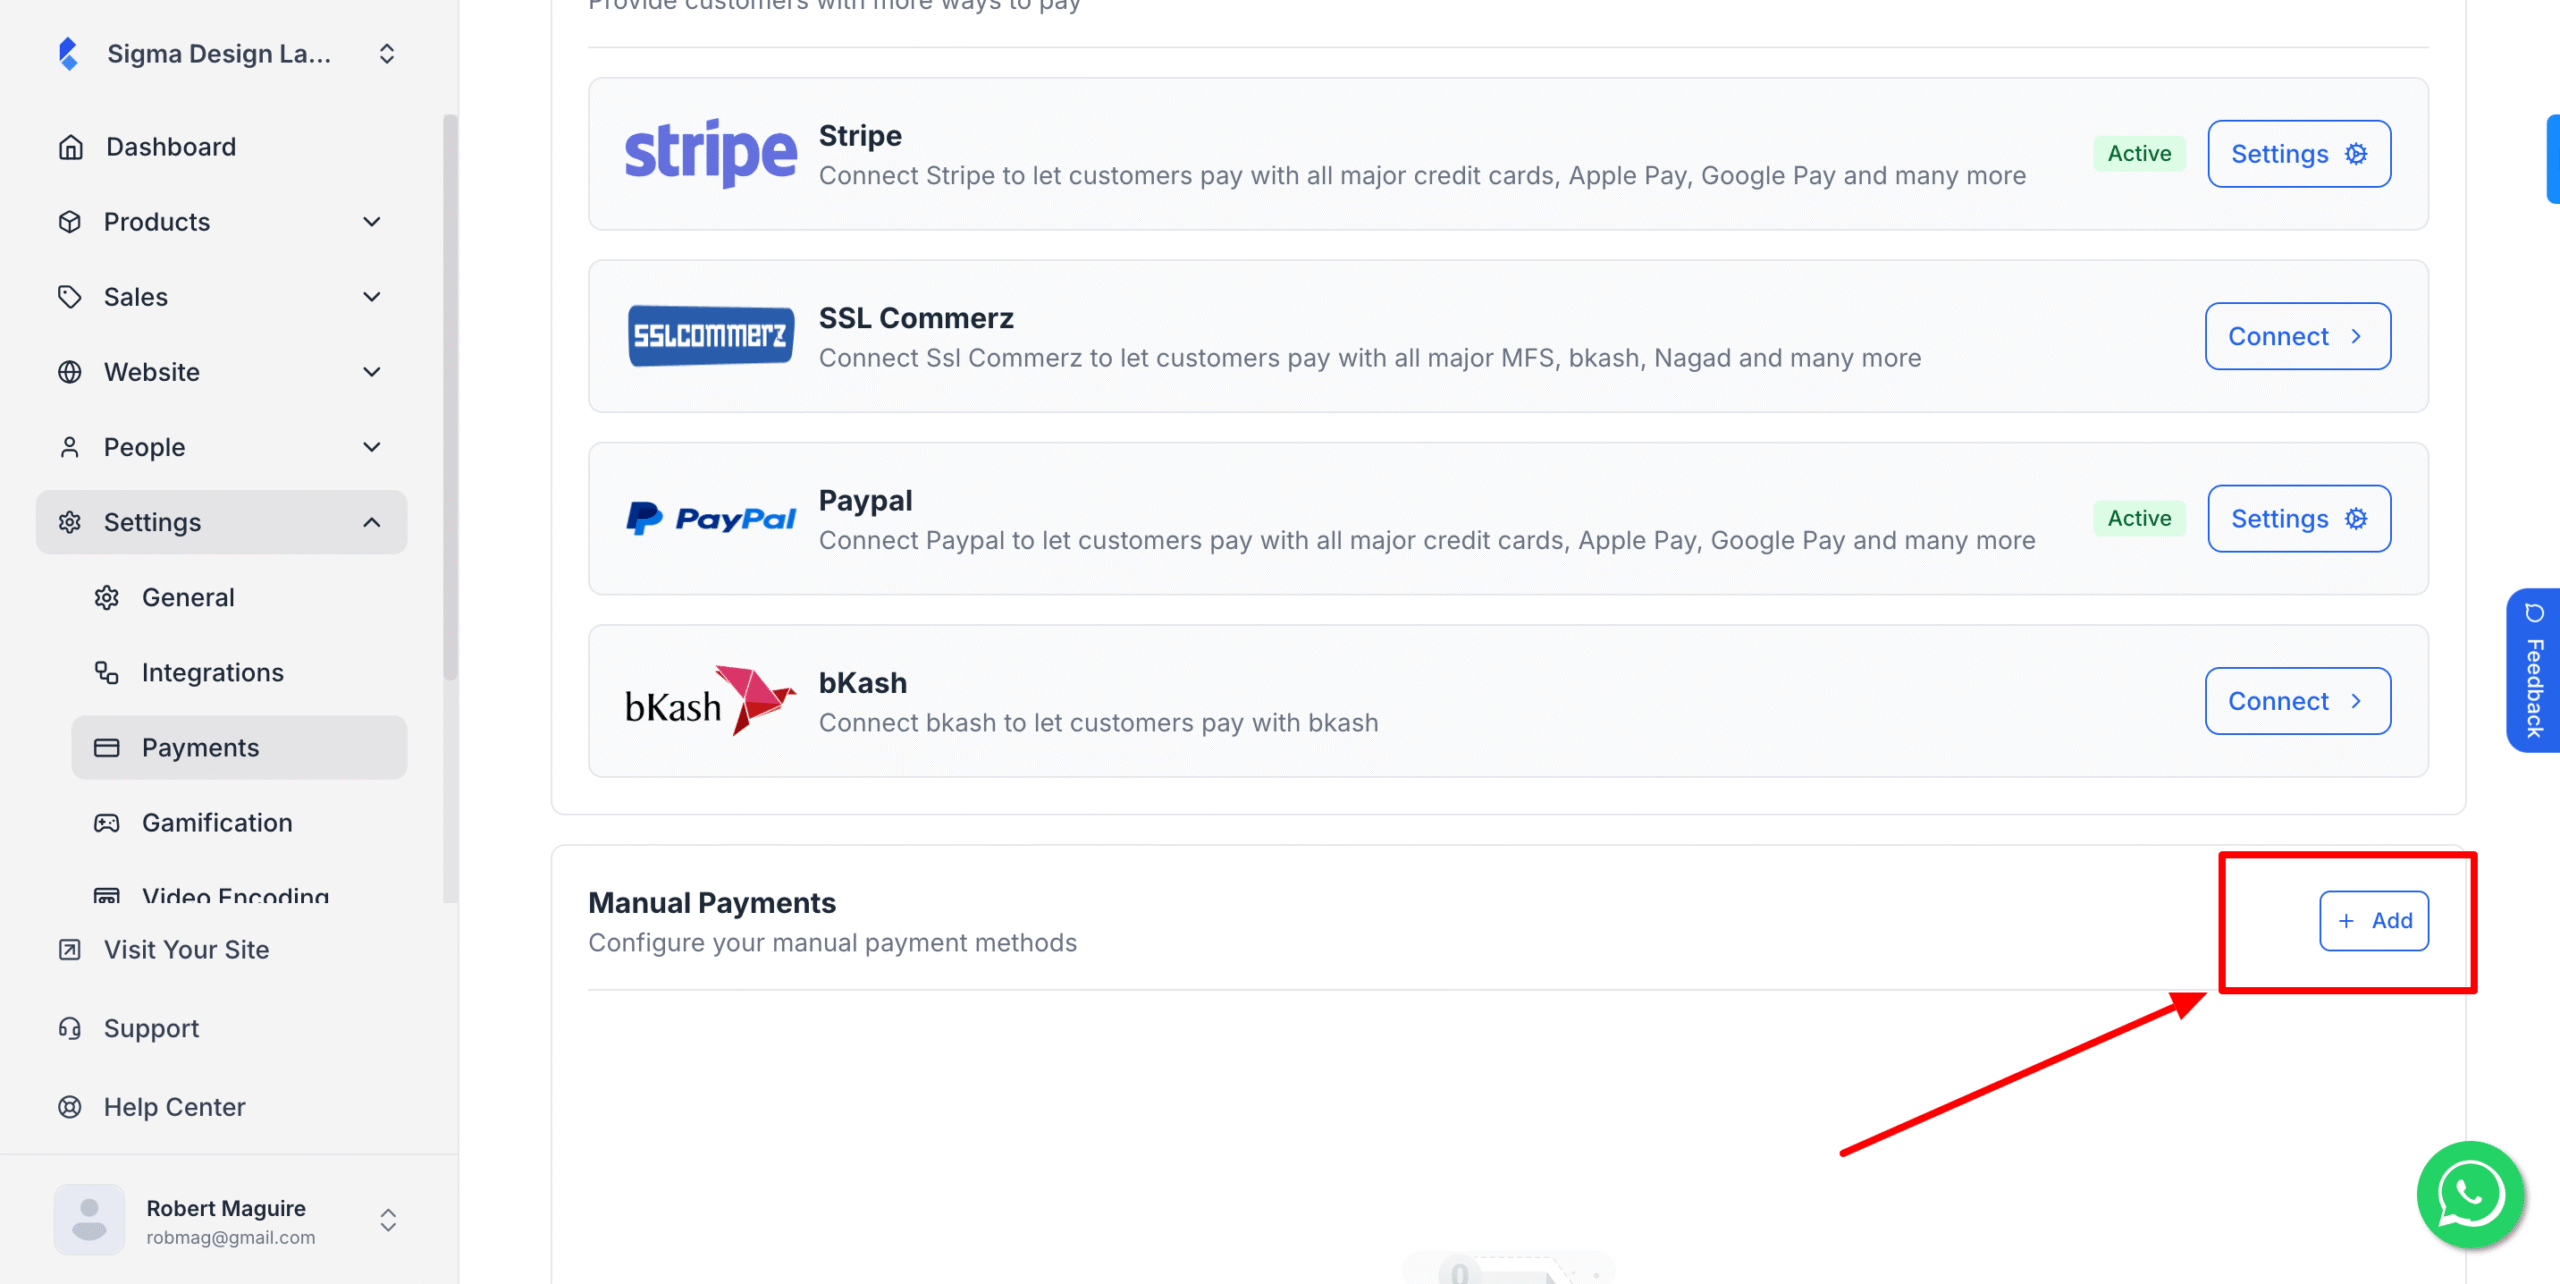
3. Then click on Add on Manual payment section
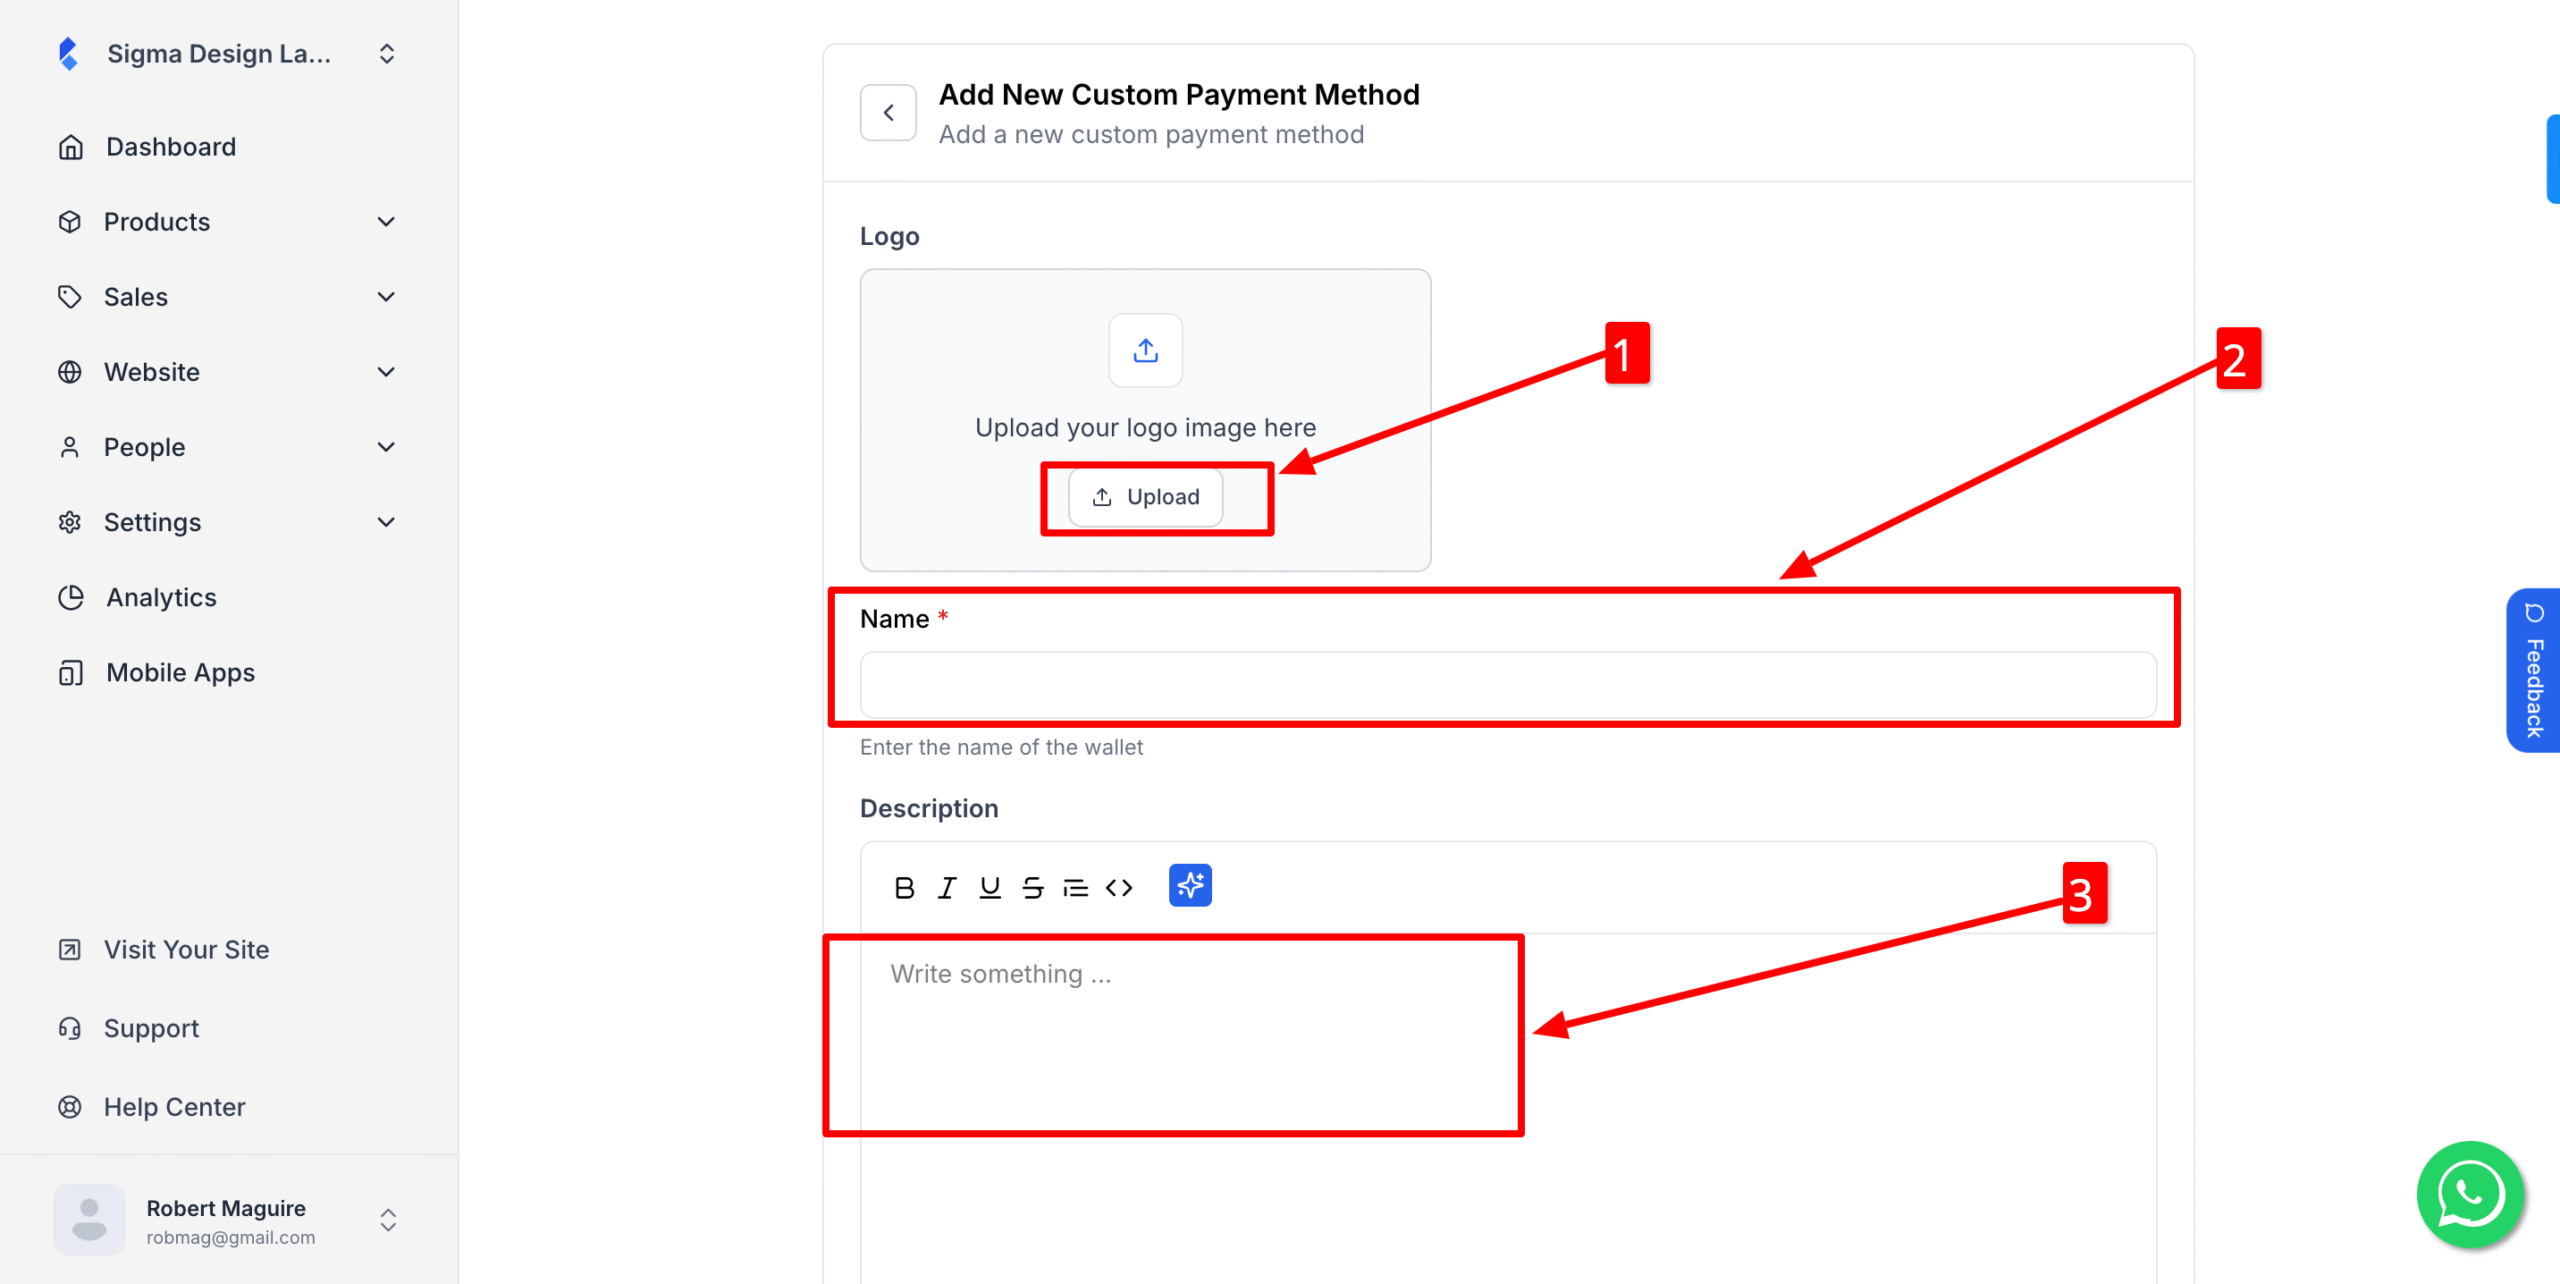
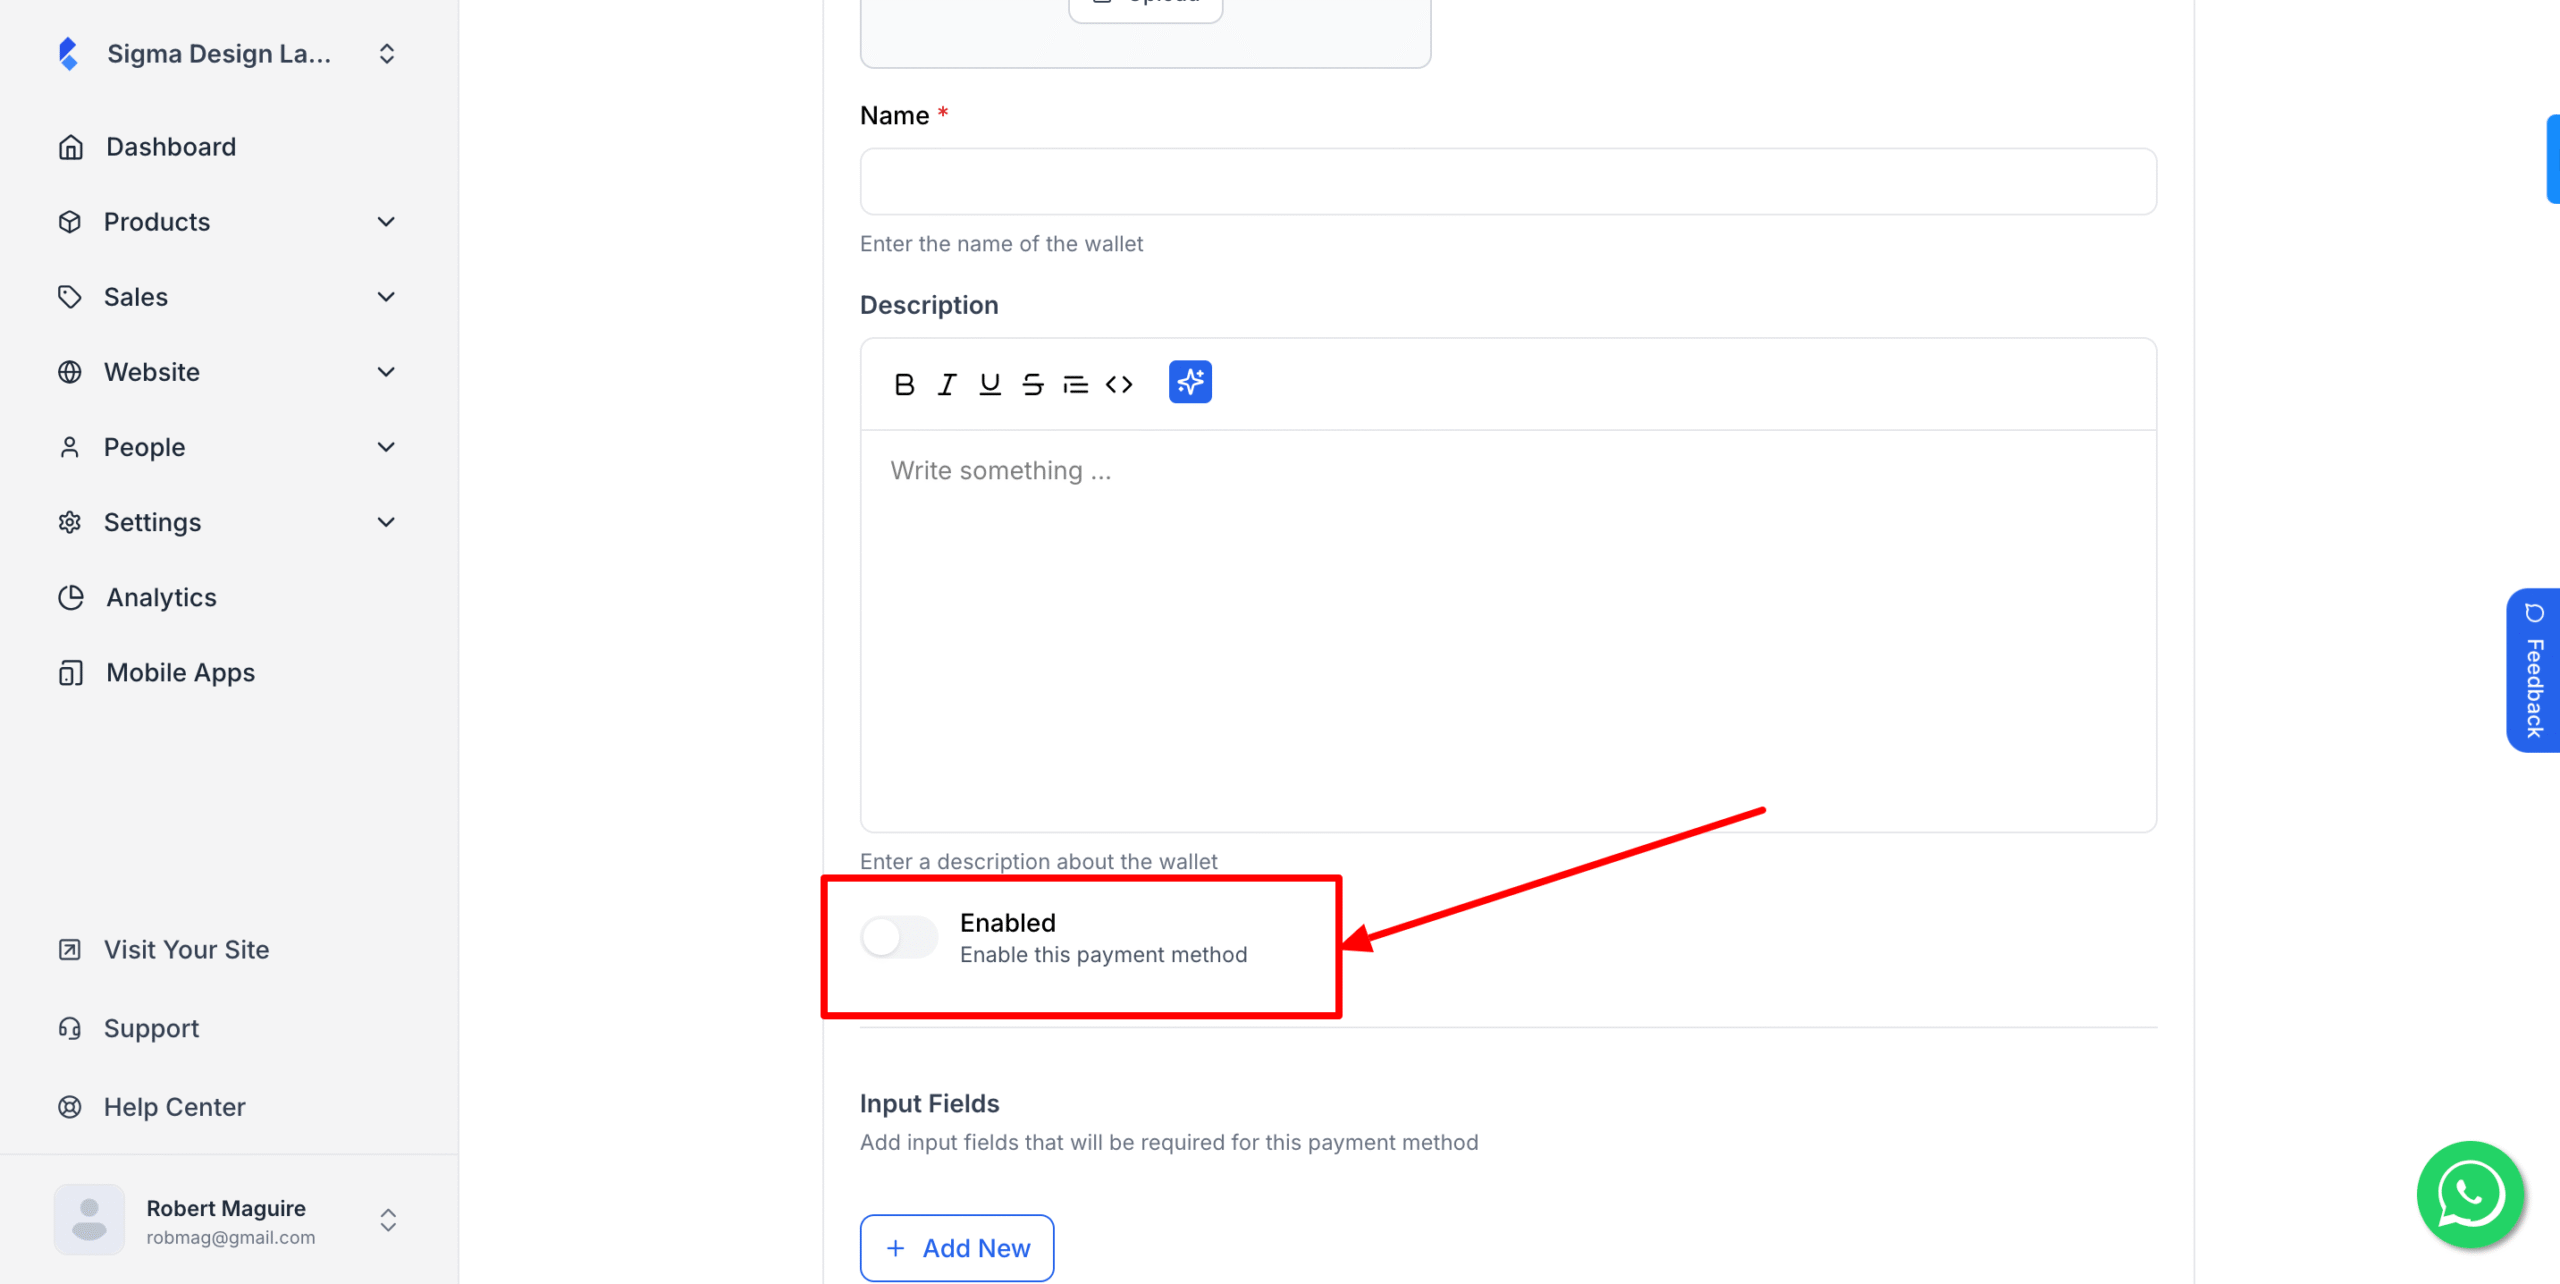
4. Upload your payment logo then put the name of the merchant. After that add the description of the merchant (can be the instruction of the payment by which you want to educate your customers)
5. Select if you want to enable/disable this payment method
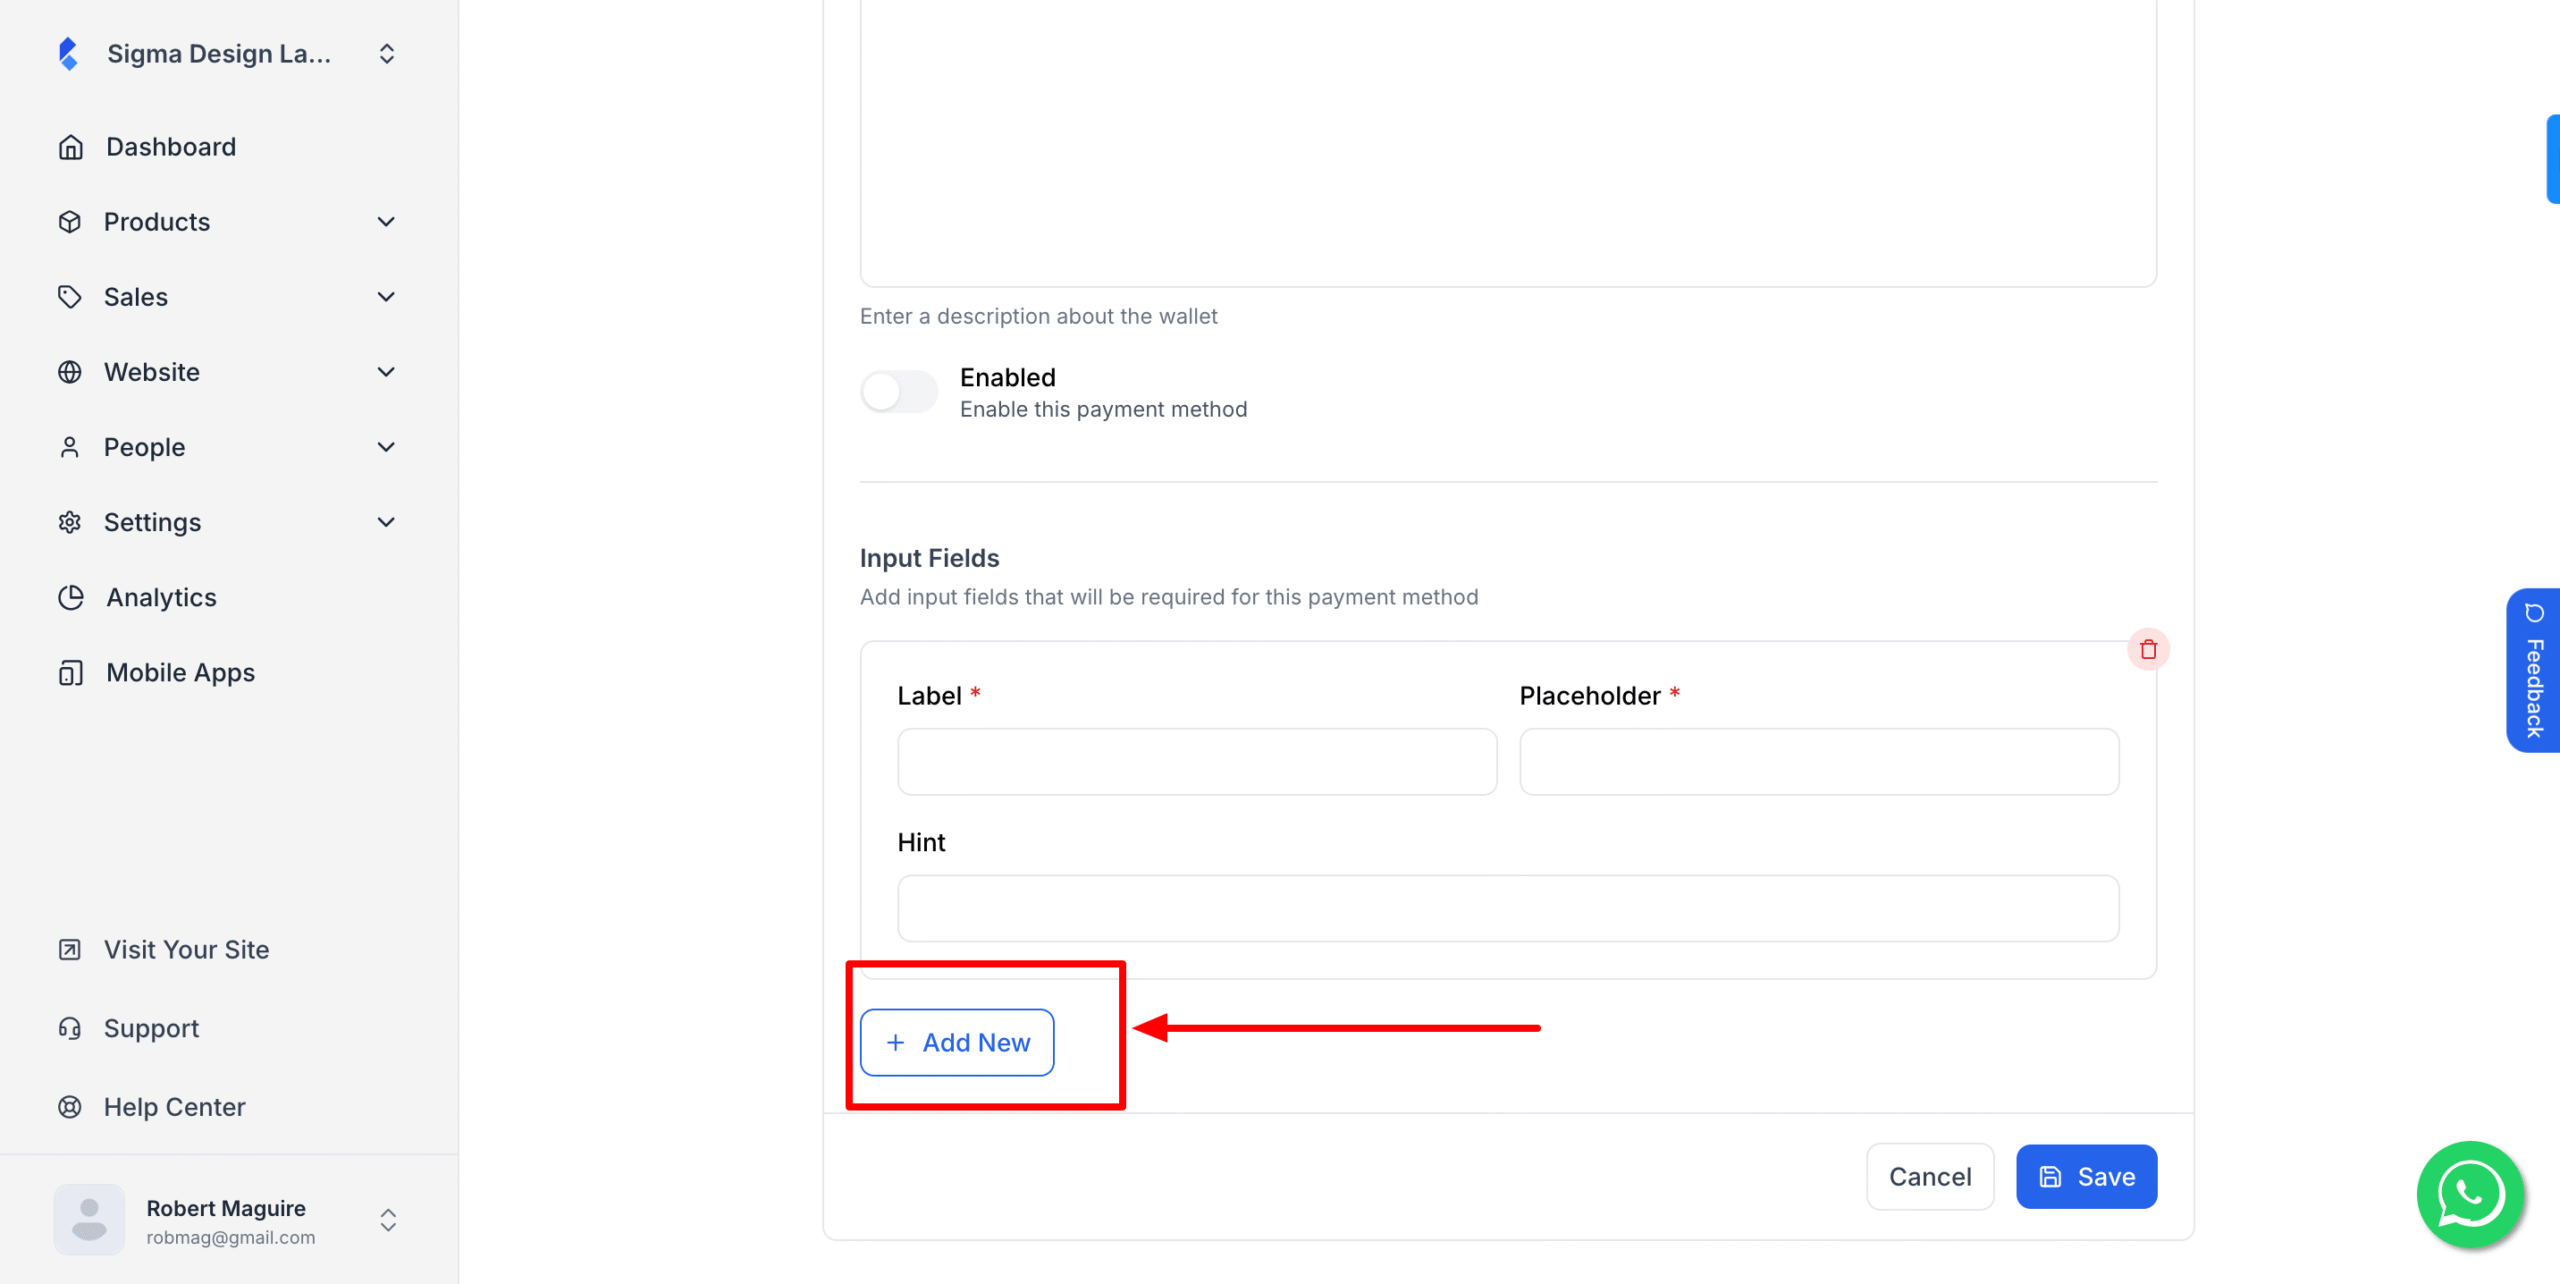
6. After that, click Add New if you want to collect any information from your customer such as Transaction ID, Customer merchant account number etc using a form.
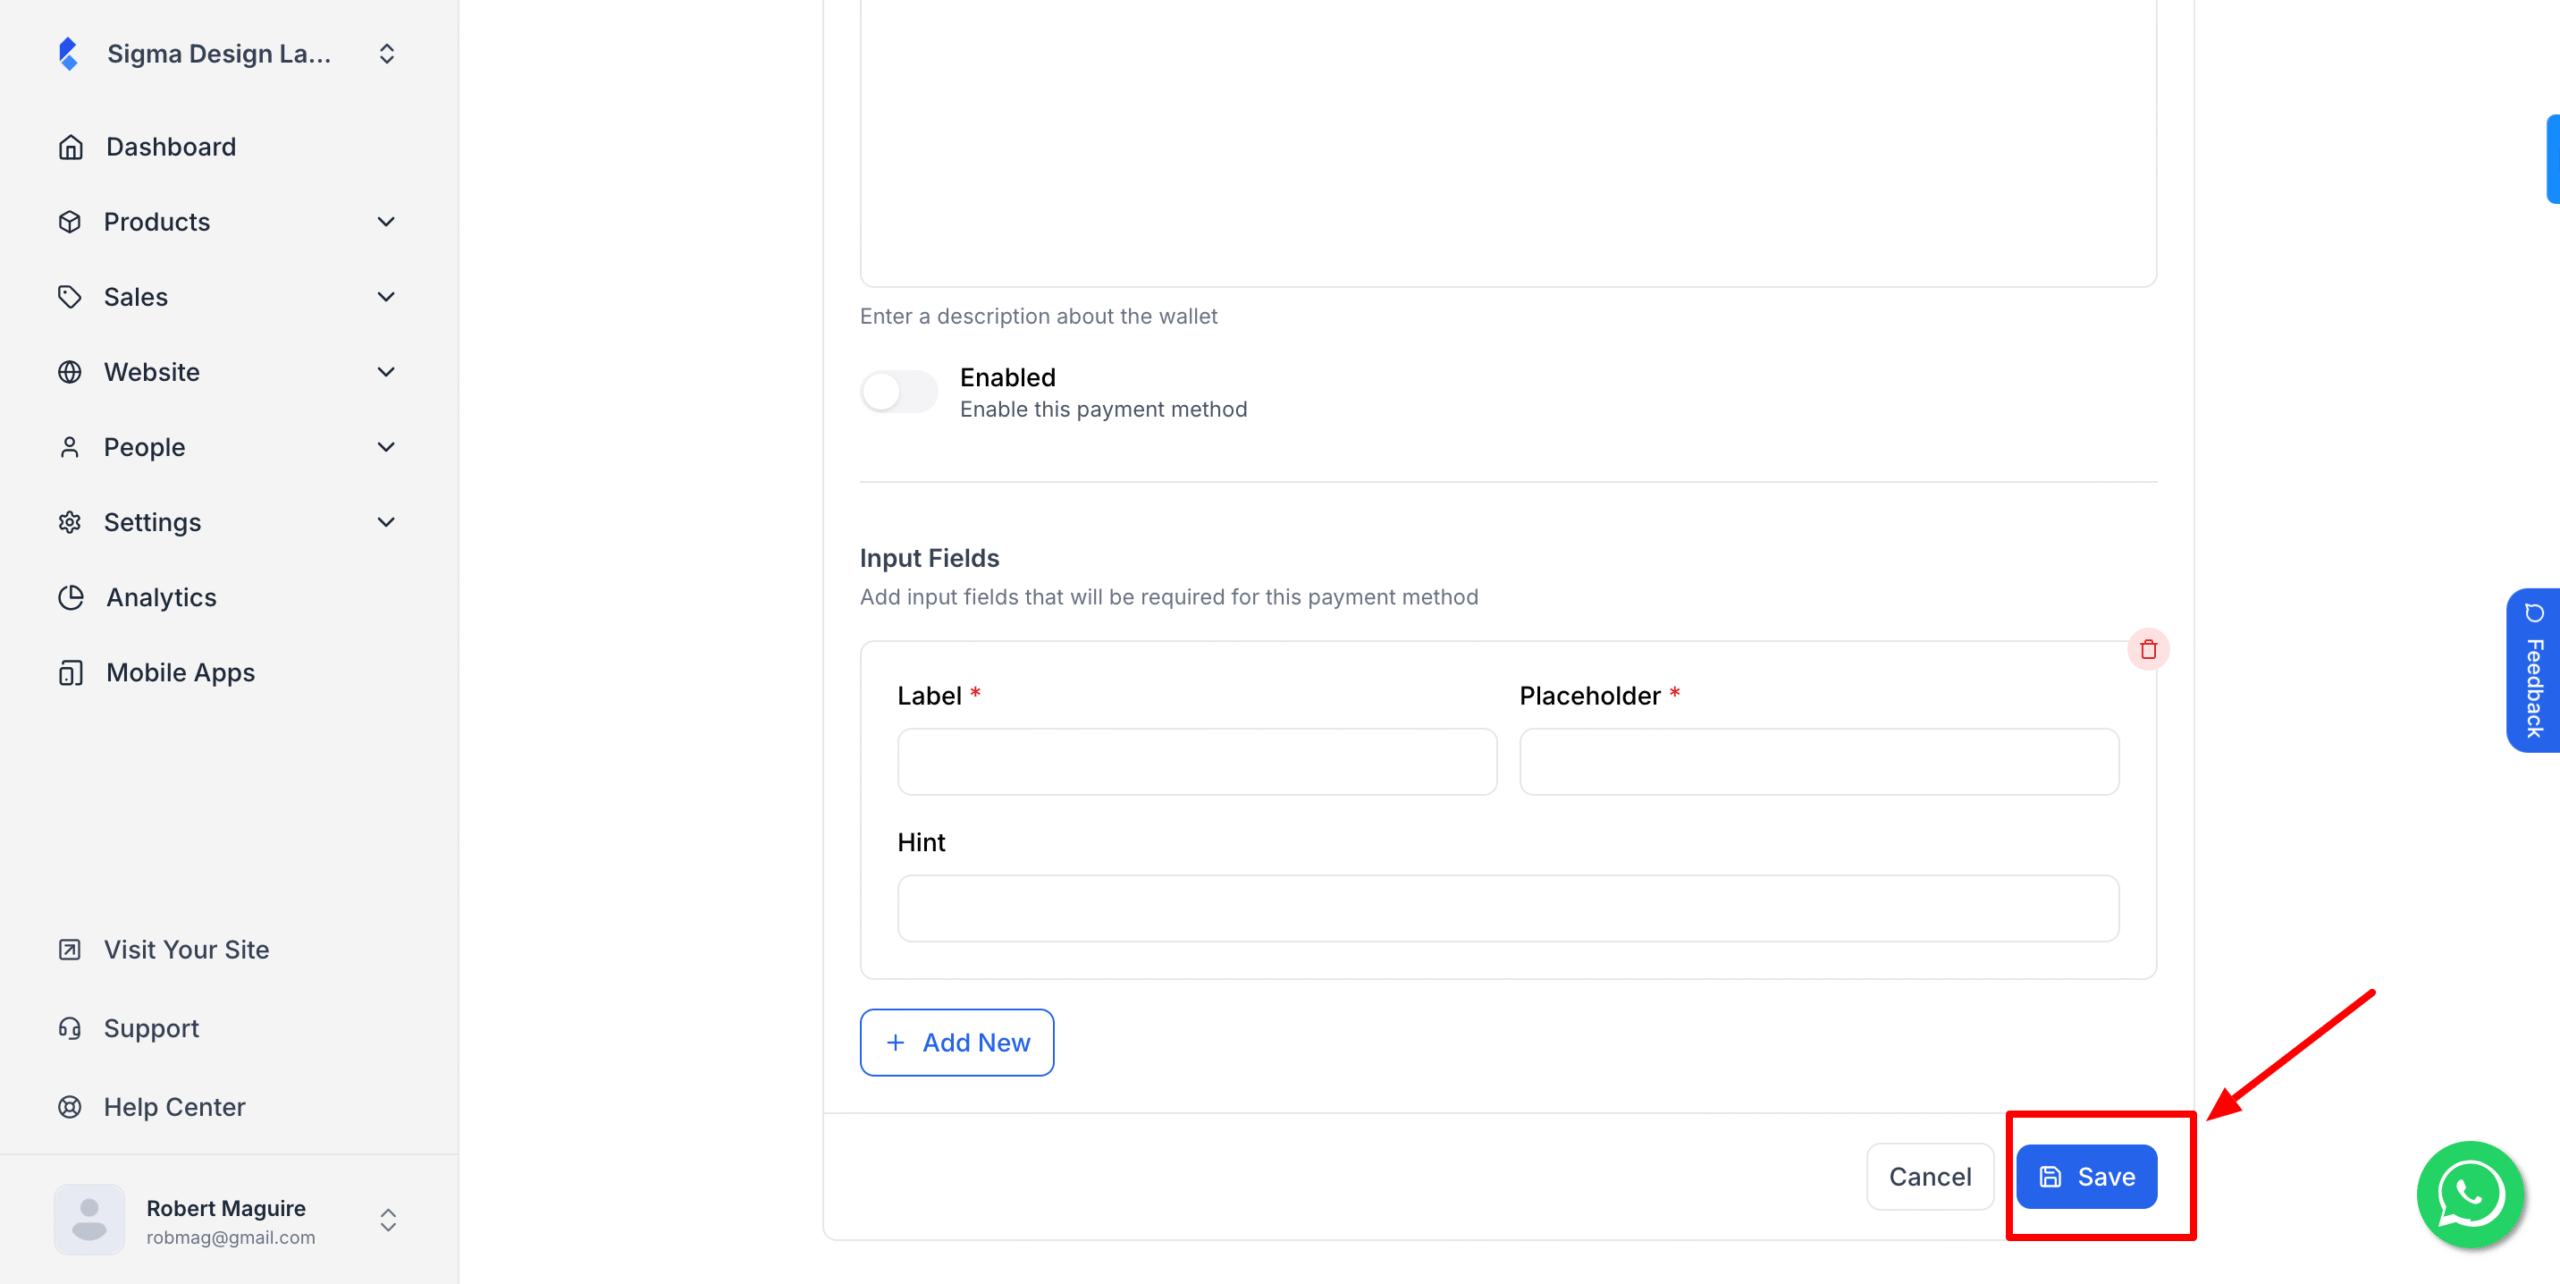
8. Finally hit Save once you’re done.
You can now receive payment using your desired custom payment method.