Klasio integrates smoothly with PayPal, one of the most trusted payment gateways worldwide.
This lets you accept payments for your online courses securely and with ease. Just be sure to check PayPal’s list of supported countries and currencies to confirm it works in your region.
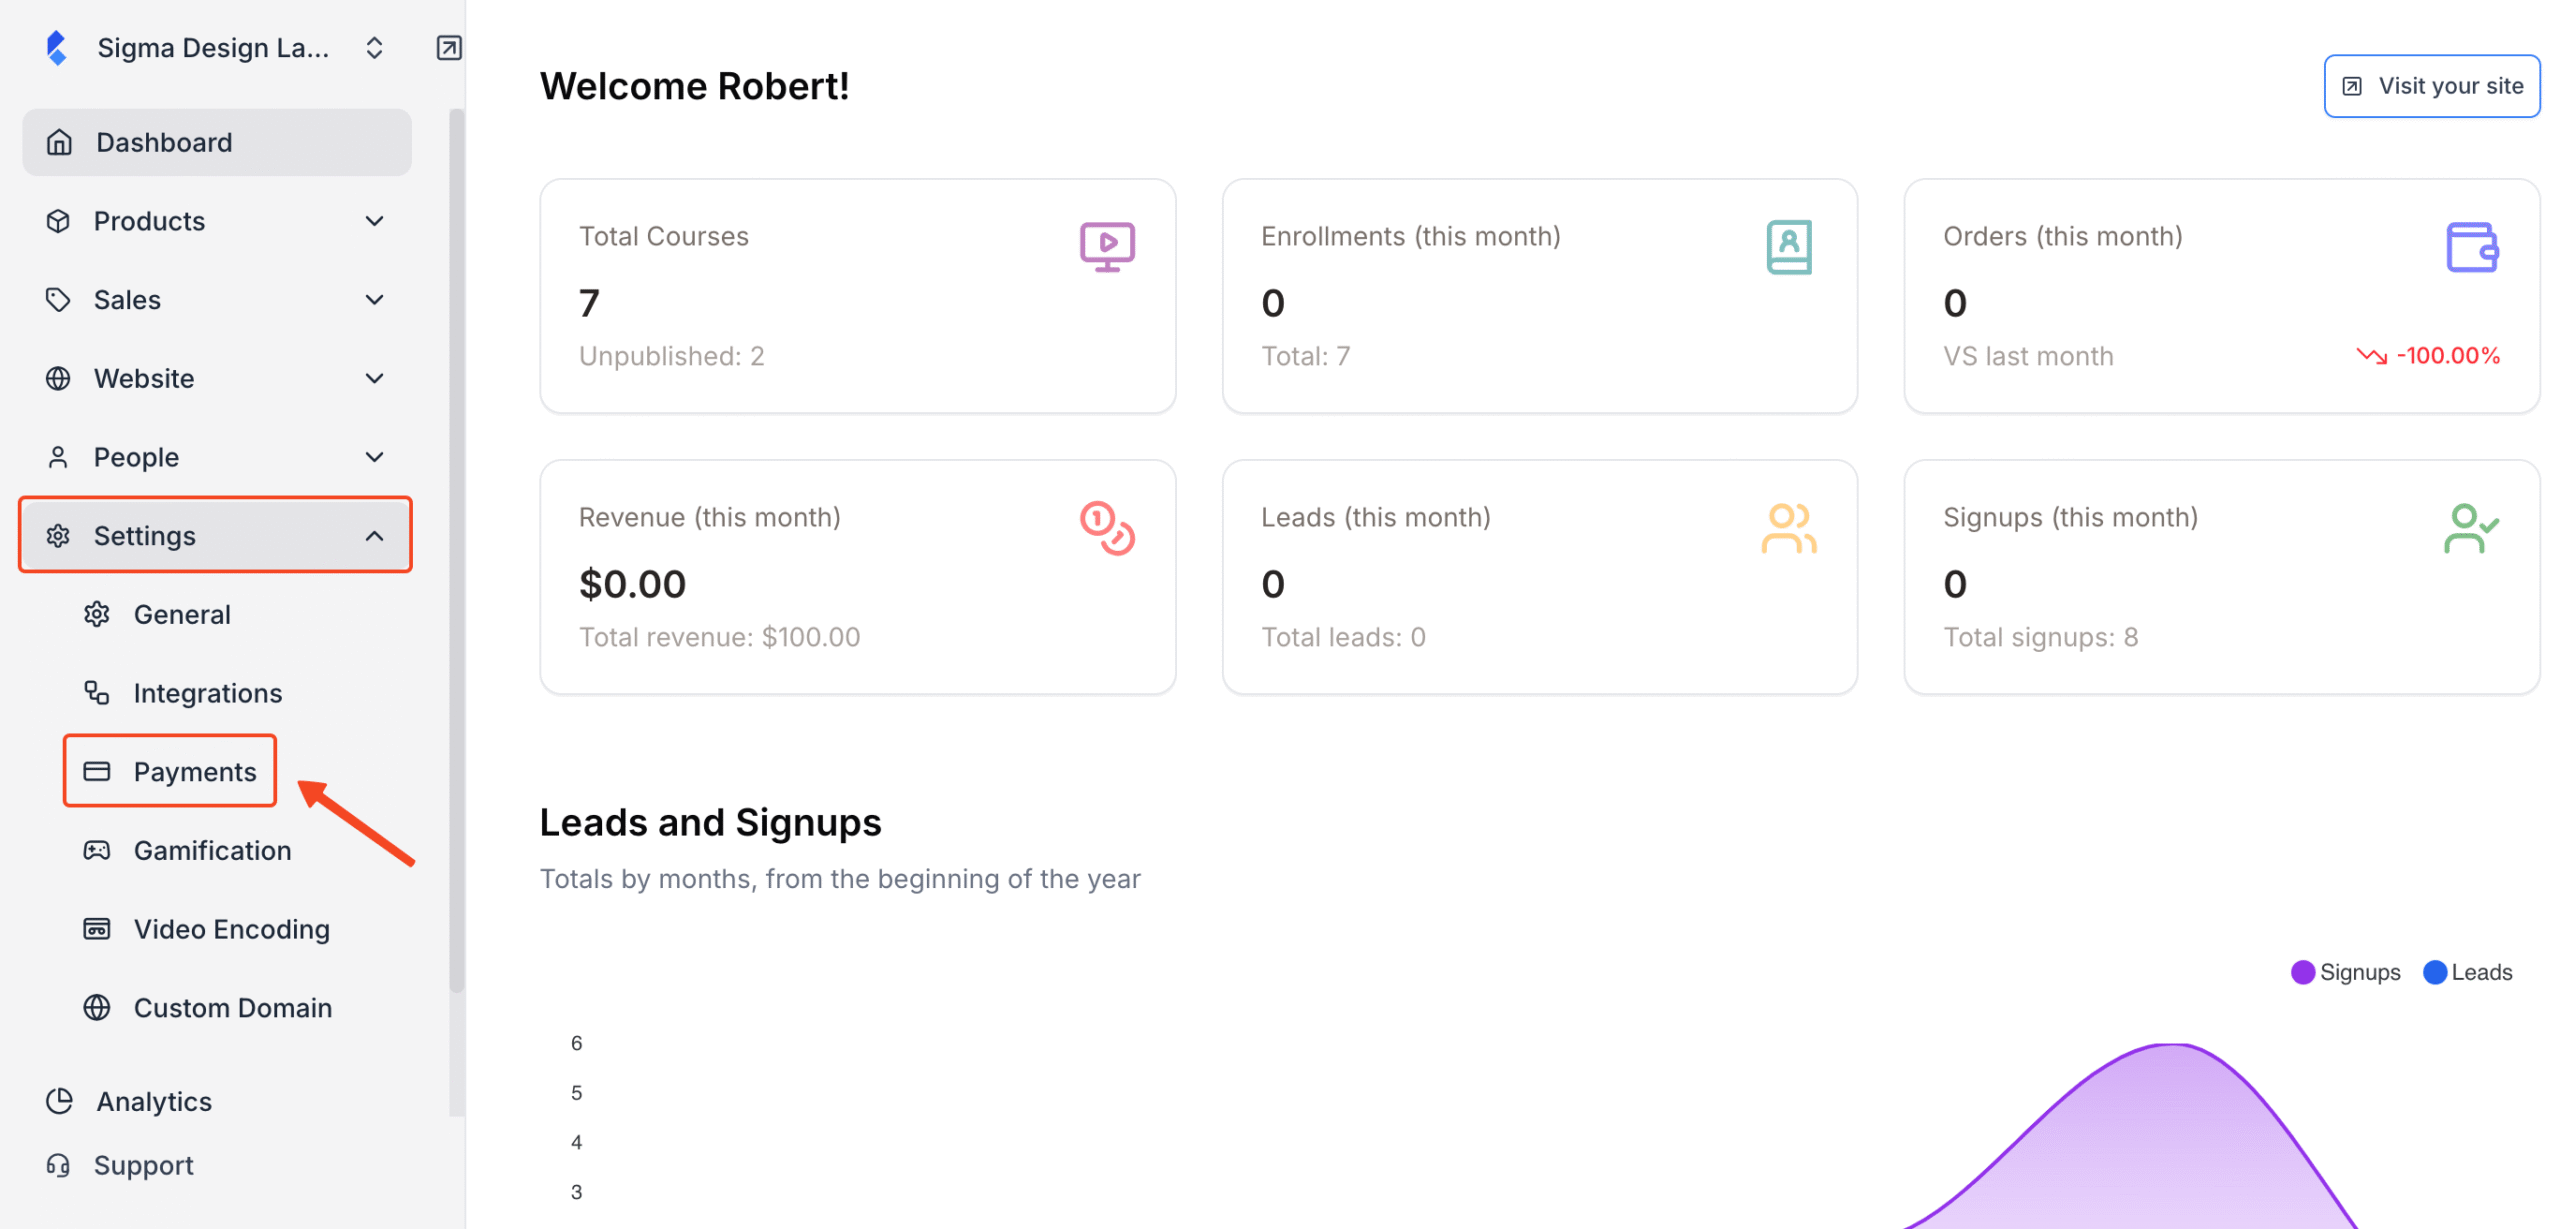
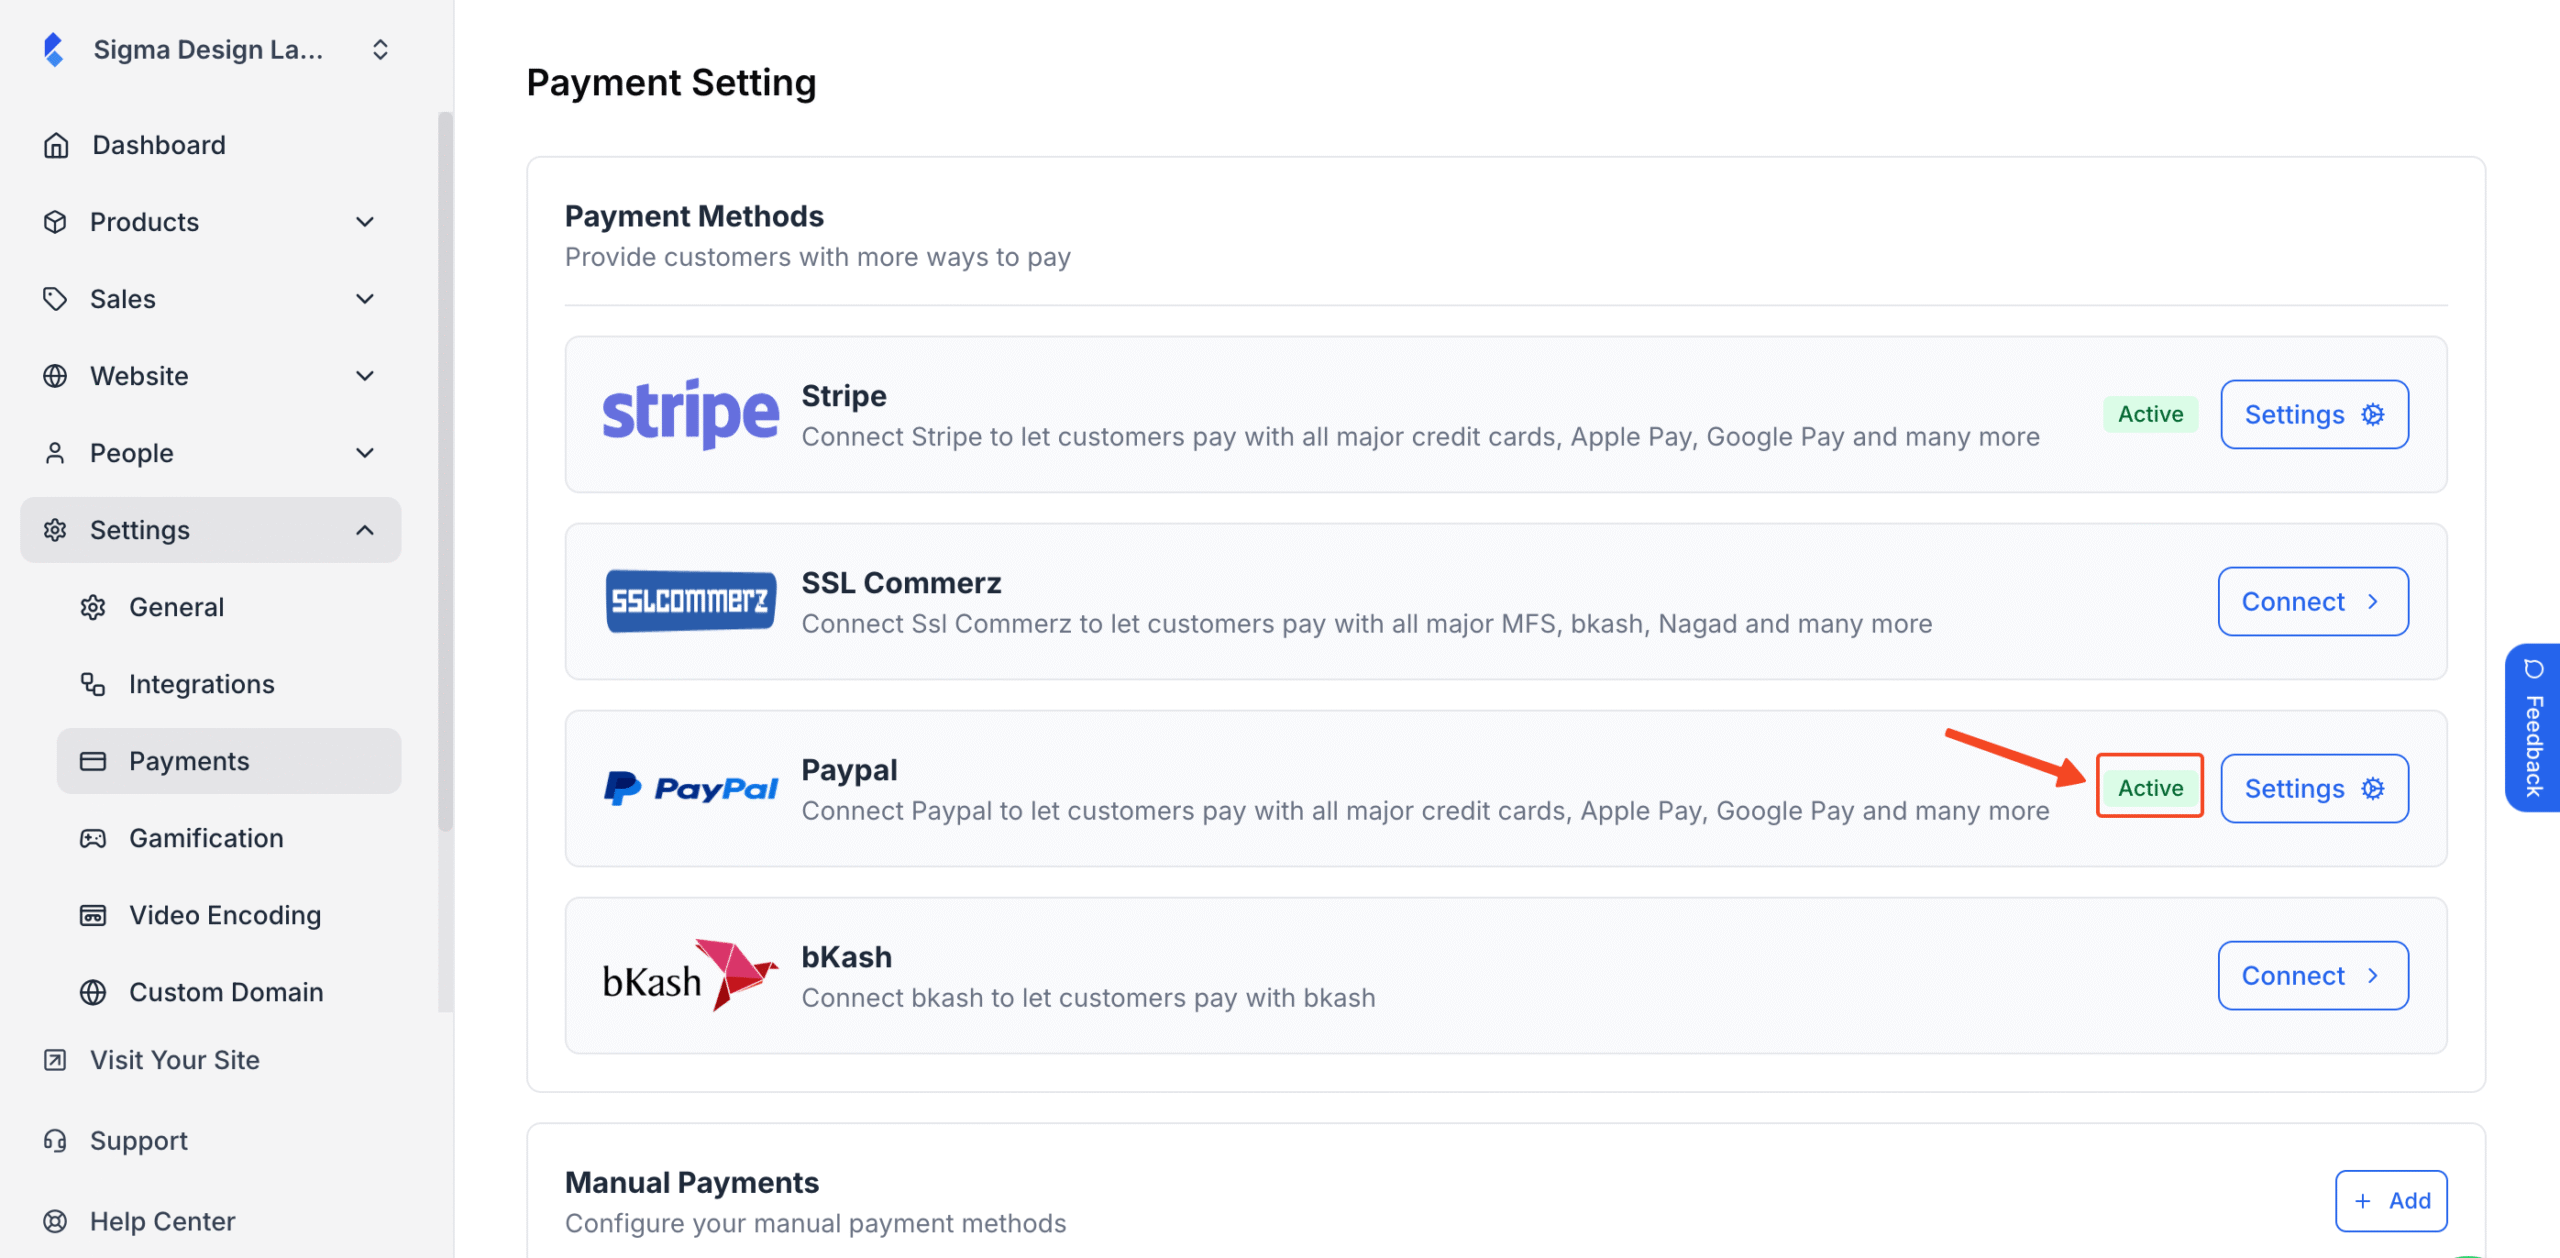
1. From the admin dashboard, go to Settings and then click Payments.
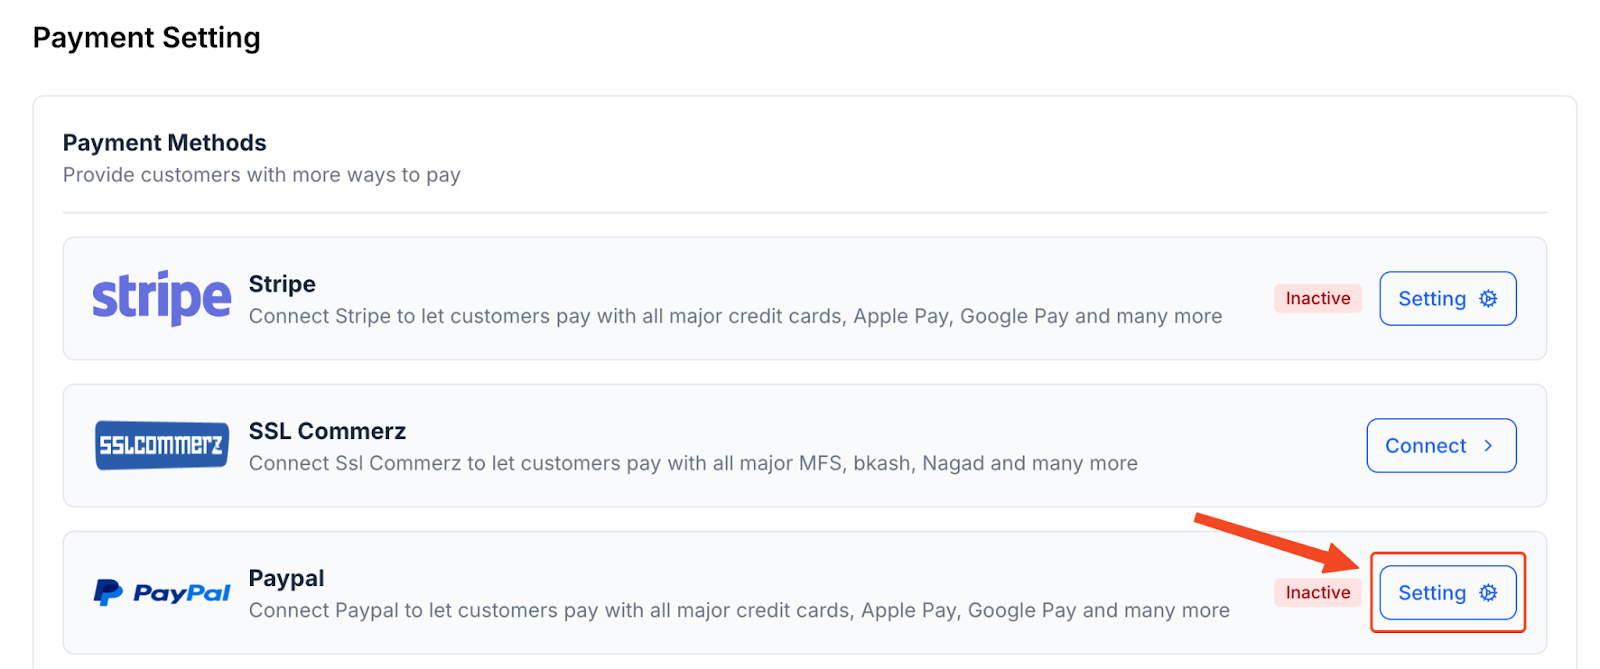
2. Next Locate the PayPal widget and click on Settings.
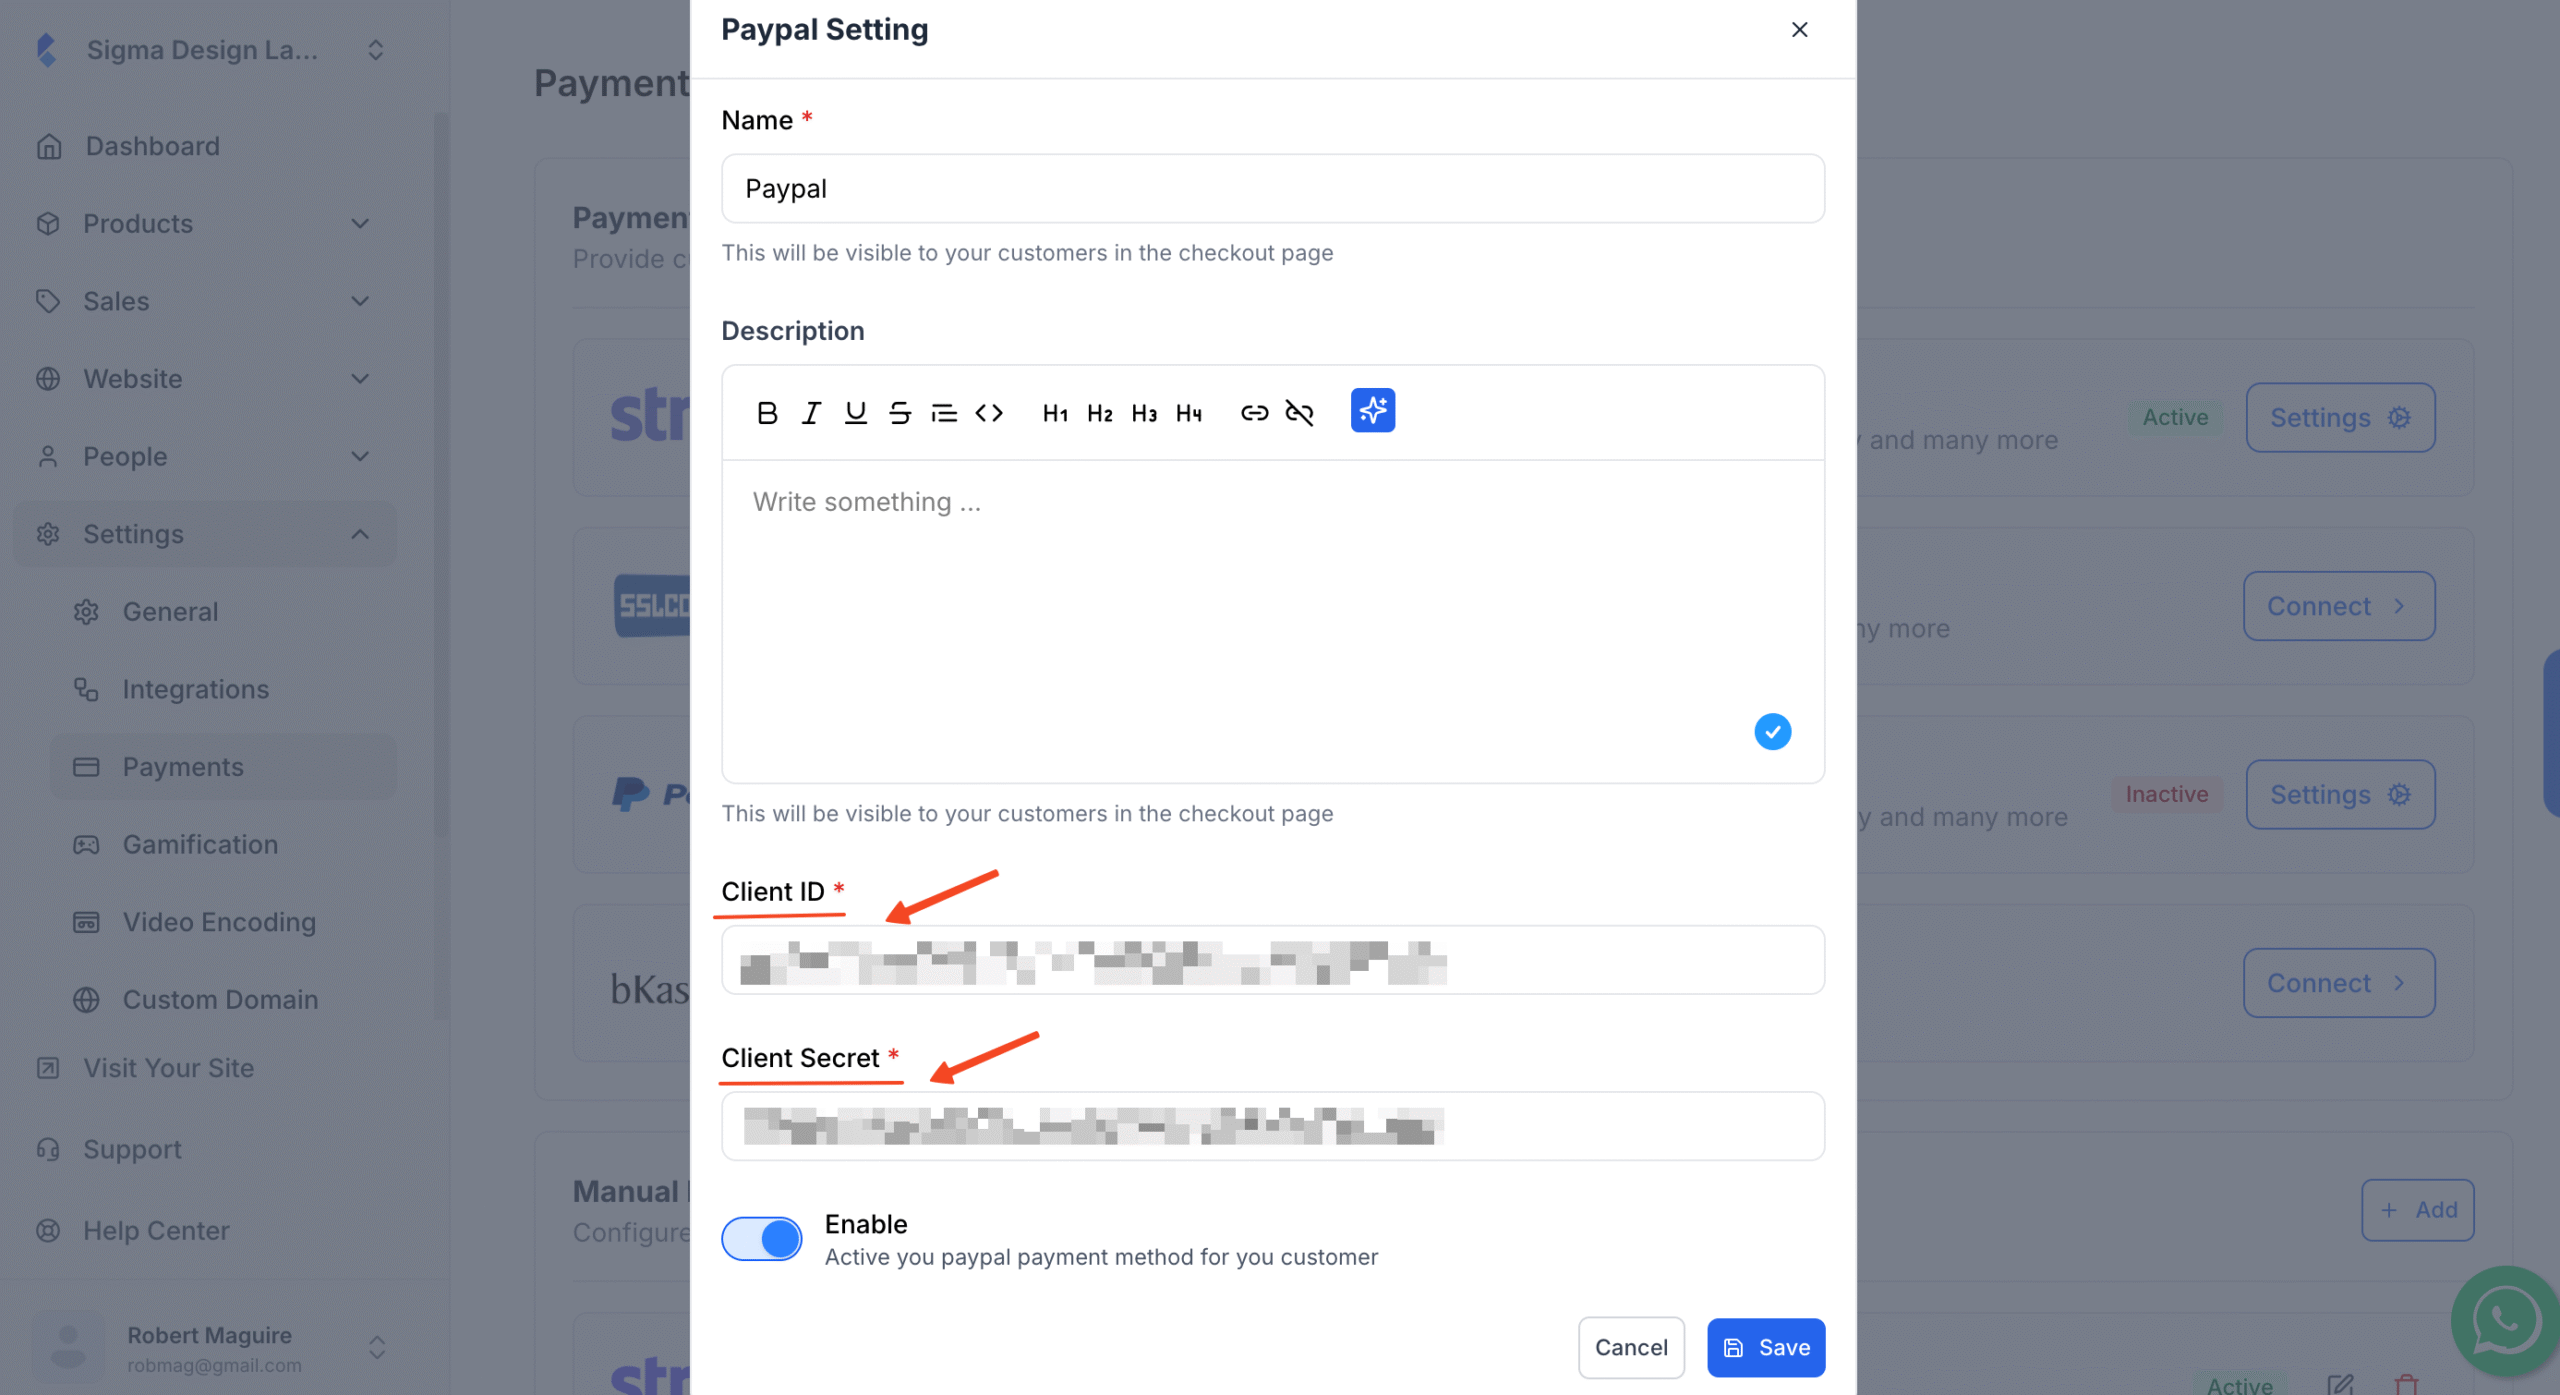
3. Type in the merchant name, add anything important for your customers in the description box.
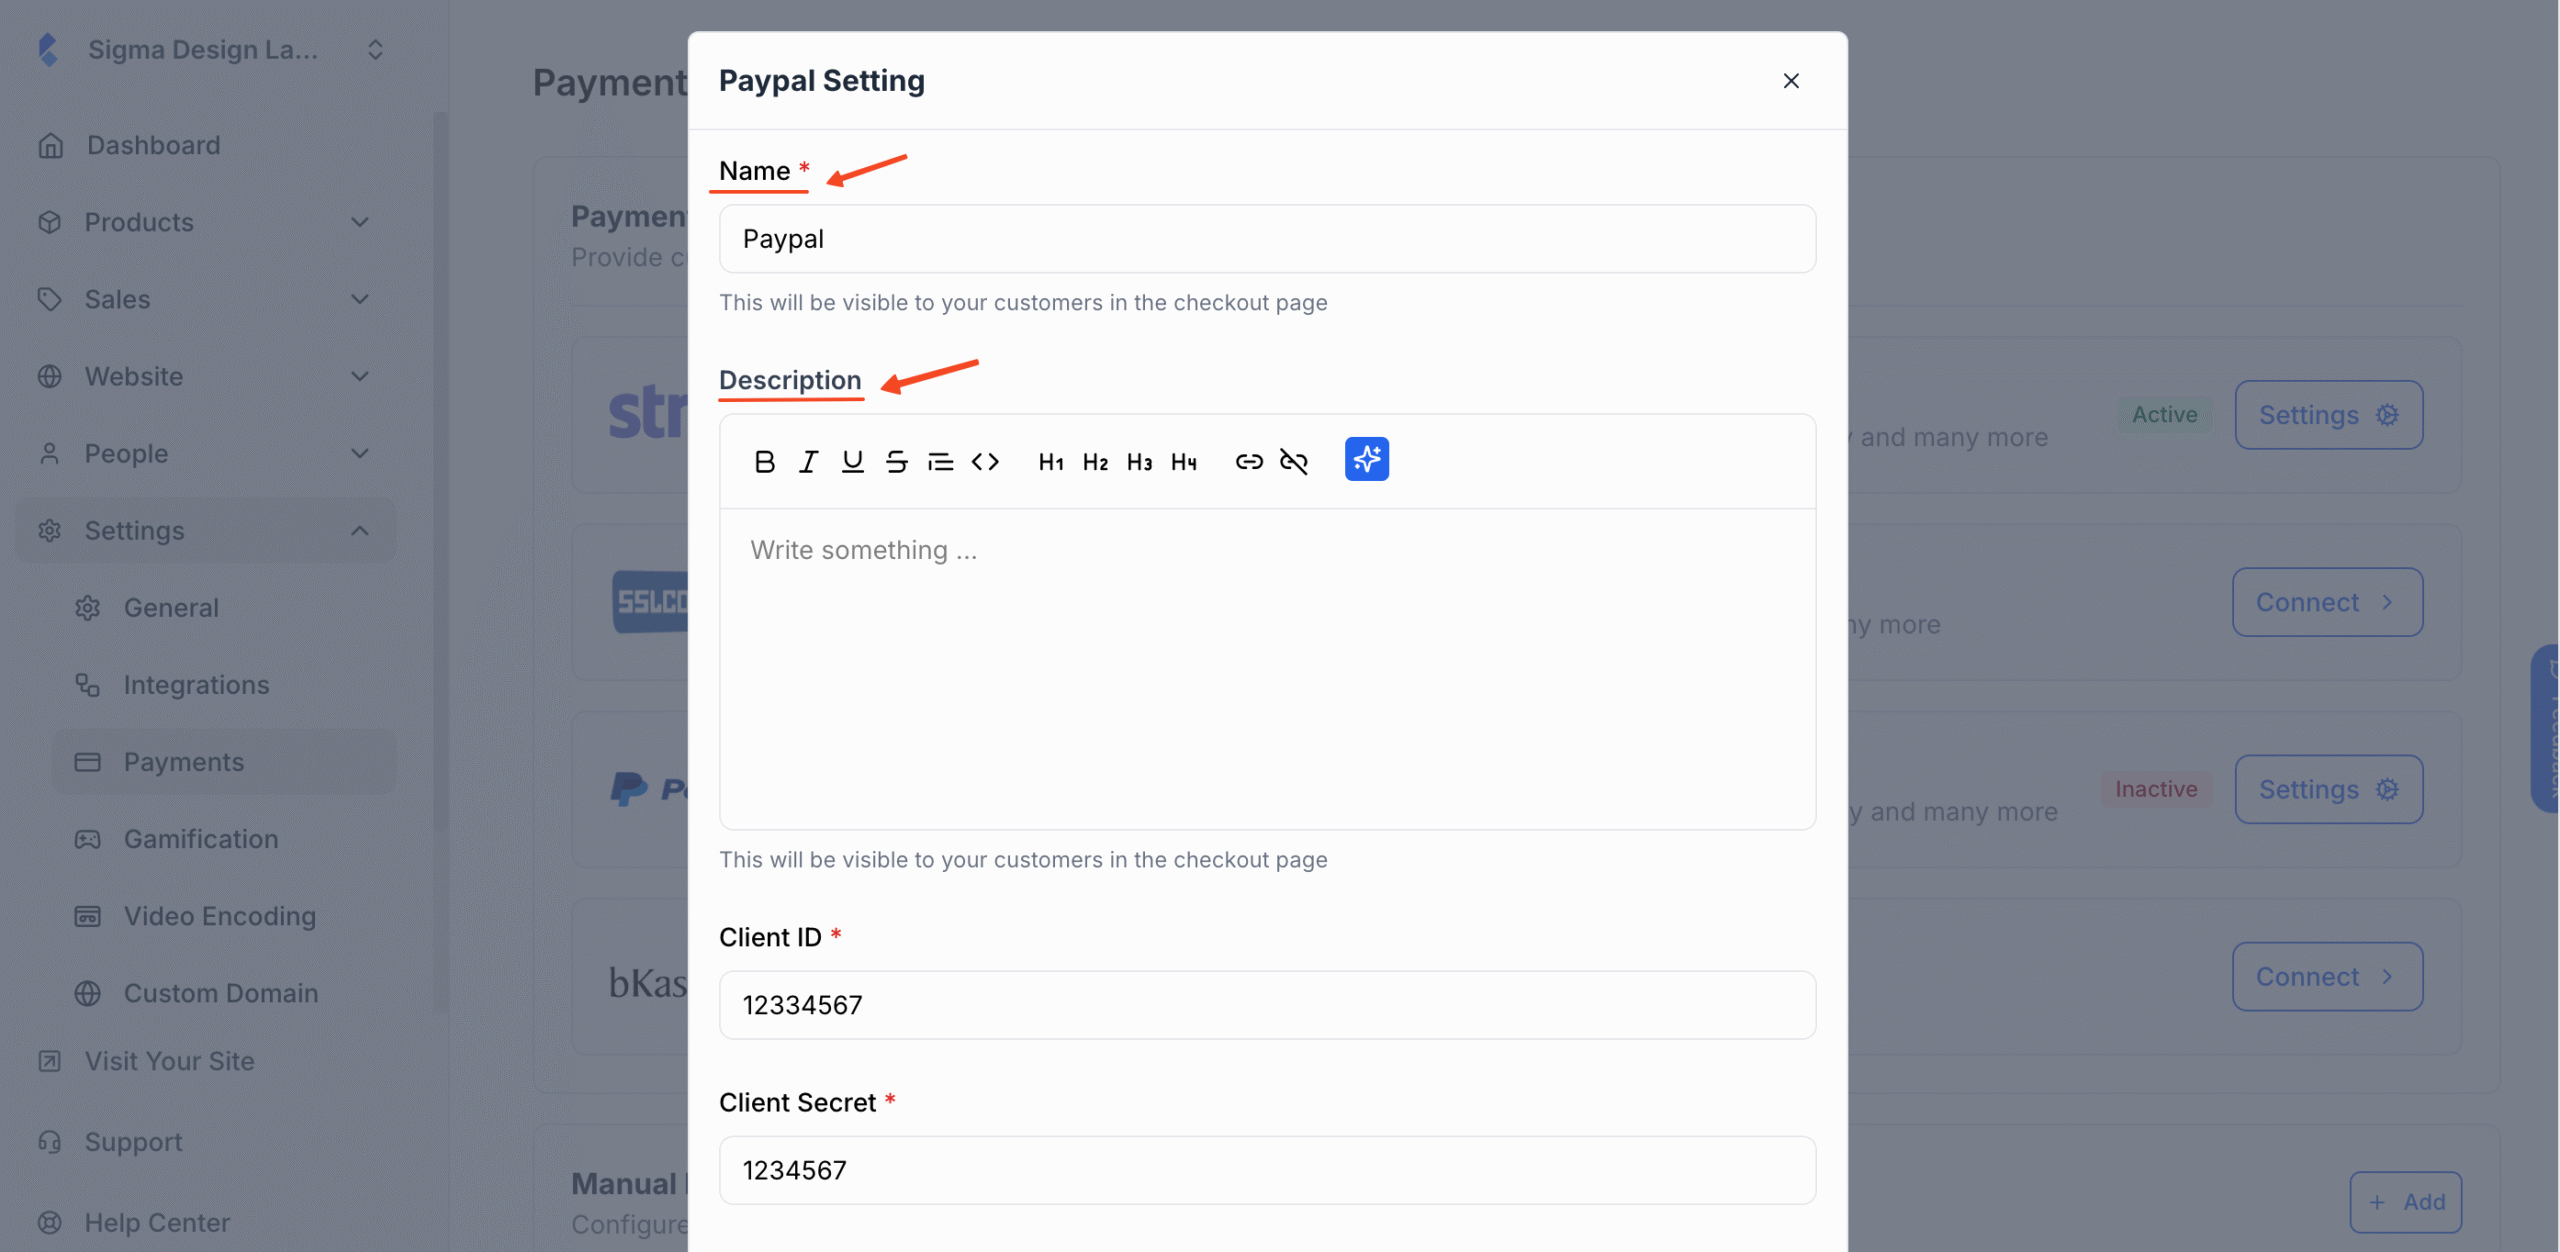
4. Then you’ll be required to insert your PayPal Client ID and Client Secret.
In order to get all these keys, you’ll be required to access your PayPal account and collect the key from there.
Payment Environment
PayPal has two modes for generating such keys. Start by choosing either “Test” or “Live”, depending on what you’re doing. Use Test mode to simulate payments, or Live mode if you’re ready to accept real transactions in your production environment.
Test / Live Merchant Email
Enter the email address linked to your PayPal account. Choose Test if you’re running test transactions, or Live for real ones. This is the email where you’ll receive payment notifications and transaction details.
How to Get PayPal Sandbox/Production Client ID and Client Secret
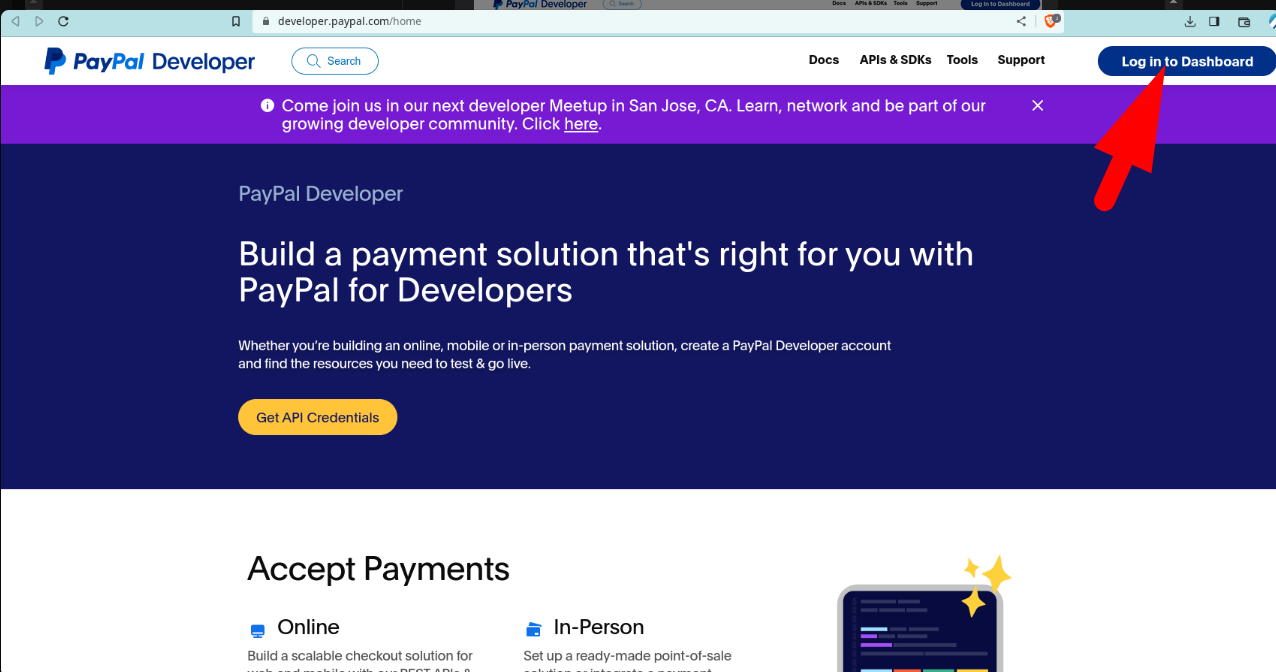
a. Go to the PayPal Developers Website and click Log in to Dashboard. Create a sandbox account to try out test payments. (If you don’t have a PayPal developer account, sign up for one now)
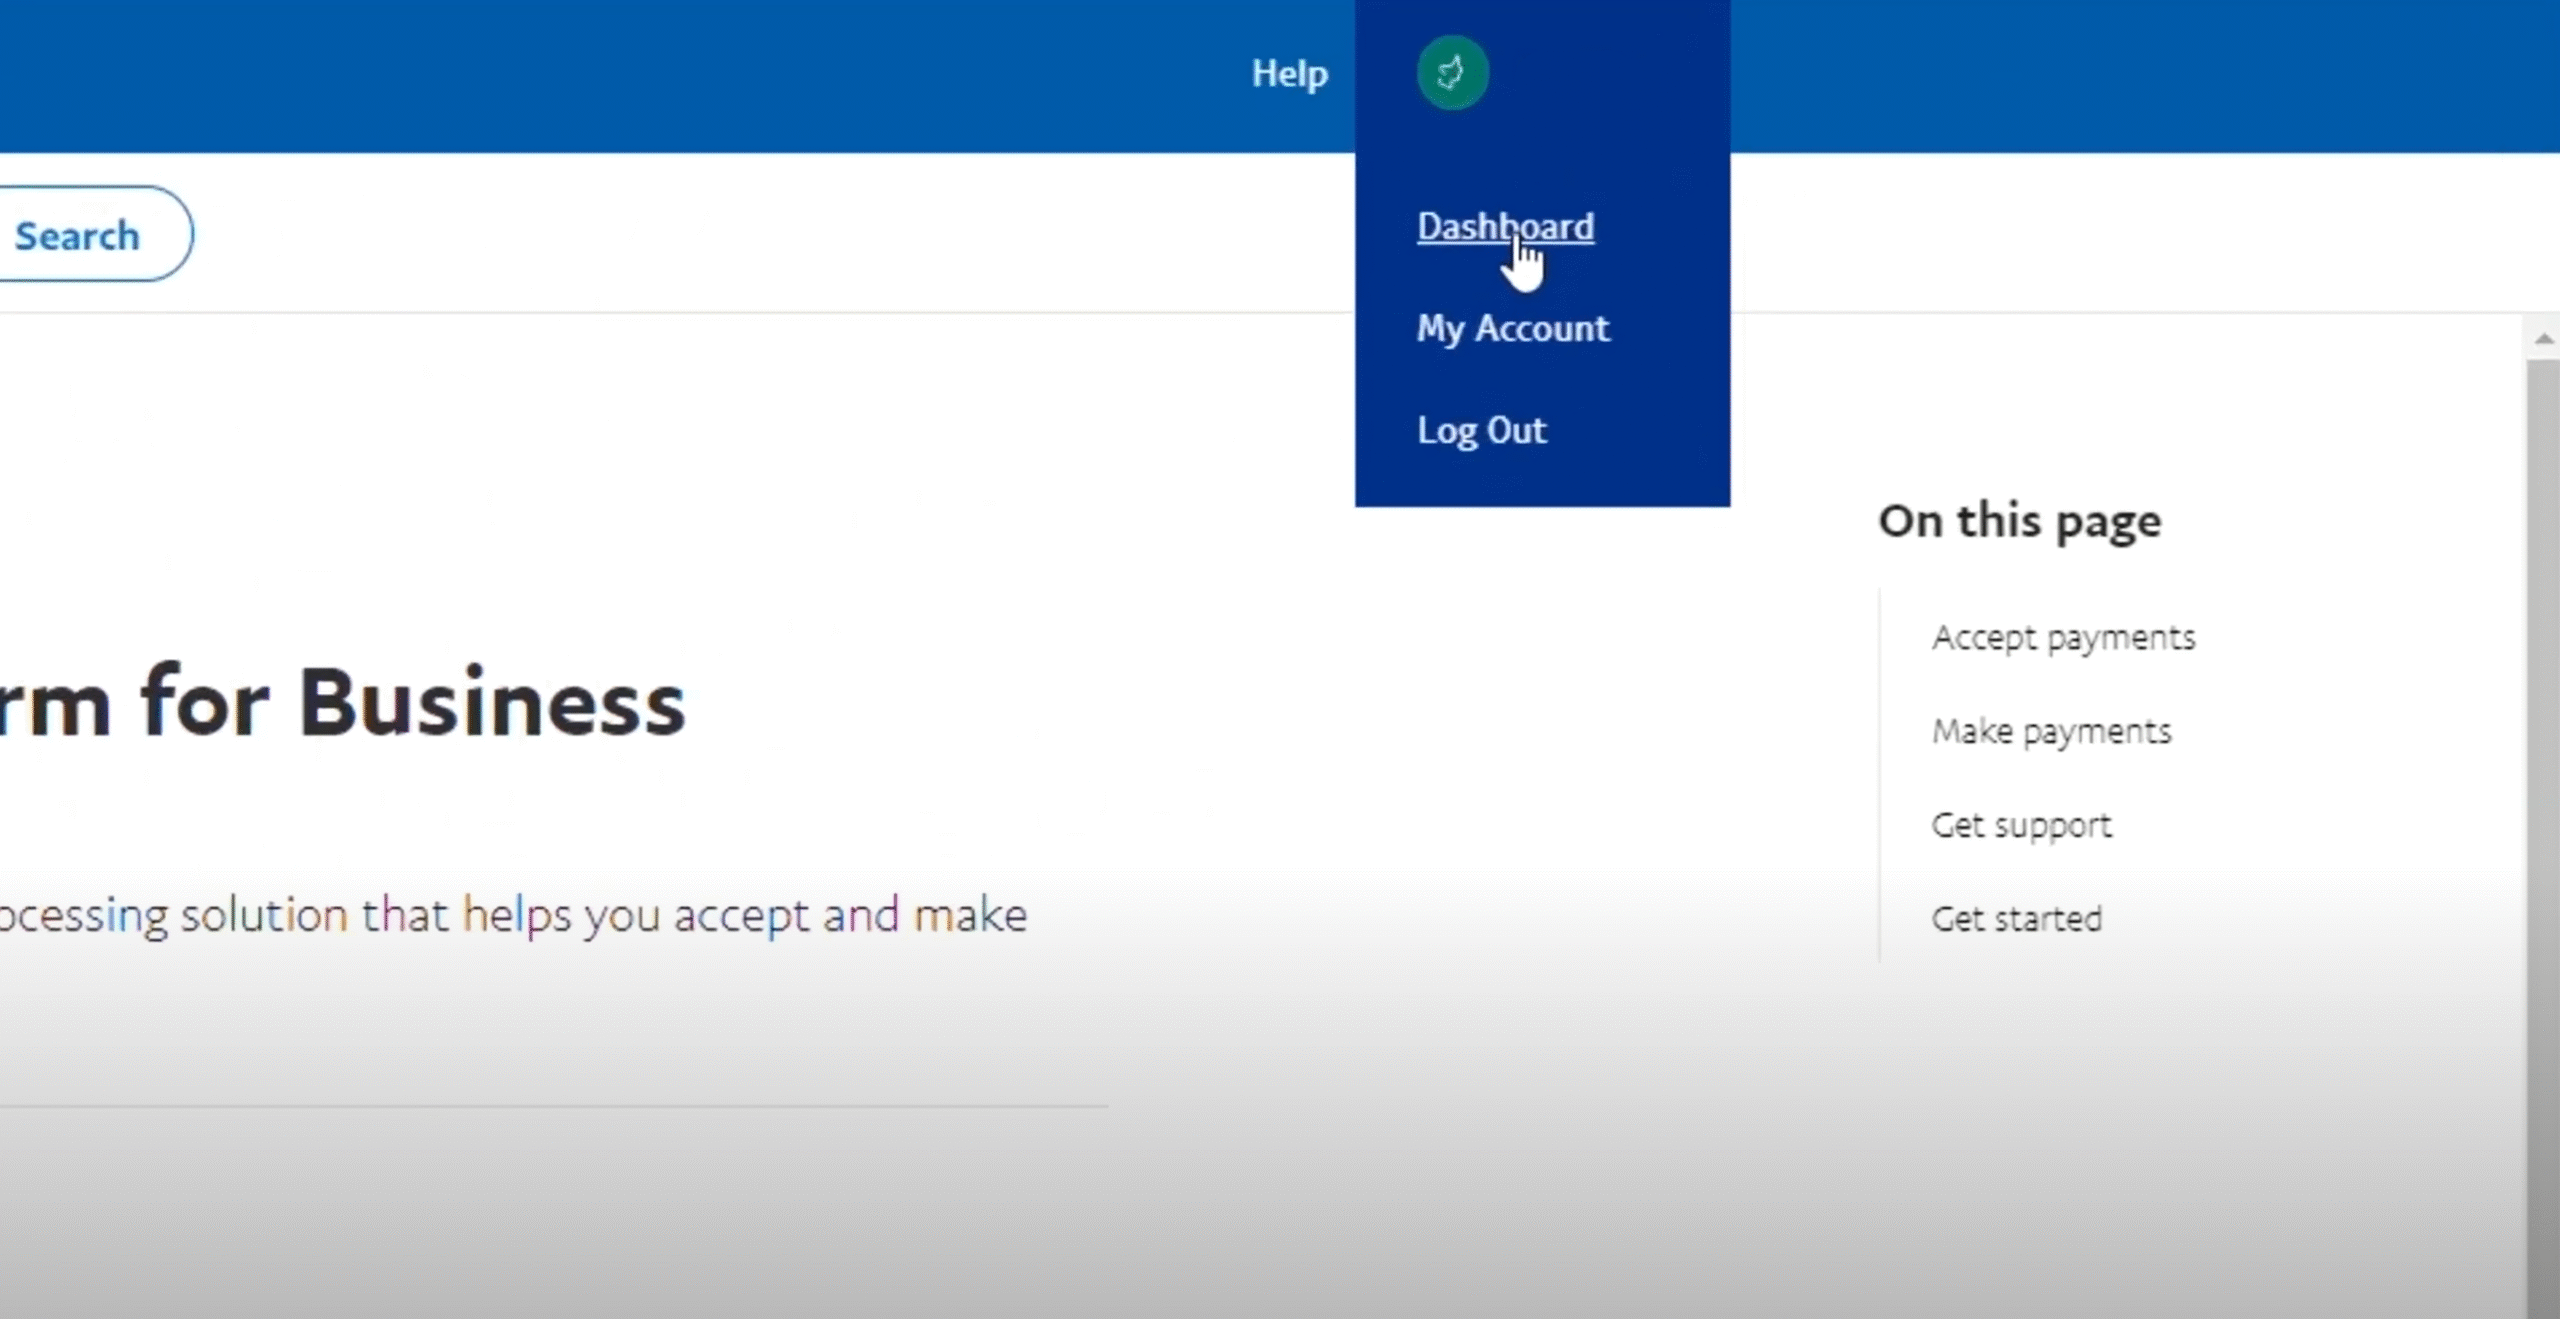
b. In the top right corner, click on [Your Name], then click on Dashboard.
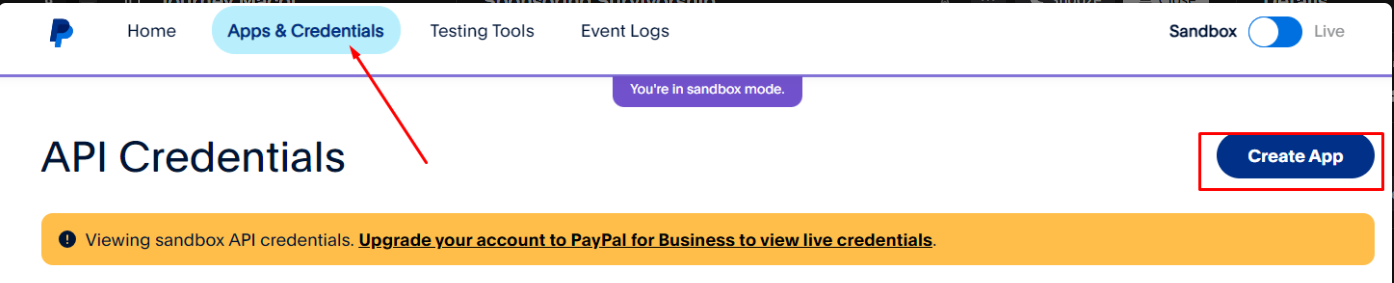
c. Next, click Apps & Credentials. Click Create App. A new window will open.
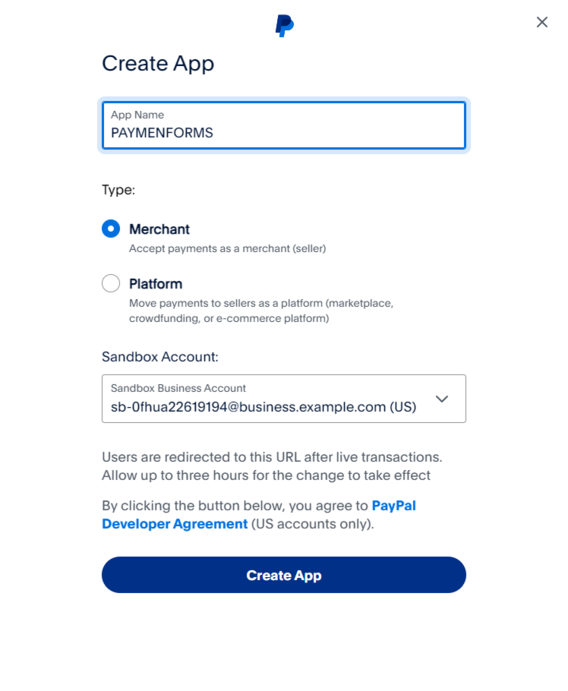
d. Fill in the details for the App Name. Select Merchant in the app Type and choose the correct Business account then save the new app by clicking the Create App button below
e. Once redirected to the Apps page, copy the Clinet ID and Secret Key. Toggle between Sandbox and Live to copy the live and test Client ID and Secret key.

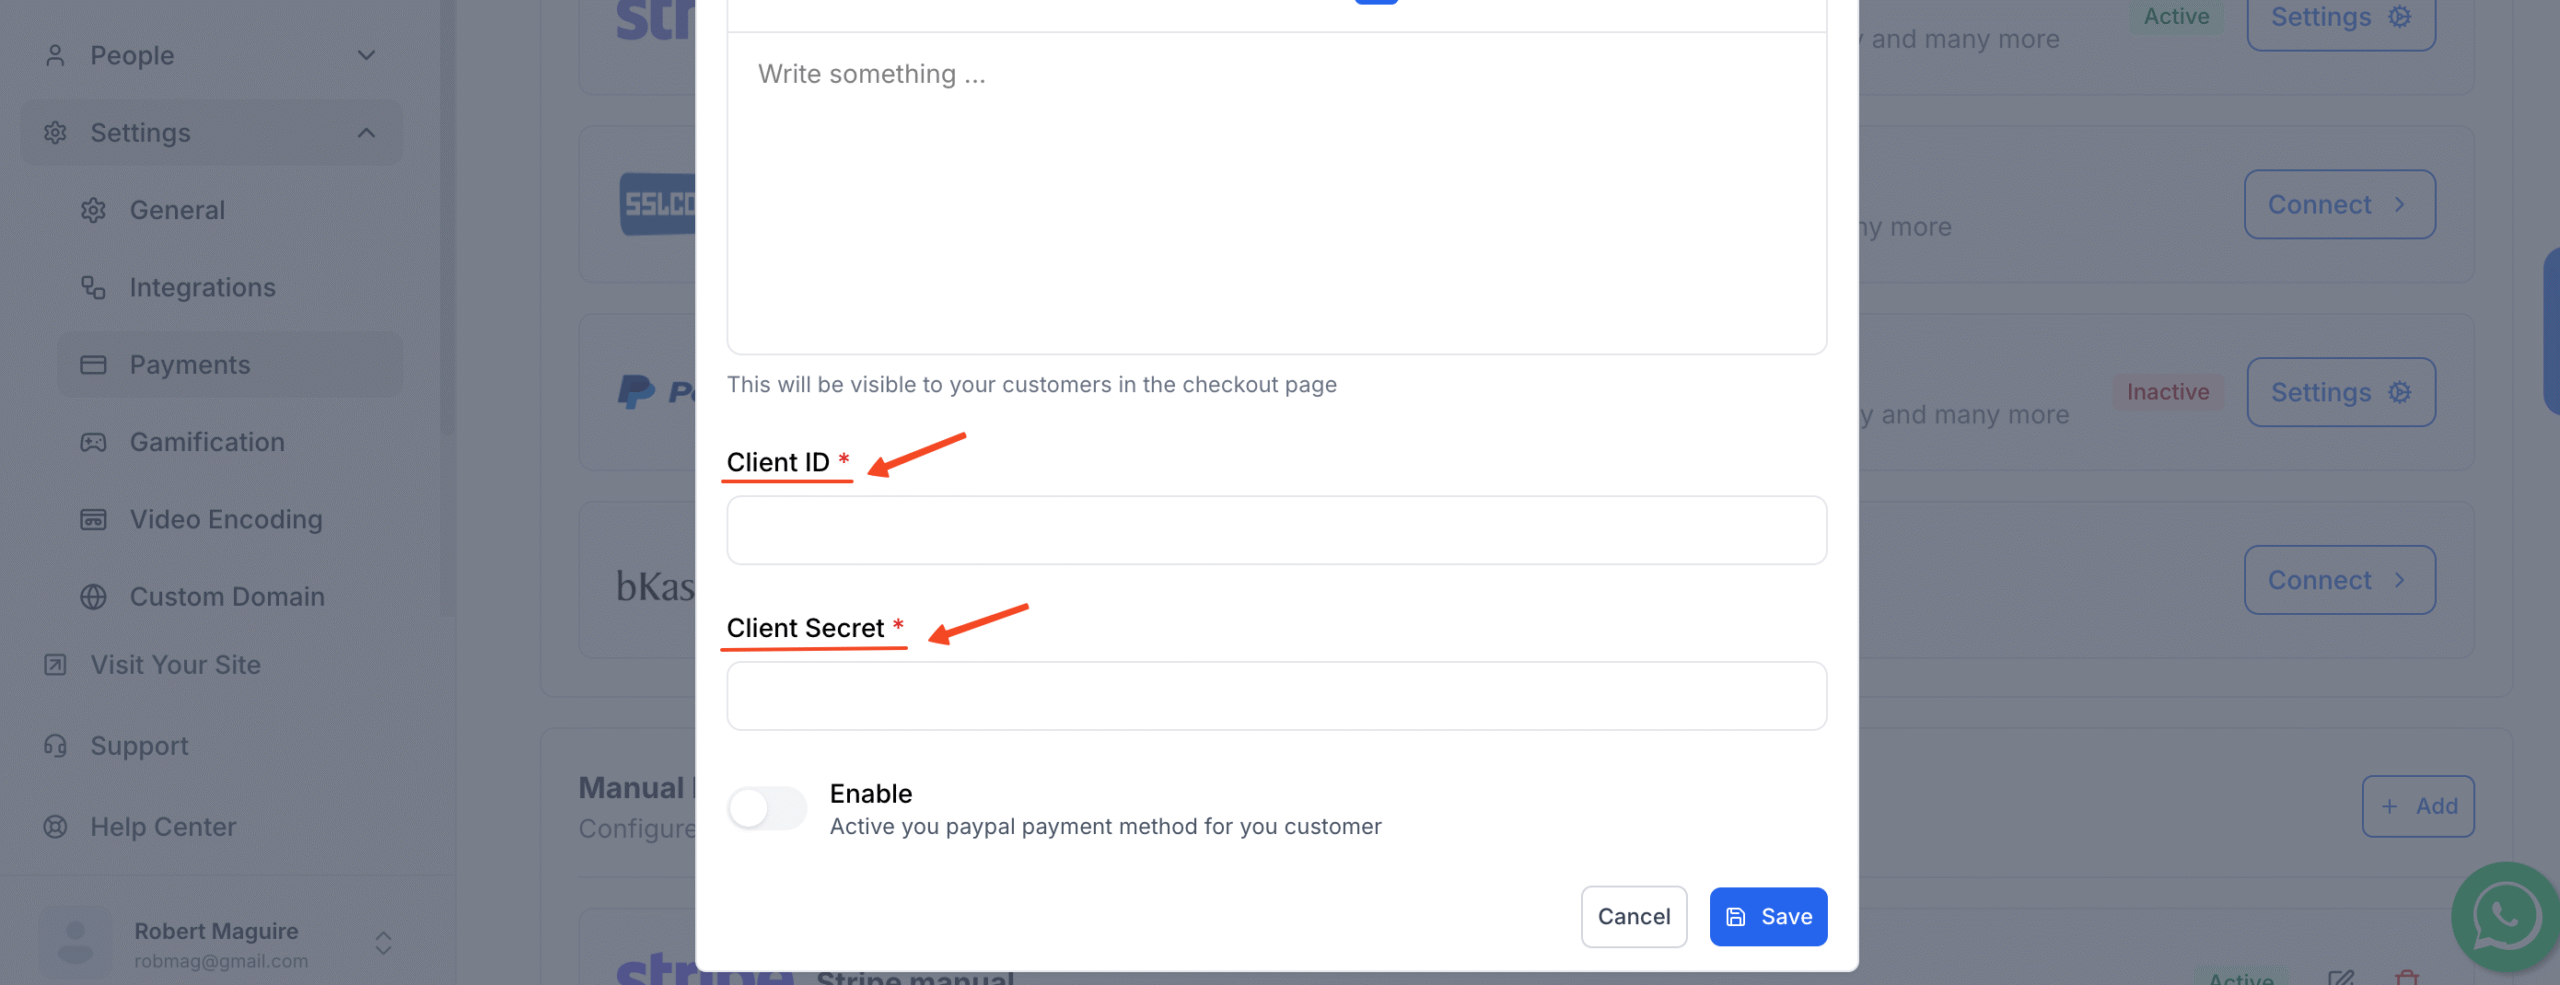
f. Paste the Client ID and Secret key and simply paste them into the respective fields in Klasio PayPal setup pop up. Finally, switch on the toggle button and hit Save.
g. PayPal setup is complete for your academy, and you’ll now see the ‘Active’ status on the PayPal integration panel
You’re now ready to receive payments using PayPal from your course website.