
Klasio’s Community feature lets you build a dedicated space where your students can discuss, share, and learn together. Instead of relying on external platforms like Facebook Groups or Discord, you can host everything right inside your academy. This keeps your students engaged, gives you full control over the experience, and makes your course business feel more complete.
This guide walks you through creating your community, setting up its details and access rules, and taking it live.
Community Limits by Plan
| Plan | Community | Communities | Members per community |
| Free | Not available | – | – |
| Starter | ✓ | 1 | 2,500 (5,000 on lifetime plans) |
| Growth | ✓ | 5 | 10,000 |
| Business | ✓ | 15 | 20,000 |
| Enterprise | ✓ | 25 | Unlimited |
How to Create a New Community
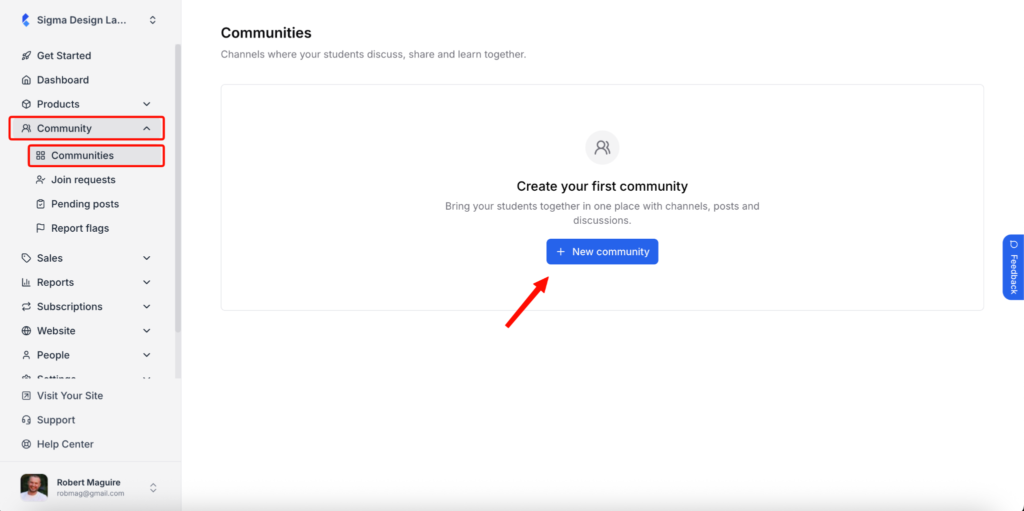
1. From the admin dashboard, click Community on the left sidebar. Then click Communities. On the Communities page, click the + New community button.
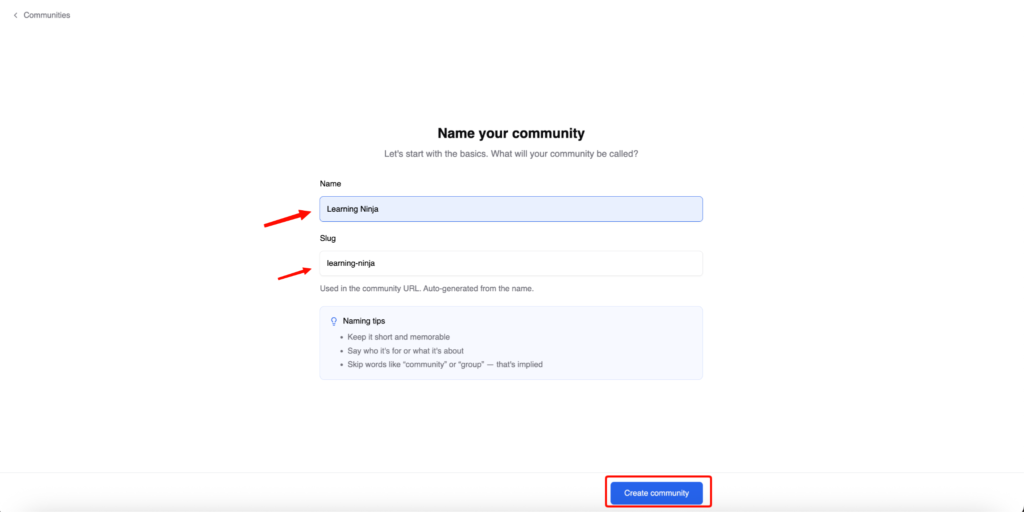
2. Name your community and use the slug that is most suitable.
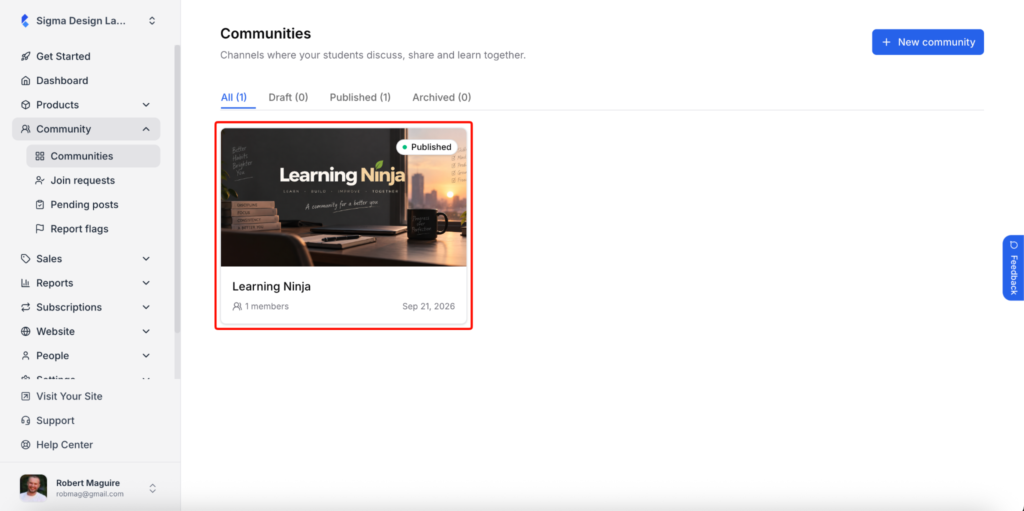
3. You’ll see it listed on the Communities page with its name, member count, and creation date.
4. Click on the community card to open it and start setting it up.
Once you’re inside, you’ll see the community dashboard with several tabs across the top: Overview, Details, Access, Channels, Members, Moderation, and Settings. Each tab controls a different part of your community.
Understanding the Community Dashboard
The Overview tab is the first thing you see when you open a community. It gives you a quick snapshot of how your community is doing.
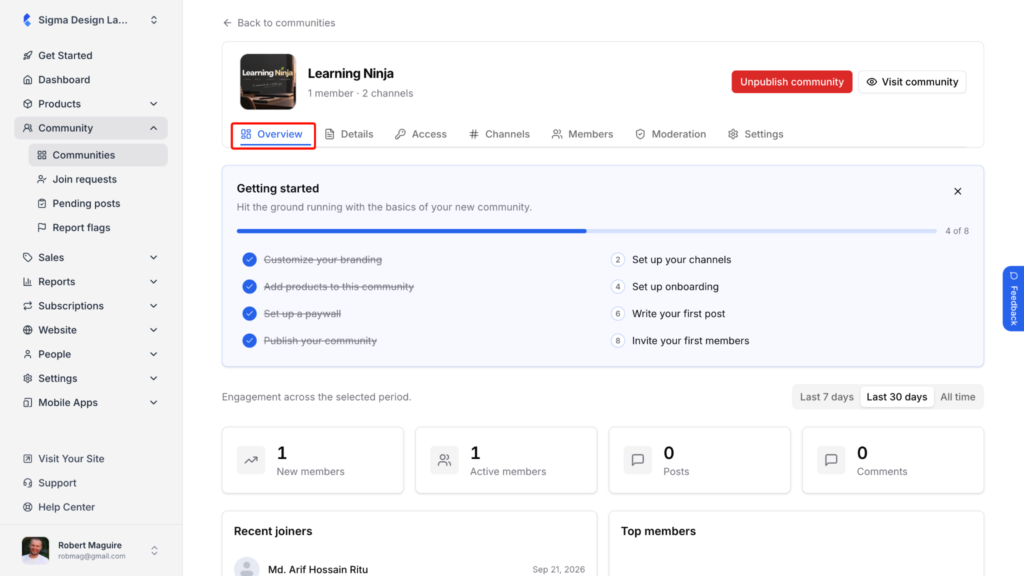
At the top, you’ll find a Getting started checklist with 8 steps to guide you through the setup process:
- Customize your branding
- Set up your channels
- Add products to this community
- Set up onboarding
- Set up a paywall
- Write your first post
- Publish your community
- Invite your first members
A progress bar tracks how many steps you’ve completed. This is a helpful way to make sure you haven’t missed anything before going live.
Below the checklist, the Engagement section shows your community stats for a selected time period (Last 7 days, Last 30 days, or All time). You can track four metrics here: New members, Active members, Posts, and Comments.
The bottom of the page shows Recent joiners and Top members, so you can quickly see who’s new and who’s most active.
How to Set Up Community Details
Click the Details tab to add your community’s basic information and branding.
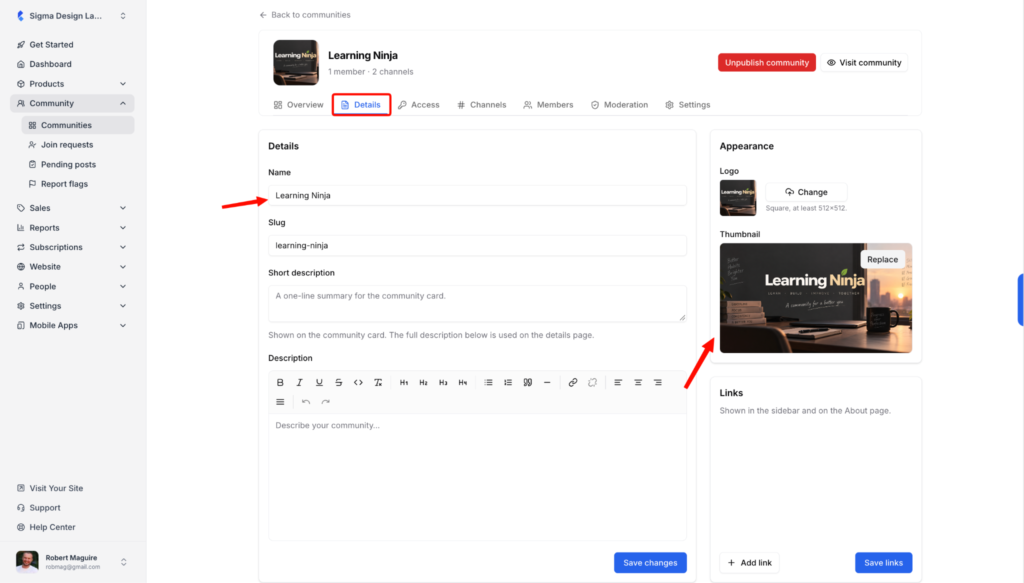
Here’s what you can configure:
Name – The name of your community. This is what your students will see.
Slug – The URL-friendly version of your community name. Klasio generates this automatically, but you can edit it if needed.
Short description – A one-line summary that appears on the community card. Keep it clear and specific so students immediately know what the community is about.
Description – A longer description shown on the community’s details page. You get a full rich text editor here with formatting options like bold, italic, headings, lists, links, and more.
On the right side, you’ll find the Appearance settings:
Logo – Upload a square image (at least 512×512 pixels) to serve as your community’s logo.
Thumbnail – Upload a rectangular image (16:9 ratio, at least 1280×720 pixels). This image appears on the community card.
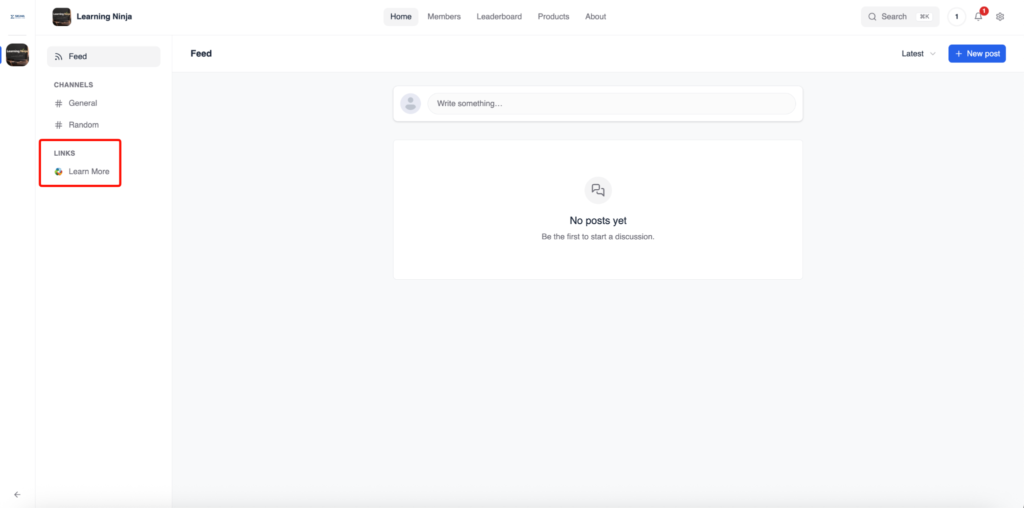
Below the appearance section, there’s a Links area where you can add external links. These links show up in the community sidebar and on the About page.
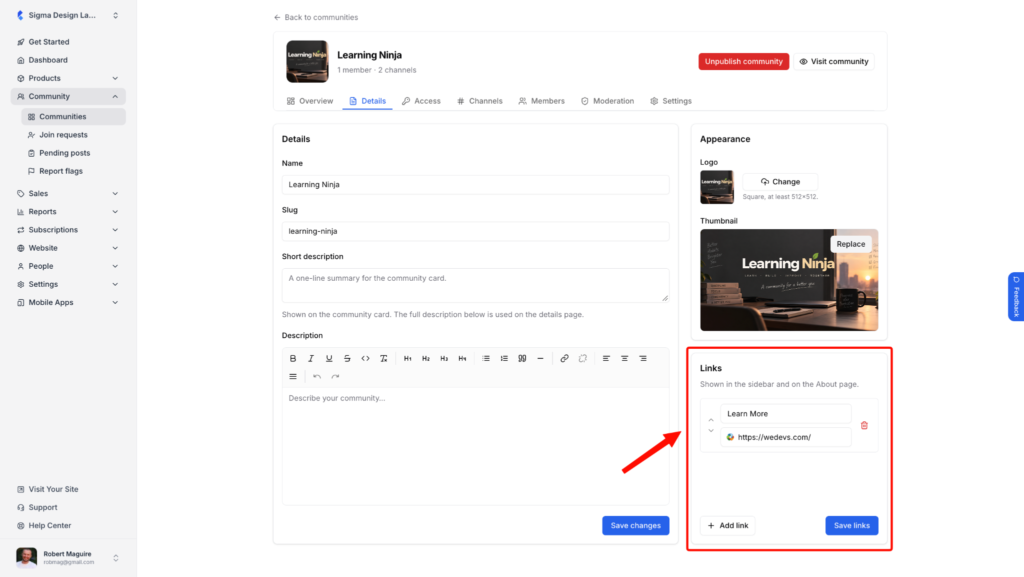
This is useful if you want to point members to your social media profiles, a resource library, or any other relevant page.
This is how your link will appear from community members side.
How to Configure Access Settings
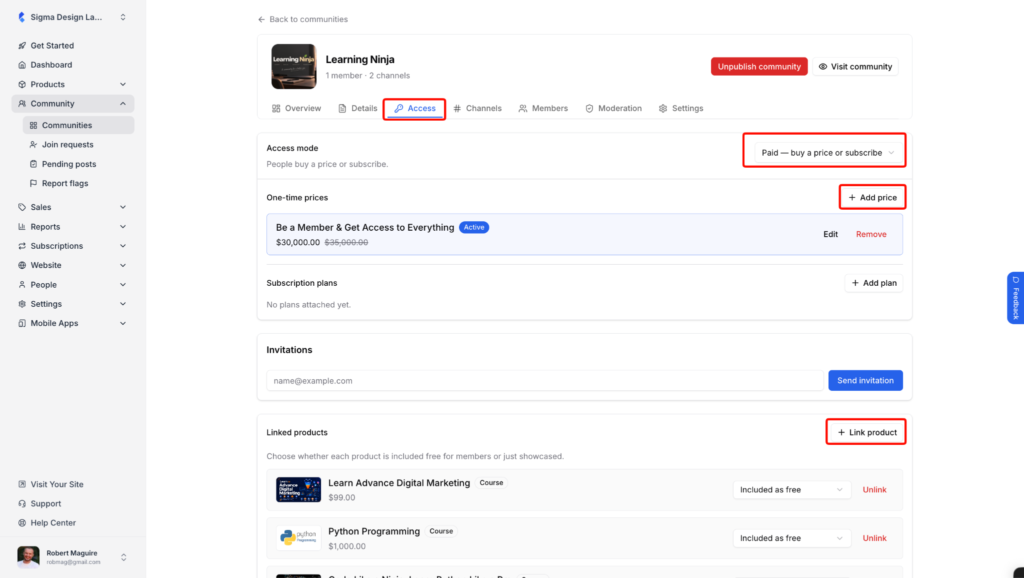
The Access tab controls who can join your community and how.
Access Mode
Click the dropdown next to Access mode to choose one of three options:
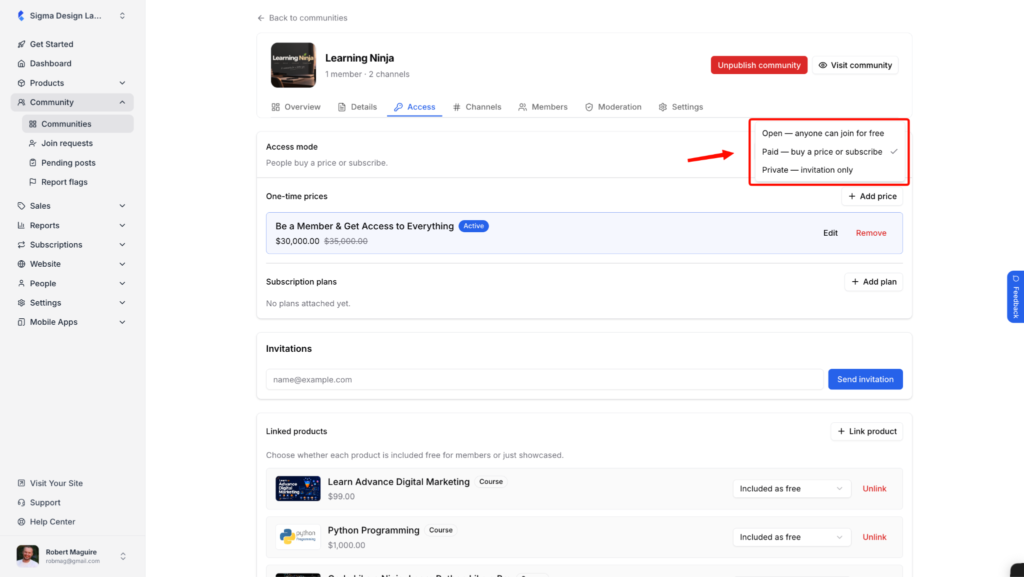
Open – Anyone can join for free. This is the default setting and works well if you want to grow your community quickly or offer it as a free bonus alongside your courses.
Paid – Choose this when your community is part of a paid offering. If you’re thinking about using a subscription model, Klasio’s subscription feature pairs well with a paid community.
Private – Only people you invite can join. This is useful for exclusive groups, beta testers, or VIP students.
Require Approval
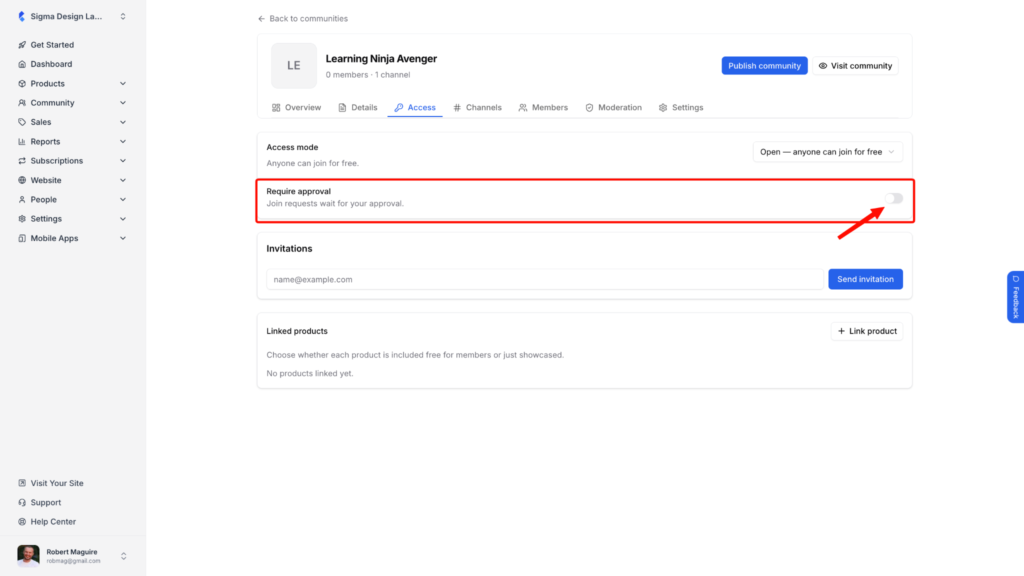
Toggle this on if you want to manually review and approve each join request before someone gets in. This gives you an extra layer of control, even with an open community.
Invitations
You can invite people directly by entering their email address and clicking Send invitation. This works for all access modes.
Linked Products
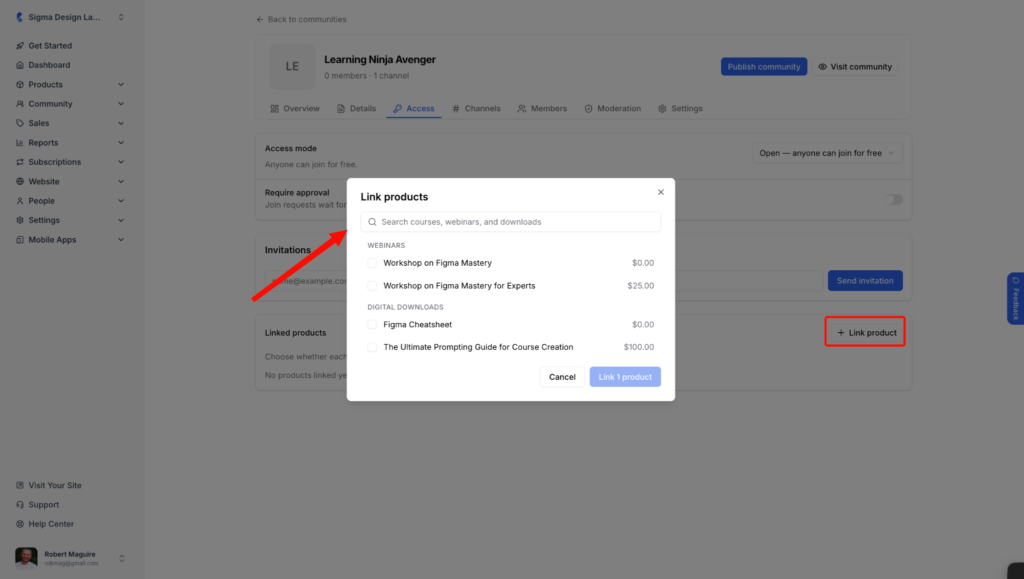
Click + Link product to connect your community to one or more Klasio products (courses, bundles, coaching, etc.). You can choose whether each product is included free for members or just showcased. This is how you tie your community to your course offerings.
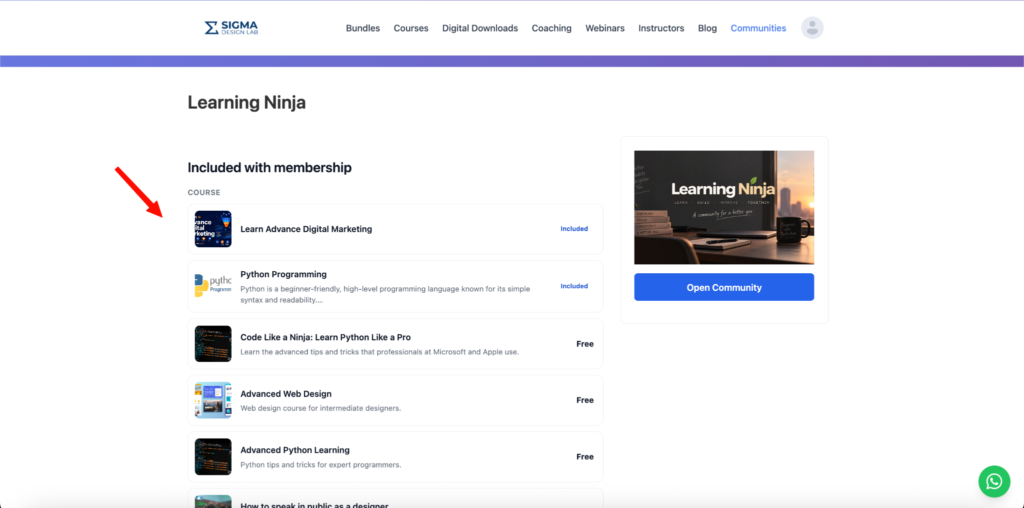
It also helps with creating a more complete learning experience, which is something many course creators overlook when building their courses.
How to Add Your Community to the Website Navigation
After setting up your community, you’ll want to make it visible on your website so students can find it.
- From the admin dashboard, go to Website on the left sidebar, then click Navigation.
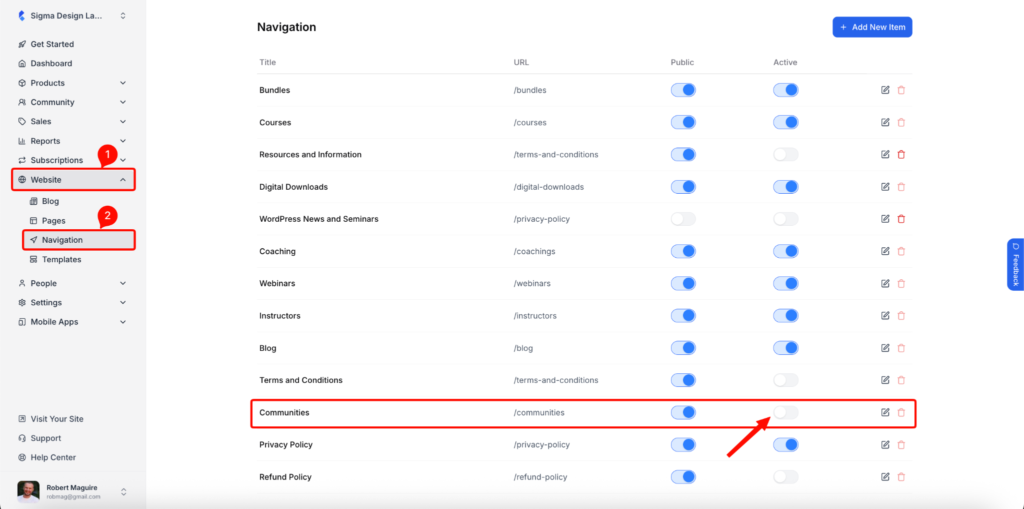
- Find Communities in the list of navigation items. It’s available as a system default menu item with the URL /communities.
- Enable the Public toggle to make it visible to everyone who visits your site. Enable the Active toggle to display it in the navigation menu.
That’s it.
Your community page will now appear in your website’s navigation, and students can browse and join from there.
How to Publish Your Community
Once you’ve finished setting up your details, access rules, channels, and moderation preferences, it’s time to go live.
- Go back to the Overview tab of your community.
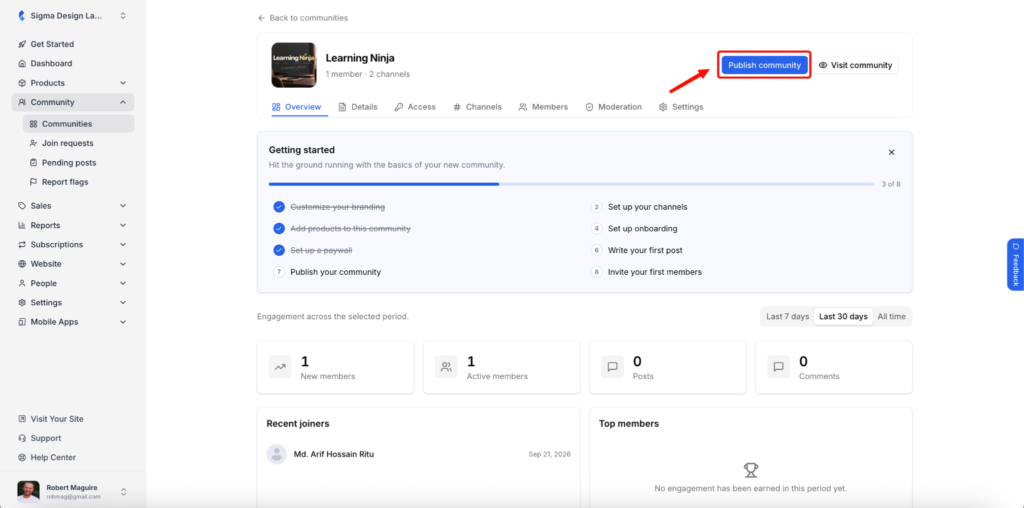
- Click the Publish community button in the top-right corner.
Your community will move from Draft to Published status. Students can now find it on your site (if you’ve added it to the navigation) and start joining based on your access settings.
You can also click Visit community to see what it looks like from a member’s perspective.
What Your Published Community Looks Like
Once your community is live, here’s what you (and your members) will see when you visit it.
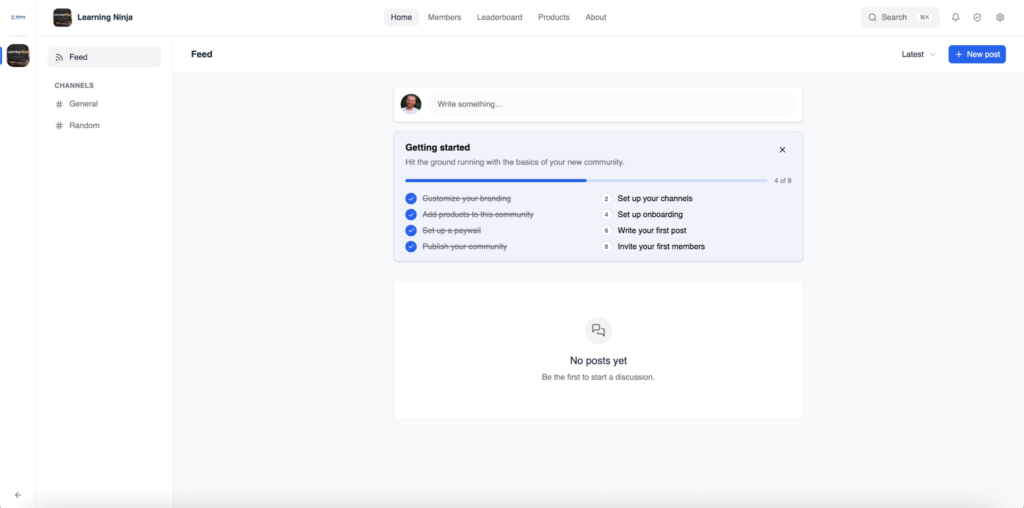
At the top, you’ll see your community name, logo, and a navigation bar with Home, Members, Leaderboard, Products, and About tabs. There’s also a Search bar so members can quickly find posts or topics.
On the left sidebar, you’ll see the Feed and all your Channels listed below it (in this example, General and Random). Members can click on any channel to filter the feed to just that topic.
The main content area shows the community feed. At the top, there’s a “Write something…” composer where members can create new posts. You can also click the + New post button in the top-right corner. The feed can be sorted by Latest using the dropdown.
If you’re visiting the community for the first time, you’ll see the Getting started checklist here too. It tracks your setup progress (like customizing branding, adding products, setting up your paywall, and publishing). As you complete each step, a checkmark appears next to it.
When the feed is empty, members will see a “No posts yet” message with a prompt to start a discussion. As the community owner, it’s a good idea to write the first post yourself. Welcome your members, explain what the community is for, and set the tone for the kind of conversations you want to see.
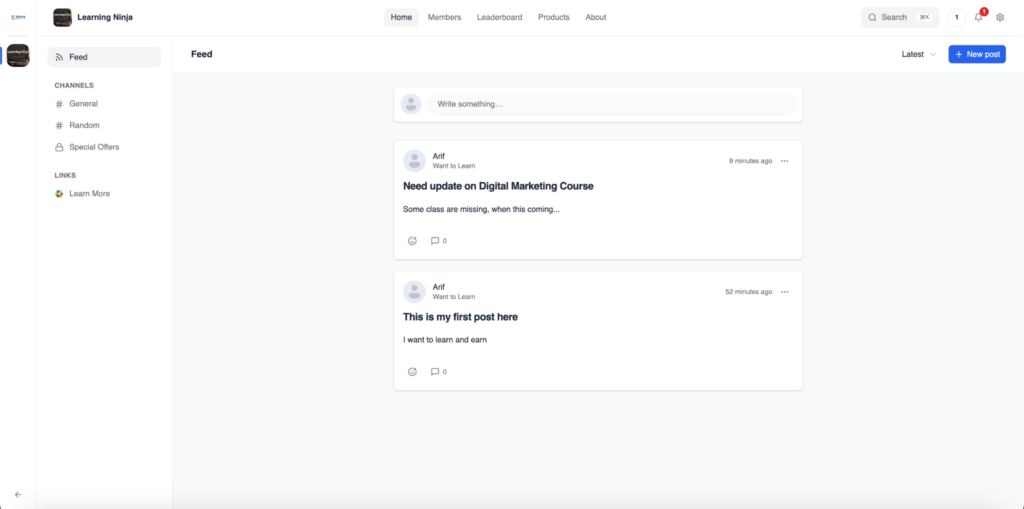
If you’re building a course business from the ground up, adding a community early gives your students a reason to stay connected even after they finish a course. It also creates a place to announce new content, gather feedback, and build the kind of engagement that keeps people coming back.