Creating a course from scratch can feel overwhelming, especially when you’re staring at a blank page. That’s where Klasio’s AI-assisted course builder can help.
It gives you a strong starting point by auto-generating a course structure based on your input. This saves you time and helps you focus on your expertise.
Here’s how to do it:
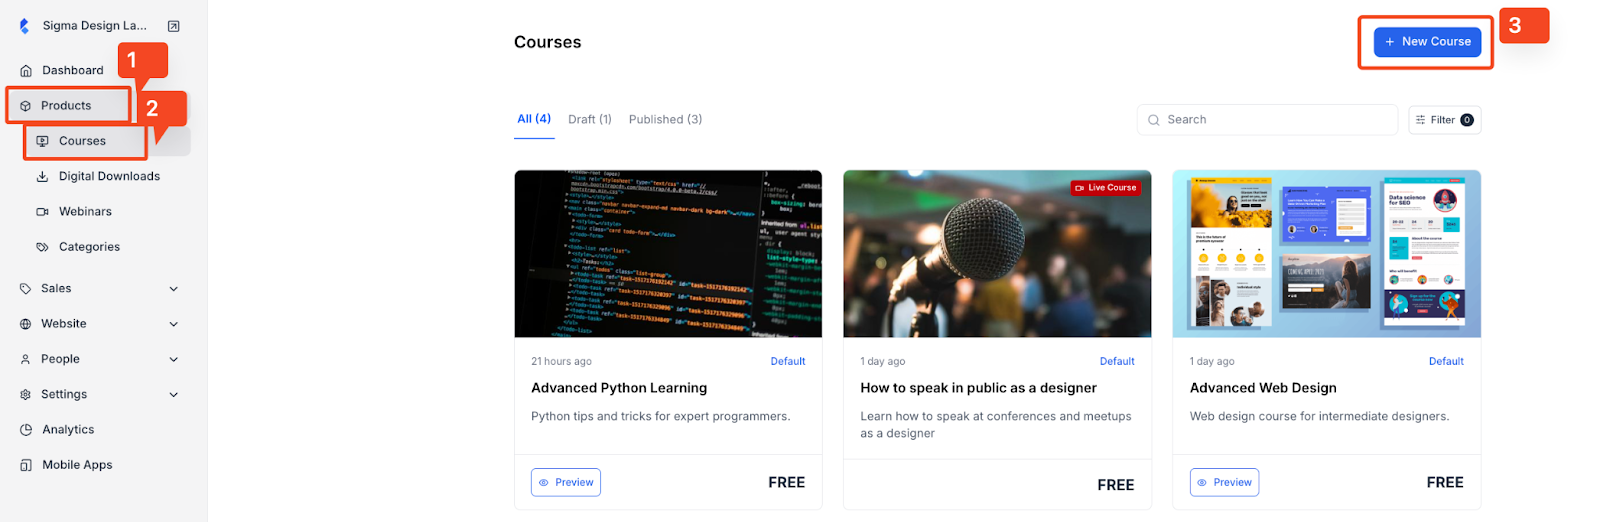
1. Log into your admin dashboard and head over to Products → Courses → New Course. This is where you’ll kick off your course creation.
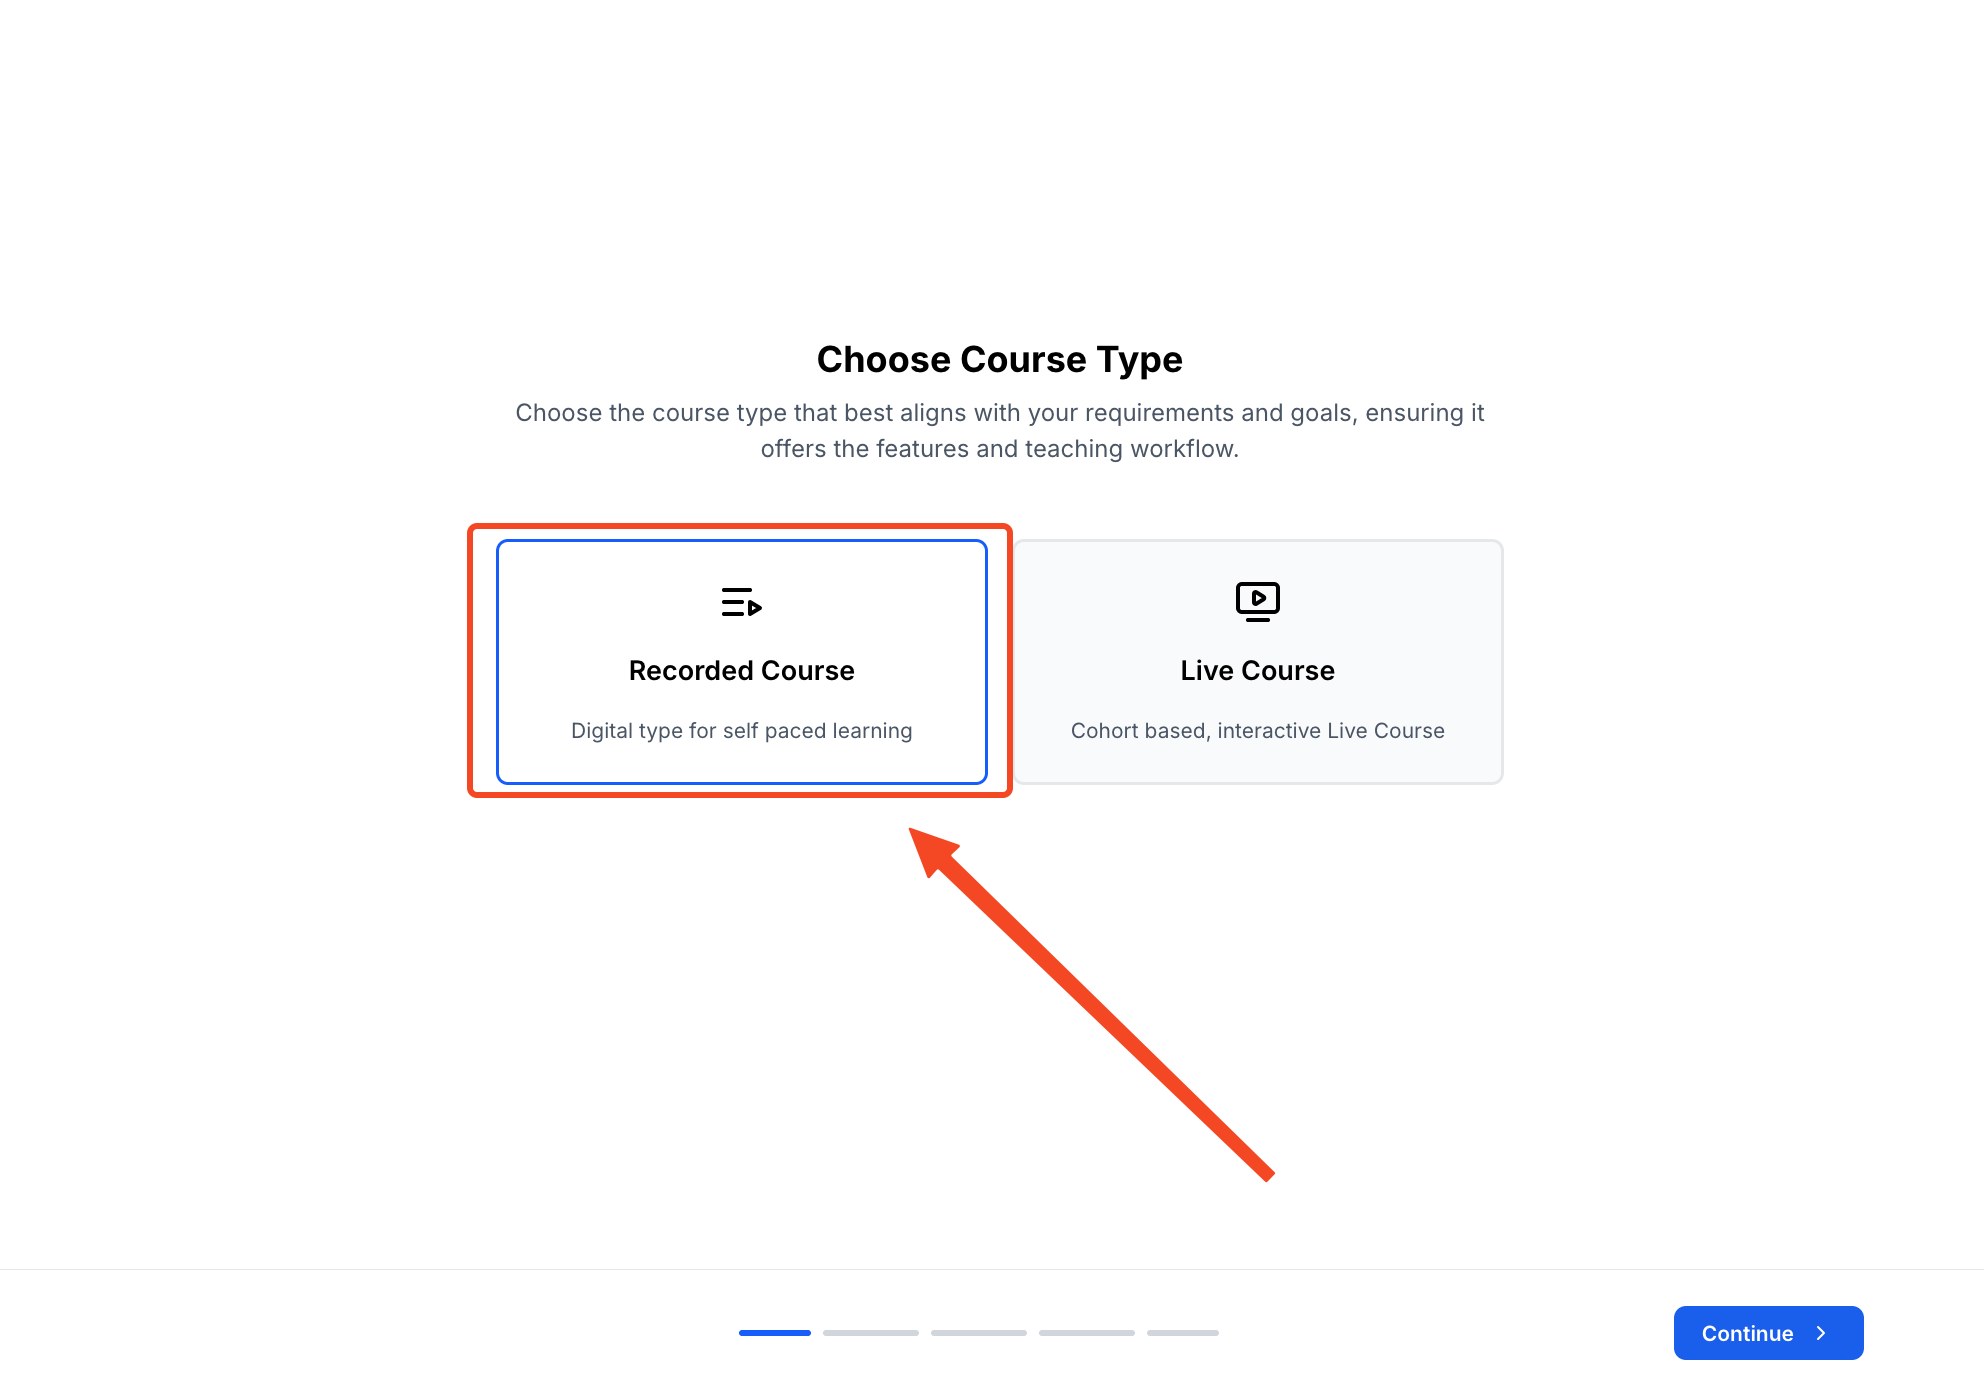
2. Select Recorded Course, then hit Continue.
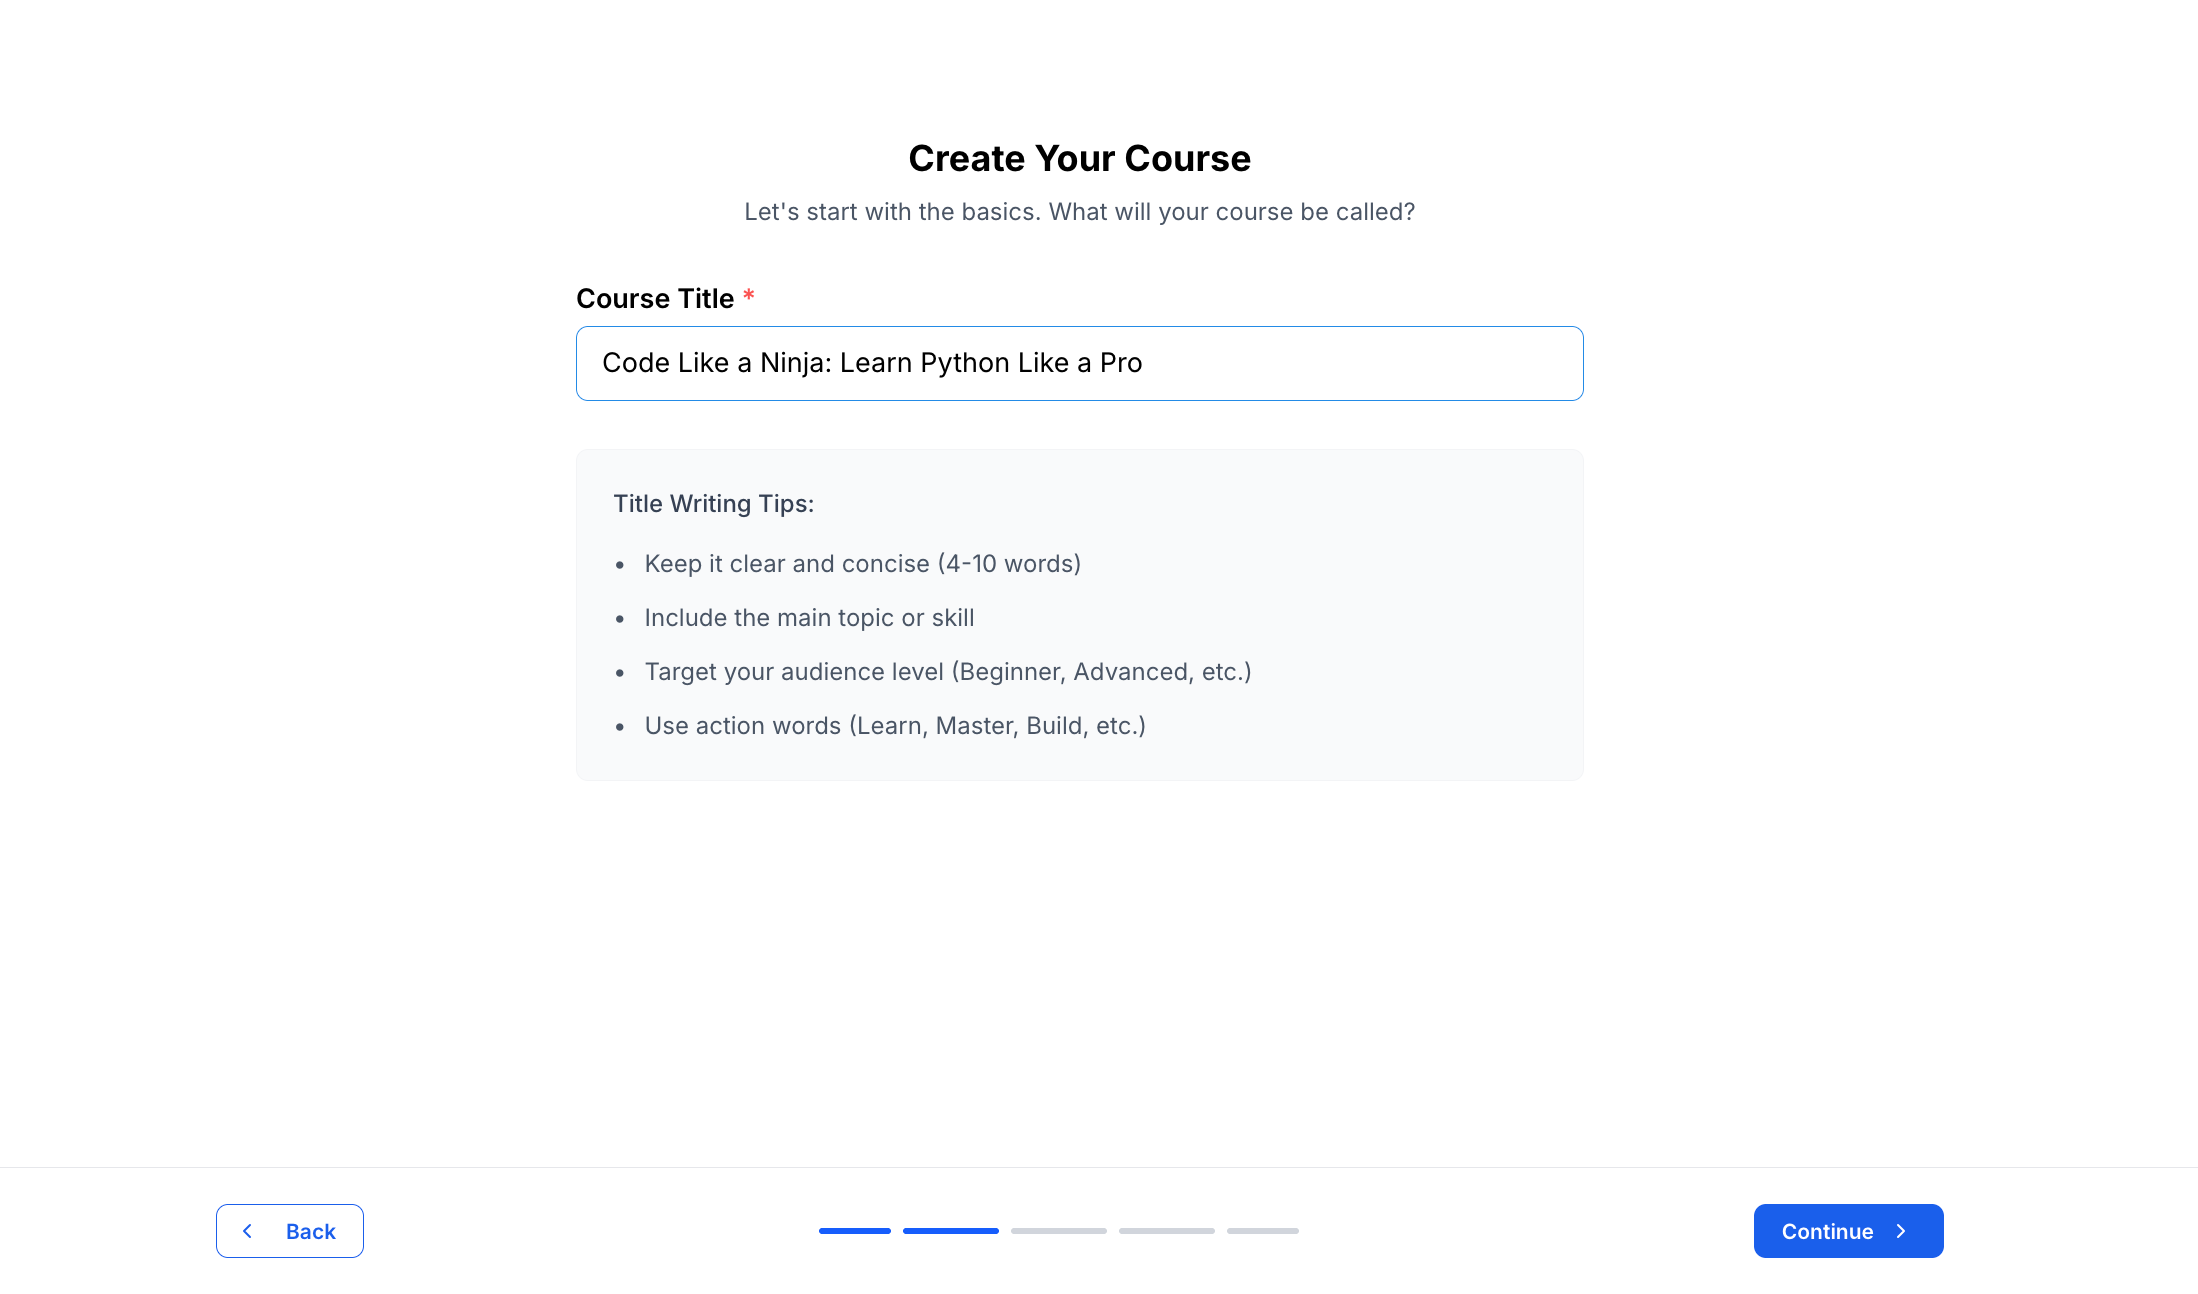
3. In the next step, you get to name your course.
Tip: While naming your course, remember to keep it outcome-focused. Also, make sure to keep it clear, specific, and simple. If you’re feeling creative, you can add a funny or transformative word to keep the title memorable.
For example, instead of naming your course, “Advanced Python Learning”, you can use something like “Code Like a Ninja: Learn Python Like a Pro.”
When you’re done naming your course, click on the continue button.
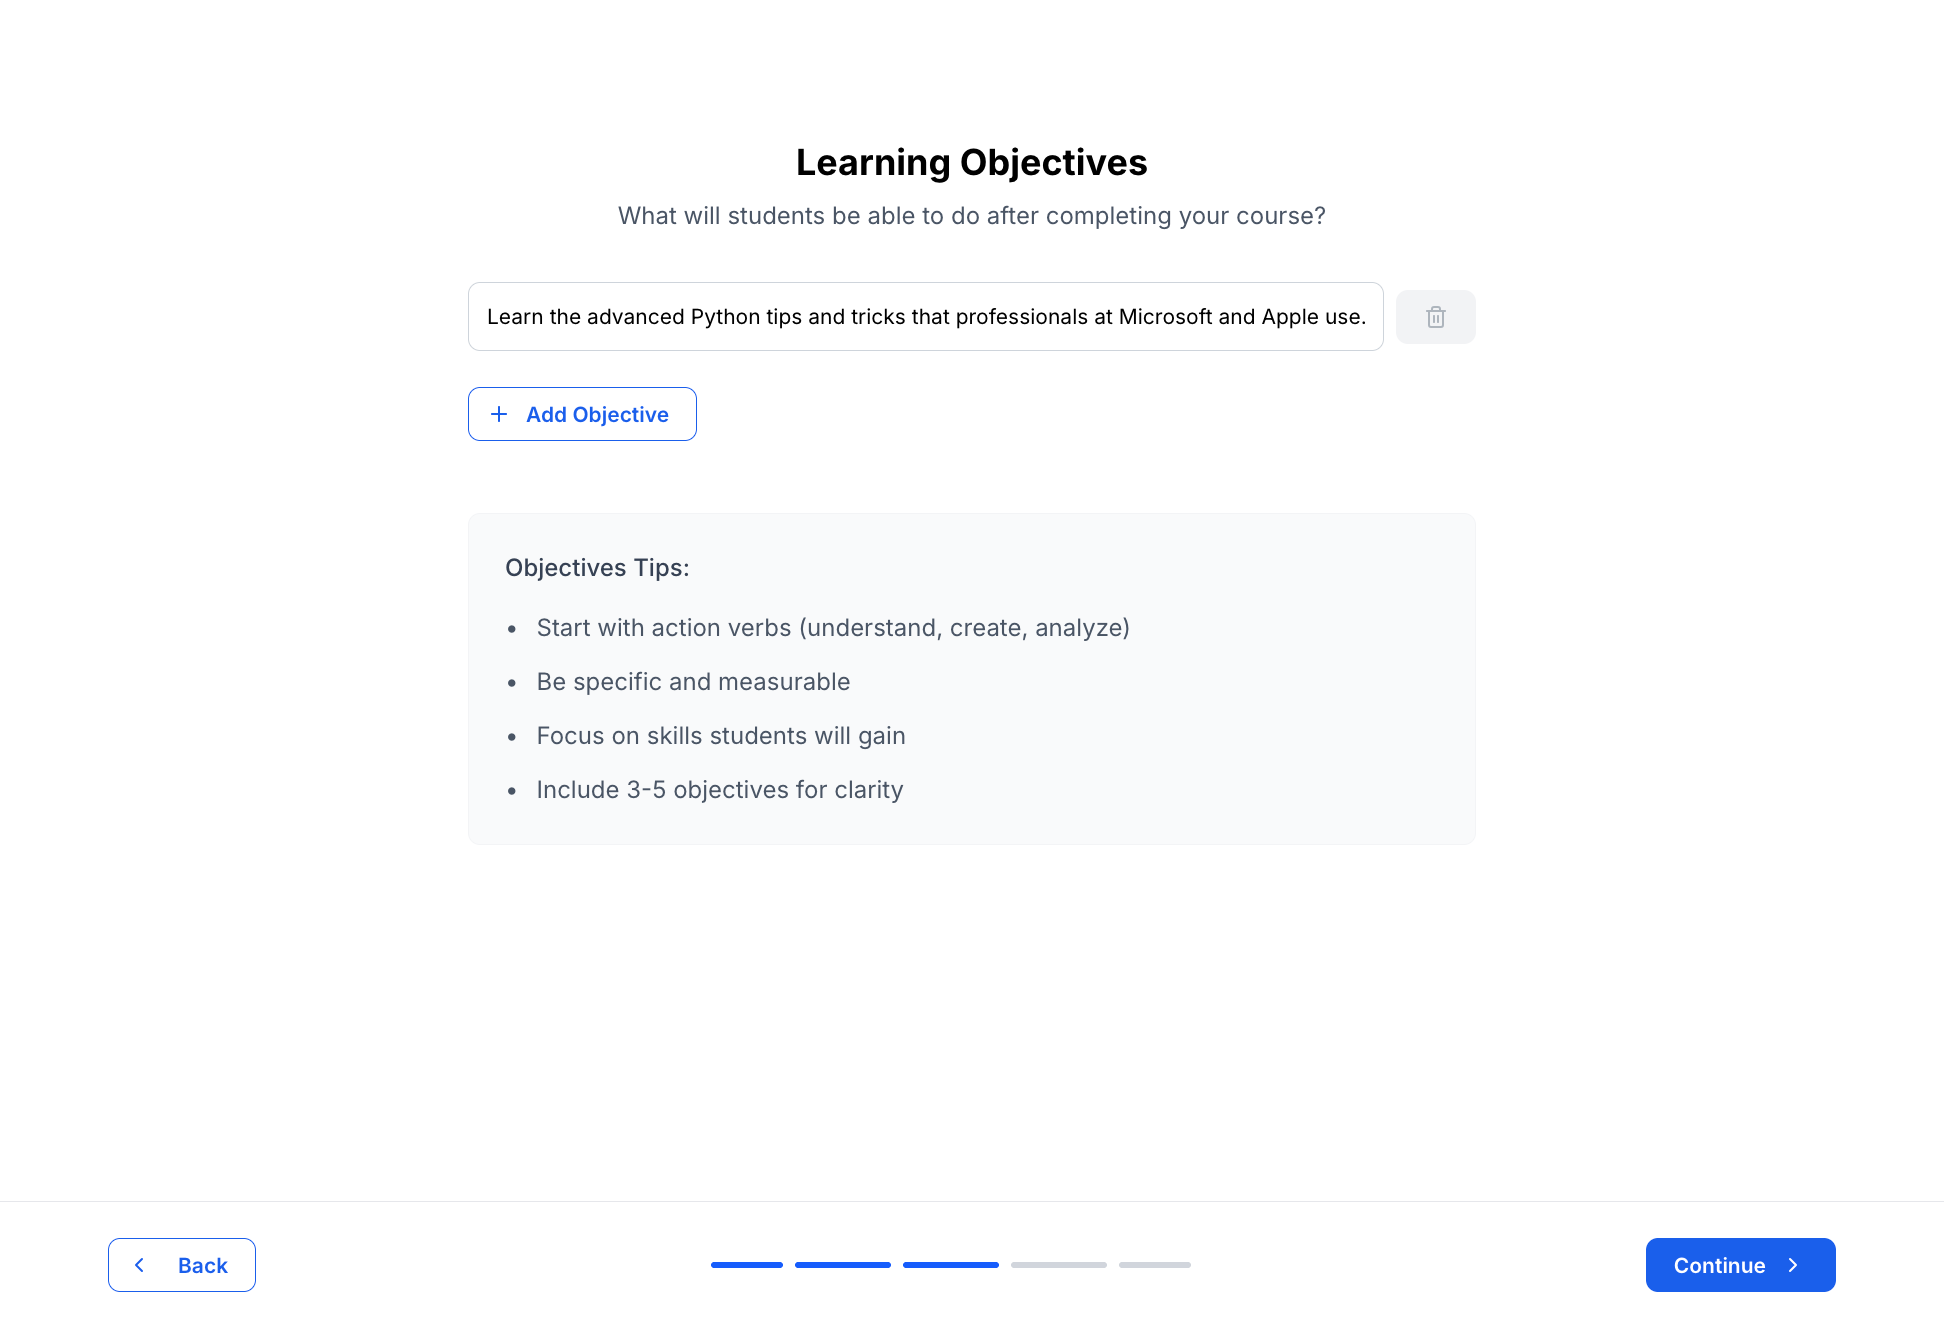
4. You’ll then be asked to add some learning objectives for your students. These learning objectives will help your students understand what they will learn from this course. You will need to add at least one learning objective before moving on to the next step. Also, if you want to add more than one objective, you can do so by clicking on the “Add Objective” button.
You can add as many learning objectives as you want. However, we recommend adding 3-5 so your students get a clear understanding of your course.
Similar to naming your course, the goal is to keep the objectives simple, clear, and specific. For example, instead of saying “Learn Python”, you could write “Learn the advanced Python tips and tricks that professionals at Microsoft and Apple use.”
Once you are done adding the objectives, click on the “Continue” button to move on.
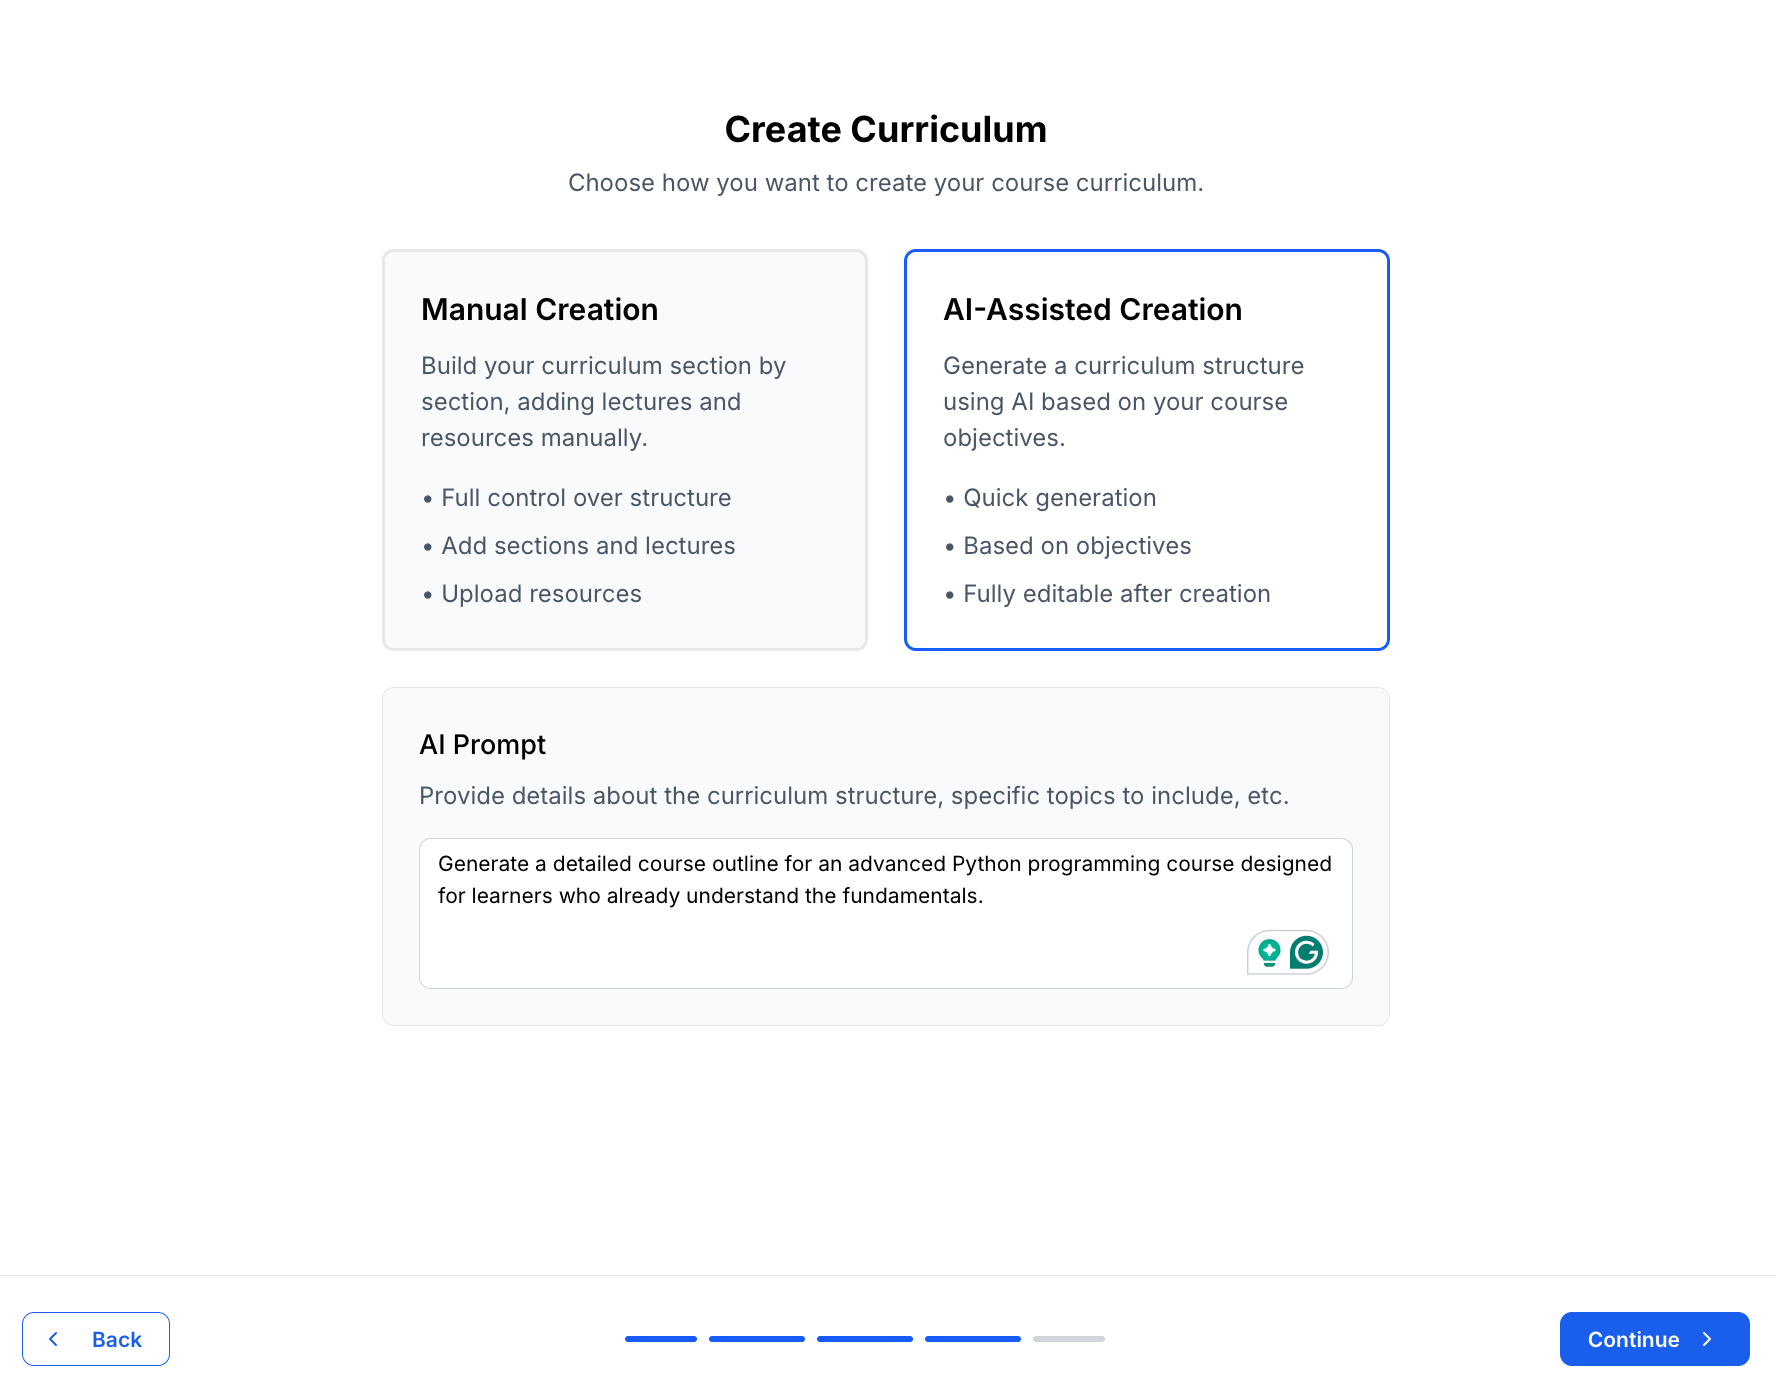
5. Next up, we will create the curriculum using AI. You will see two options: “Manual Creation” and “AI-Assisted Creation.” Since we will be using AI, choose “AI-Assisted Creation.”
Once you choose it, a field for prompts will appear. Write the prompt for generating your course outline.
While writing the prompt, make sure to give the AI enough context and specify exactly what you want. For example, instead of prompting “generate an advanced python course outline” you can write “Generate a detailed course outline for an advanced Python programming course designed for learners who already understand the fundamentals.”
When you’re ready with the prompt, click on the “Create” button.
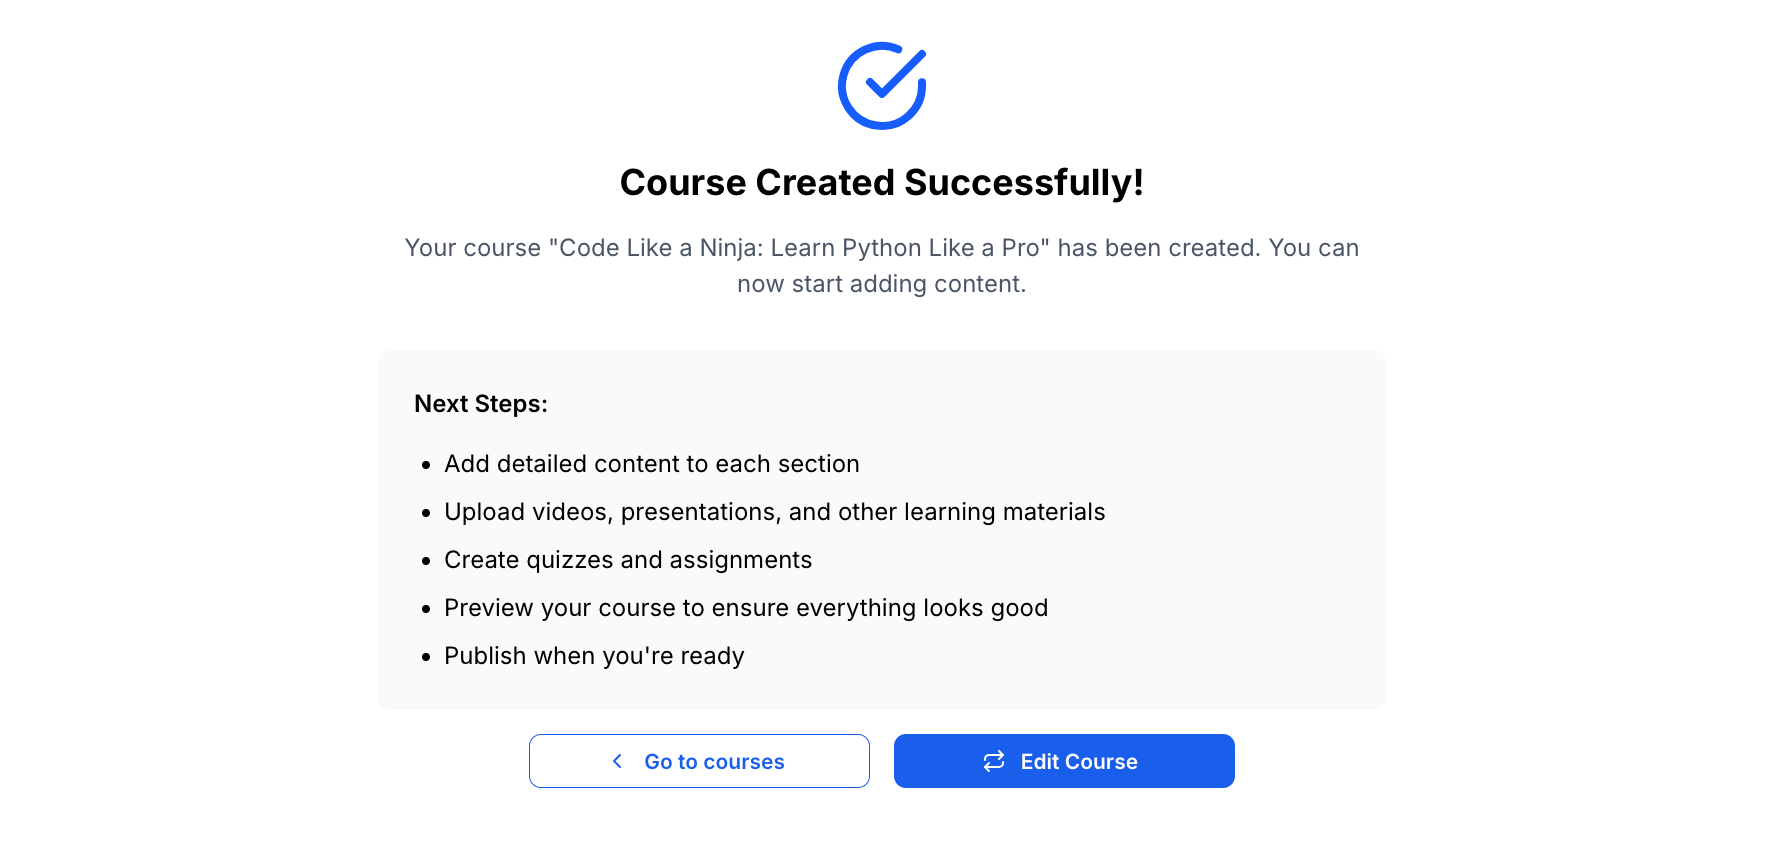
6. After submitting your prompts, Klasio’s AI will take a moment to generate a full course outline — chapters, lessons, and all. It only takes a few seconds. Once the AI finishes generating the outline, you will see this success message. To see what the AI has generated for you, click on the “Edit Courses” button.
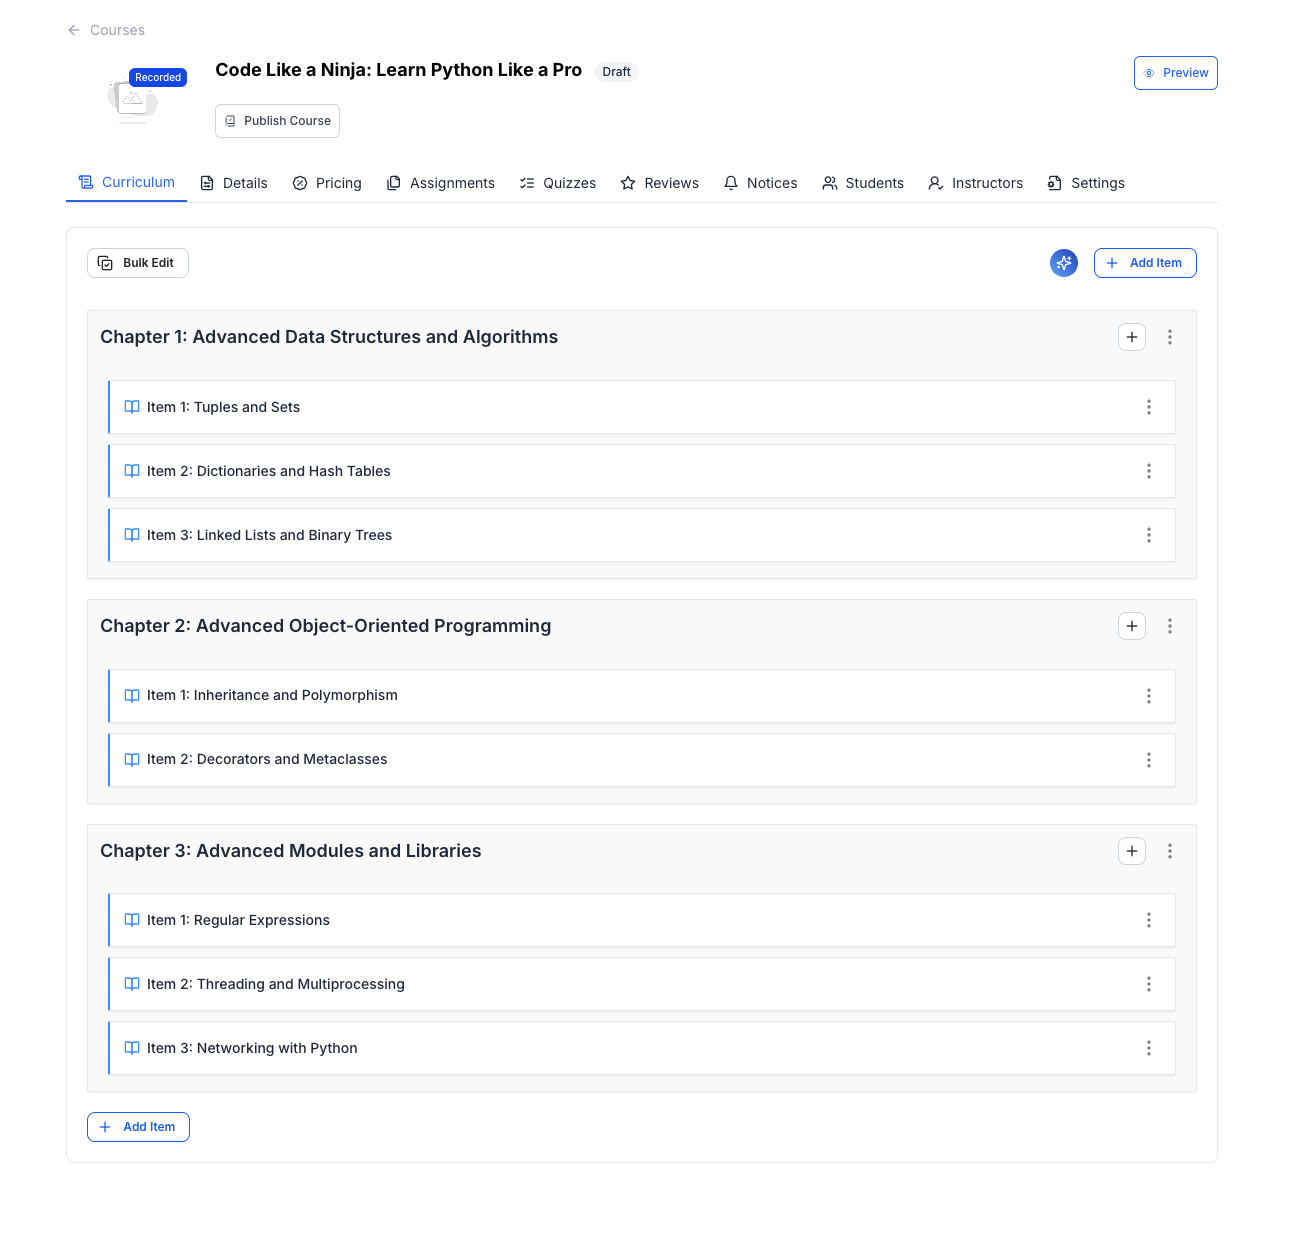
7. When you click on “Edit Course”, you will be taken to the course editor, where you can see the chapters and lessons that have been generated for you. Keep in mind that these are only outlines; there is no lesson content inside these lessons. If you need, you can add more lessons and chapters to your course.
This is how you can generate a course outline with Klasio’s AI.