In Klasio, you can create categories to sort your products. In this documentation, we will walk you through how to create a product category in Klasio. These categories can be used across all of your products.
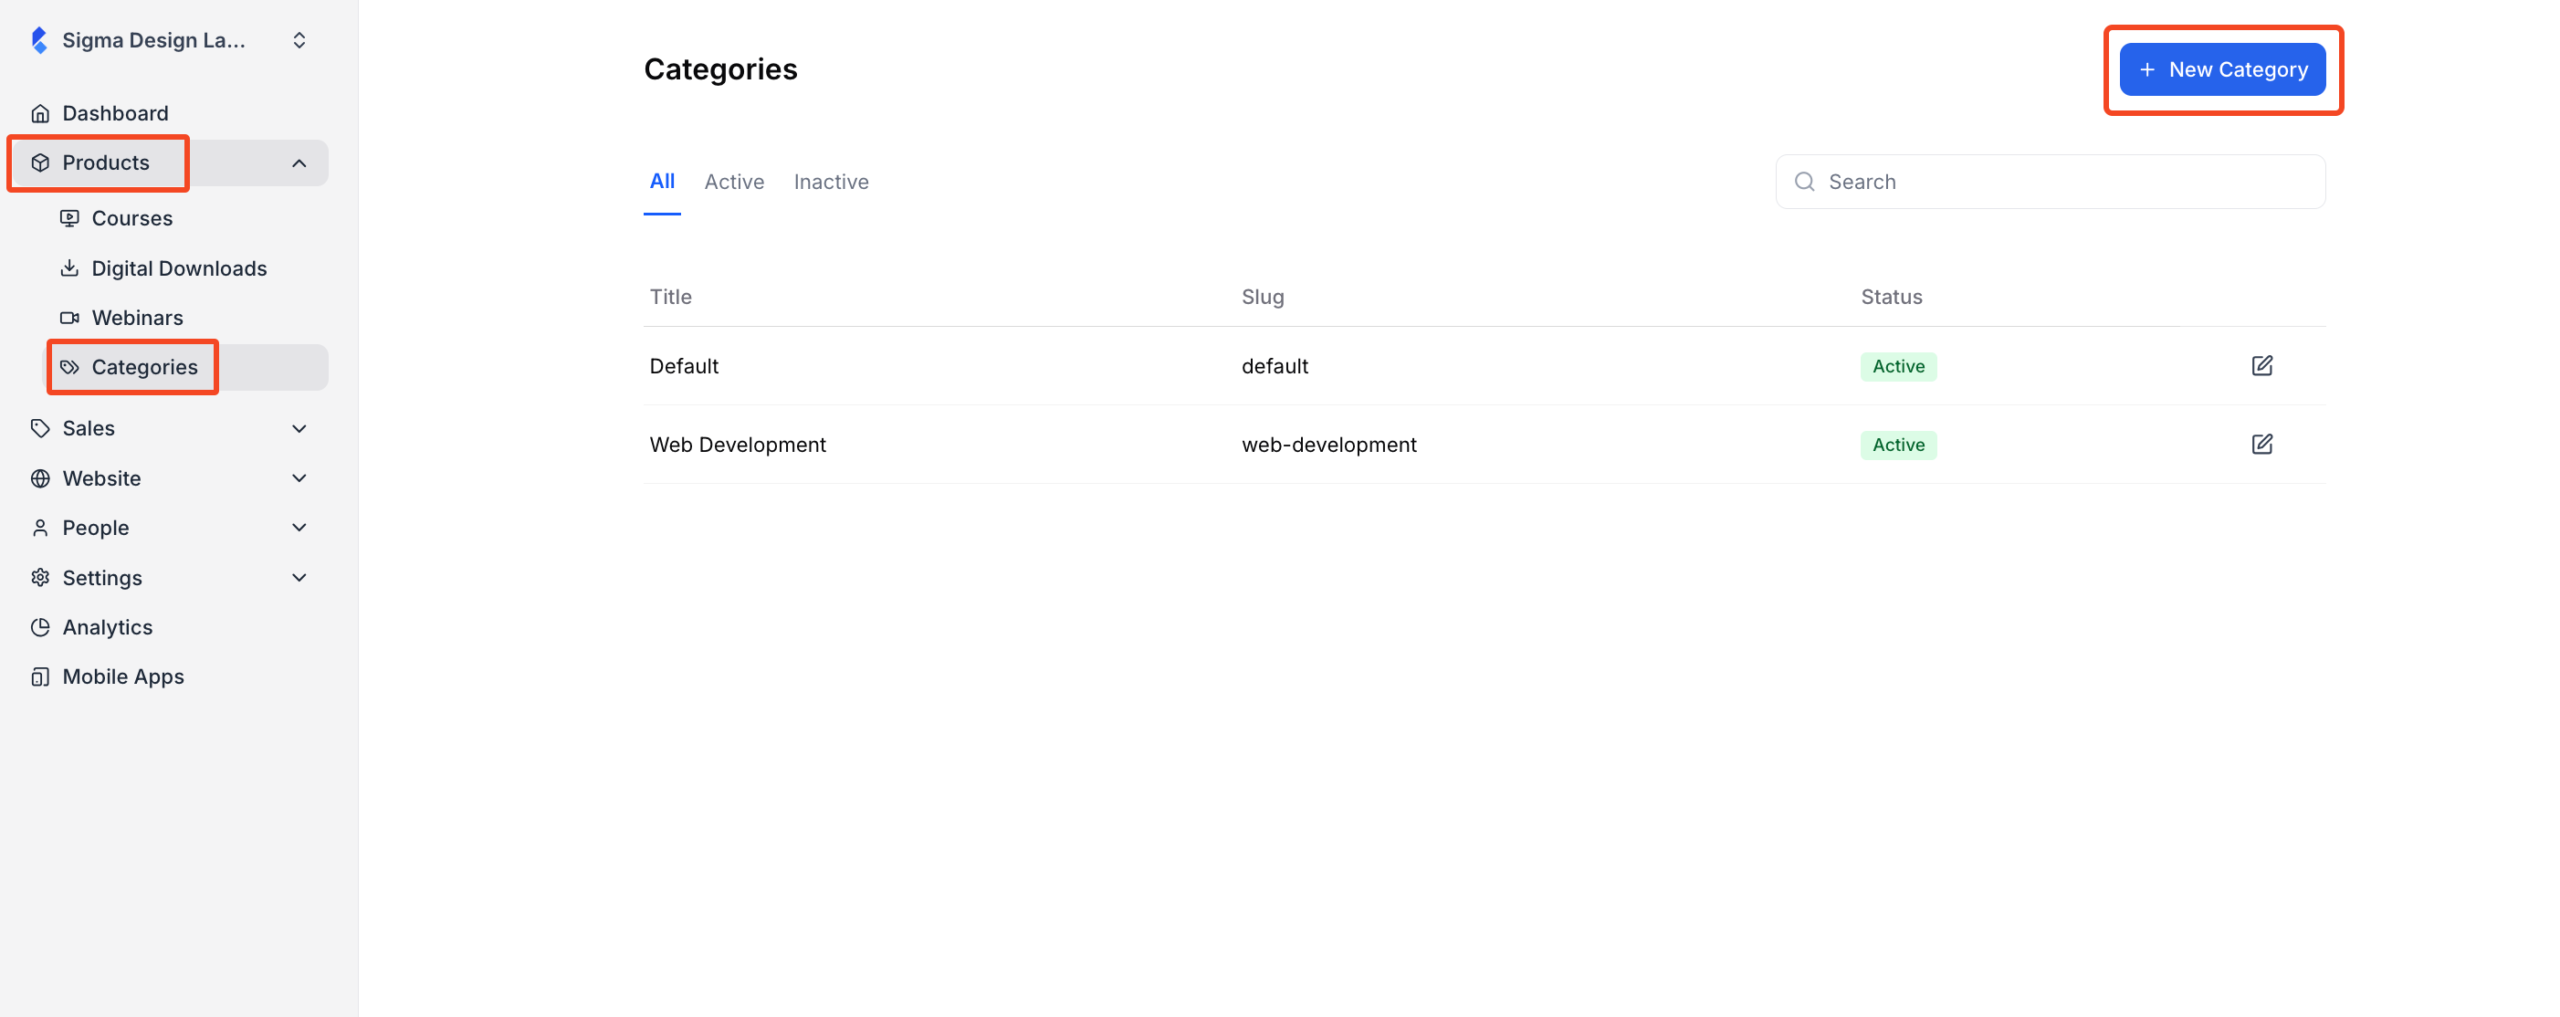
1. From the admin dashboard, go to Categories under Products. Then, click on the “New Category” button.
3. Once you click on the button, a popup will appear where you can insert the “Category Title.” As you type in the title, your category slug will be automatically generated based on the title. However, if you want, you can edit the slug manually.

4. Next, select if you want to keep it as an active category or an inactive category. If you don’t plan to use the category now, you can keep it inactive. Otherwise, you should choose “Active.”
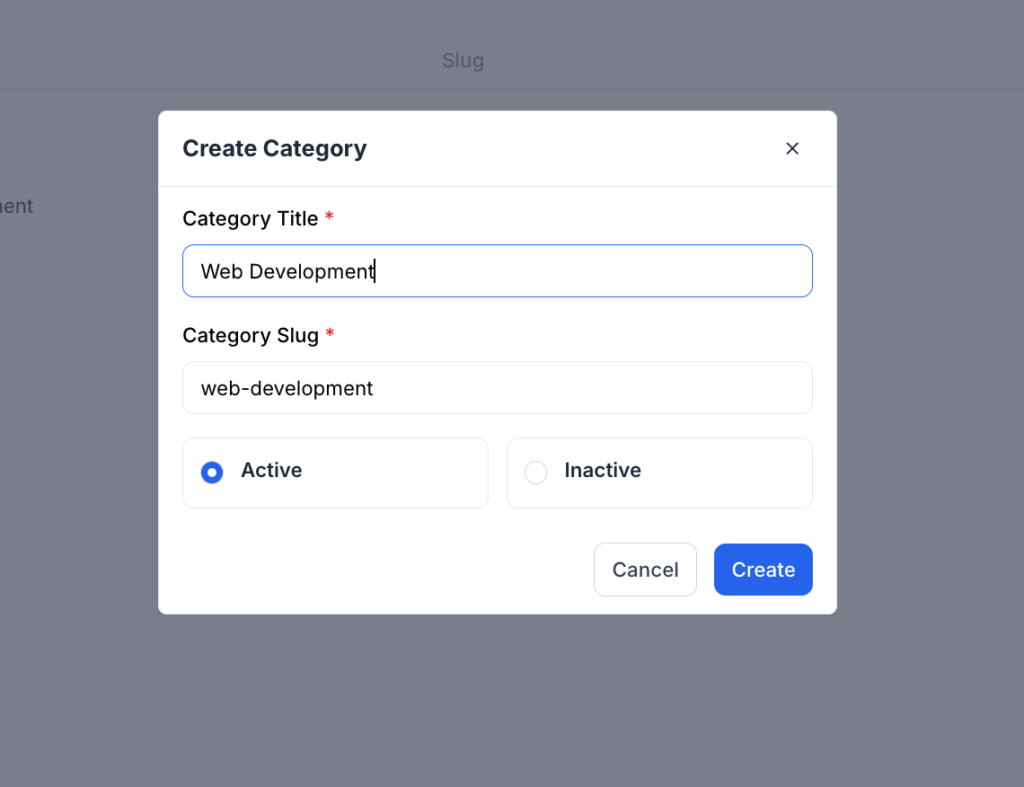
5. Finally, hit Create, and the category will be created.