By configuring the course settings, you can change the course’s visibility, category, difficulty level, archive or delete the course, and more. Here’s how-
1. From the dashboard, expand “Products” and go to courses. Next, select the course for which you want to change the settings.

2. Once you do, you will be taken to the course editor. From the course editor, go to the “Settings” tab, and you will land on the “General” tab by default.
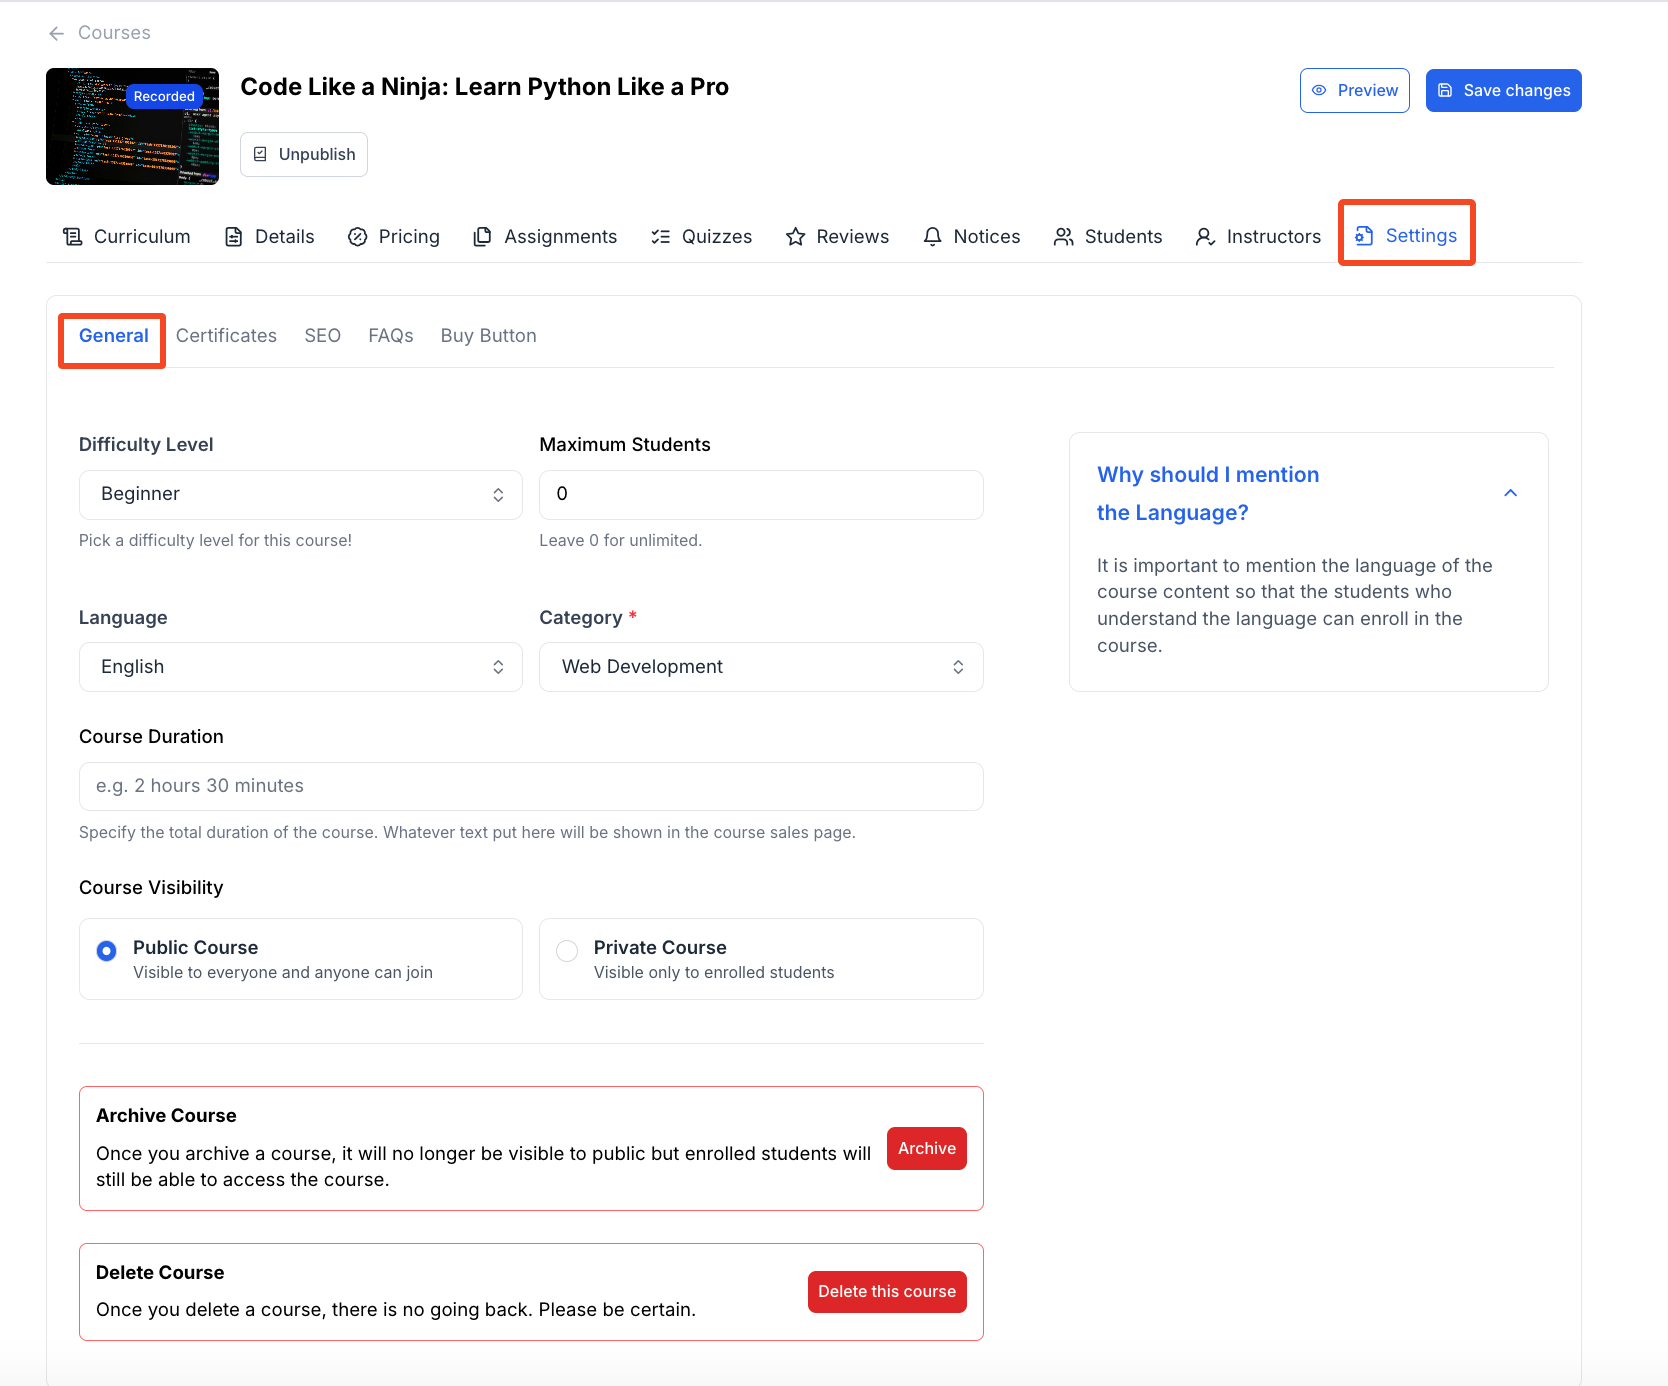
Here, you can customize the following things about your course:
- Difficulty Level: You can set a difficulty level for your course, which will be displayed in the course details page on your website. You get 4 options: Any, Beginner, Intermediate, and Advanced.
- Maximum Students: If you want, you can limit the maximum number of students that can enroll in the course. Set it at 0 for unlimited students.
- Language: This field is for communicating the language of your course to your students. Changing this will not change the language of the course website or the interface of the Klasio app.
- Category: Choose the category of the course from this dropdown. Here, you will only find the existing categories that you have created. If you want to add a new category, you will have to create it, following a different process.
- Course Duration: Write the approximate duration of your course, so your students know how much time they need to invest to complete your course.
- Course Visibility: Choose the visibility of your course. You can keep it public, so anyone who visits your website can access it. Or, you can keep it private so only your enrolled students can see it.
- Archive Course: Archiving a course will remove it from your course website, and your site visitors won’t be able to see it. However, the students who have enrolled in the course will still be able to see and access it.
- Delete Course: Deleting a course will permanently remove it, and there will be no way to recover it. So, think twice before you want to delete a course.
3. Once you are done making the changes, click on the “Save Changes” button in the top right corner.