You can create live courses in Klasio and manage them with various settings for cohorts, chapters, and lessons.
First, expand Products, select Courses, then click on “New Course.”

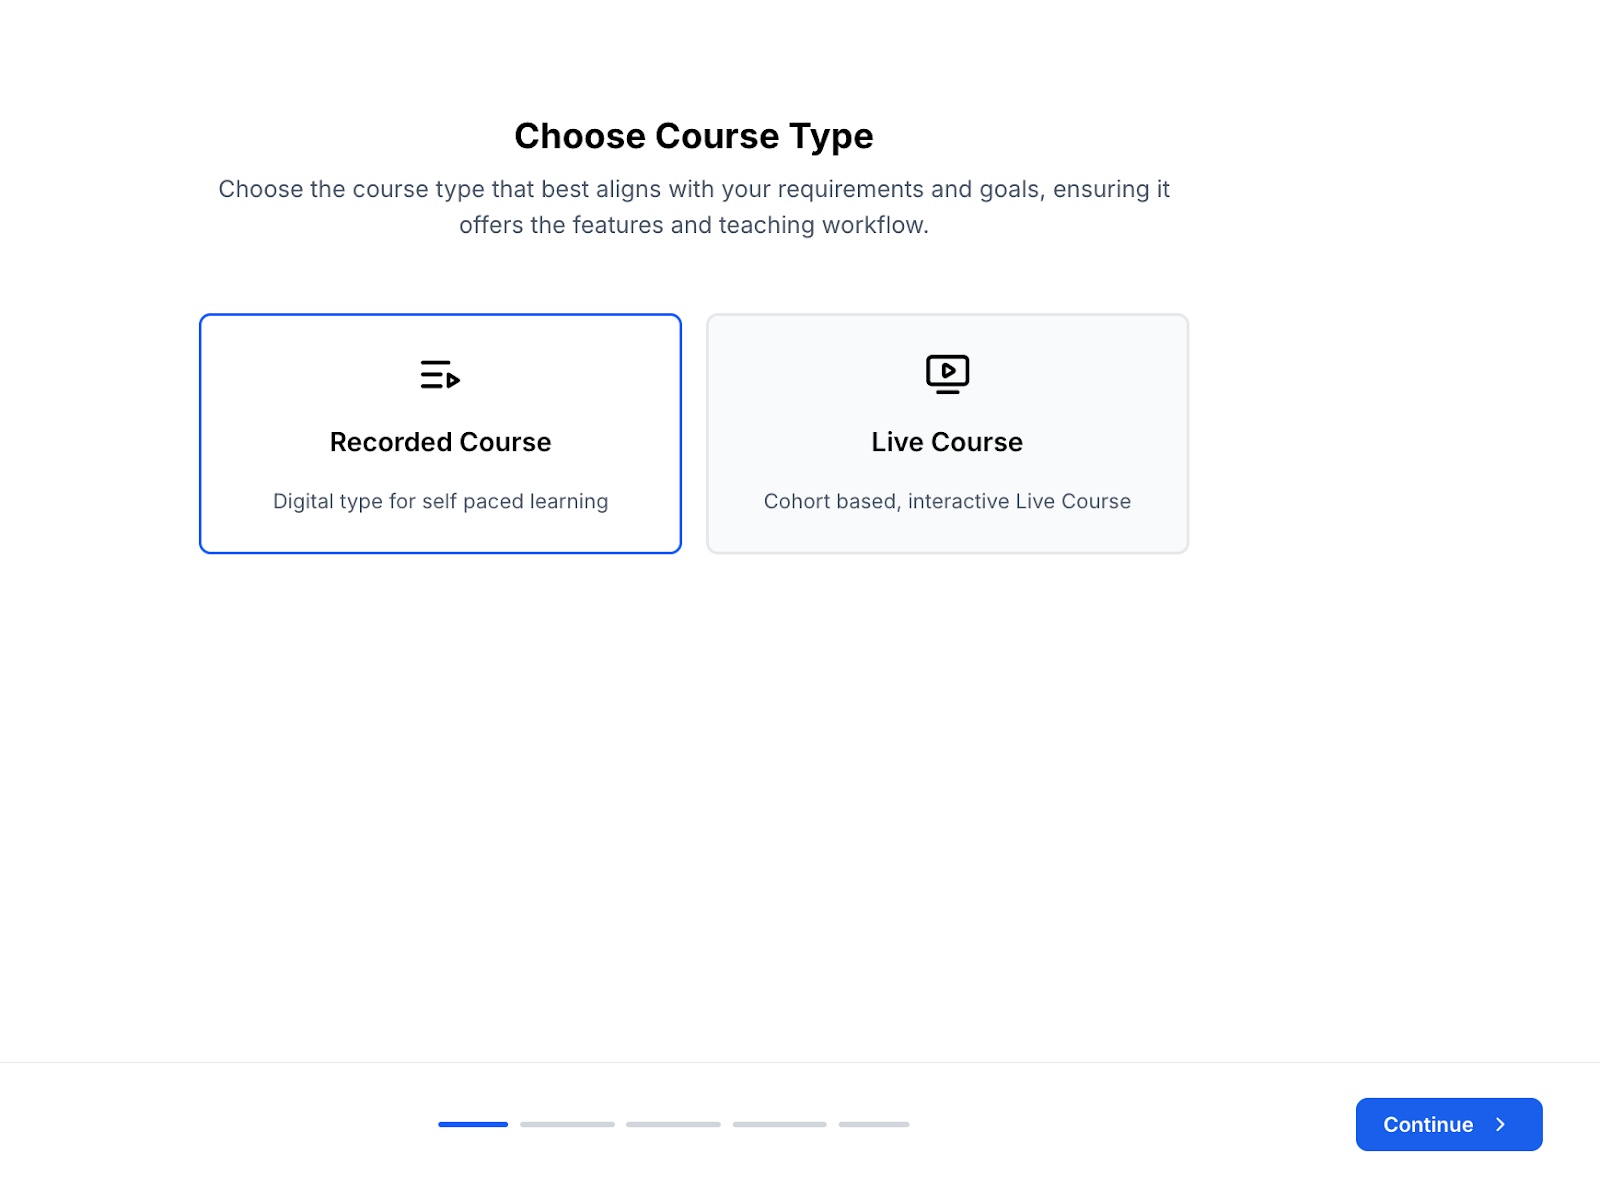
Then you will be asked to select between a recorded course and a live course. Choose Live Course and click on Continue.
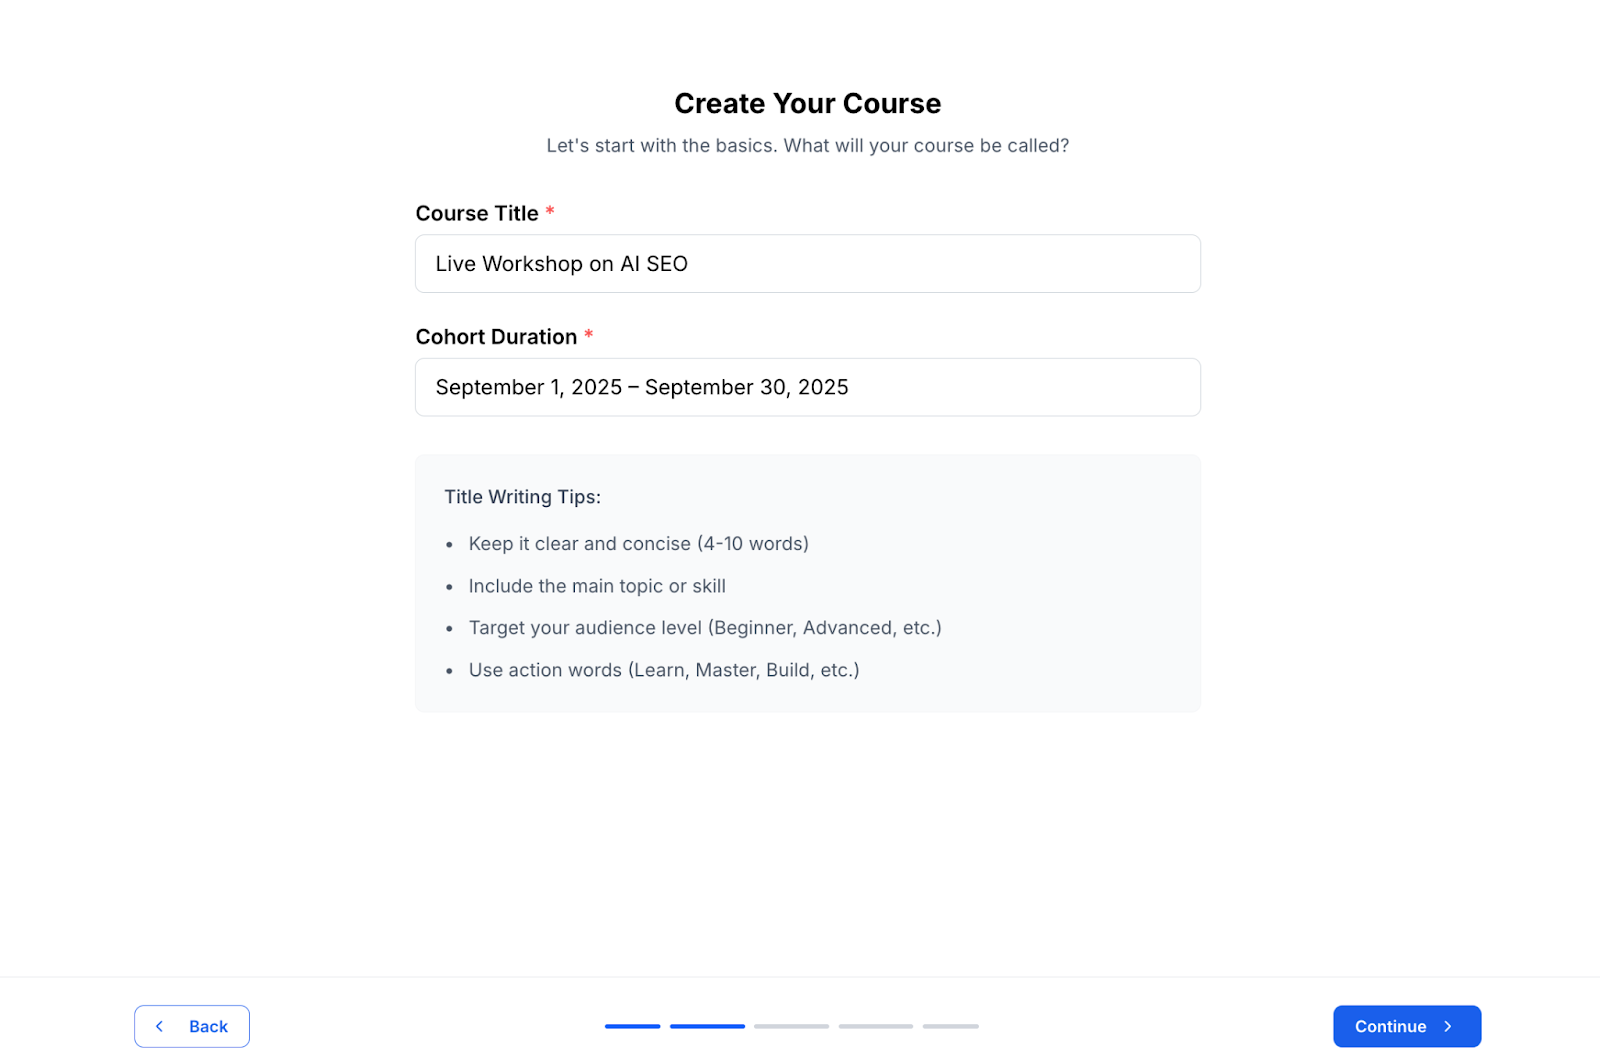
Then give your course a name and choose a duration for the live course. Next, click Continue to move on.

On the next screen, you will have to add a learning objective. Once done, click on Continue.
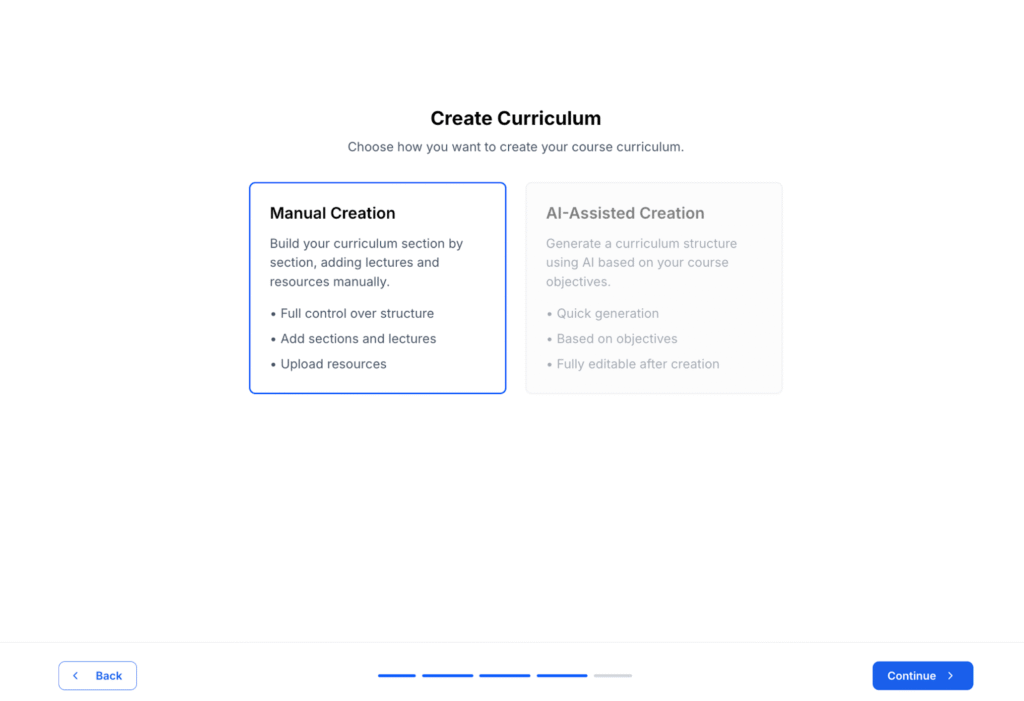
Now, it’s time to create your curriculum. For live courses, you have to create the curriculum manually. So just click on Continue to move on.
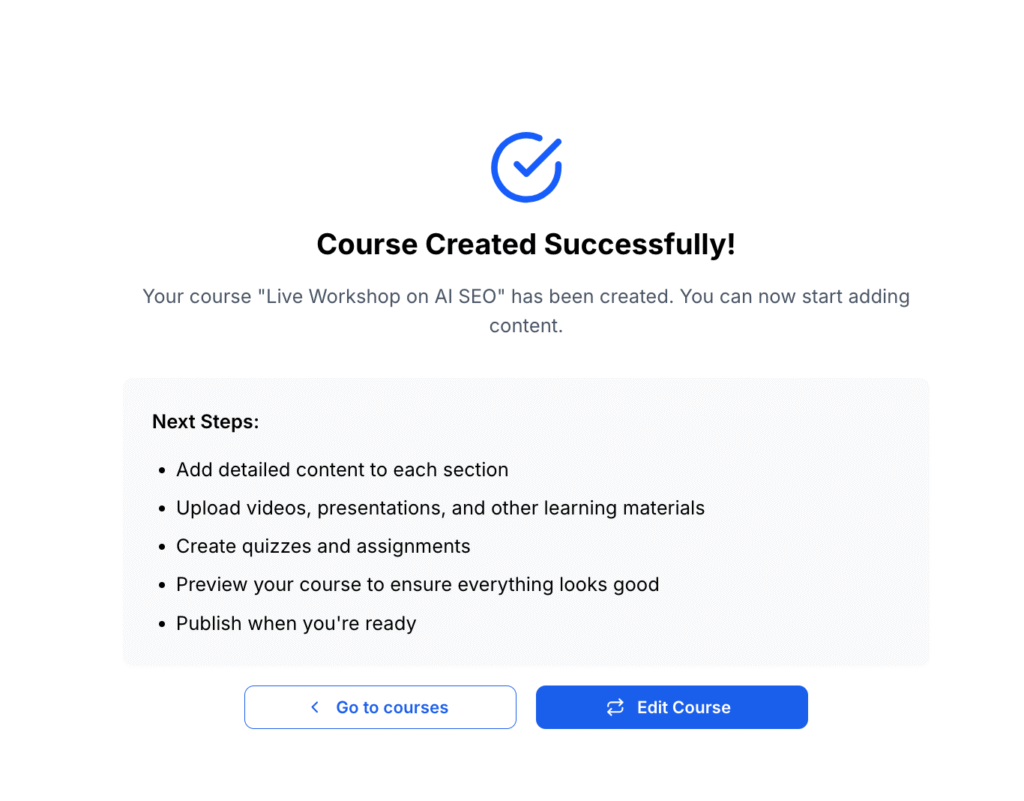
Give it a few seconds to finish creating your live course, then click on Edit Course to go to the curriculum editor.
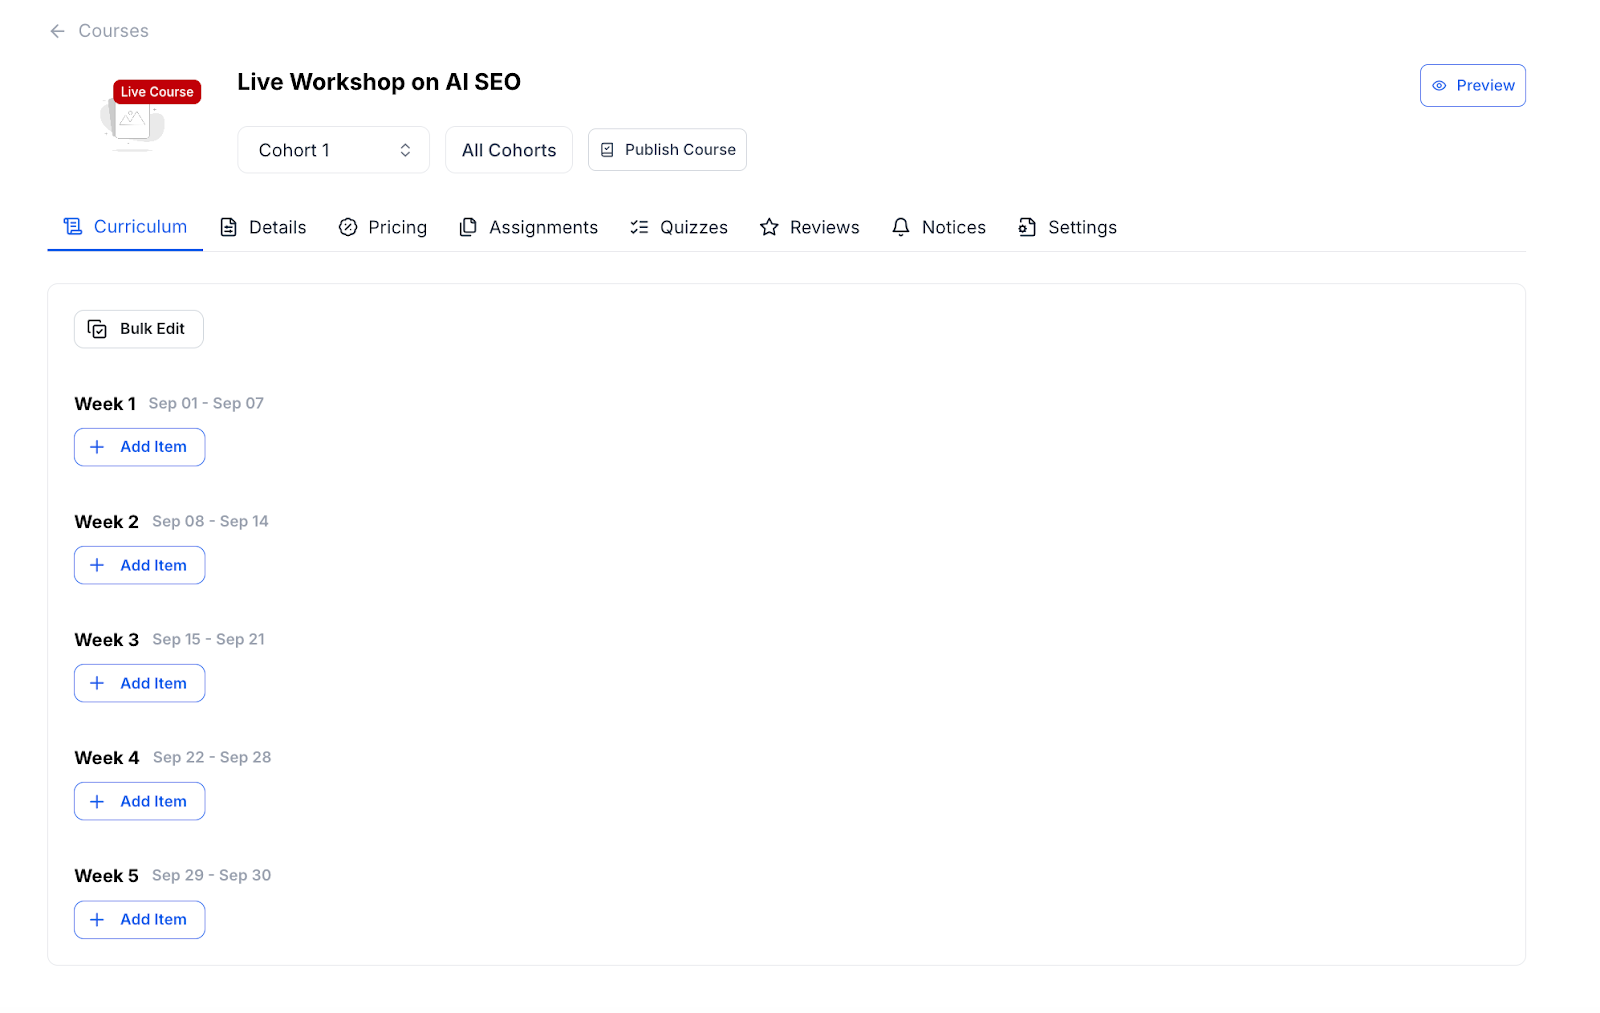
On the curriculum editor, you will be asked to create schedules for your live course.

Simply clicking on Create Schedules will do the trick. Your live courses will be divided into weeks based on the cohort duration you chose during course creation.
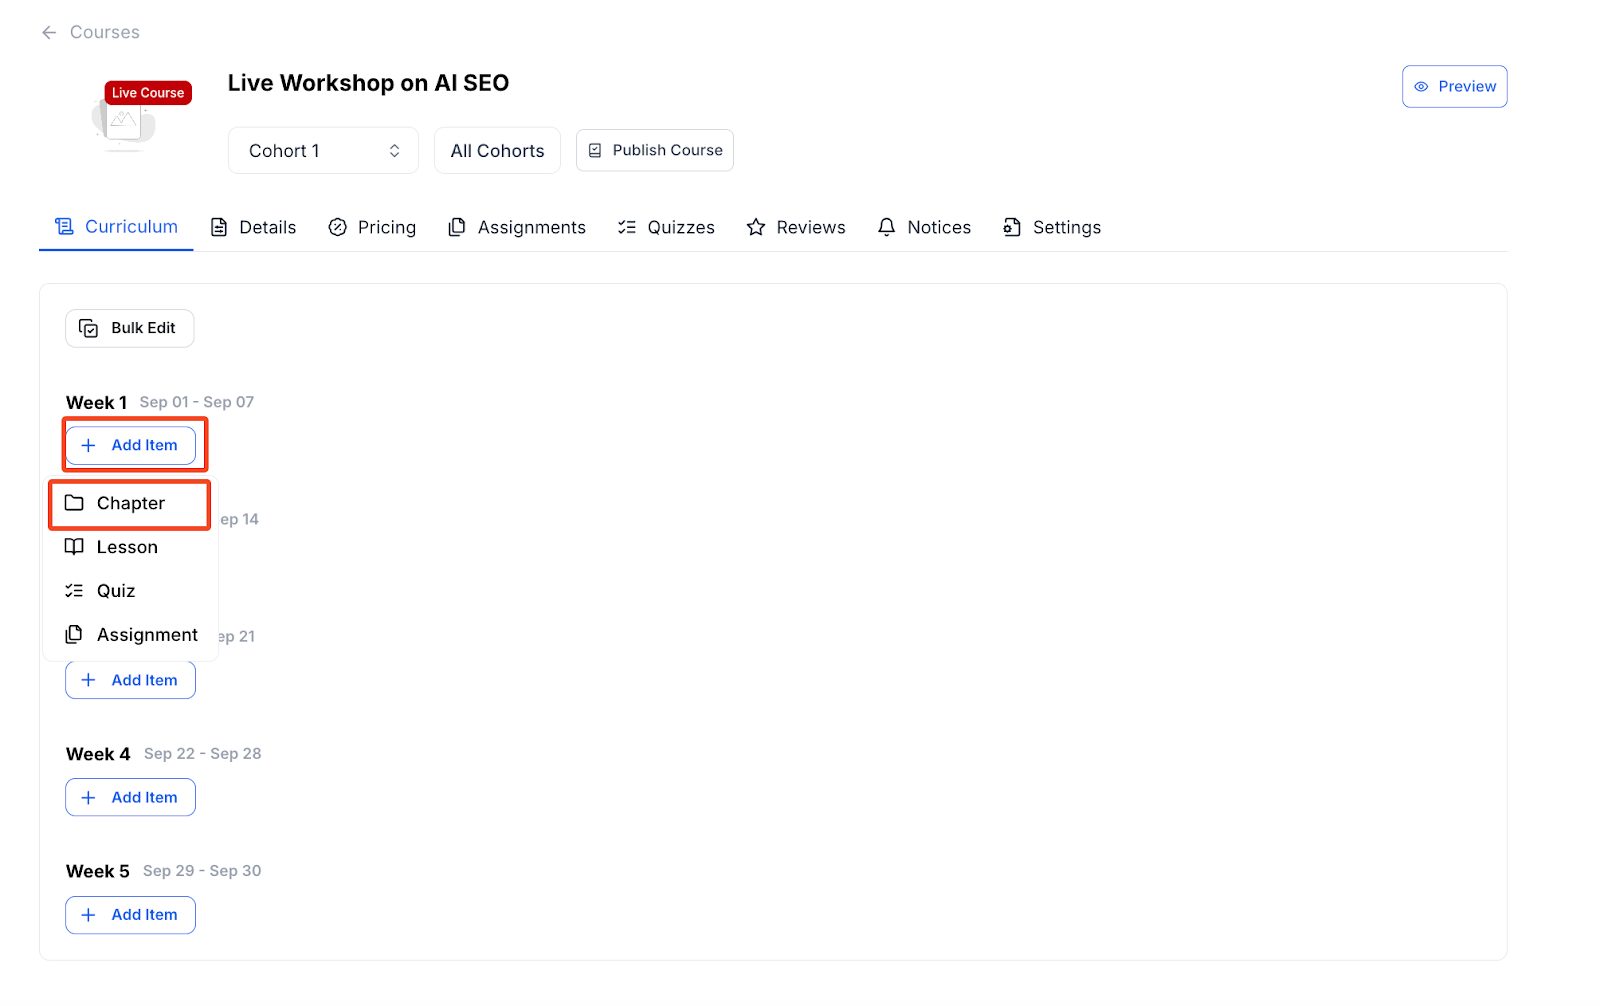
Now, let’s add some chapters and lessons to your live course. Click on the Add Item button that’s below any of the weeks and select Chapter.
Then, you will need to give your chapter a name and a description. Next, choose if you want to publish this chapter or keep it as draft. Also, there is a toggle button named Create More. If you enable it, another popup just like this will appear so you can create another chapter.
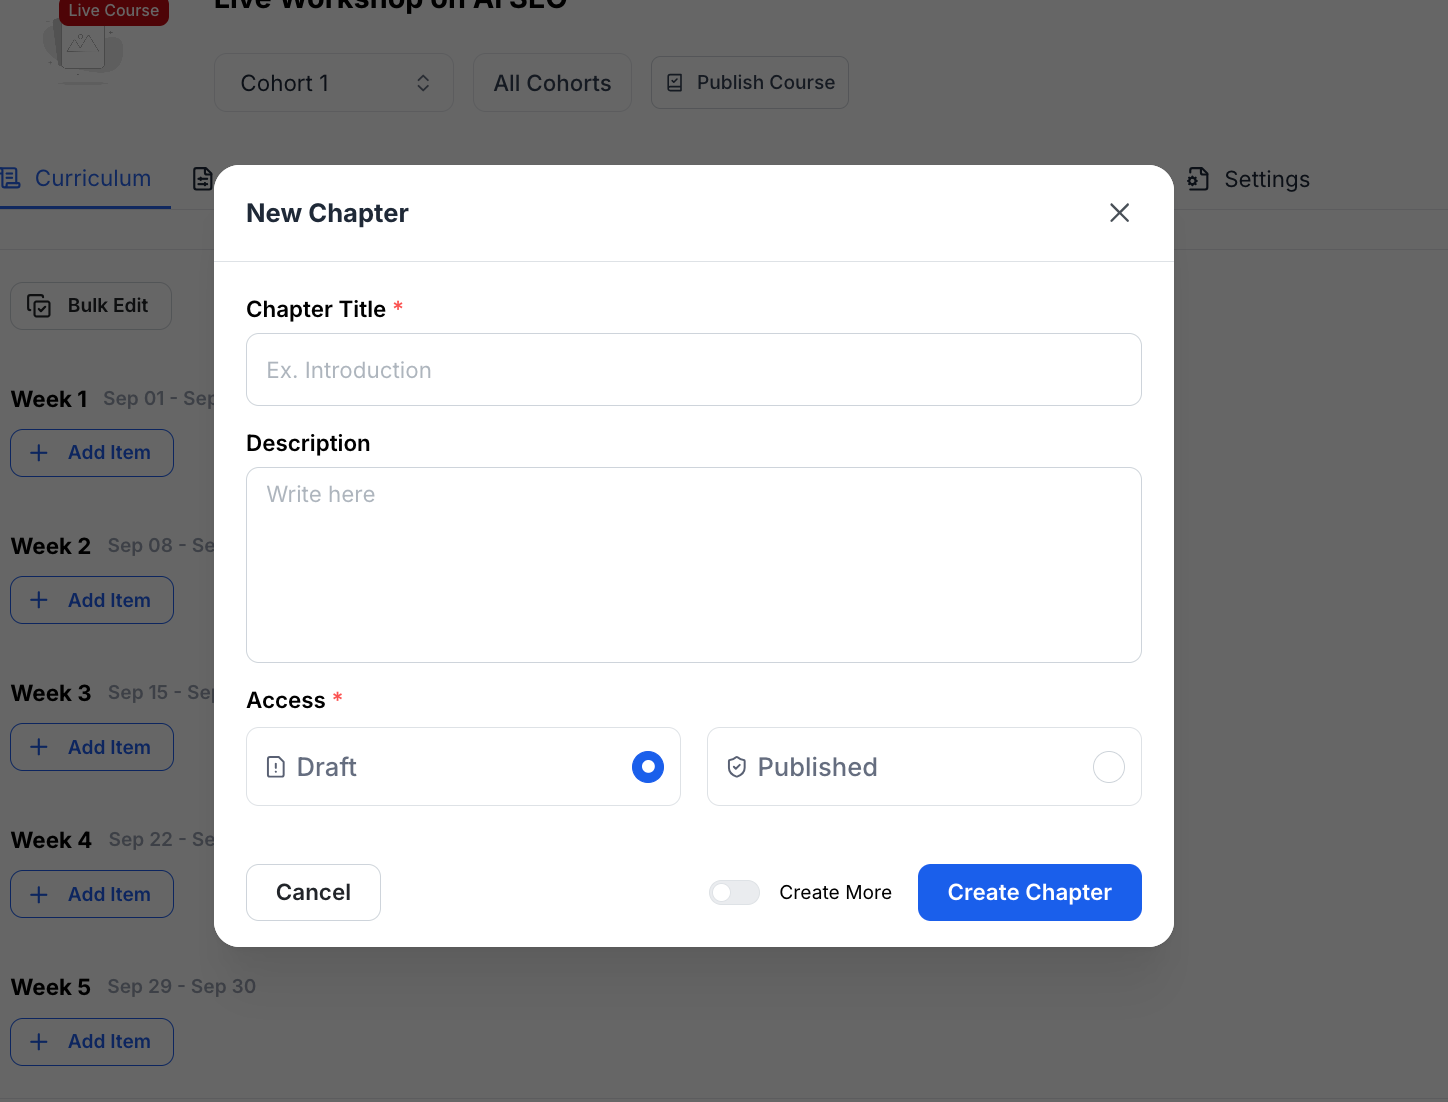
Once you are done, click on Create Chapter, and this chapter will be added to the cohort.
Now, let’s add a lesson to this chapter. Click on the plus icon beside the chapter and select Lesson.
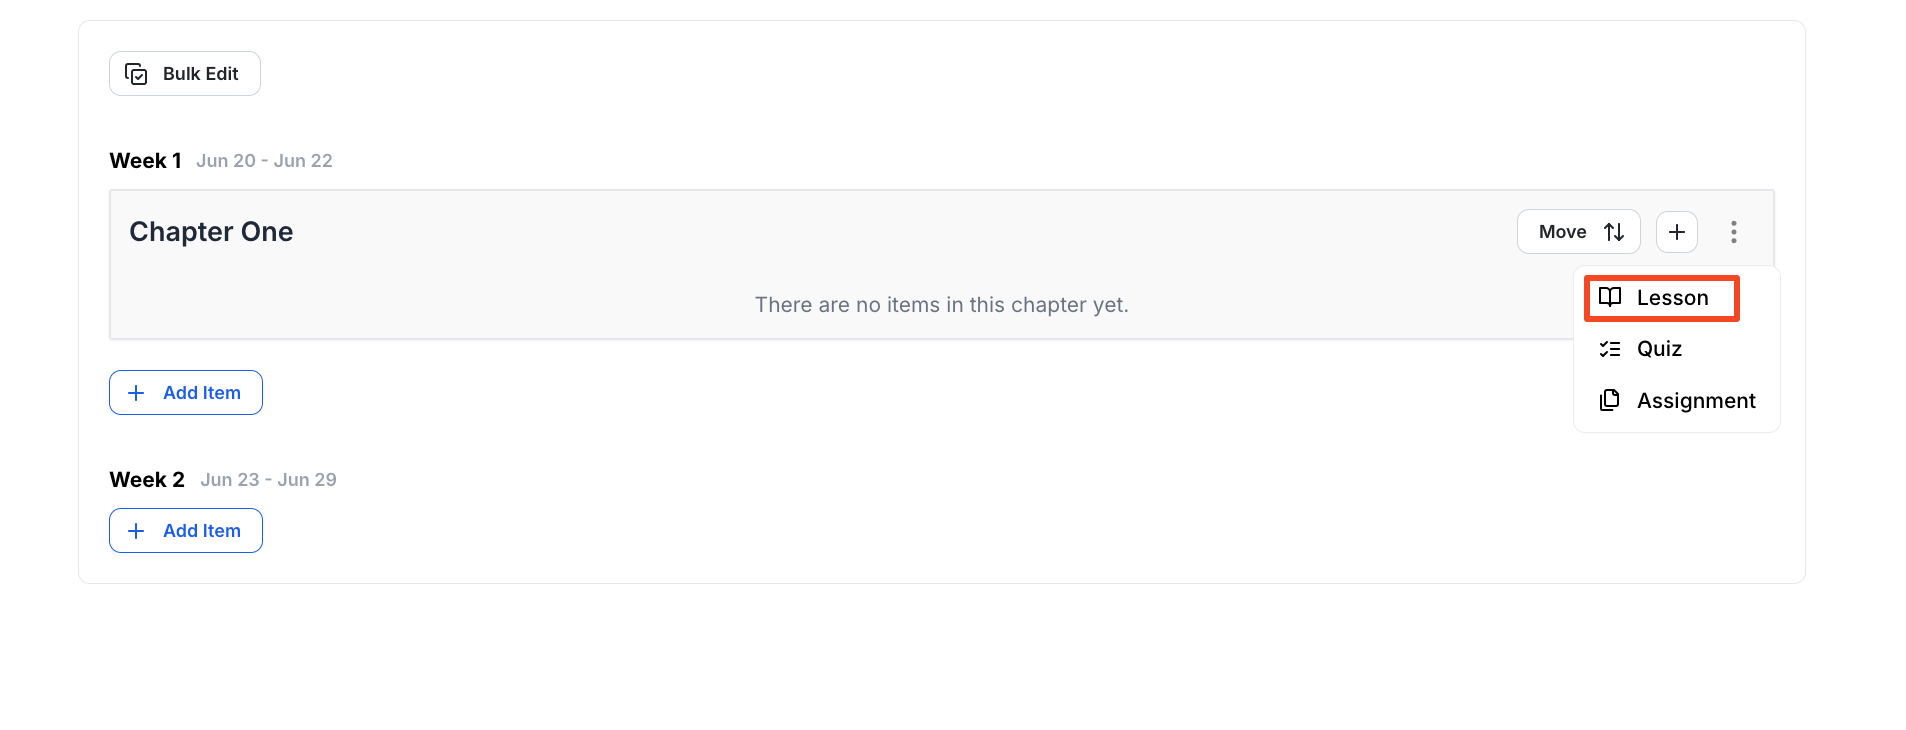
Then a popup will appear asking you to input the lesson title and the lesson type. Let’s choose a Live Lesson for this. When you select Live Lesson, you will also have to choose a live session provider.
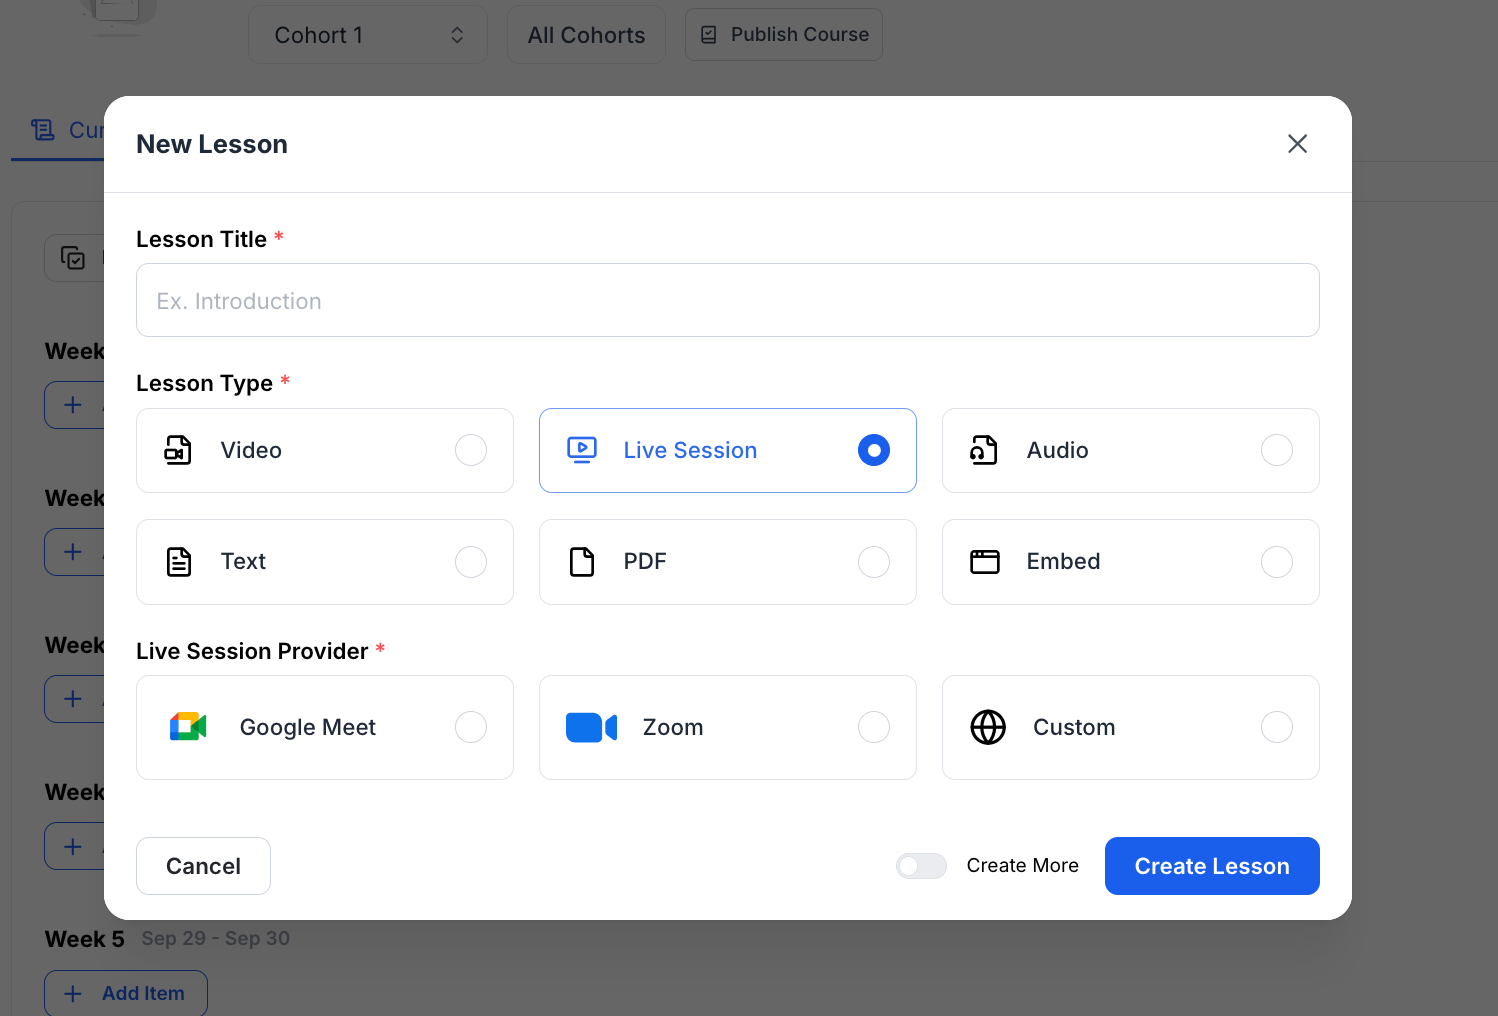
Klasio offers both Zoom and Google Meet integrations for creating live classes. Before you create a live lesson, you must integrate Google Meet and/or Zoom with Klasio.
For this live lesson, let’s select Zoom and click on Create Lesson.
Now, you will be taken to the lesson editor. First, add a lesson description. This is optional.
Then, scroll down to find the field, and you will find the fields where you can input the duration, date, and timezone for the live class.
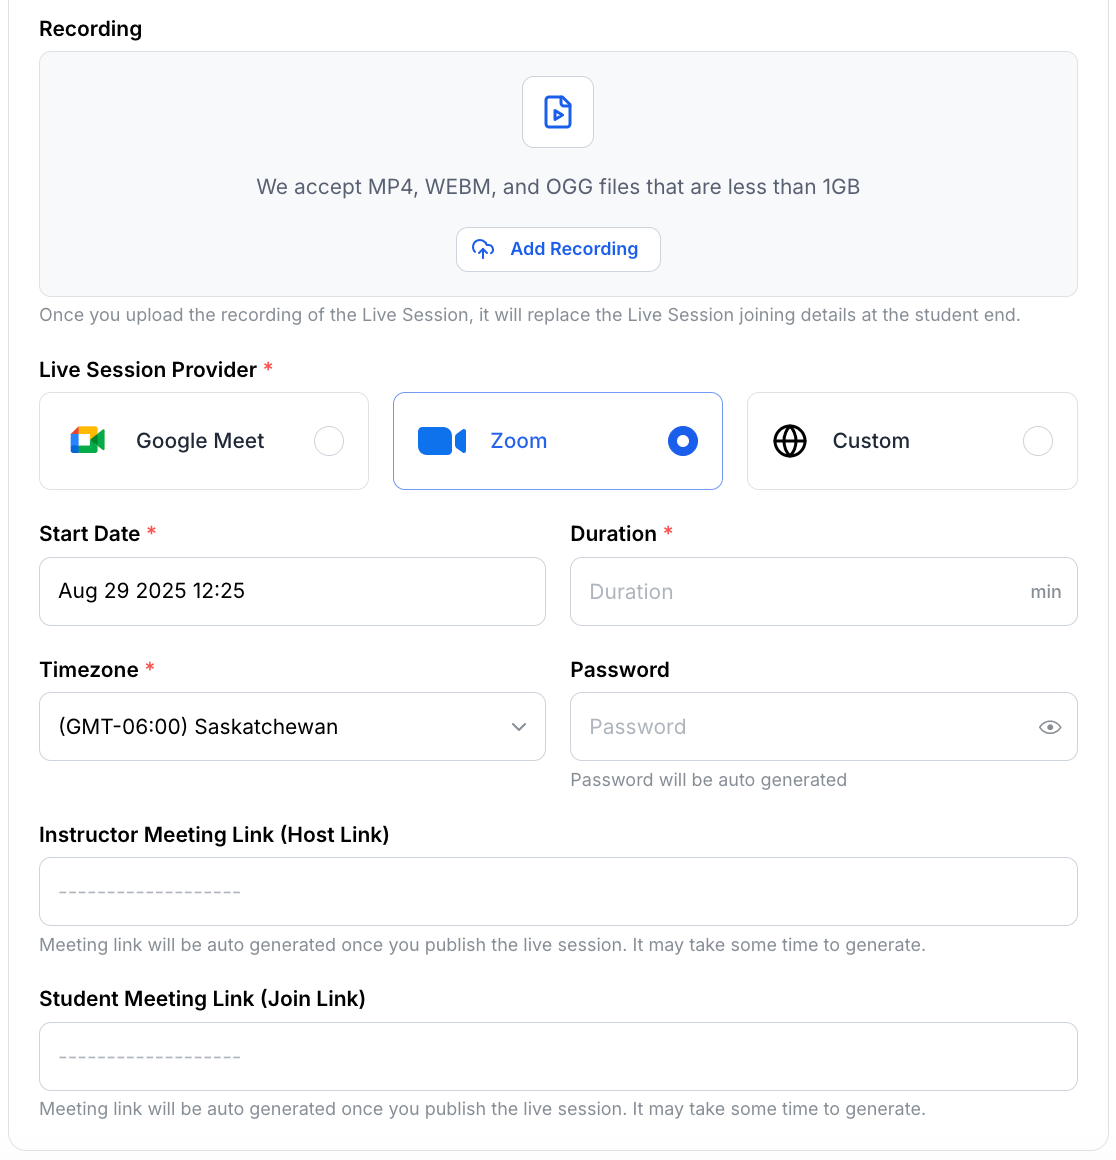
You will also see the uploader, where you can upload the recording of the webinar.
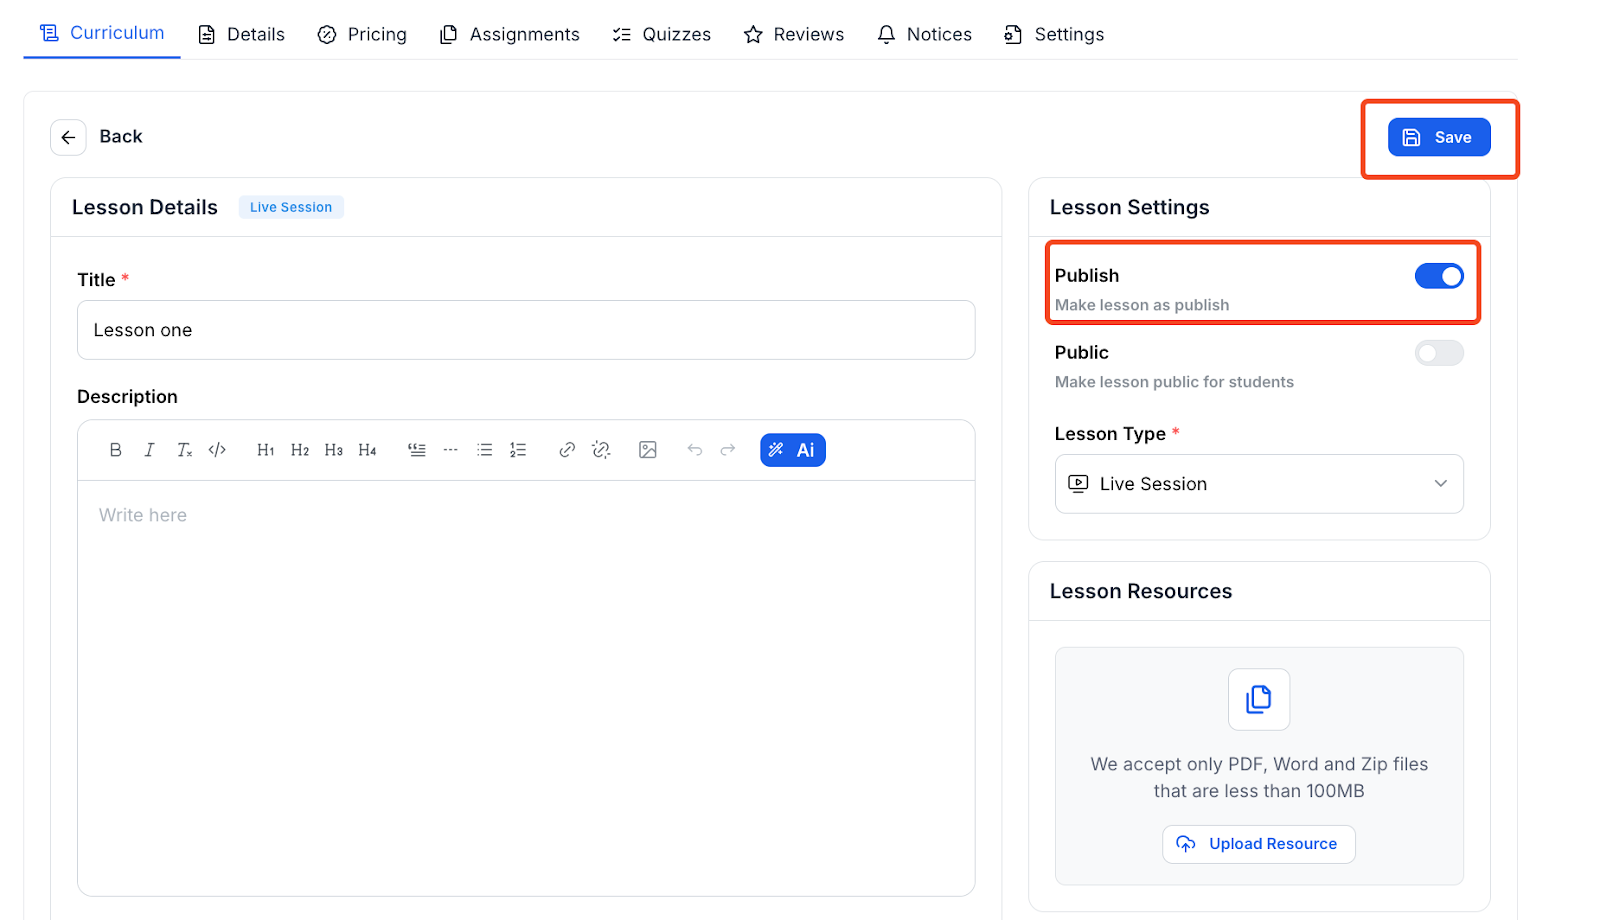
Then scroll back up and toggle on the Publish button to publish the lesson. Once everything is set, click on the Save button to save the changes.
Now, we need to change the cohort setting. Go over to the All Cohorts button and click it. It will show you a list of all the cohorts you have created so far. Click on the edit icon on the right side of the cohort, and you will be taken to the editing screen.
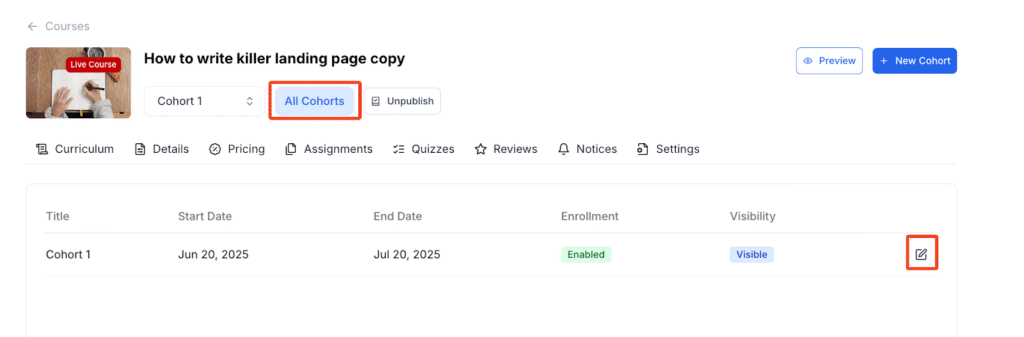
Here, you can change your cohort’s name, add a seat limit to the cohort, enable or disable enrollments, and change the visibility. Remember, you must change the visibility from here; otherwise, your live course will not be visible on the course website.
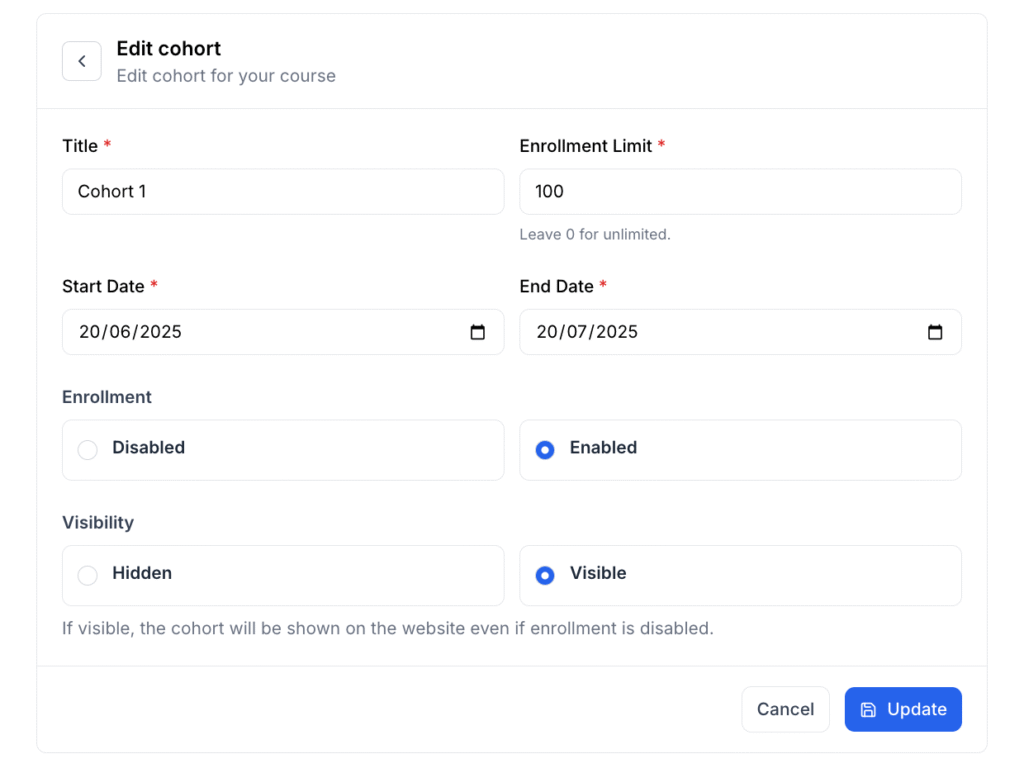
Once you have edited everything, click on Update.