Follow these steps below to set the price for your digital products in Klasio:
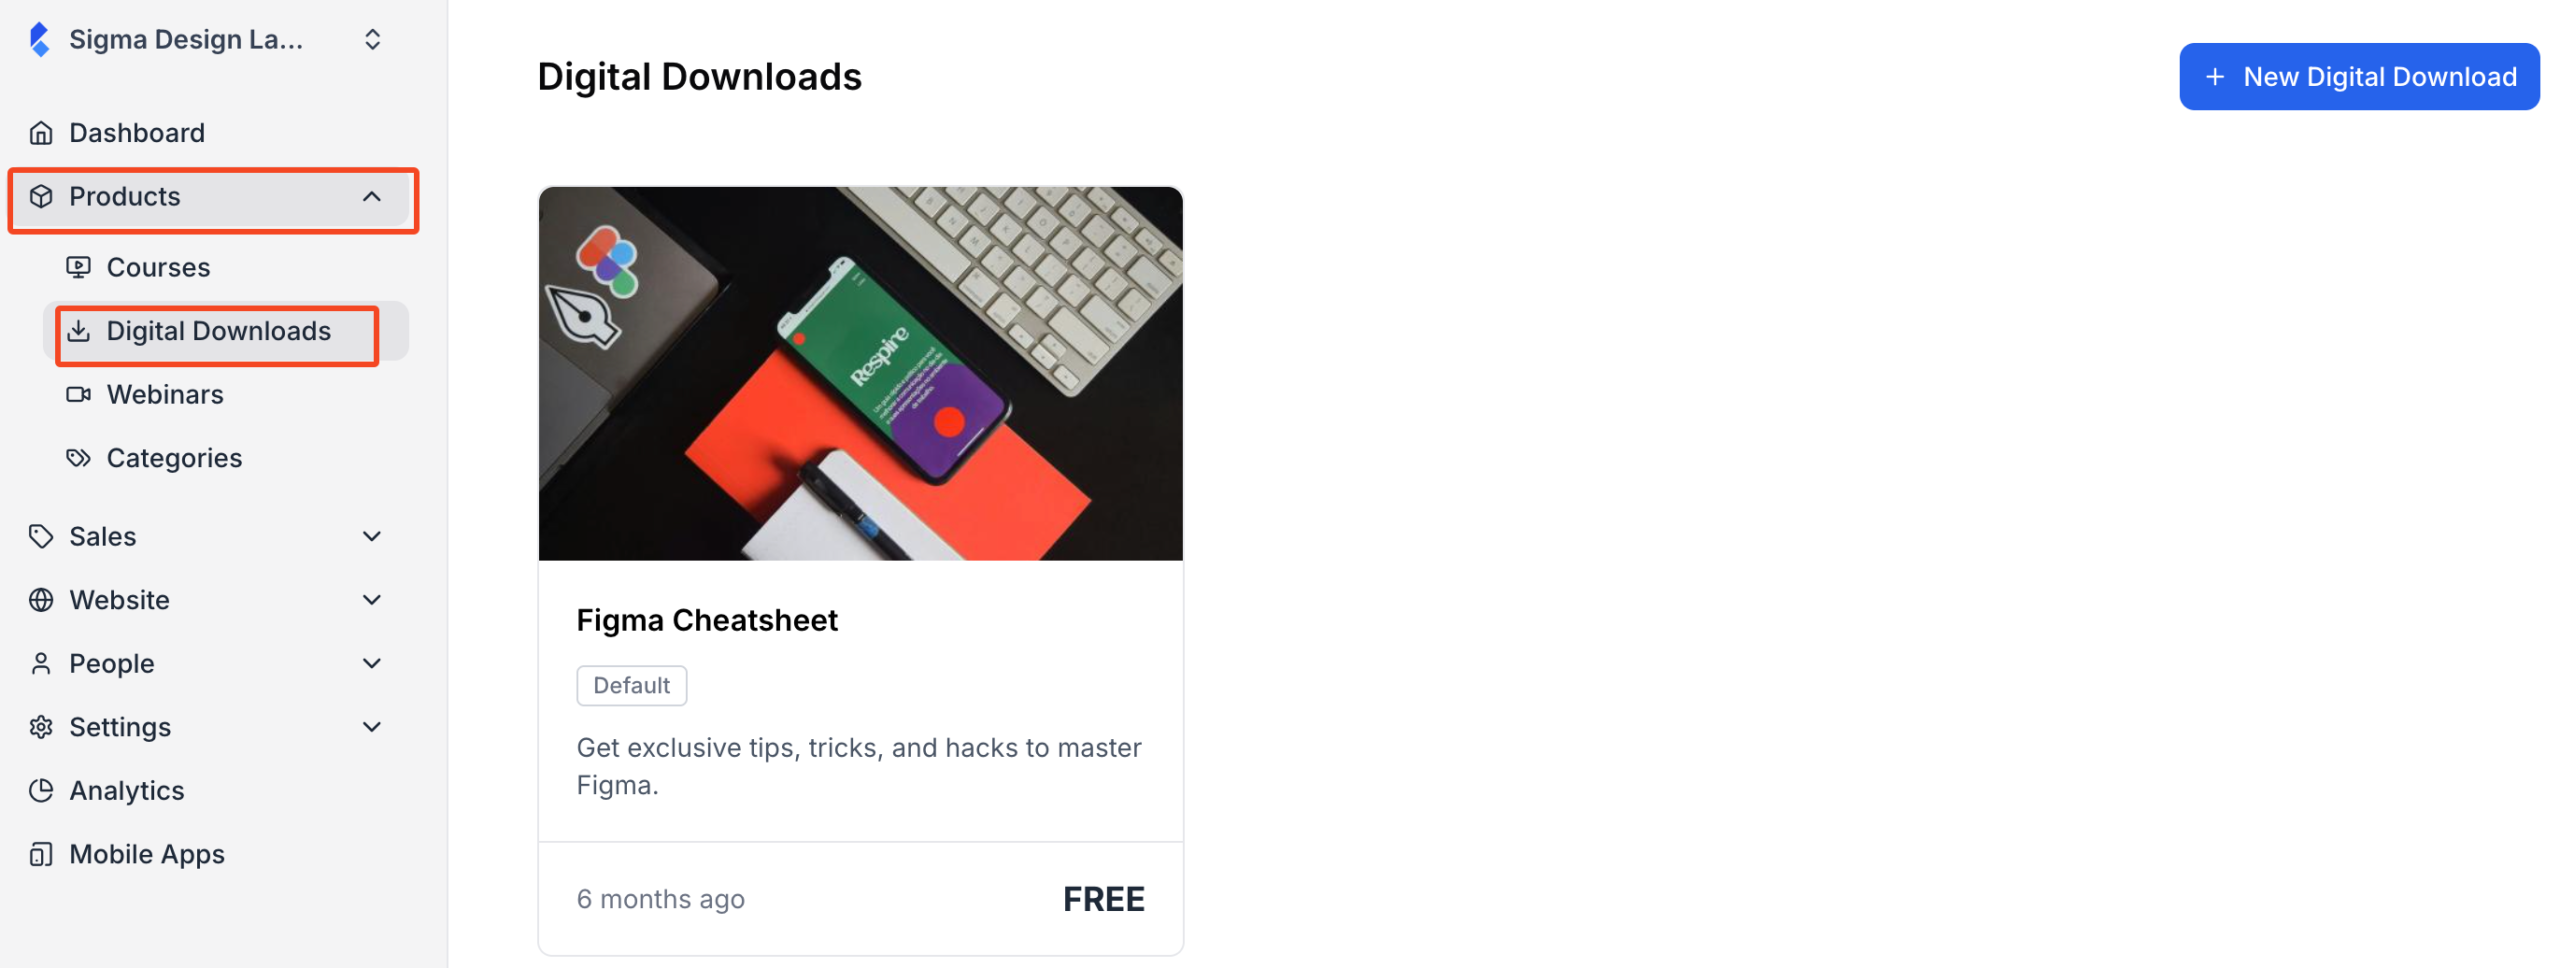
1. From your dashboard, expand “Products” and then click on “Digital Downloads’. Then select the digital product you want to price.
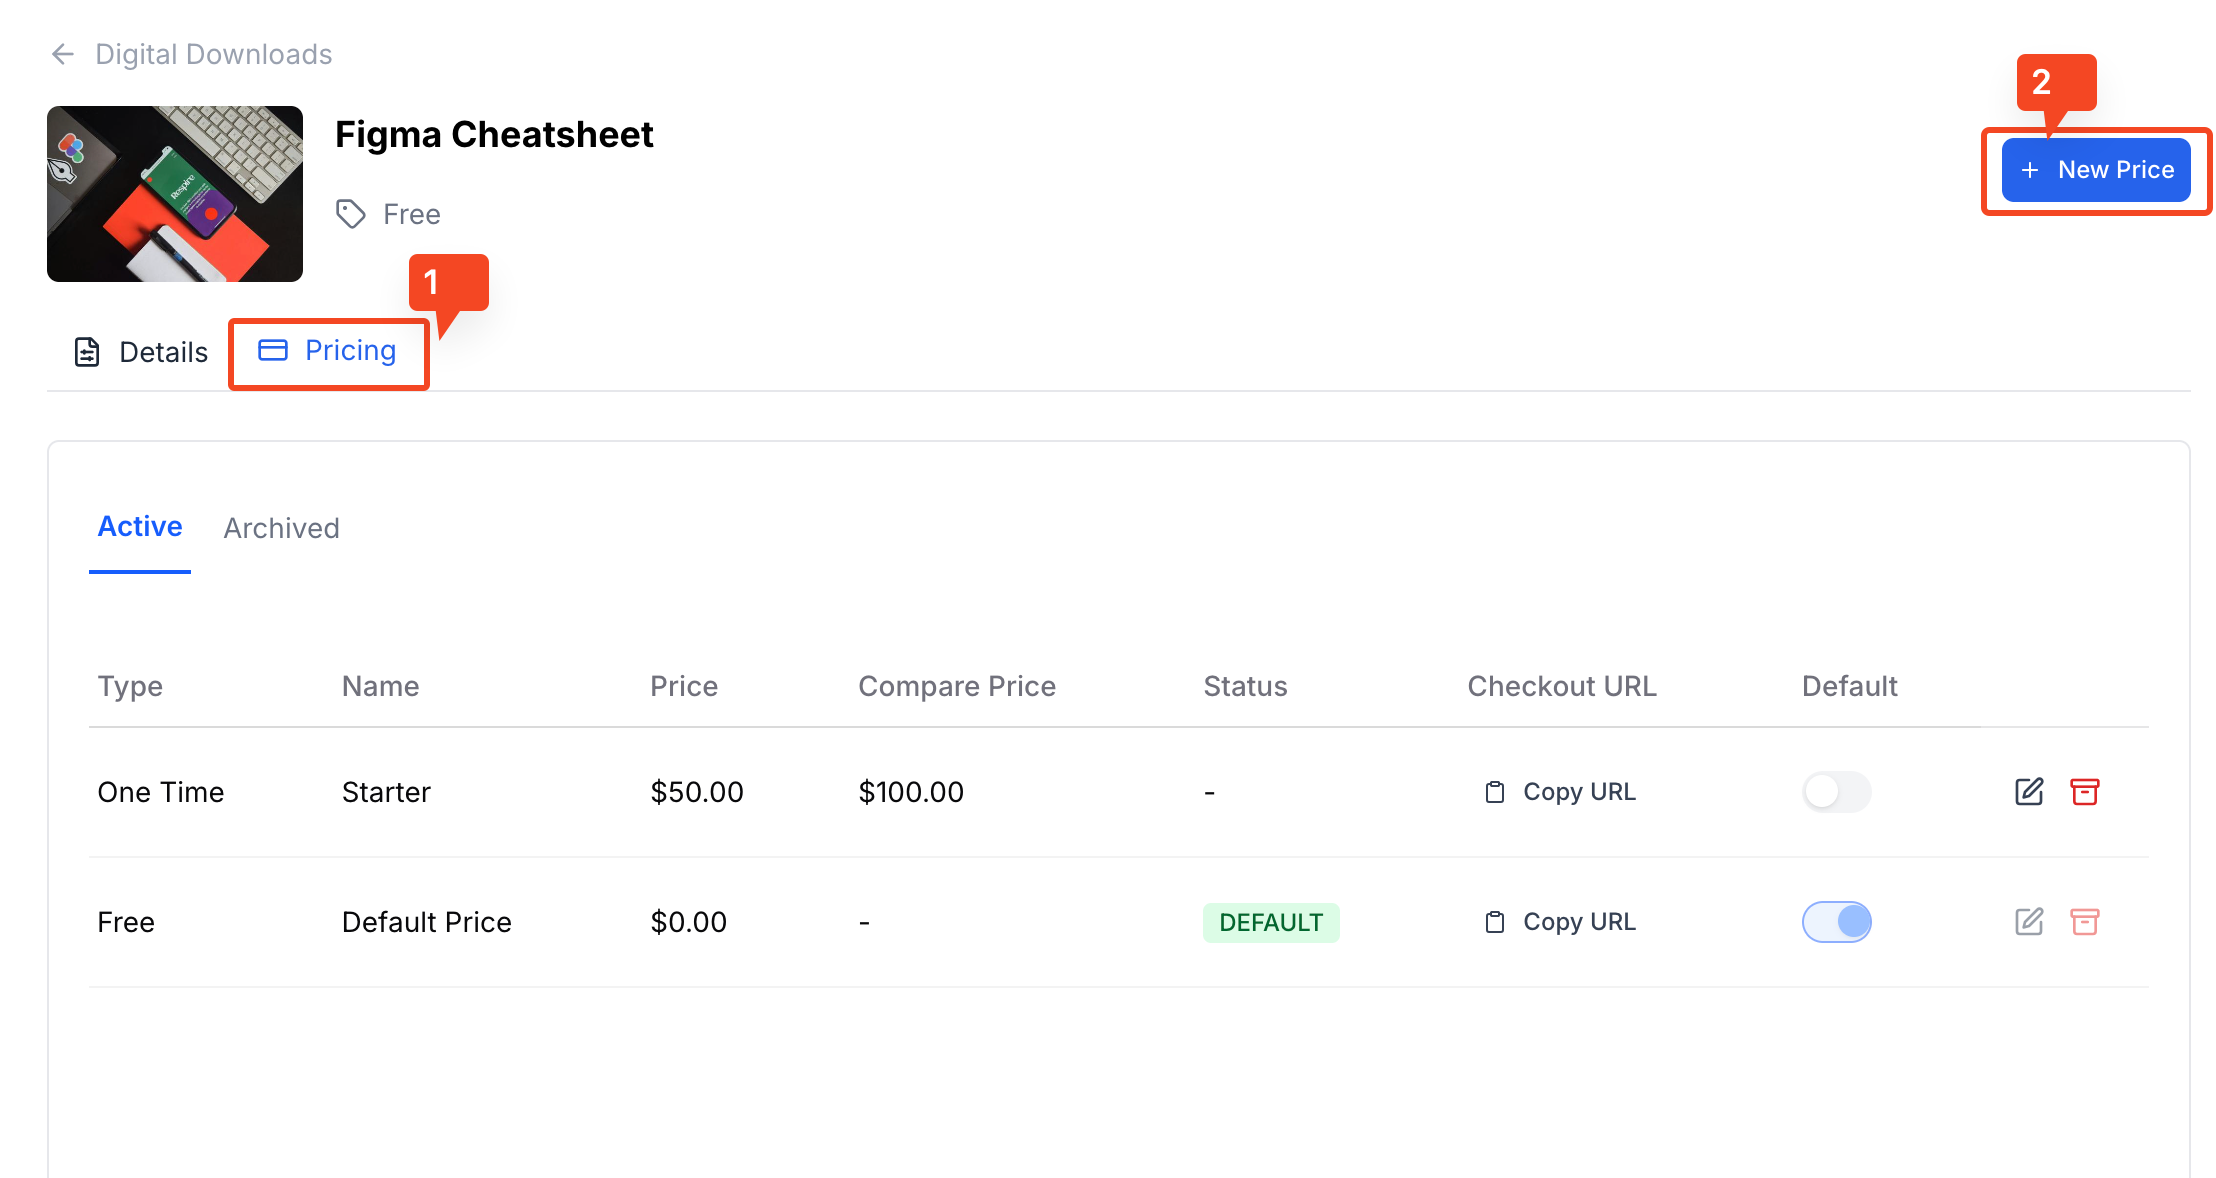
2. Once you do, you will be taken to the digital product editor. Then, you will have to click on the ‘Pricing’ tab. In the pricing tab, you will see all the pricing you have created so far for this product. To add a new price, click on the “New Price” button on the top right.
3. On the new screen, you will see the form for setting up the price for your digital product. First up, you can choose if you want to give it away for free or charge your students an one time fee. If you choose “One Time”, two fields for prices will appear.
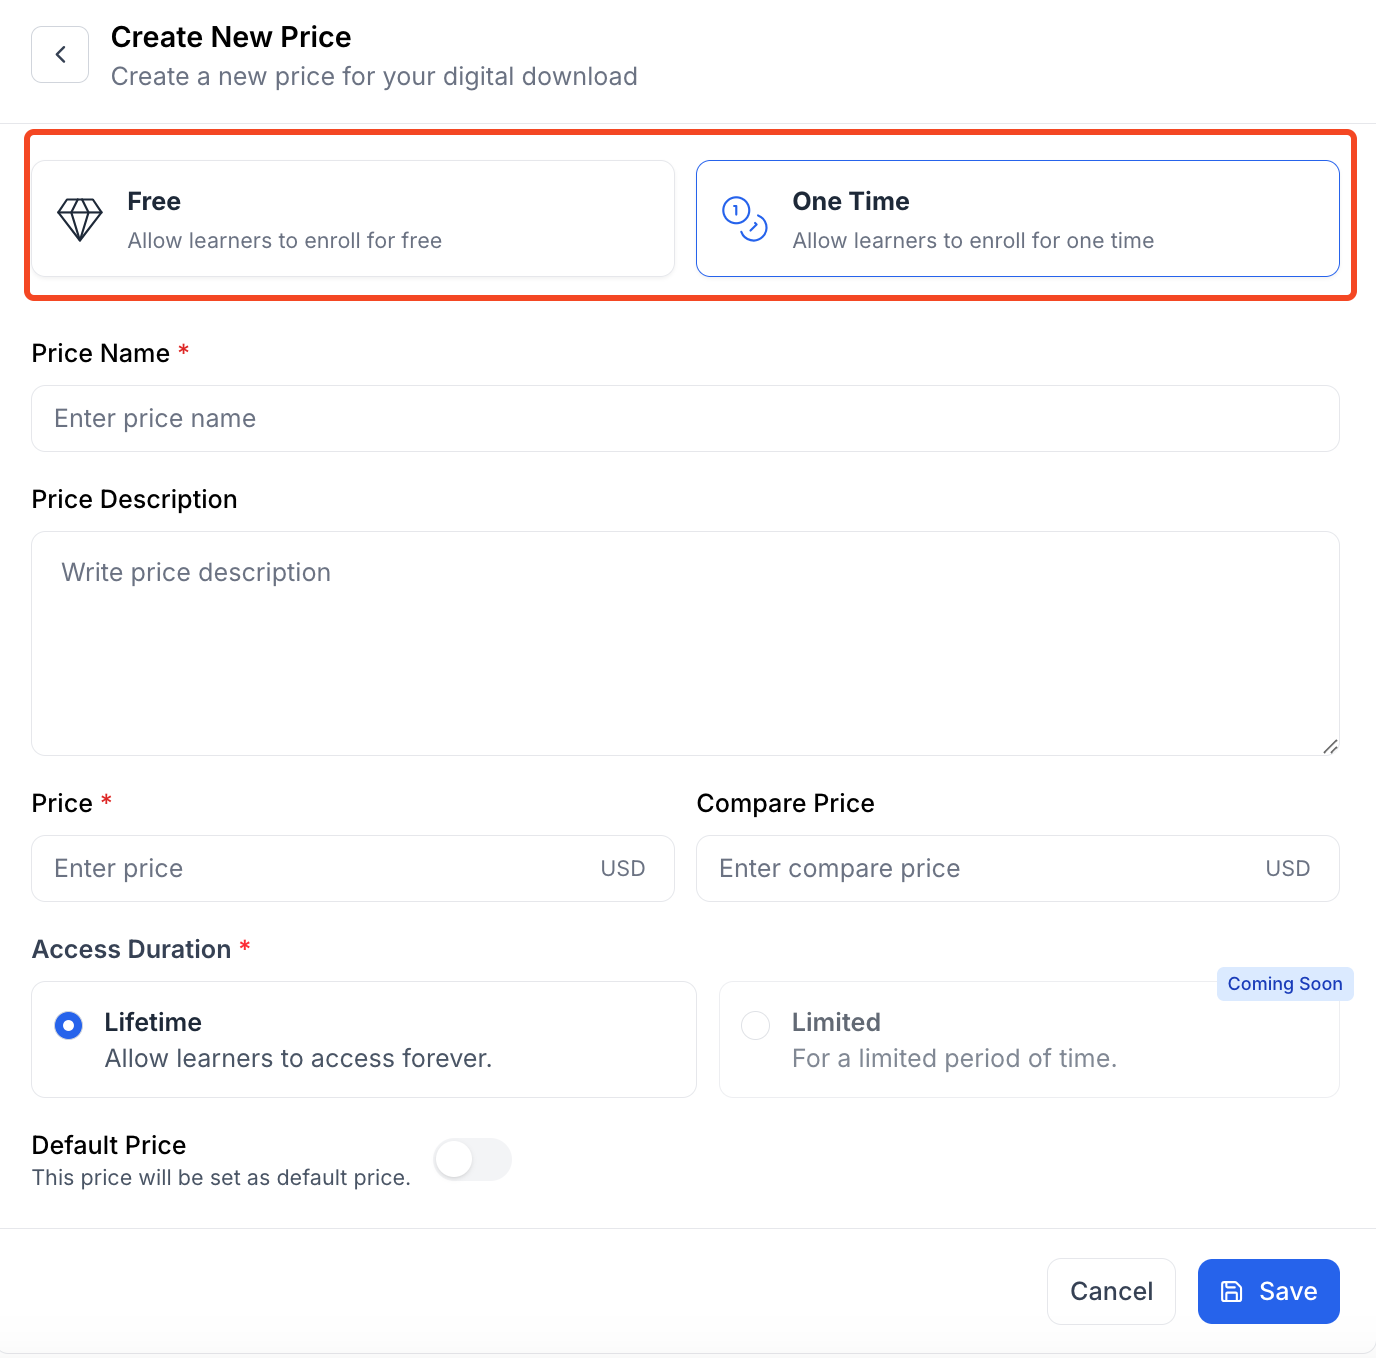
4. Next, you will need to set up a “Price Name” and “Price Description.” The price name is mandatory. If the pricing is a regular price, you can name it like “Starter”, “Regular”, or something like that. If the pricing is a special discounted price, you can name it something like “Black Friday Special.”
The pricing description is optional.
Keep in mind that the name and the description are for you to keep track of the pricing. The pricing name or the description will not appear on your course website for your students.
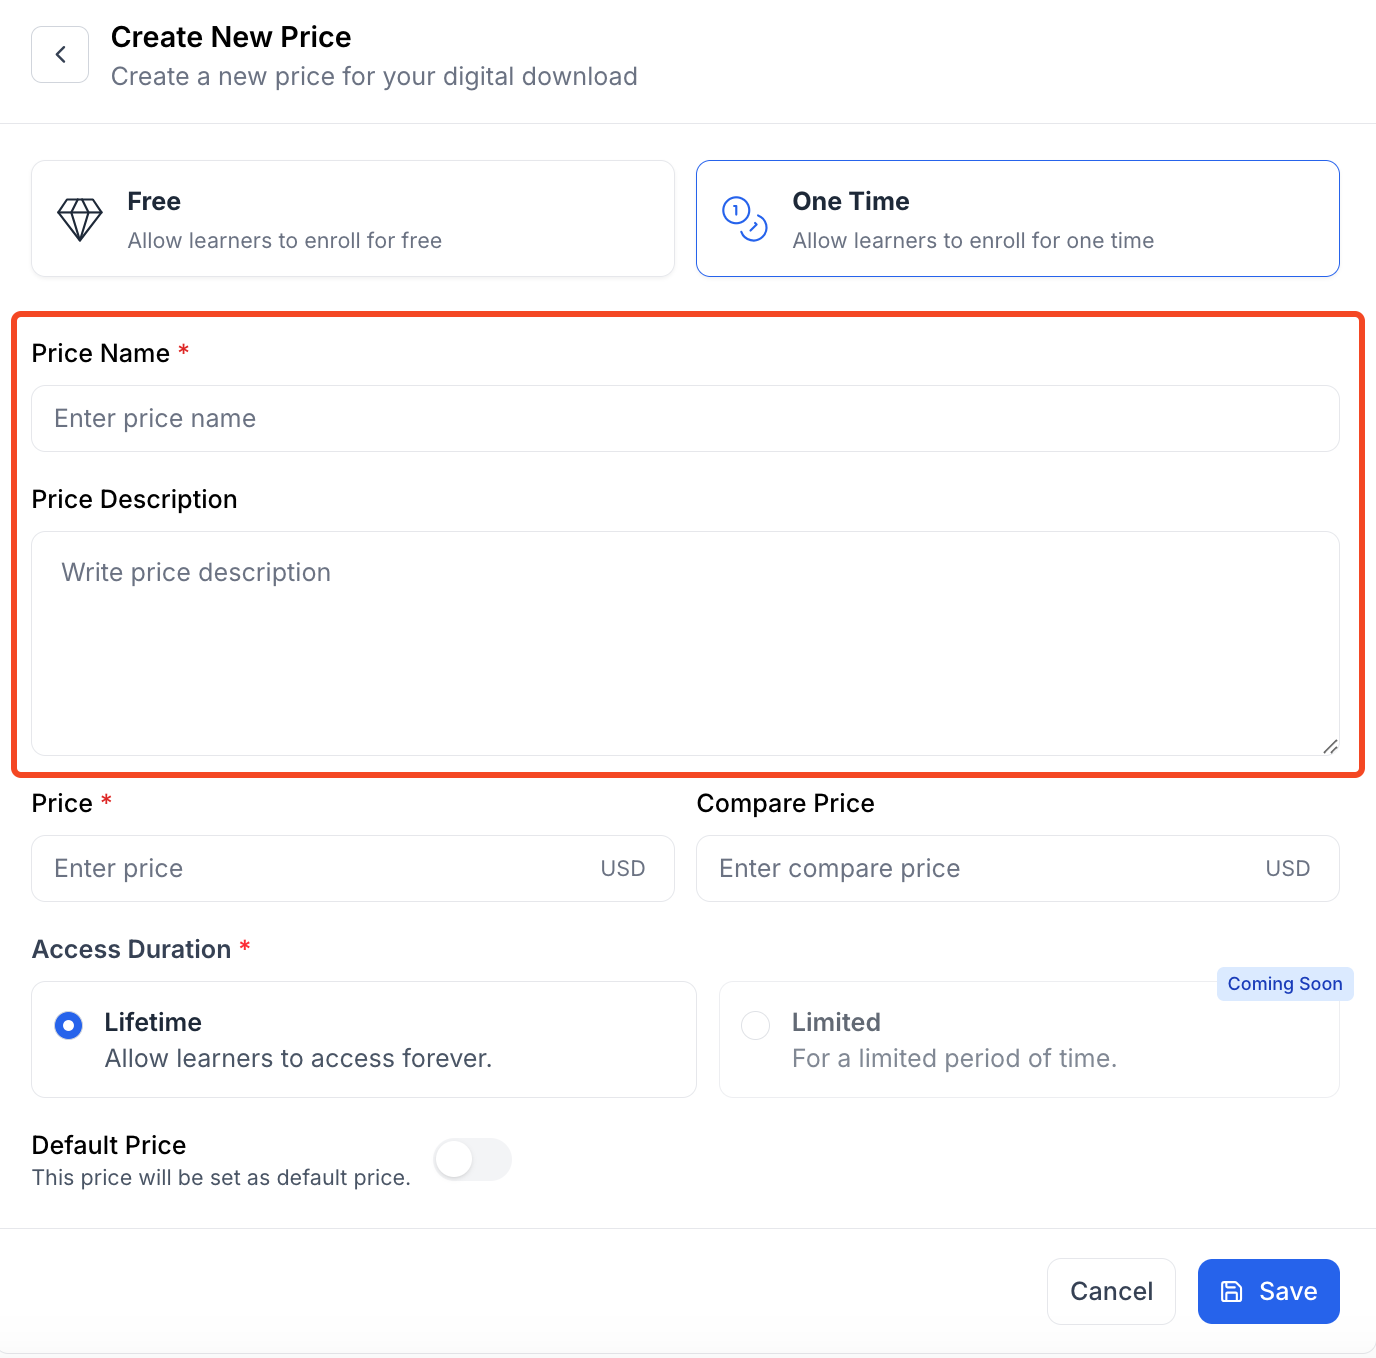
5. Now, it’s time to set up the price. There are two fields: Price and Compare Price. The “Price” field is mandatory, where you will need to input the actual price of the product.
The “Compare Price” field is optional. You can use this when offering a discount by entering the regular price in this field.
For example, if your product’s regular price is $100 and the offer price is $50, you put $50 in the “Price” field and $100 in the “Compare Price” field.

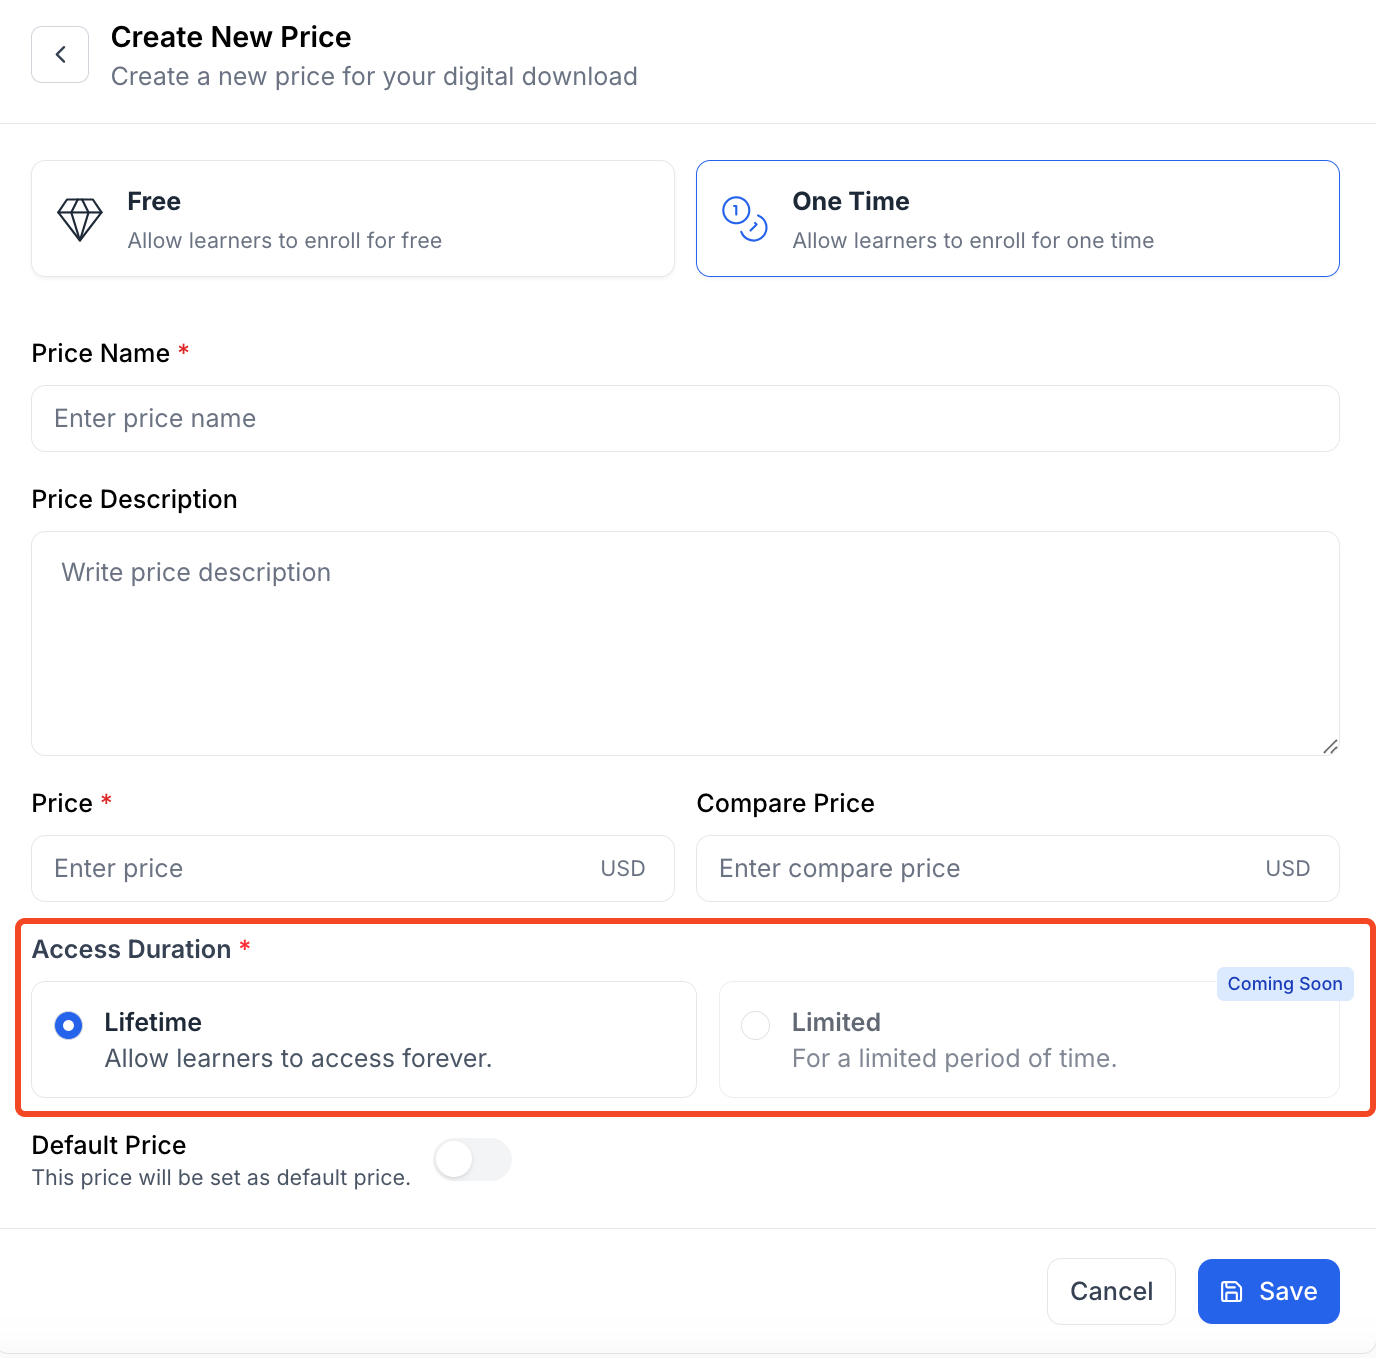
6. Next, you choose how long your students will be able to access the product. For now, we have only one option, which is a lifetime.
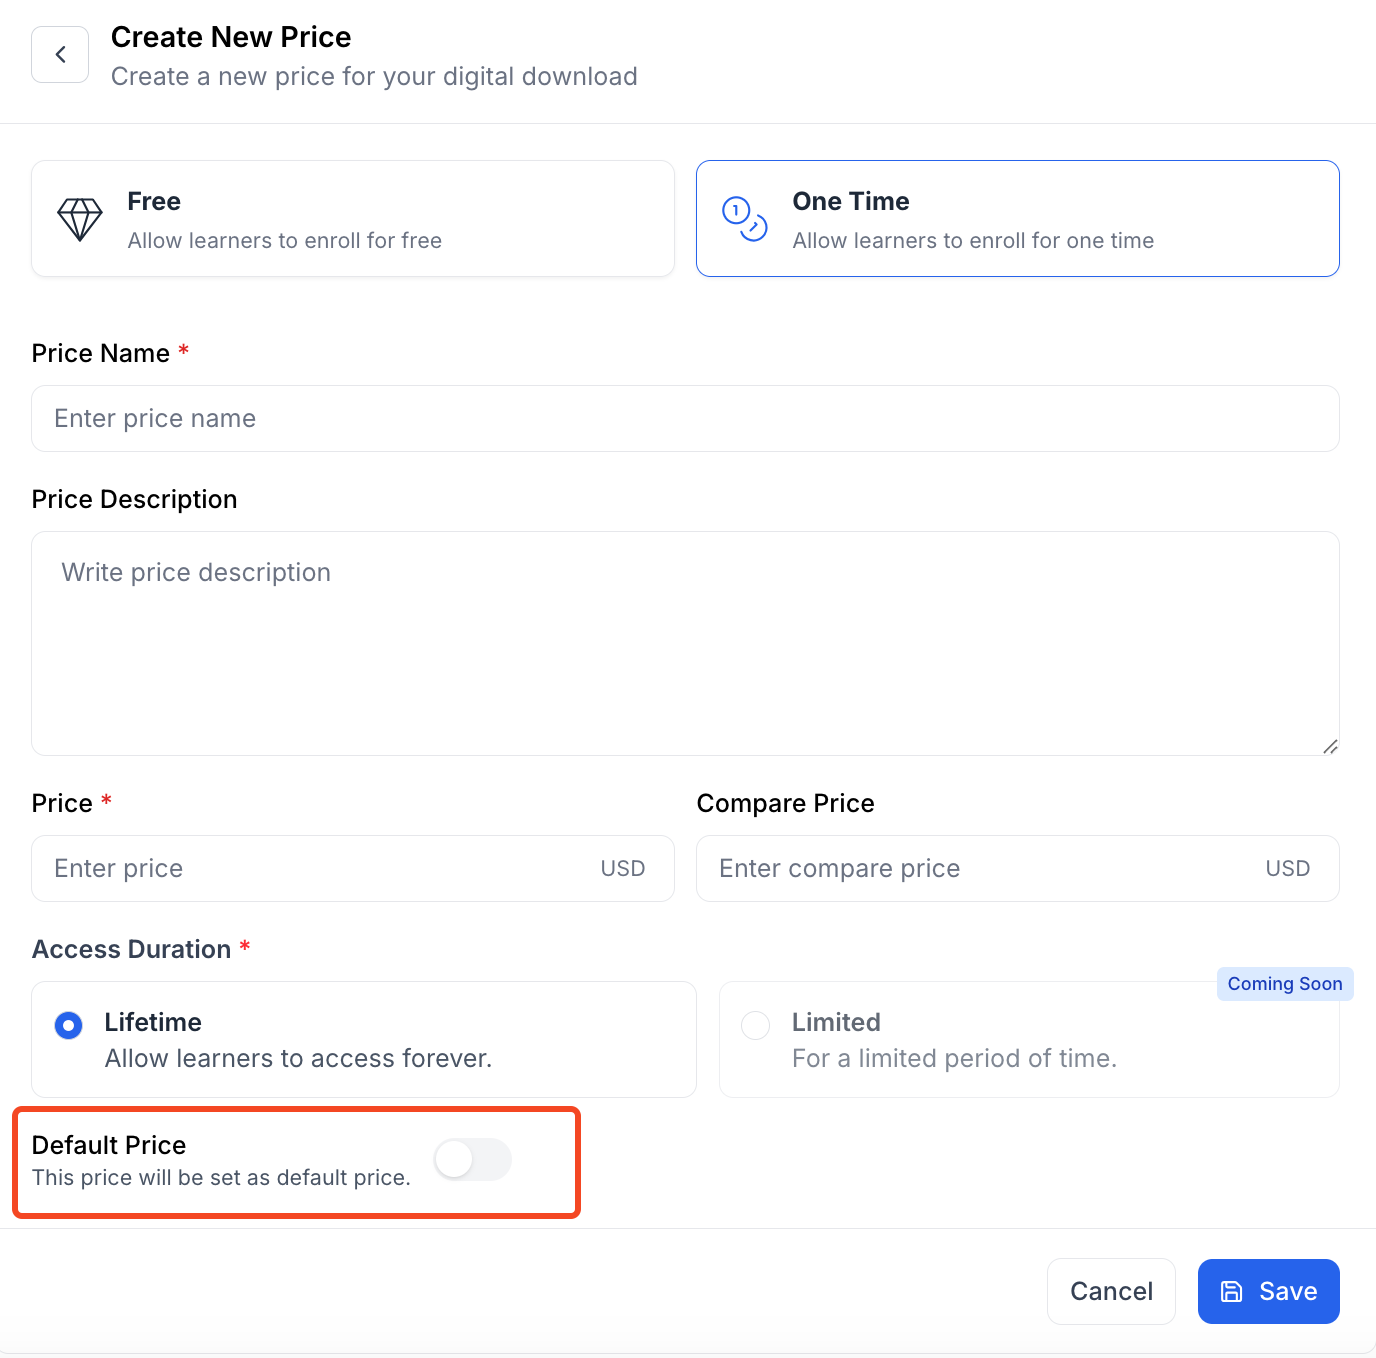
7. Then, there’s a toggle button named “Default Price.” Turn this on if you want to make this price the default price for the product. If no, then keep it toggled off. Once you are done with everything, hit the “Save” button to keep the changes.
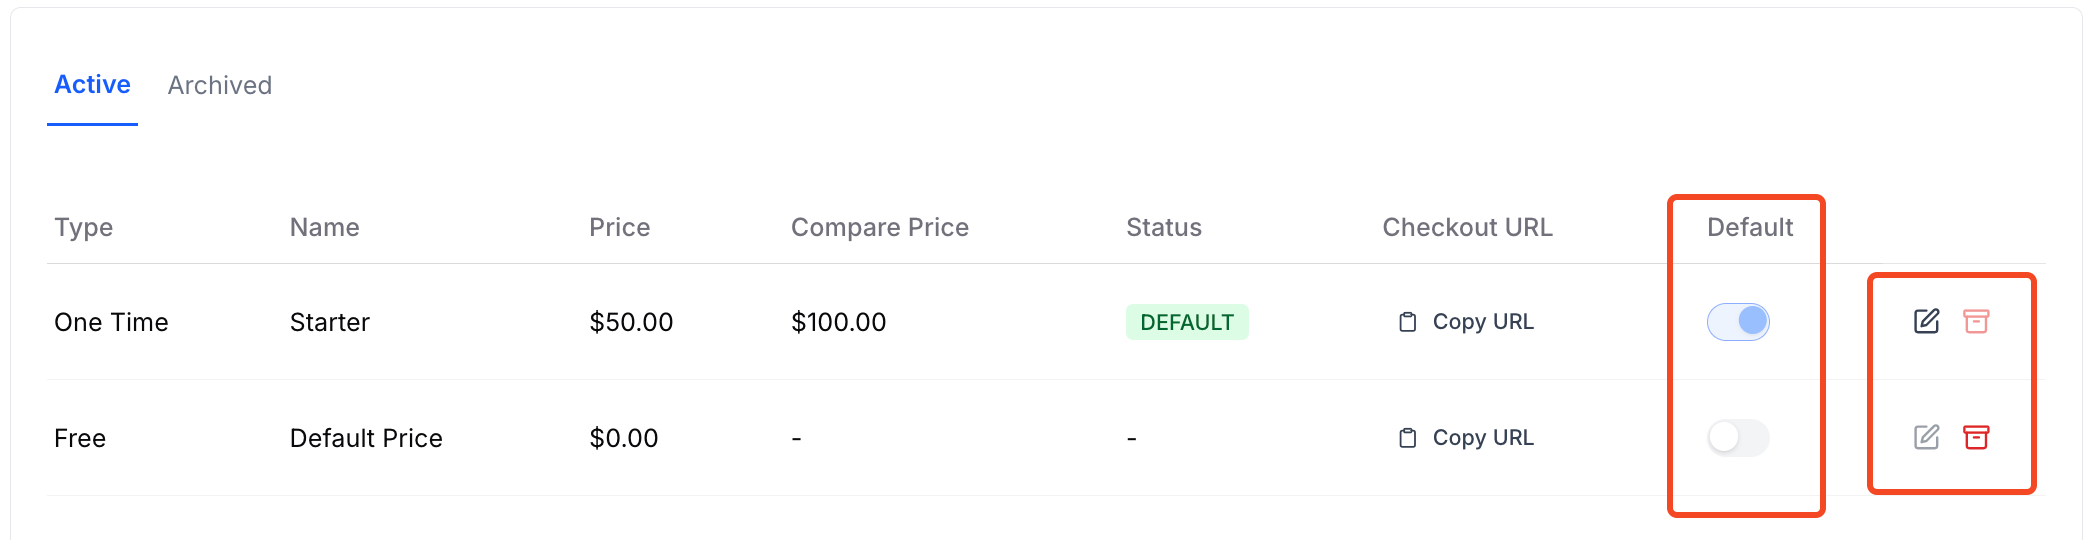
8. Once you click on “Save,” you will be back to the pricing tab, where you can find the pricing you just created. You’ll notice that each pricing plan has a toggle under the Default column. This toggle lets you set a pricing plan as the default. If you have multiple pricing plans, you can easily switch the default using this toggle.
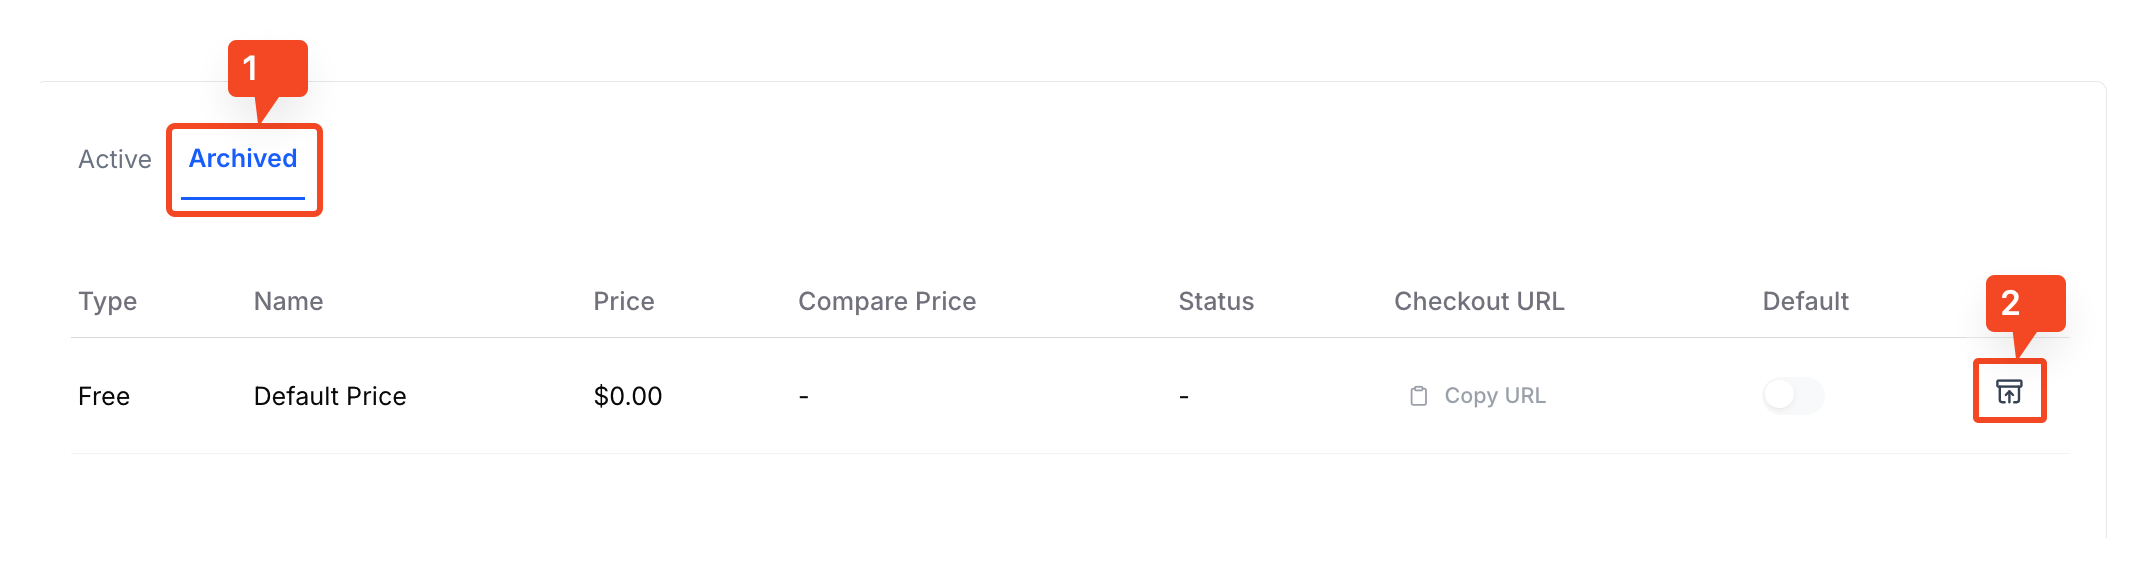
To edit the pricing plan, click the Edit icon. To archive it, click the Box icon. Archiving a pricing plan does not delete it permanently; it simply removes it from the list of active plans.
Note: You can’t archive a pricing when it is selected as the default price.
9. If you want to reactivate any archived pricing plan, you can find all the archived pricing plans in the “Archived” tab. Simply, click on the ‘Box’ icon there to reactivate any archived pricing plan.