To add lessons to your course, you can follow the steps below.
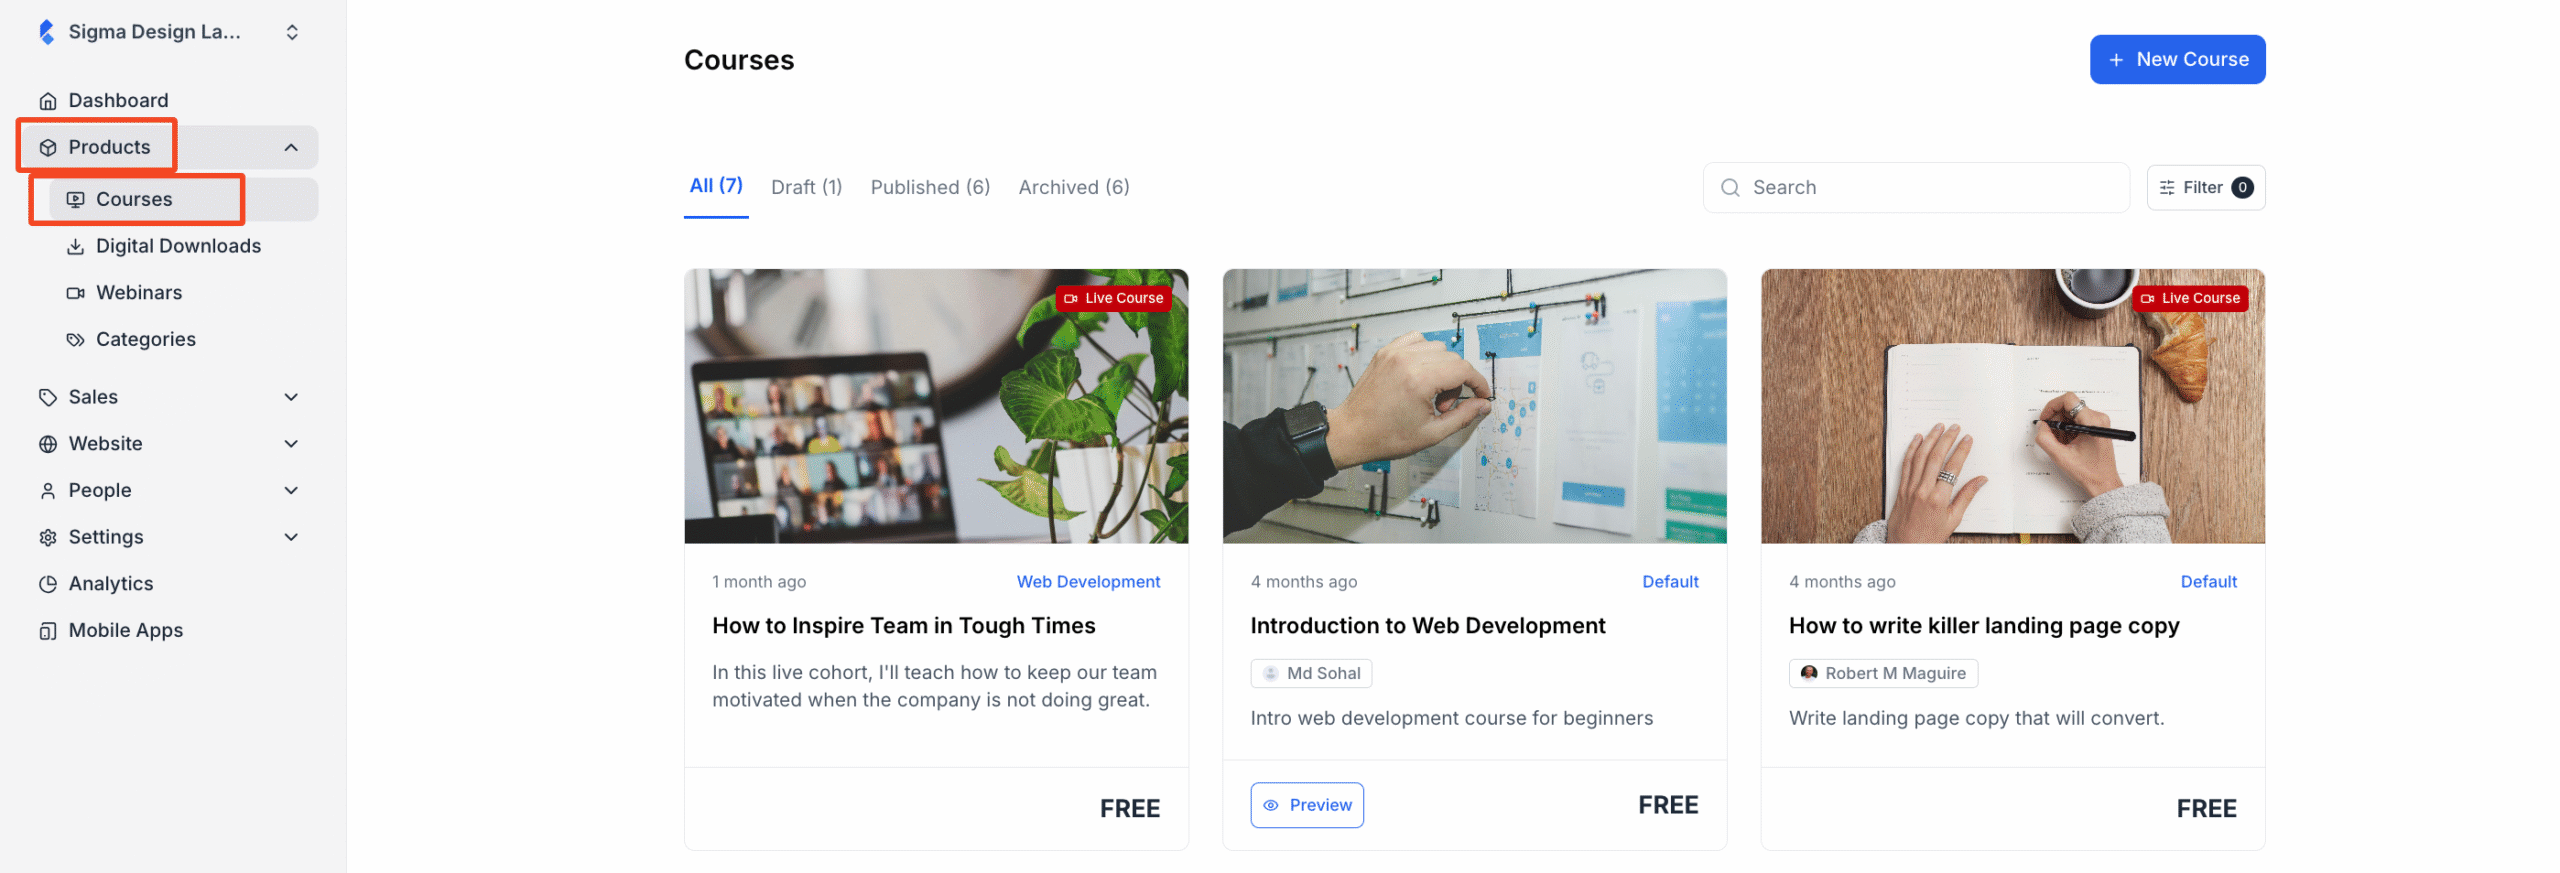
1. From the dashboard, click on Products > Courses. Then choose the course you want to add the lesson to.
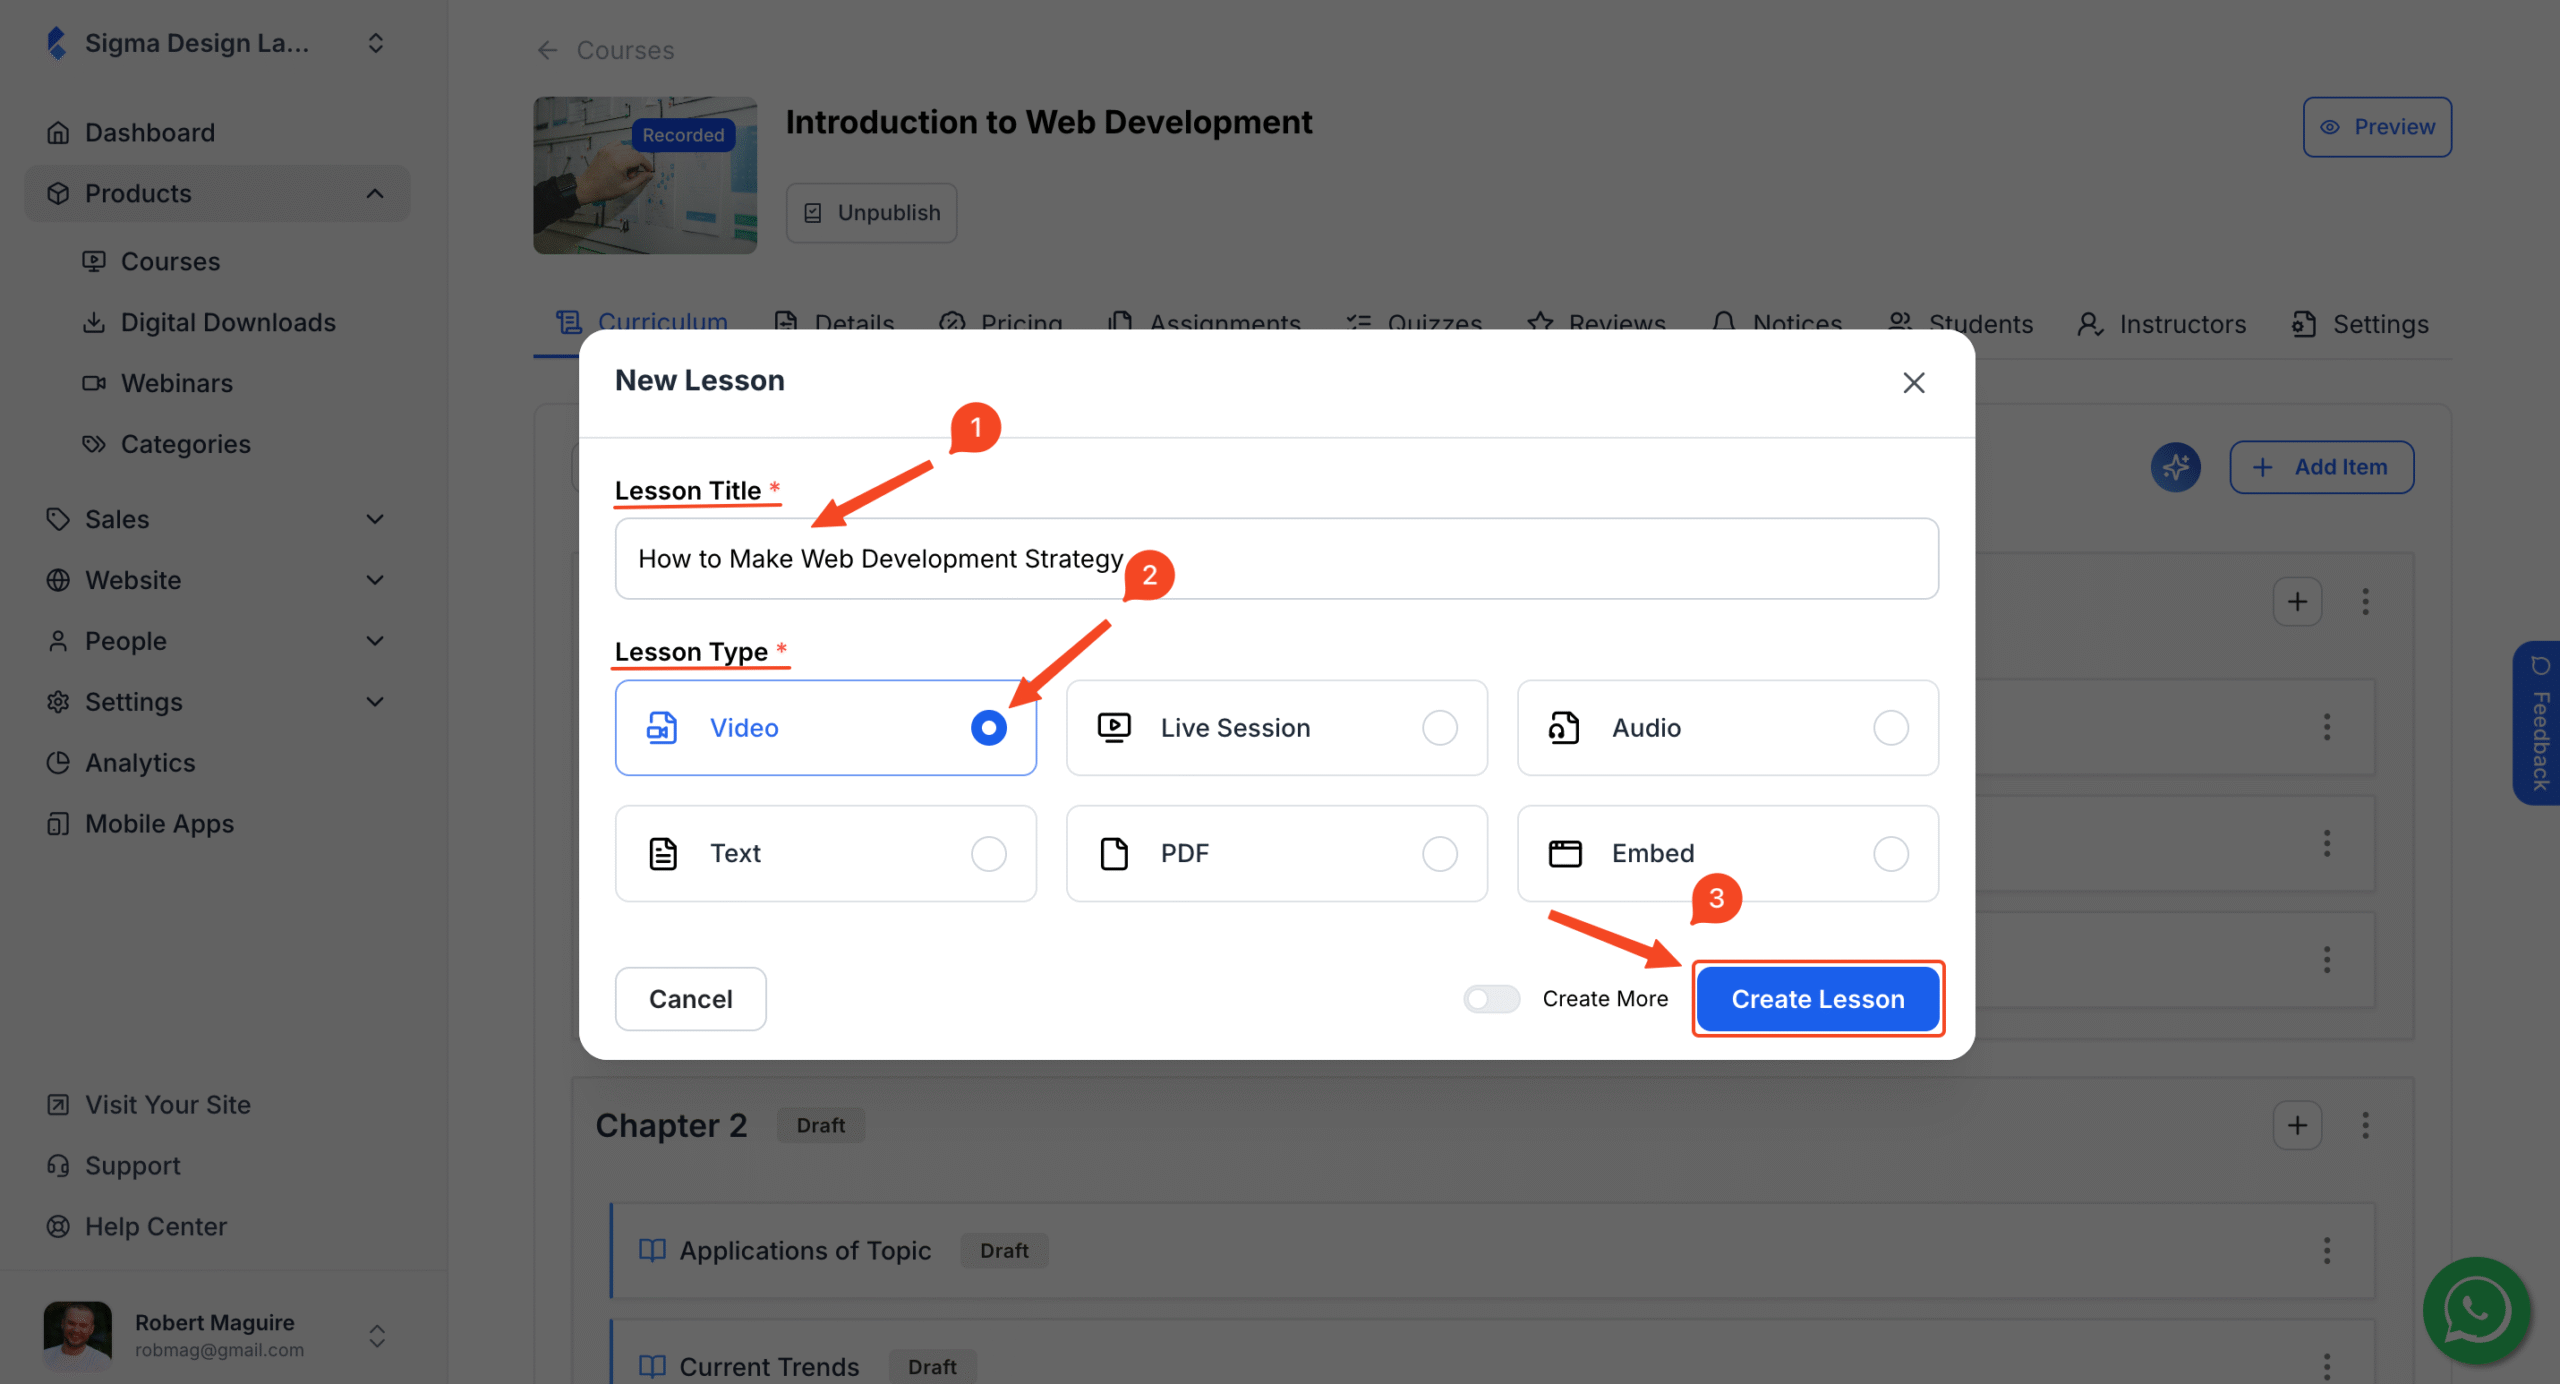
2. Inside the course, you will see the existing chapters. Choose a chapter where you want to add the lesson. Then click on the plus icon beside it. When you do so, a dropdown will appear with multiple options. Choose “Lesson” from there.
If you do not want the lesson to be a part of any existing chapter, you can click on the “Add Item” button and select “Lesson” from there.

2. Then, a popup will appear, where you can enter ‘Lesson Title’ and select the ‘Lesson Type’. You can write whatever you like as the lesson title. For the lesson type, you have 6 different lesson types to choose from.
- Video: Choose if your lesson is a video file.
- Live Session: Choose if you want to take a live class for this lesson.
- Audio: You can record your lesson as an audio file and upload.
- Text: You can go for a simple text lesson.
- PDF: Choose this if you want to upload a PDF file for the lesson.
- Embed: You can include content from an external source directly inside your lesson.
When you’re done, click on “Create Lesson“.
Tip: To have the most impact on your students, you should be clear about the outcome of the lesson in the title. You should also avoid vague words and include action verbs. Extra points if you can keep the lesson title short, specific, and easy to understand at a glance.
For example, instead of “Lesson 3: Web Development Strategy“, you can write “How to Make a Web Development Strategy.“
3. Once you do, you will be taken to the lesson editor, where you can add more details about the lesson. For starters, you can add a ‘Description’ for your course. A good description should cover a summary of the lesson so that students get an idea of what the lesson is about.
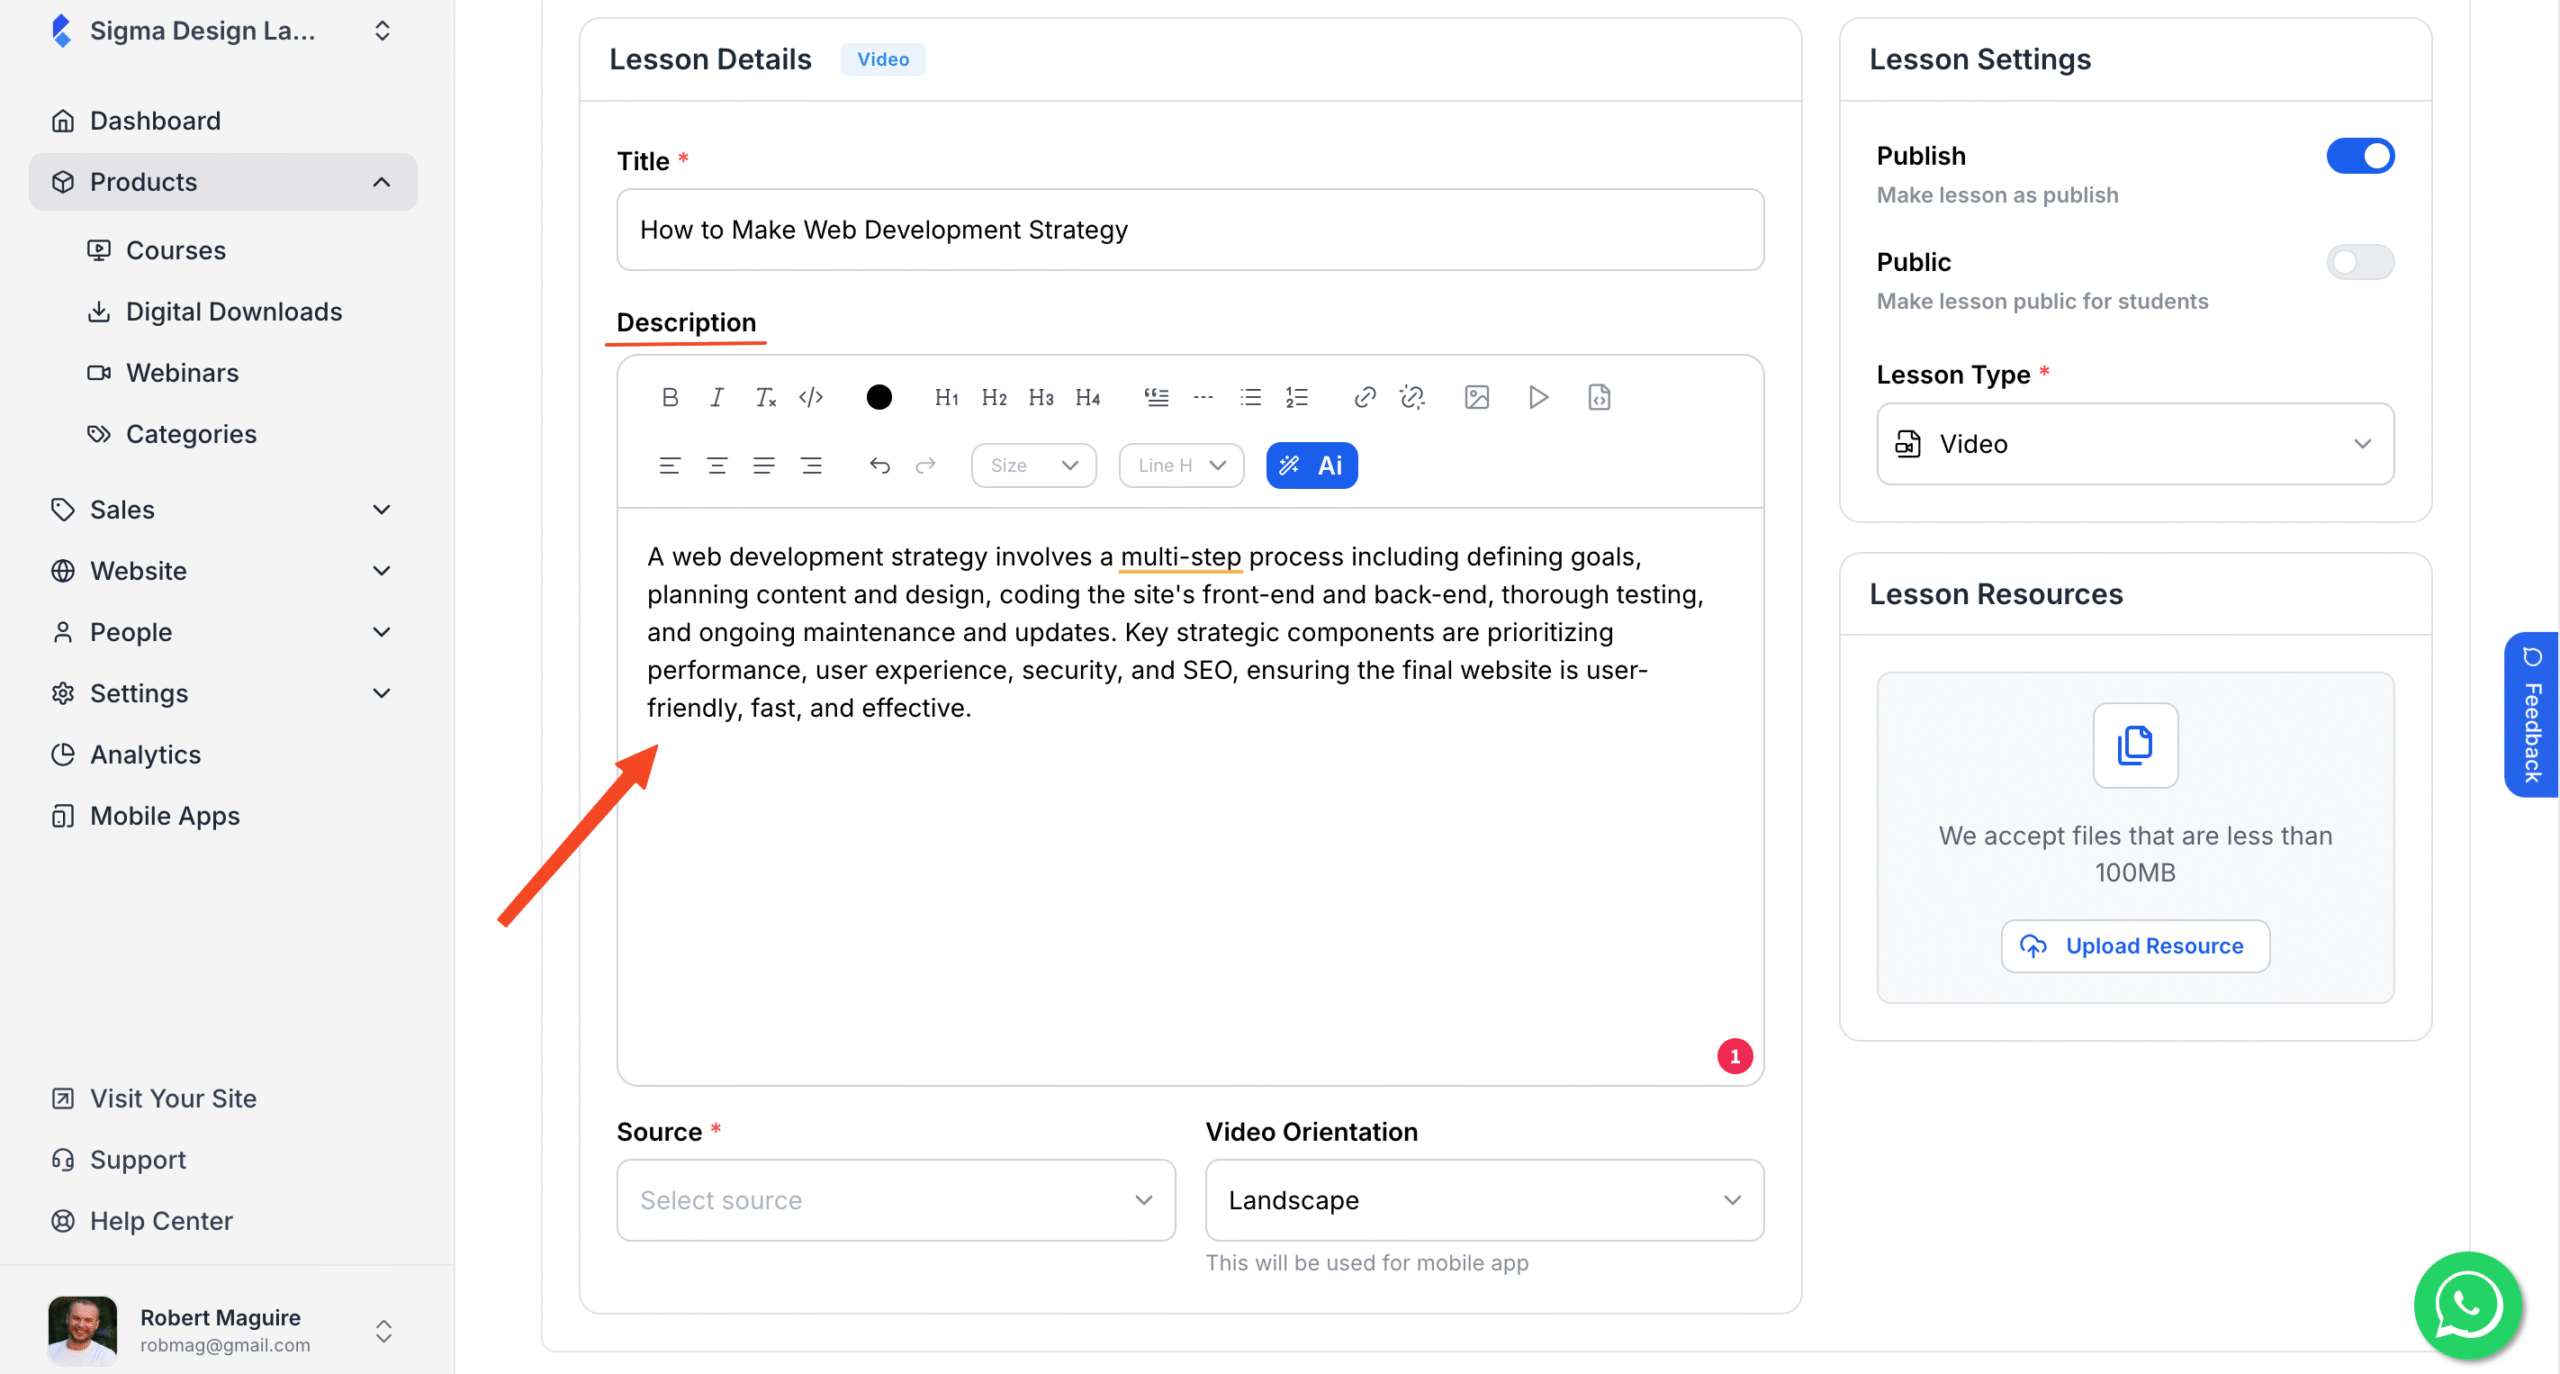
4. Now, since we have chosen video as the “Lesson Type,” we will need to upload the lesson video. To upload the lesson video, find the dropdown named source and click it. You can see multiple options such as YouTube, Vimeo, Custom Code, and Upload.
If your videos are already uploaded to YouTube or Vimeo, you can use those options to embed the video from there. Using the Custom Code option, you can embed videos that are uploaded to platforms other than YouTube and Vimeo. Finally, the upload option is for simply uploading the video from your local files.
5. Now, to upload the video, choose “Upload” and simply upload the video using the uploader. Make sure that the video is in .mp4, .webm, and .ogg formats and also less than 1 GB.
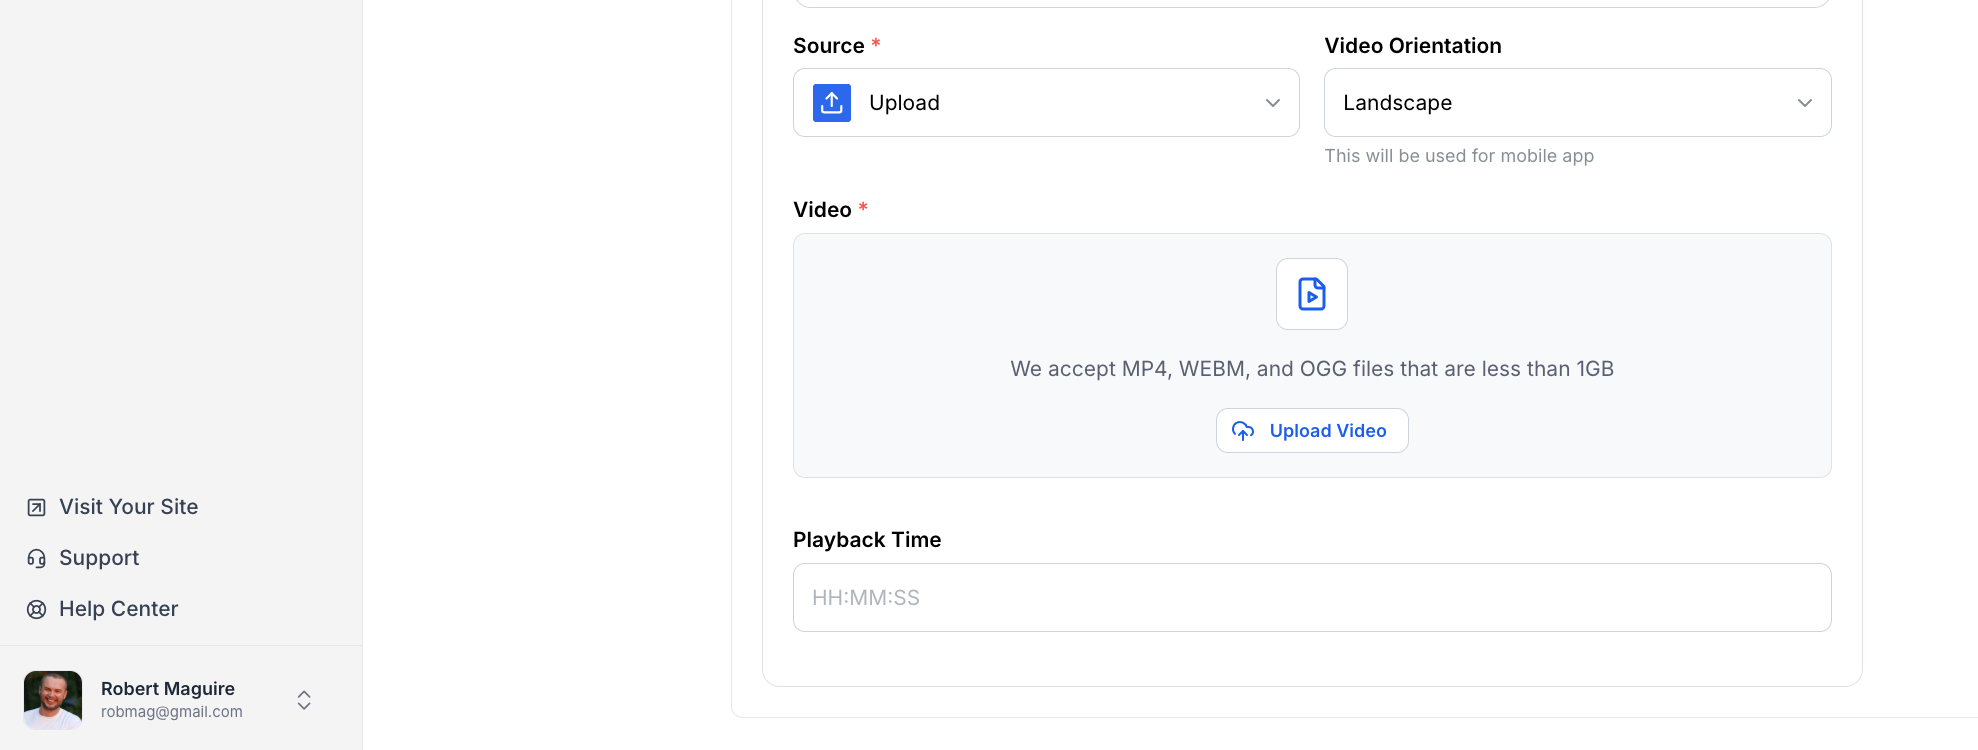
6. Once you’re done uploading, you can select the orientation of the video using the video orientation dropdown. This is for the mobile users. Also, from the playback time field, you can see the total runtime of the video.
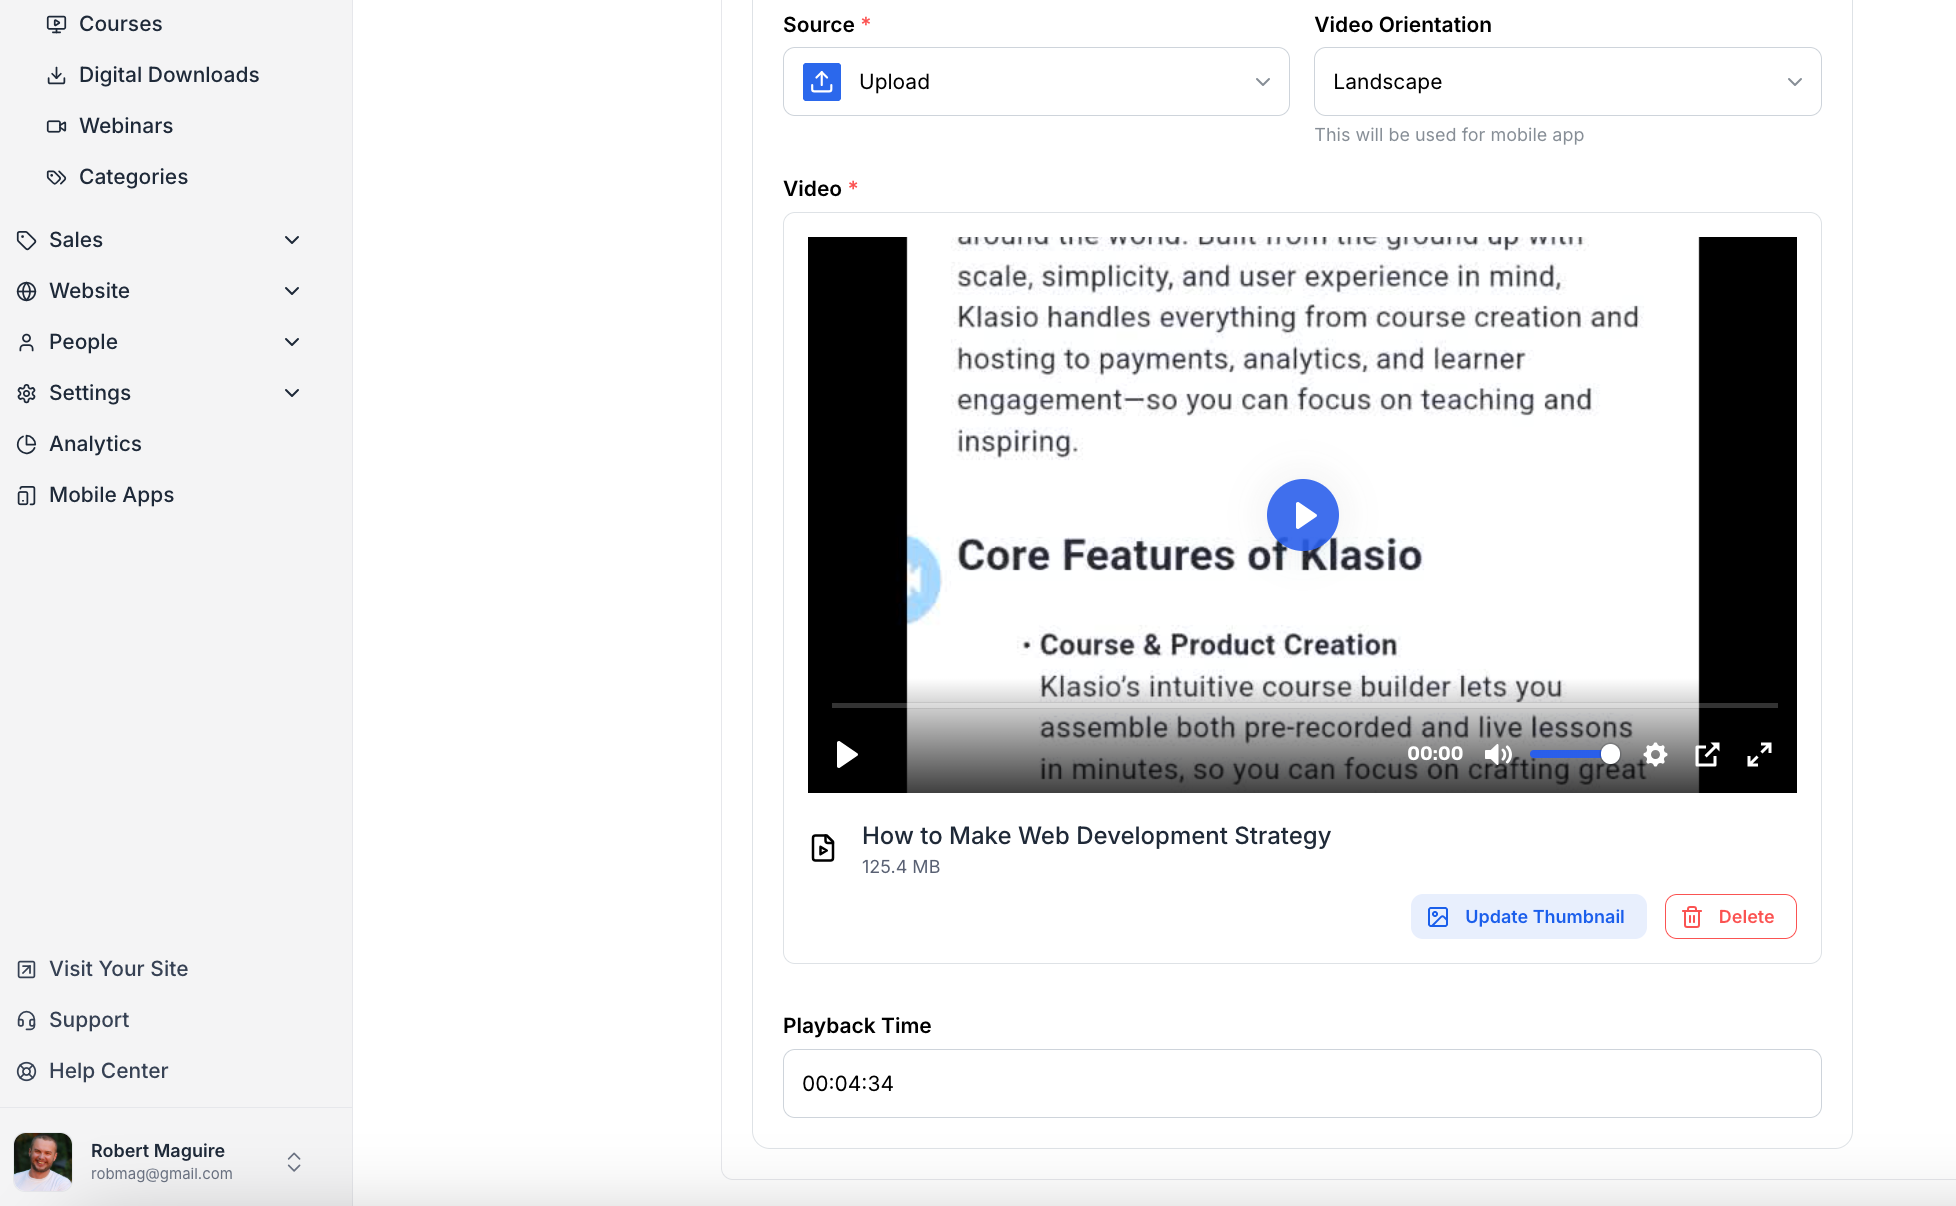
7. Next, if you want to add any additional resources, such as PDFs or Docs relevant to the lesson, you can add them by clicking on the ‘Upload Resource’ button. The maximum size for the file is 100MB.
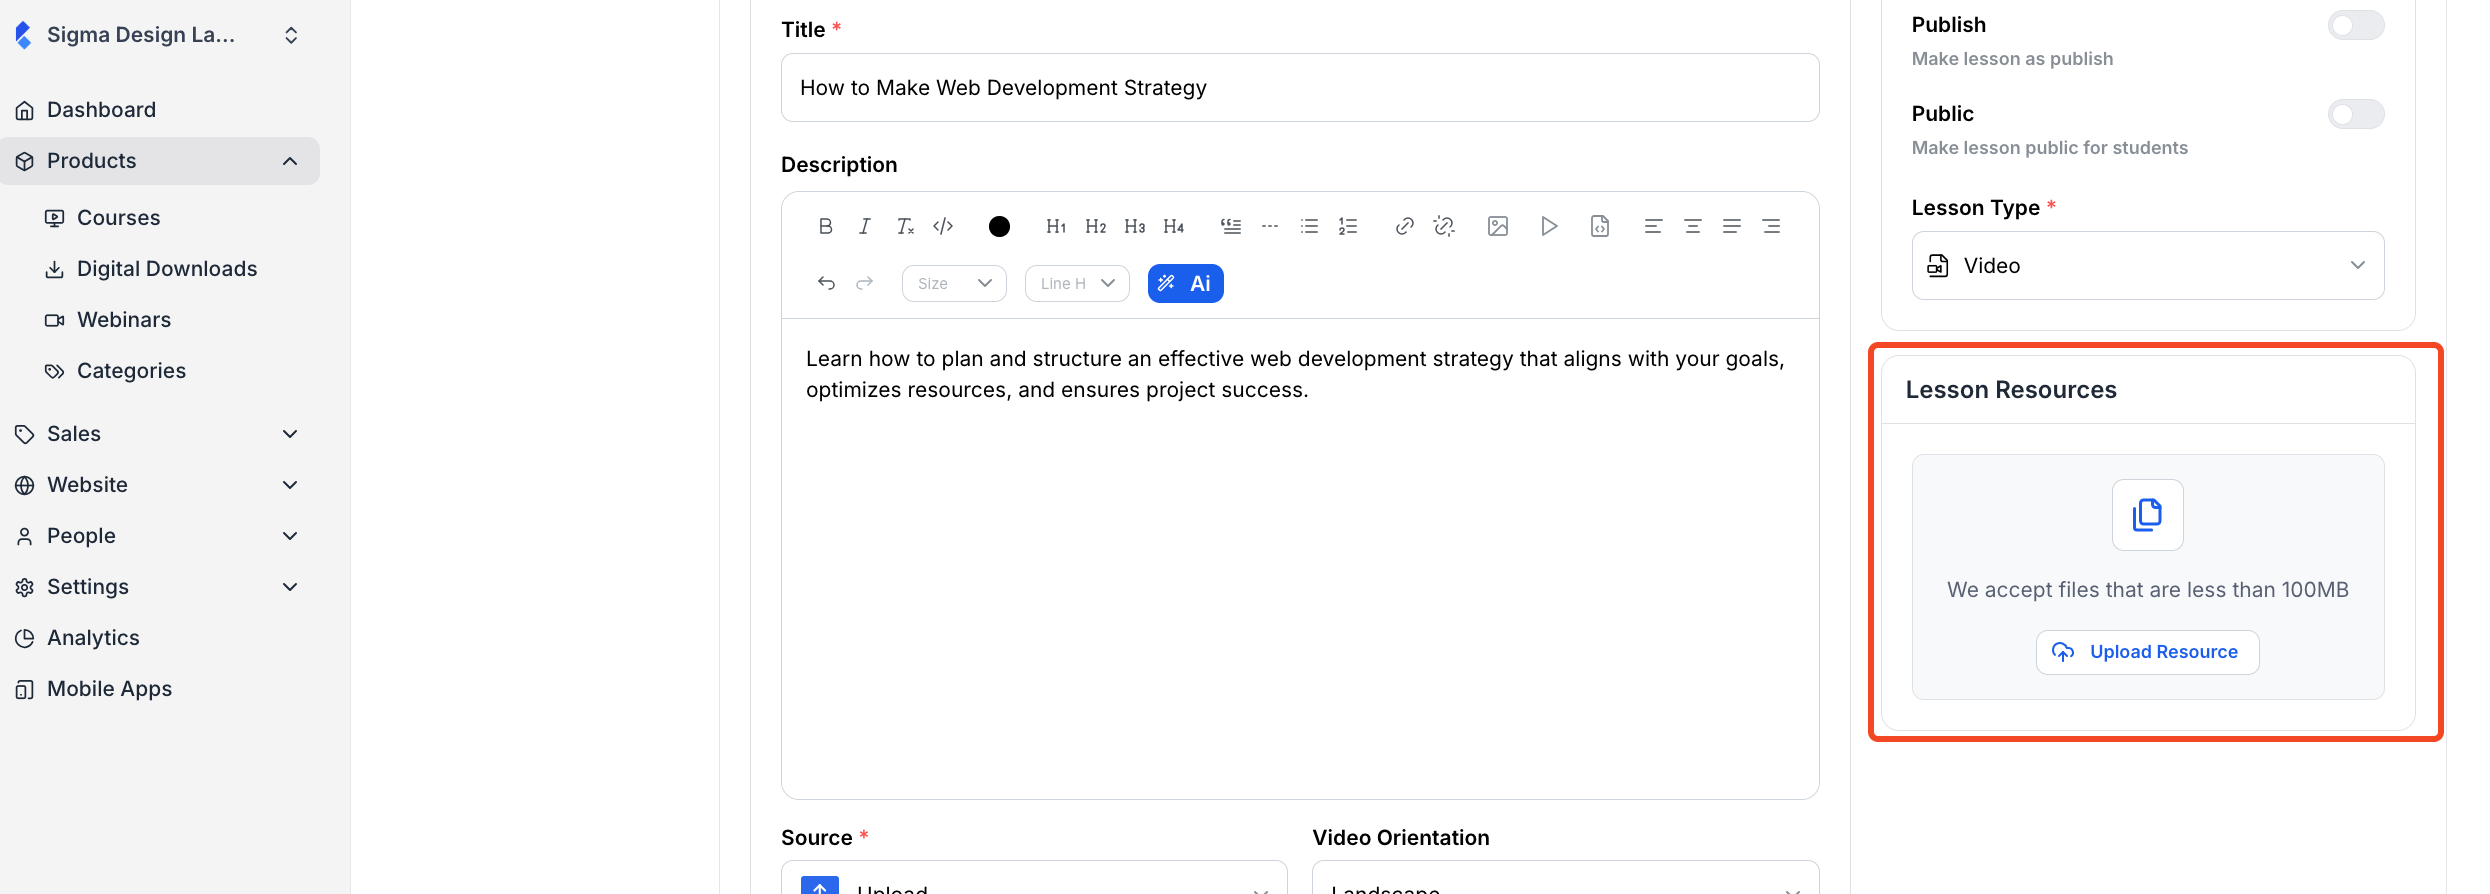
8. Finally, if you feel the lesson is ready, you can toggle the Publish button on. Doing so will publish the lesson in your course.
Warning: If you toggle on the Public button, it will make the lesson public for anyone who visits your course website. So, if you are sharing premium content in the lesson, DO NOT turn the public toggle on. Only use this when you want potential students or visitors to access any lesson for free before they decide to purchase your course.
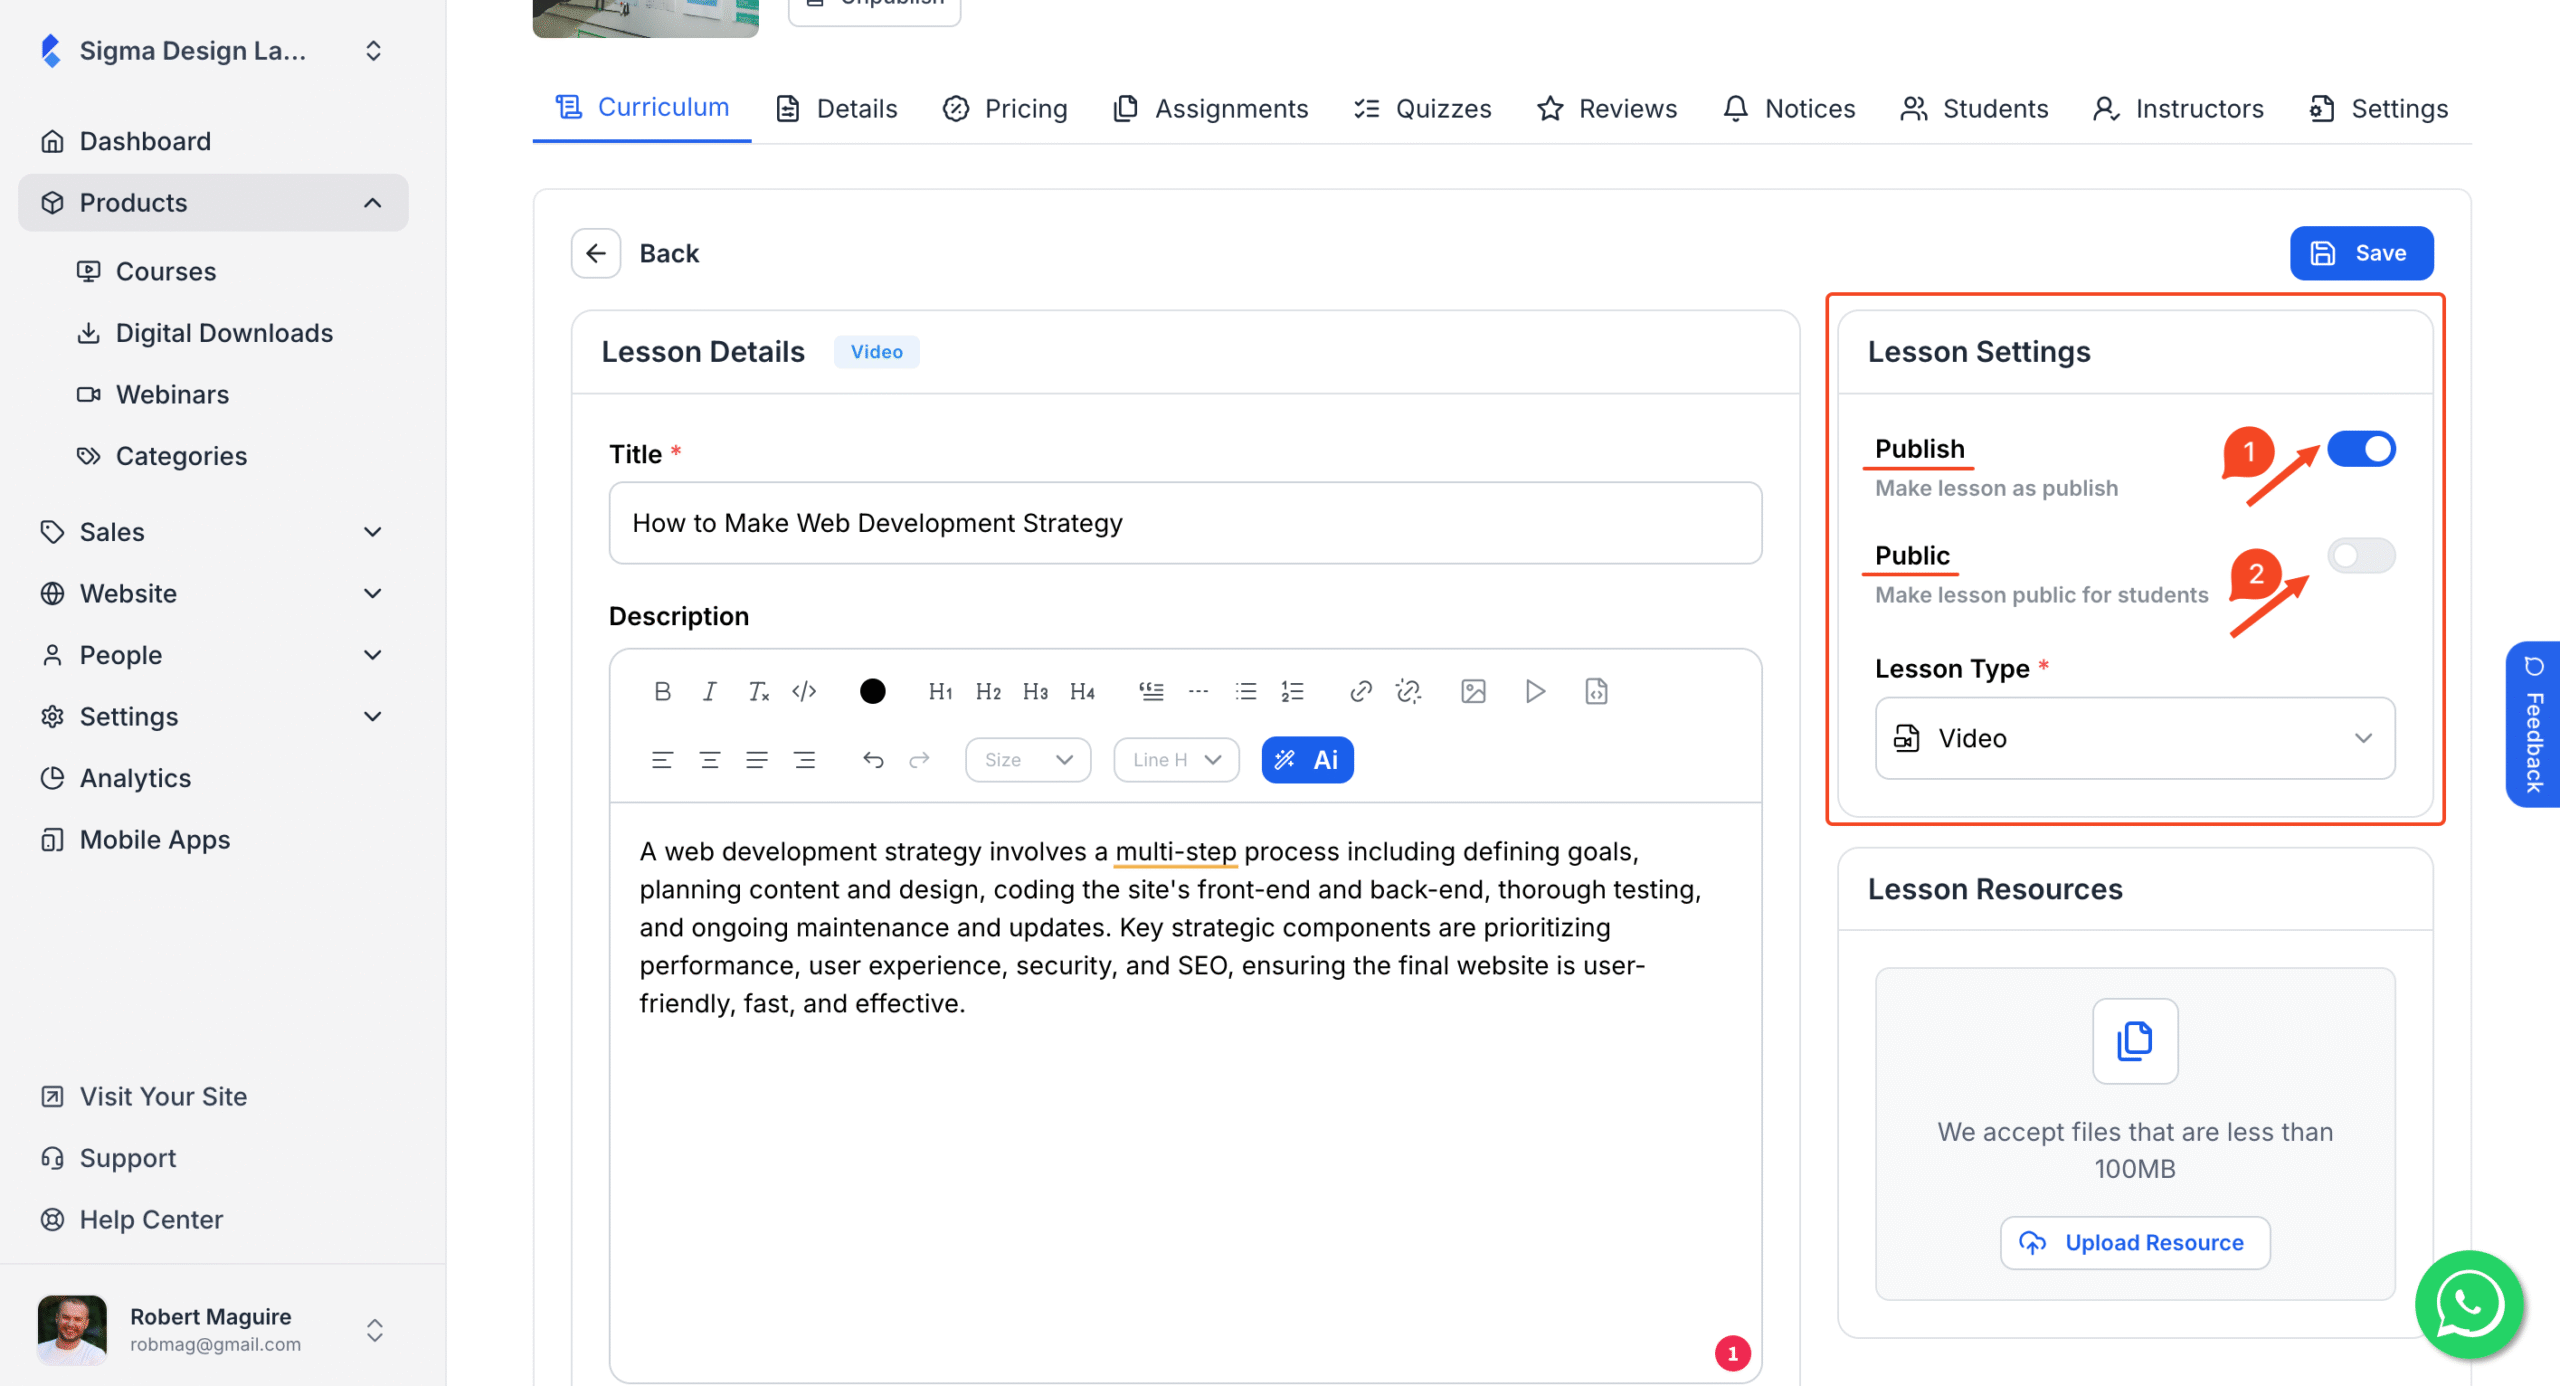
9. Hit ‘Save’ once you’re done.
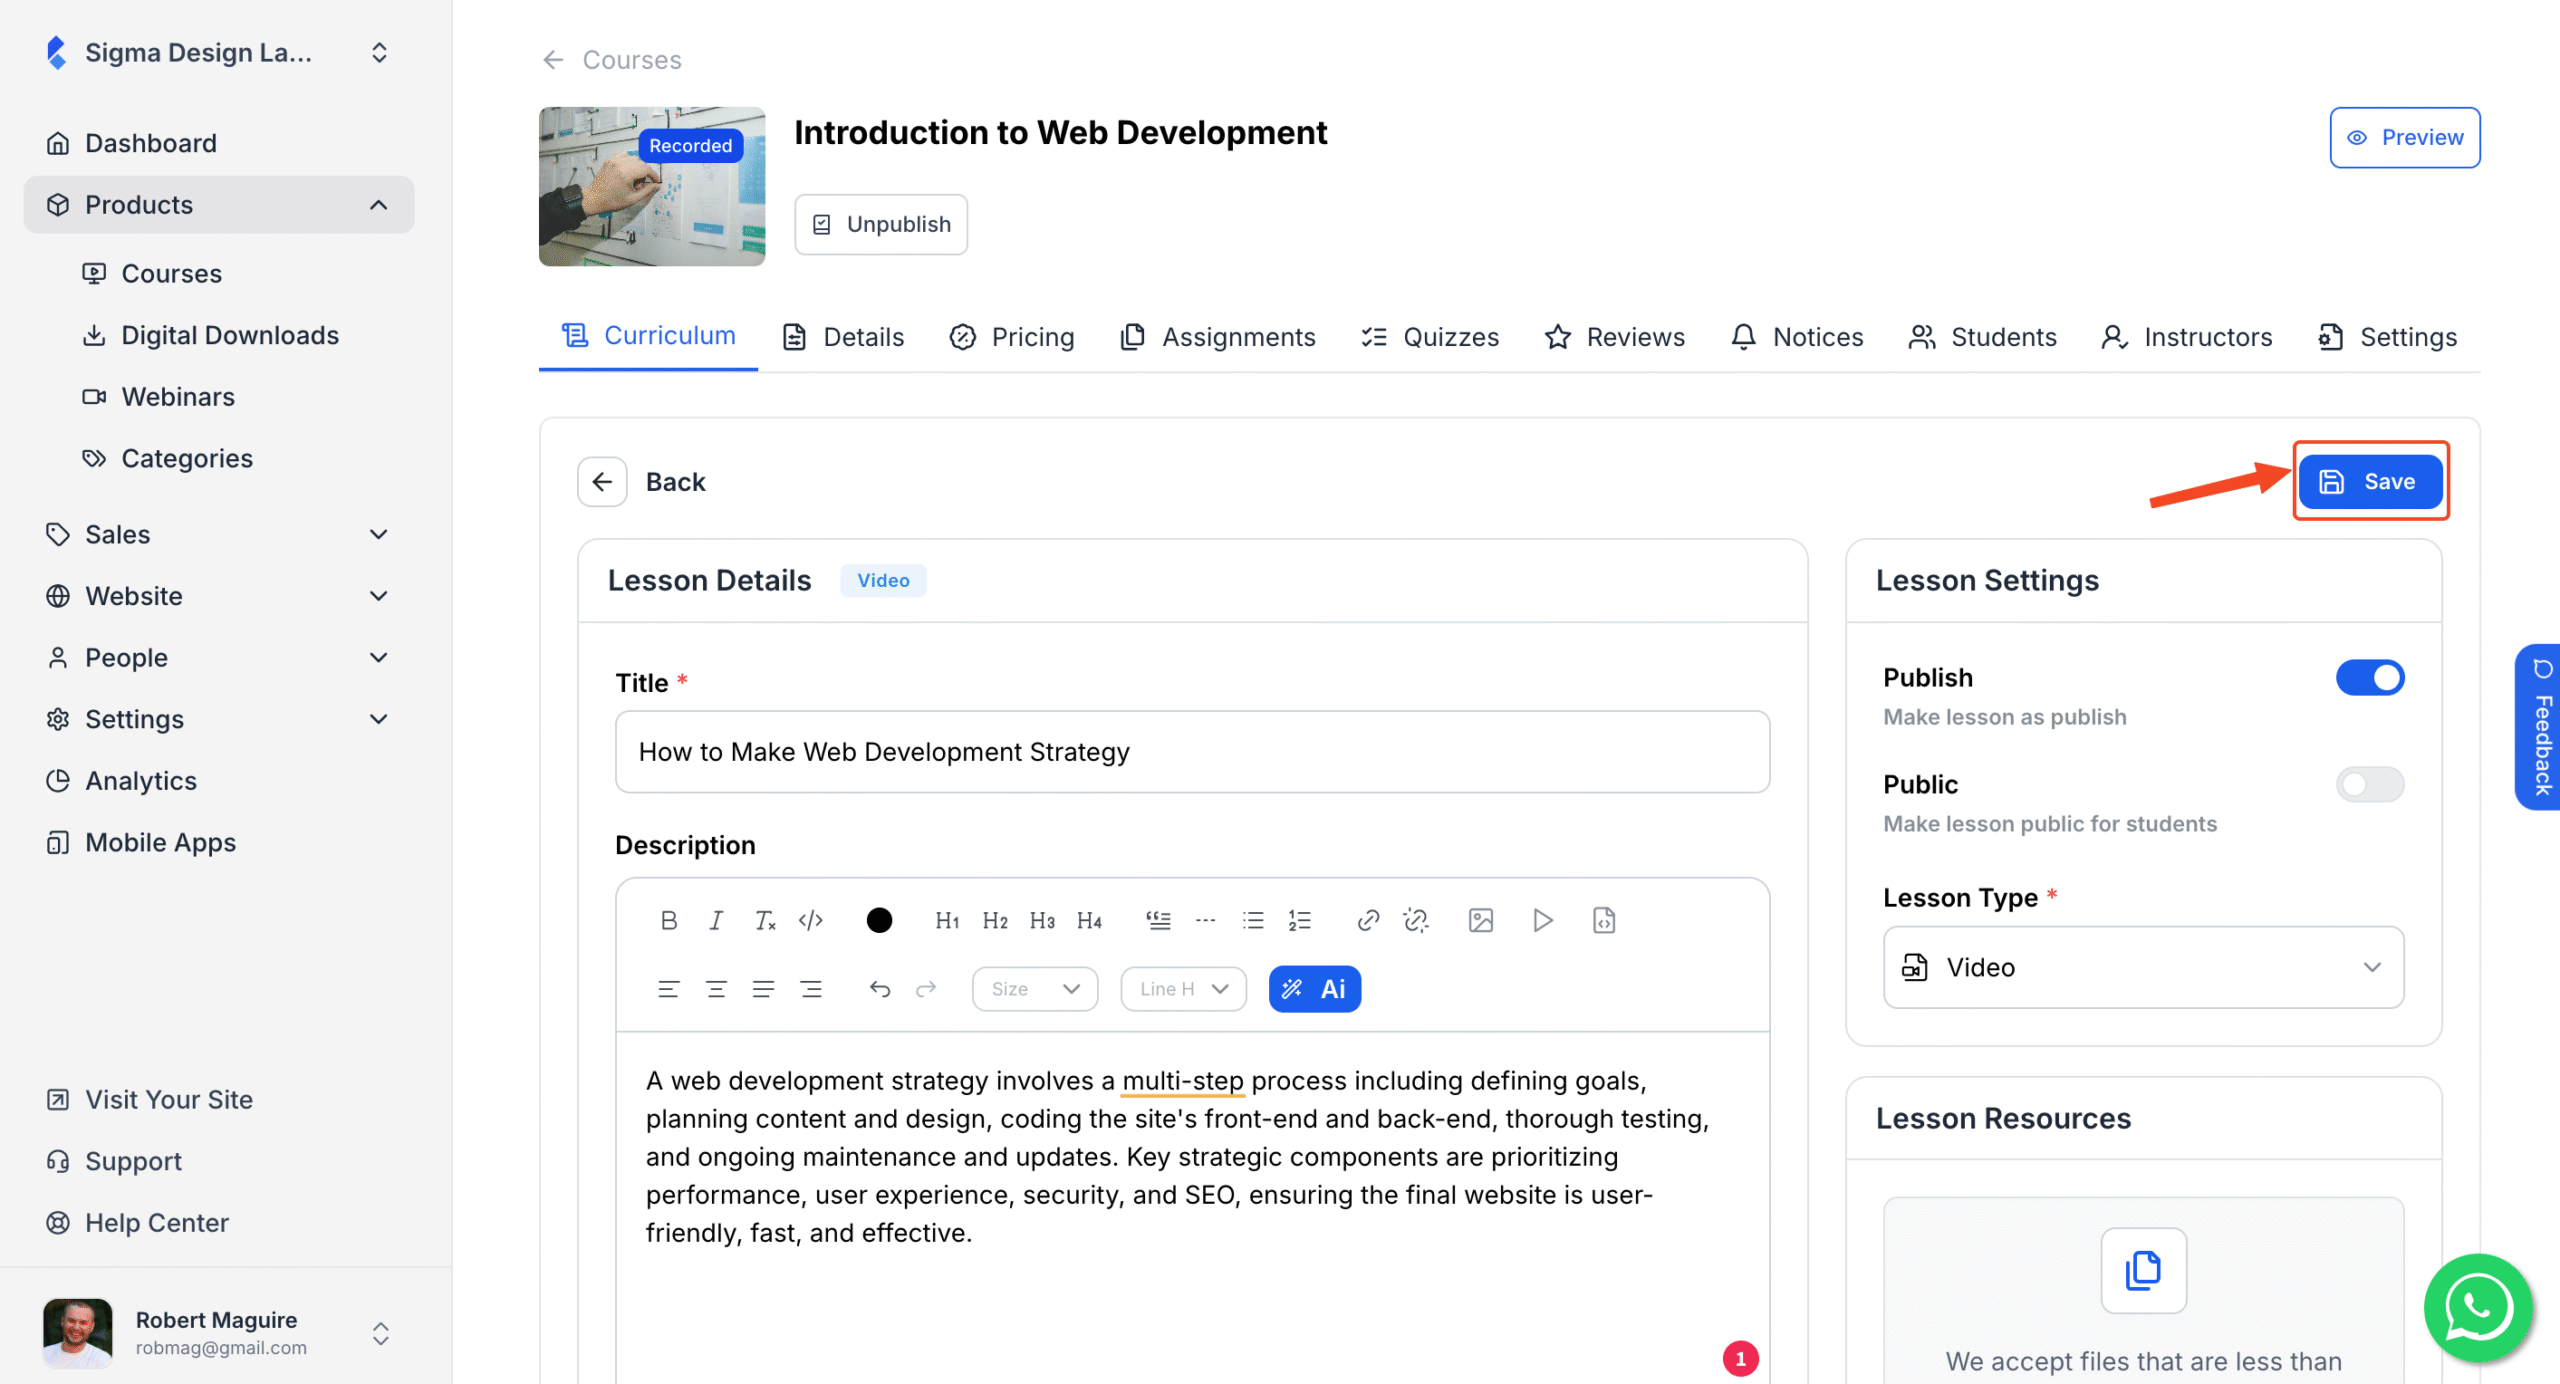
Your new lesson is now live and available for your students to access.