Keeping your social media links current on your academy website is important for staying connected with your audience. Updated links mean your visitors can easily find and follow you on your social platforms.
Here’s how to update social links on your academy website:
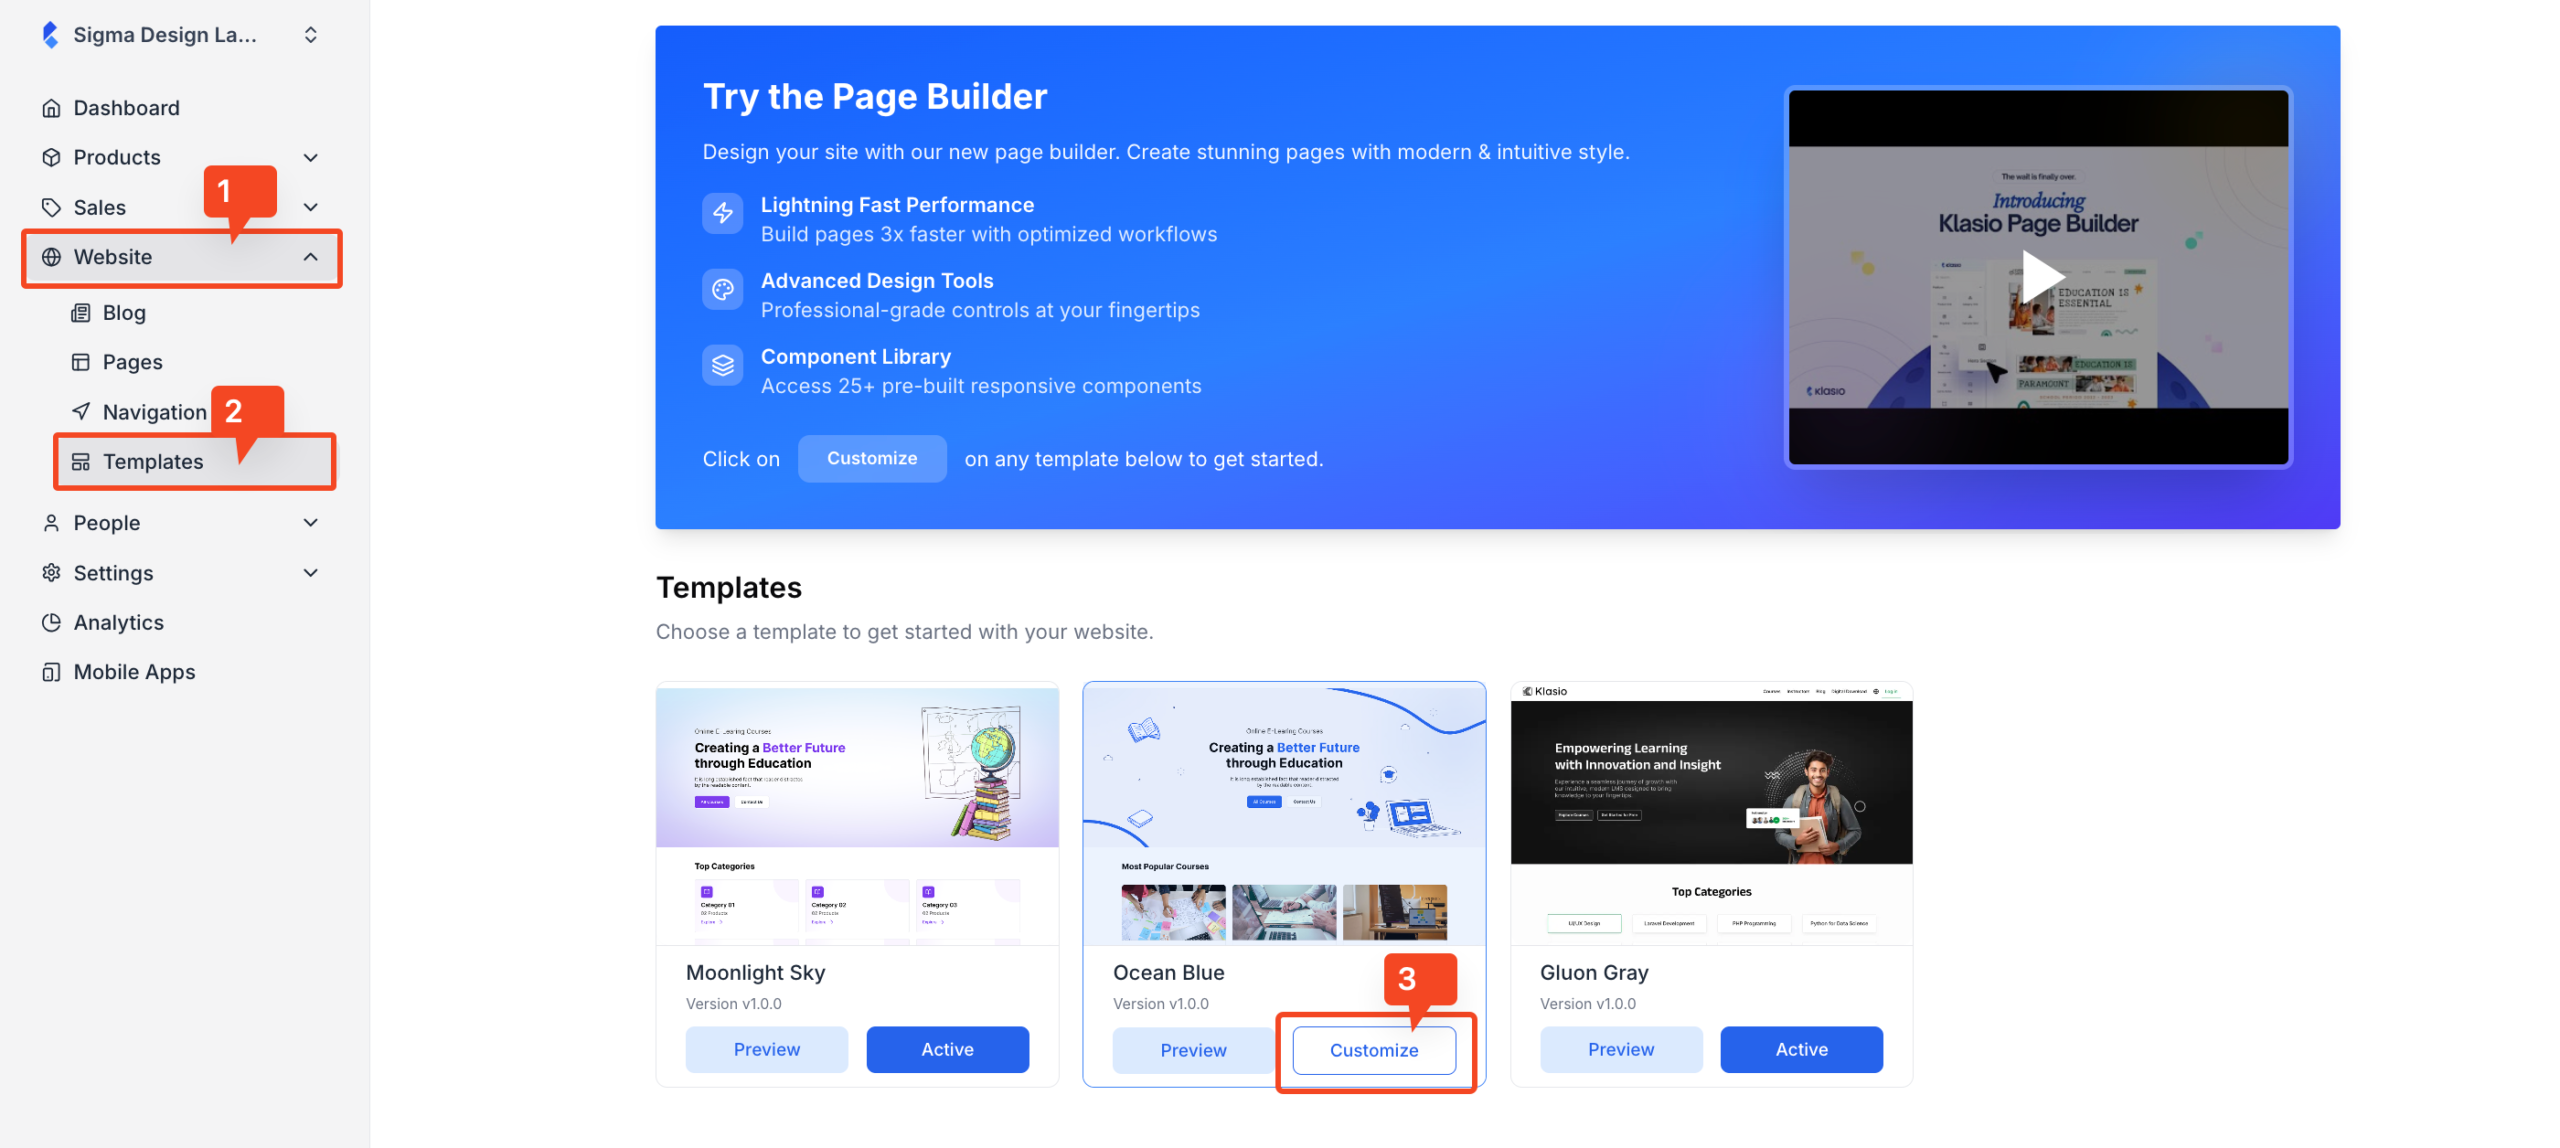
1. From your dashboard, expand Website, then click on Templates. On the templates page, you will see the default Klasio templates. Click on the “Customize” button on the active template.
2. Then, you will be taken to the page builder. On the left side, you will see the list of system and template pages. Select the page where you want to add the social links and click on the “Edit” button on the right.

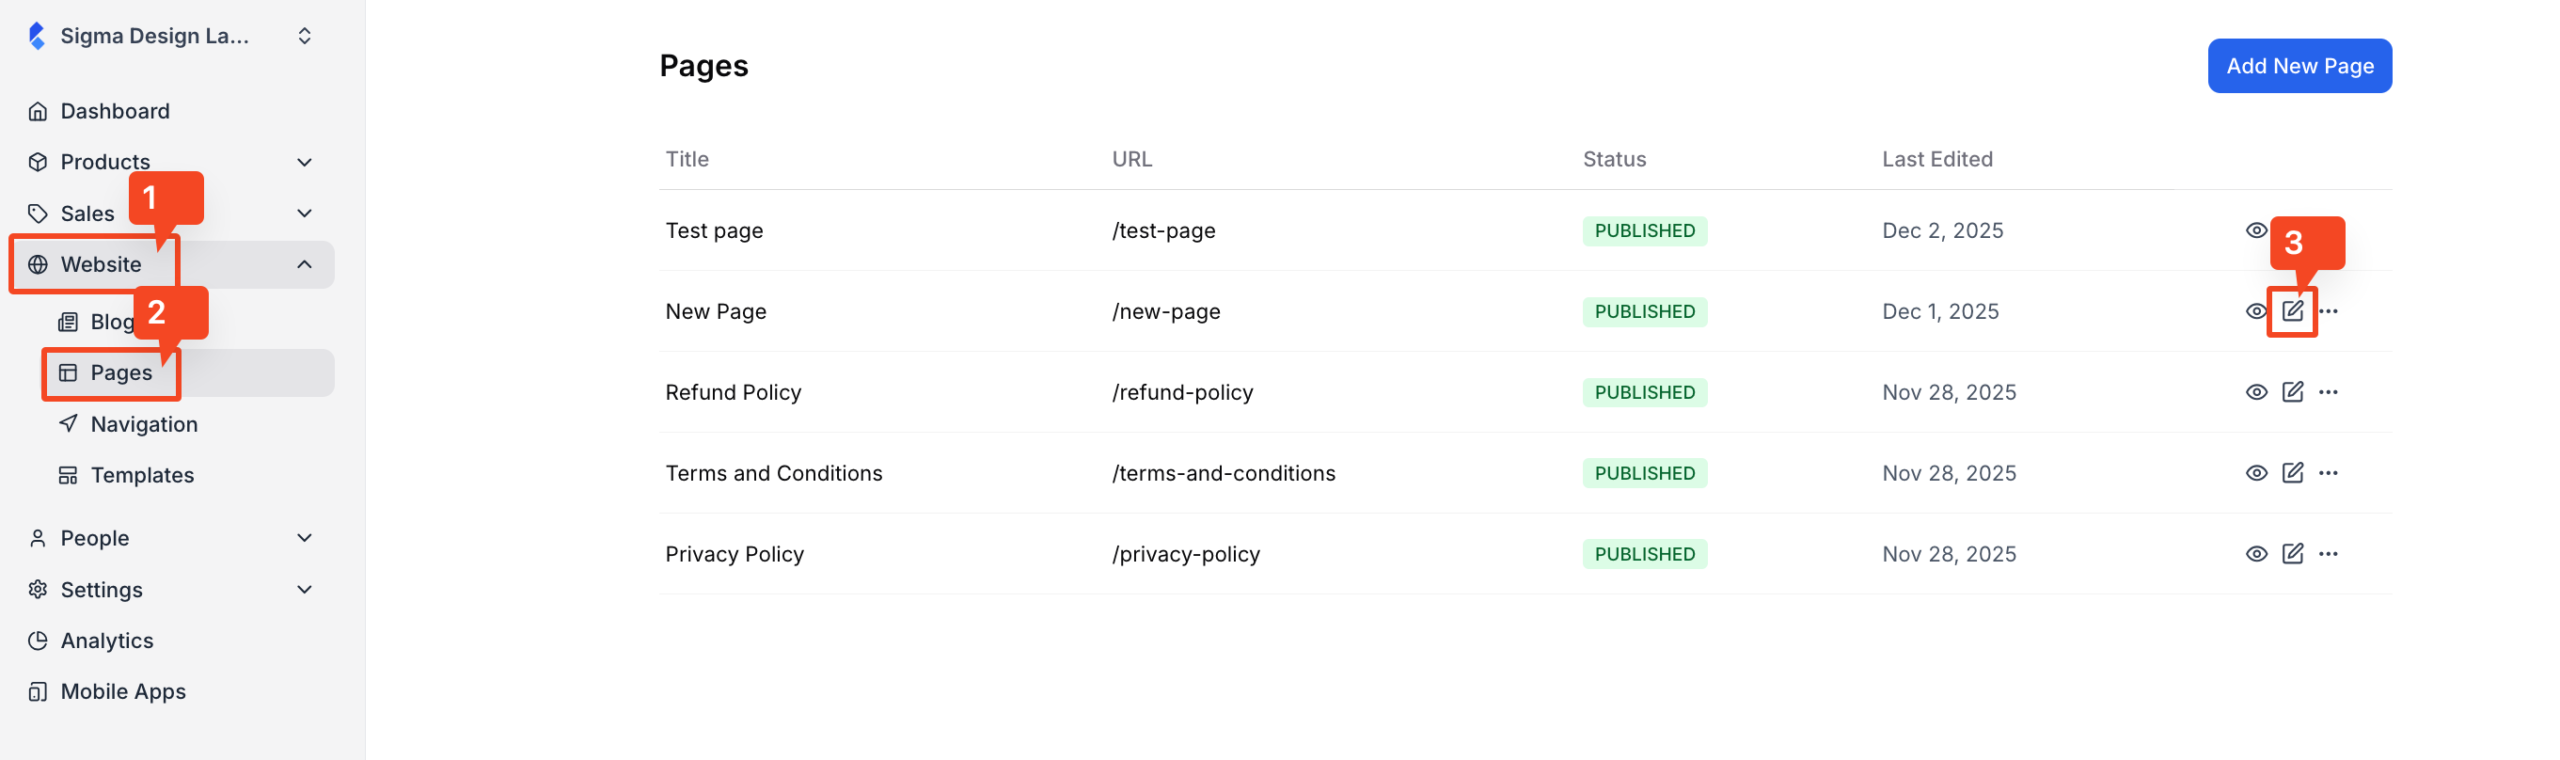
Alternatively, if you want to add social links to a custom page, go to Website > Pages. Then, choose the page where you want to add the social links and click on the “Edit” icon. Once you do, it will take you to the page builder.
3. Once the new page loads, you will see all the page builder blocks on the left-hand side. Find the block named “Social Links.”
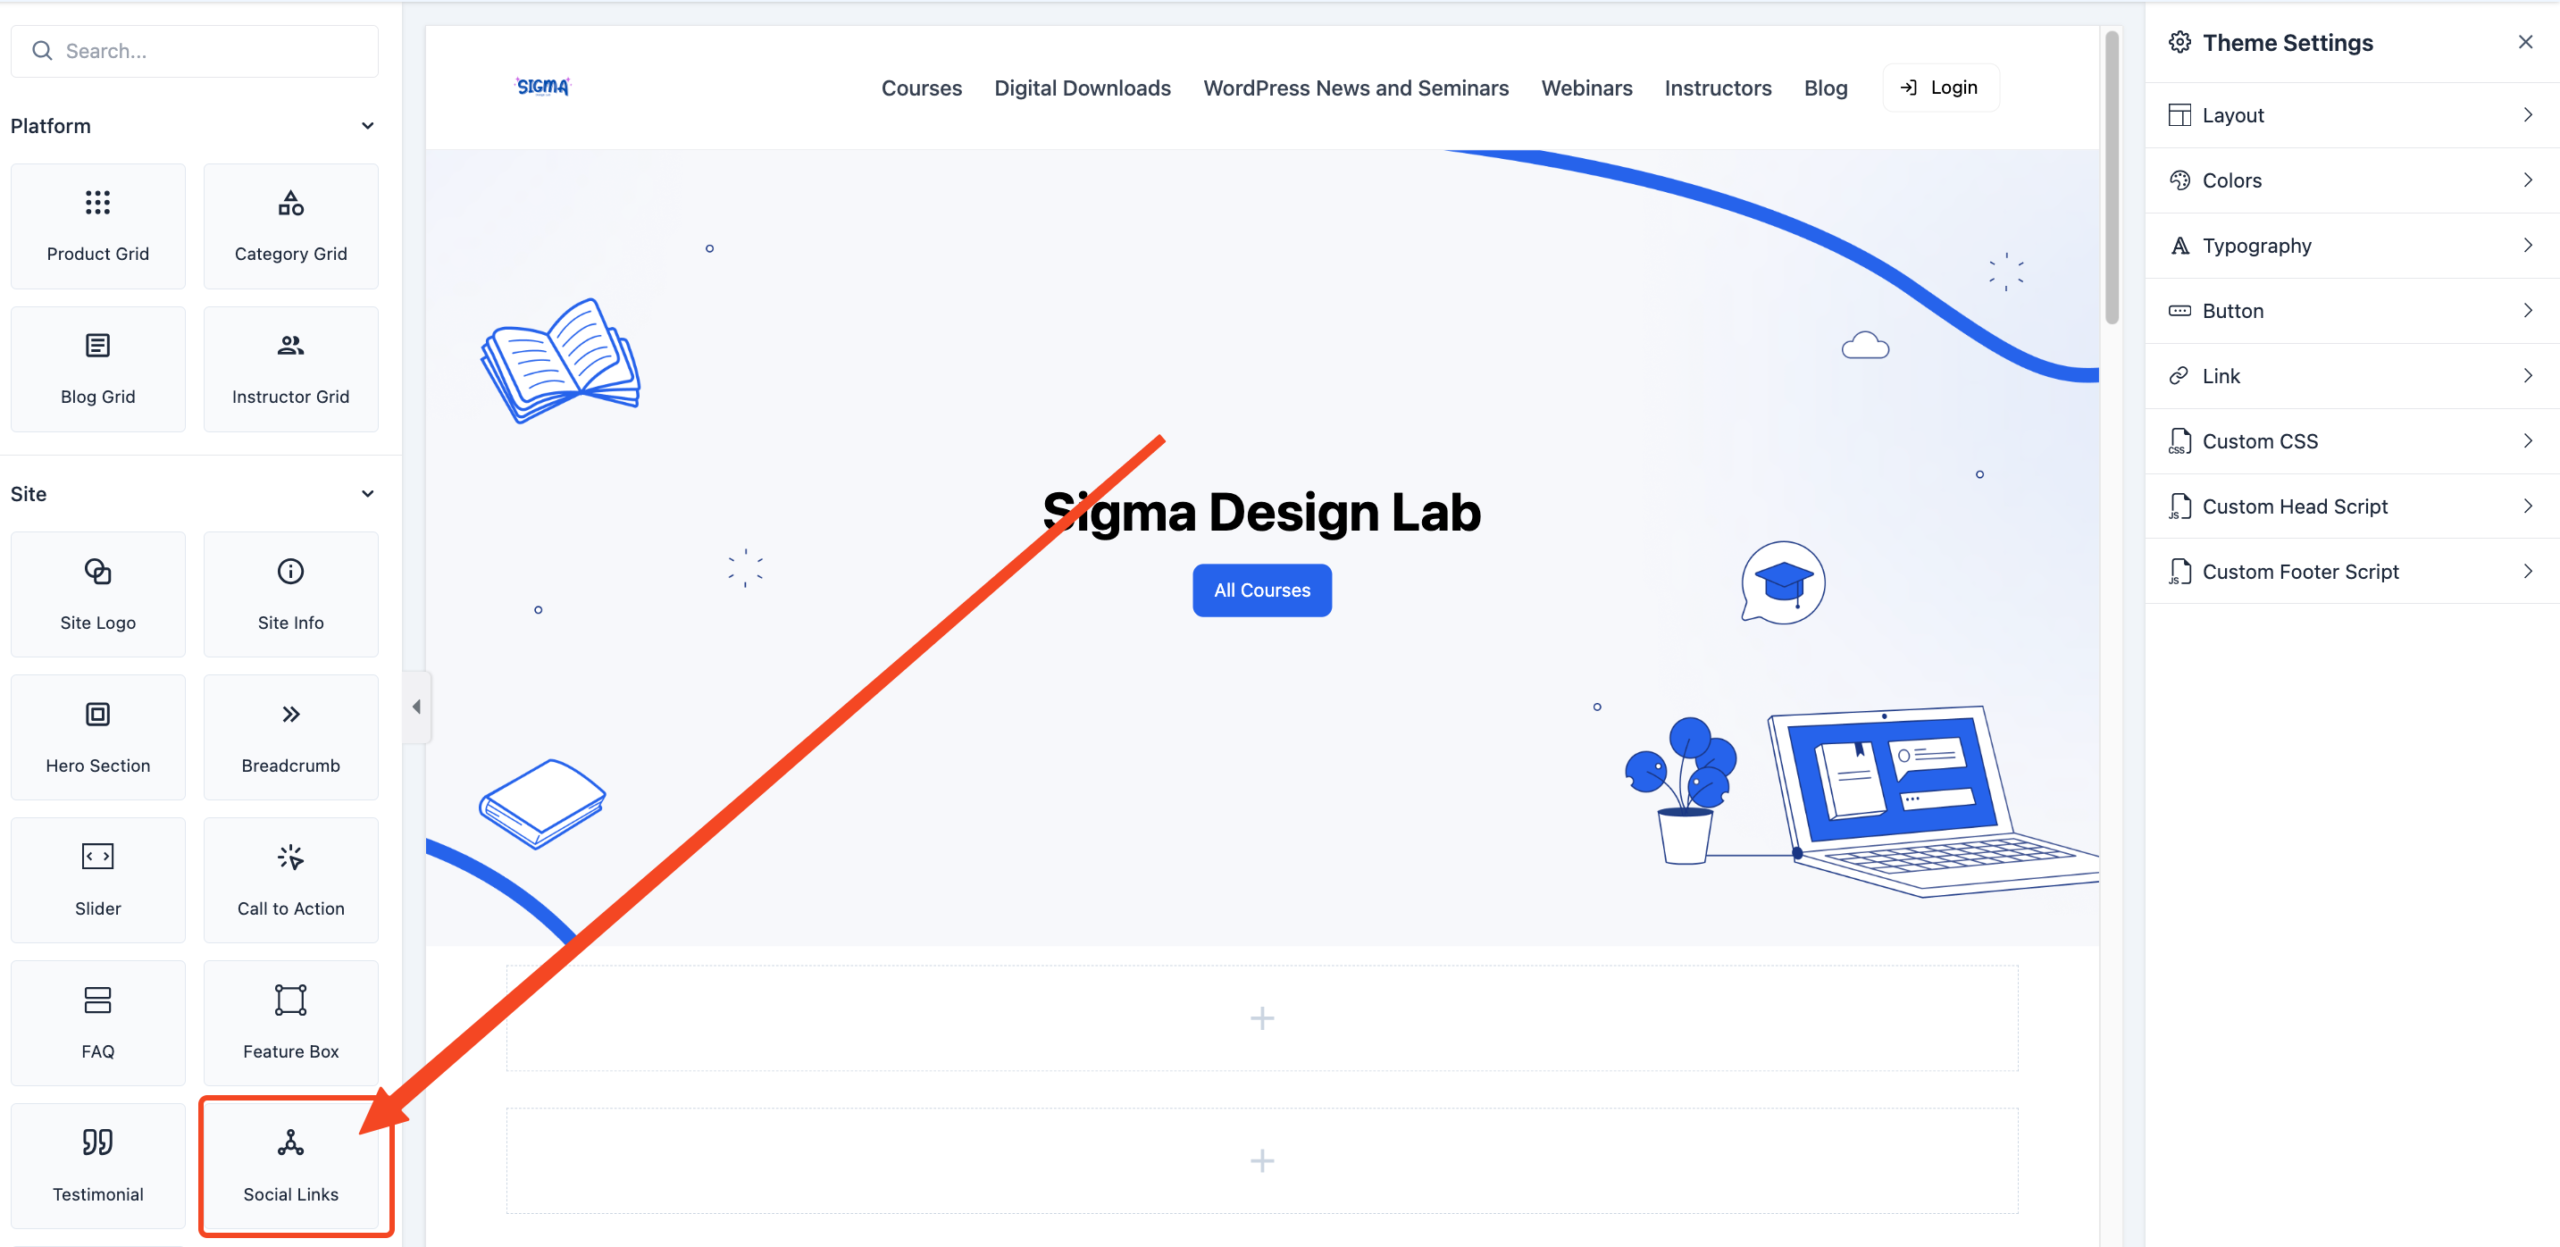
4. Now, select where you want it on the page, then drag and drop the Social Links block into that section.
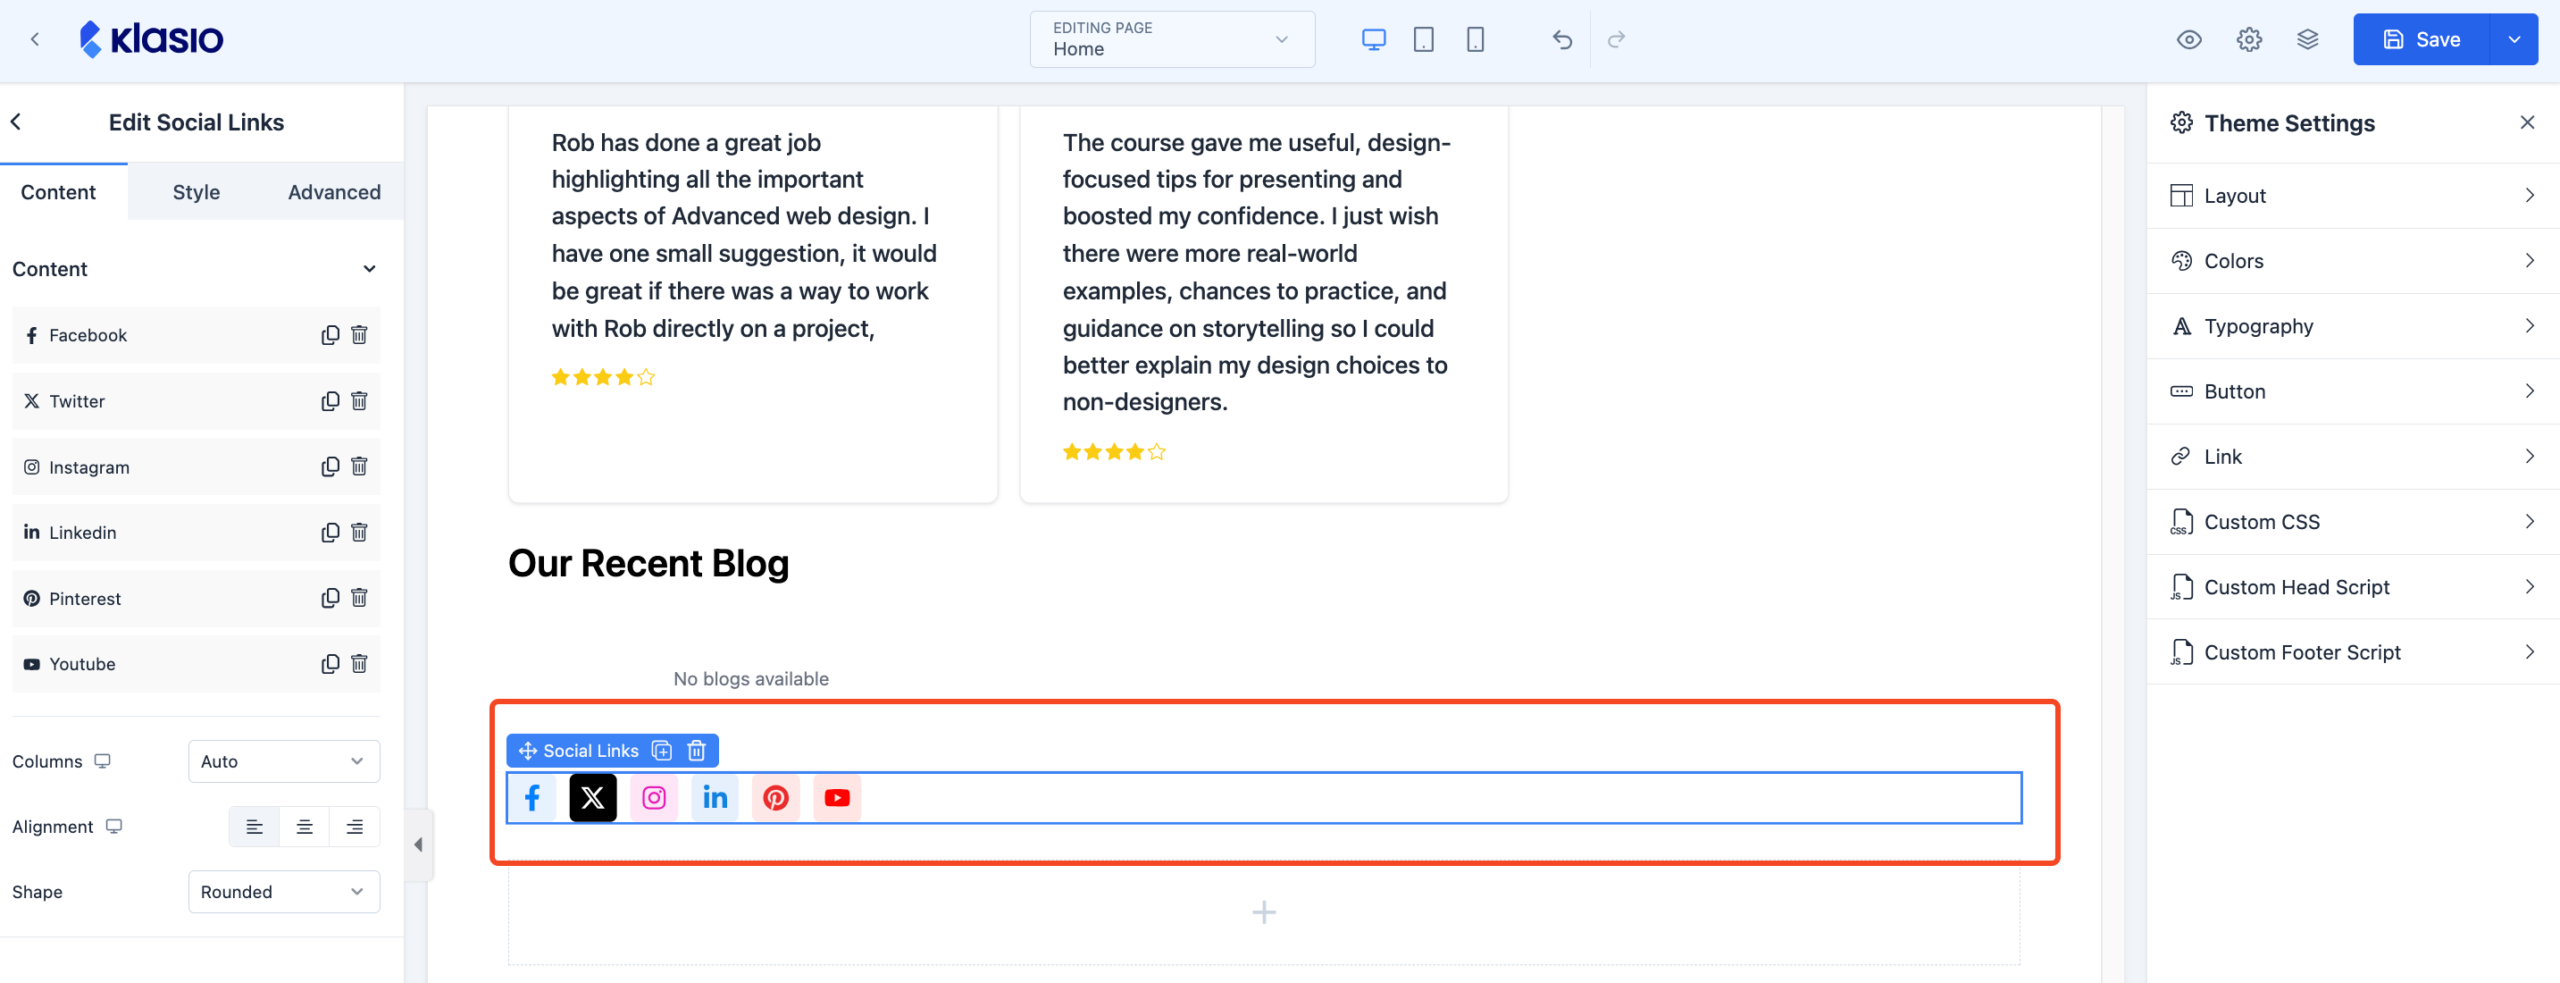
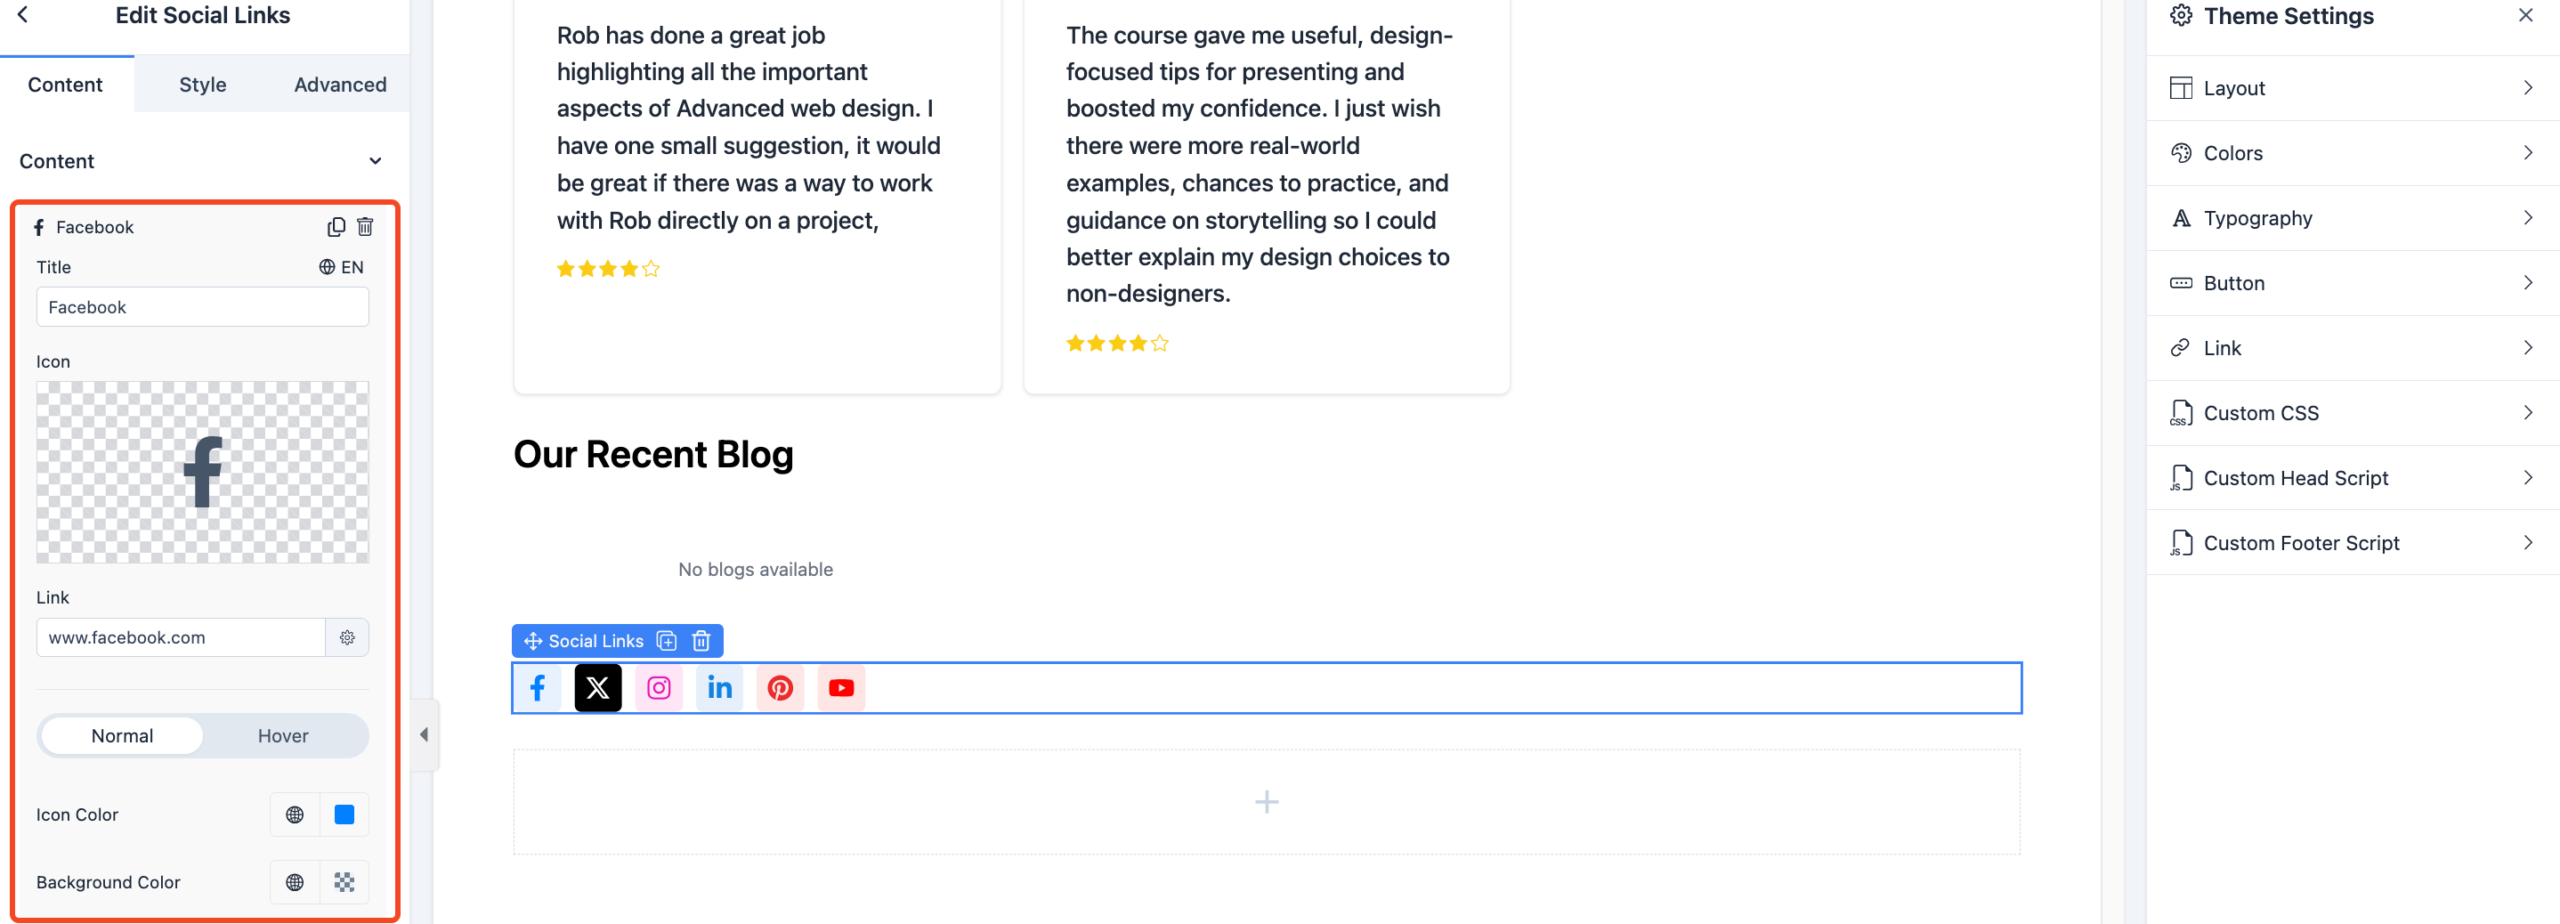
5. As you will see, you have six default social media icons: Facebook, X, Instagram, LinkedIn, Pinterest, and YouTube. To add a link, select the desired social media platform from the left panel, expand the section, and paste your link into the “Link” field.
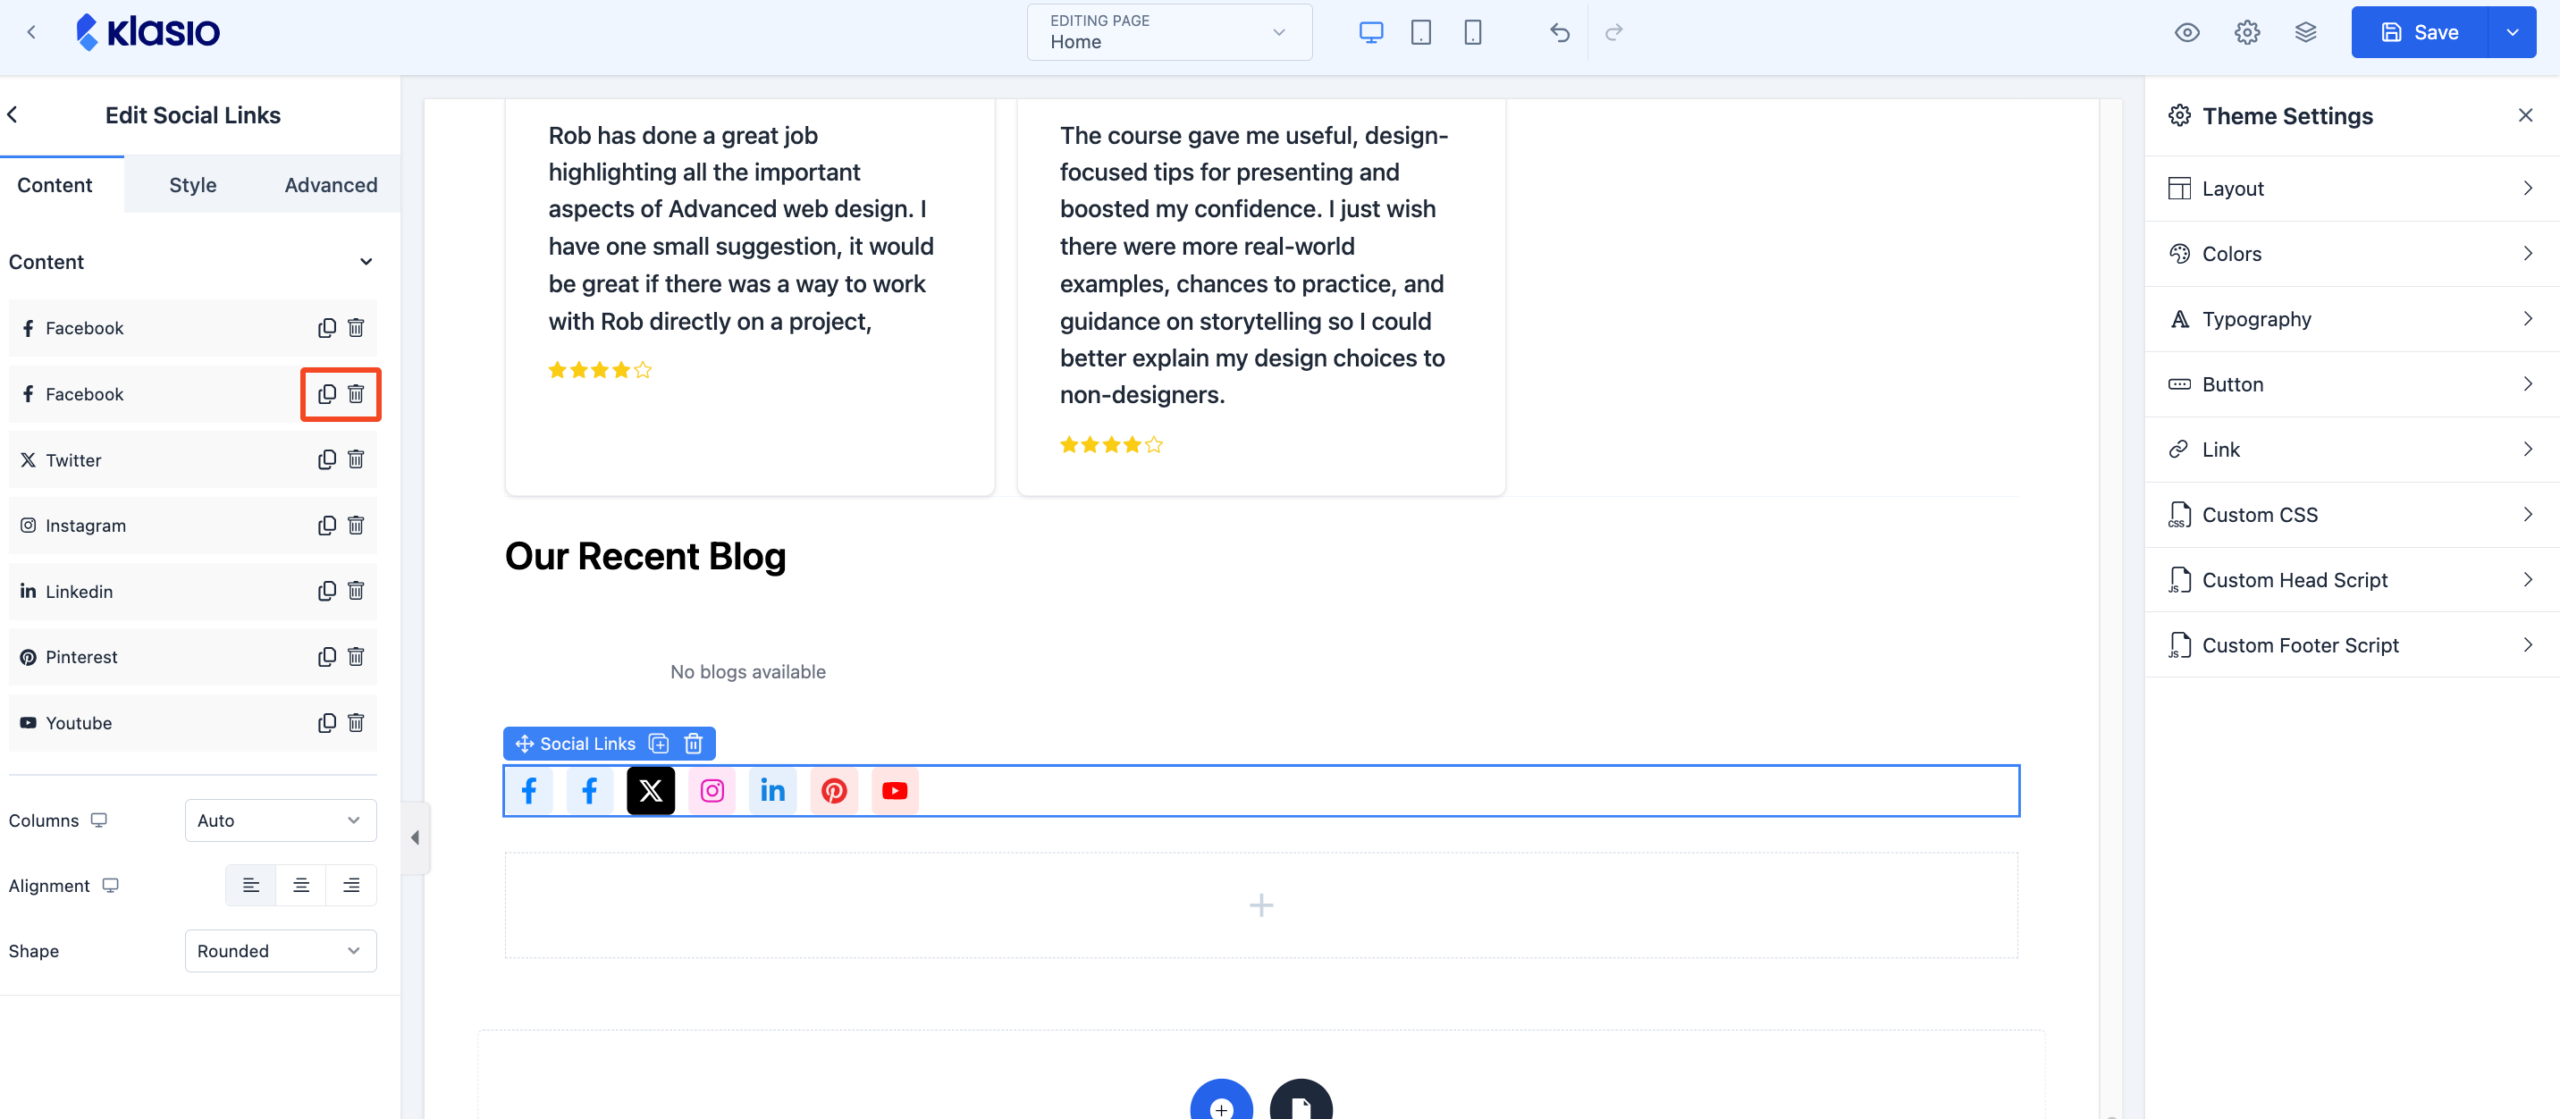
6. If you want to add more social media platforms other than the default six, you need to click on the “duplicate” icon and customize it as you need. If you want to delete, click on the “trash” icon.
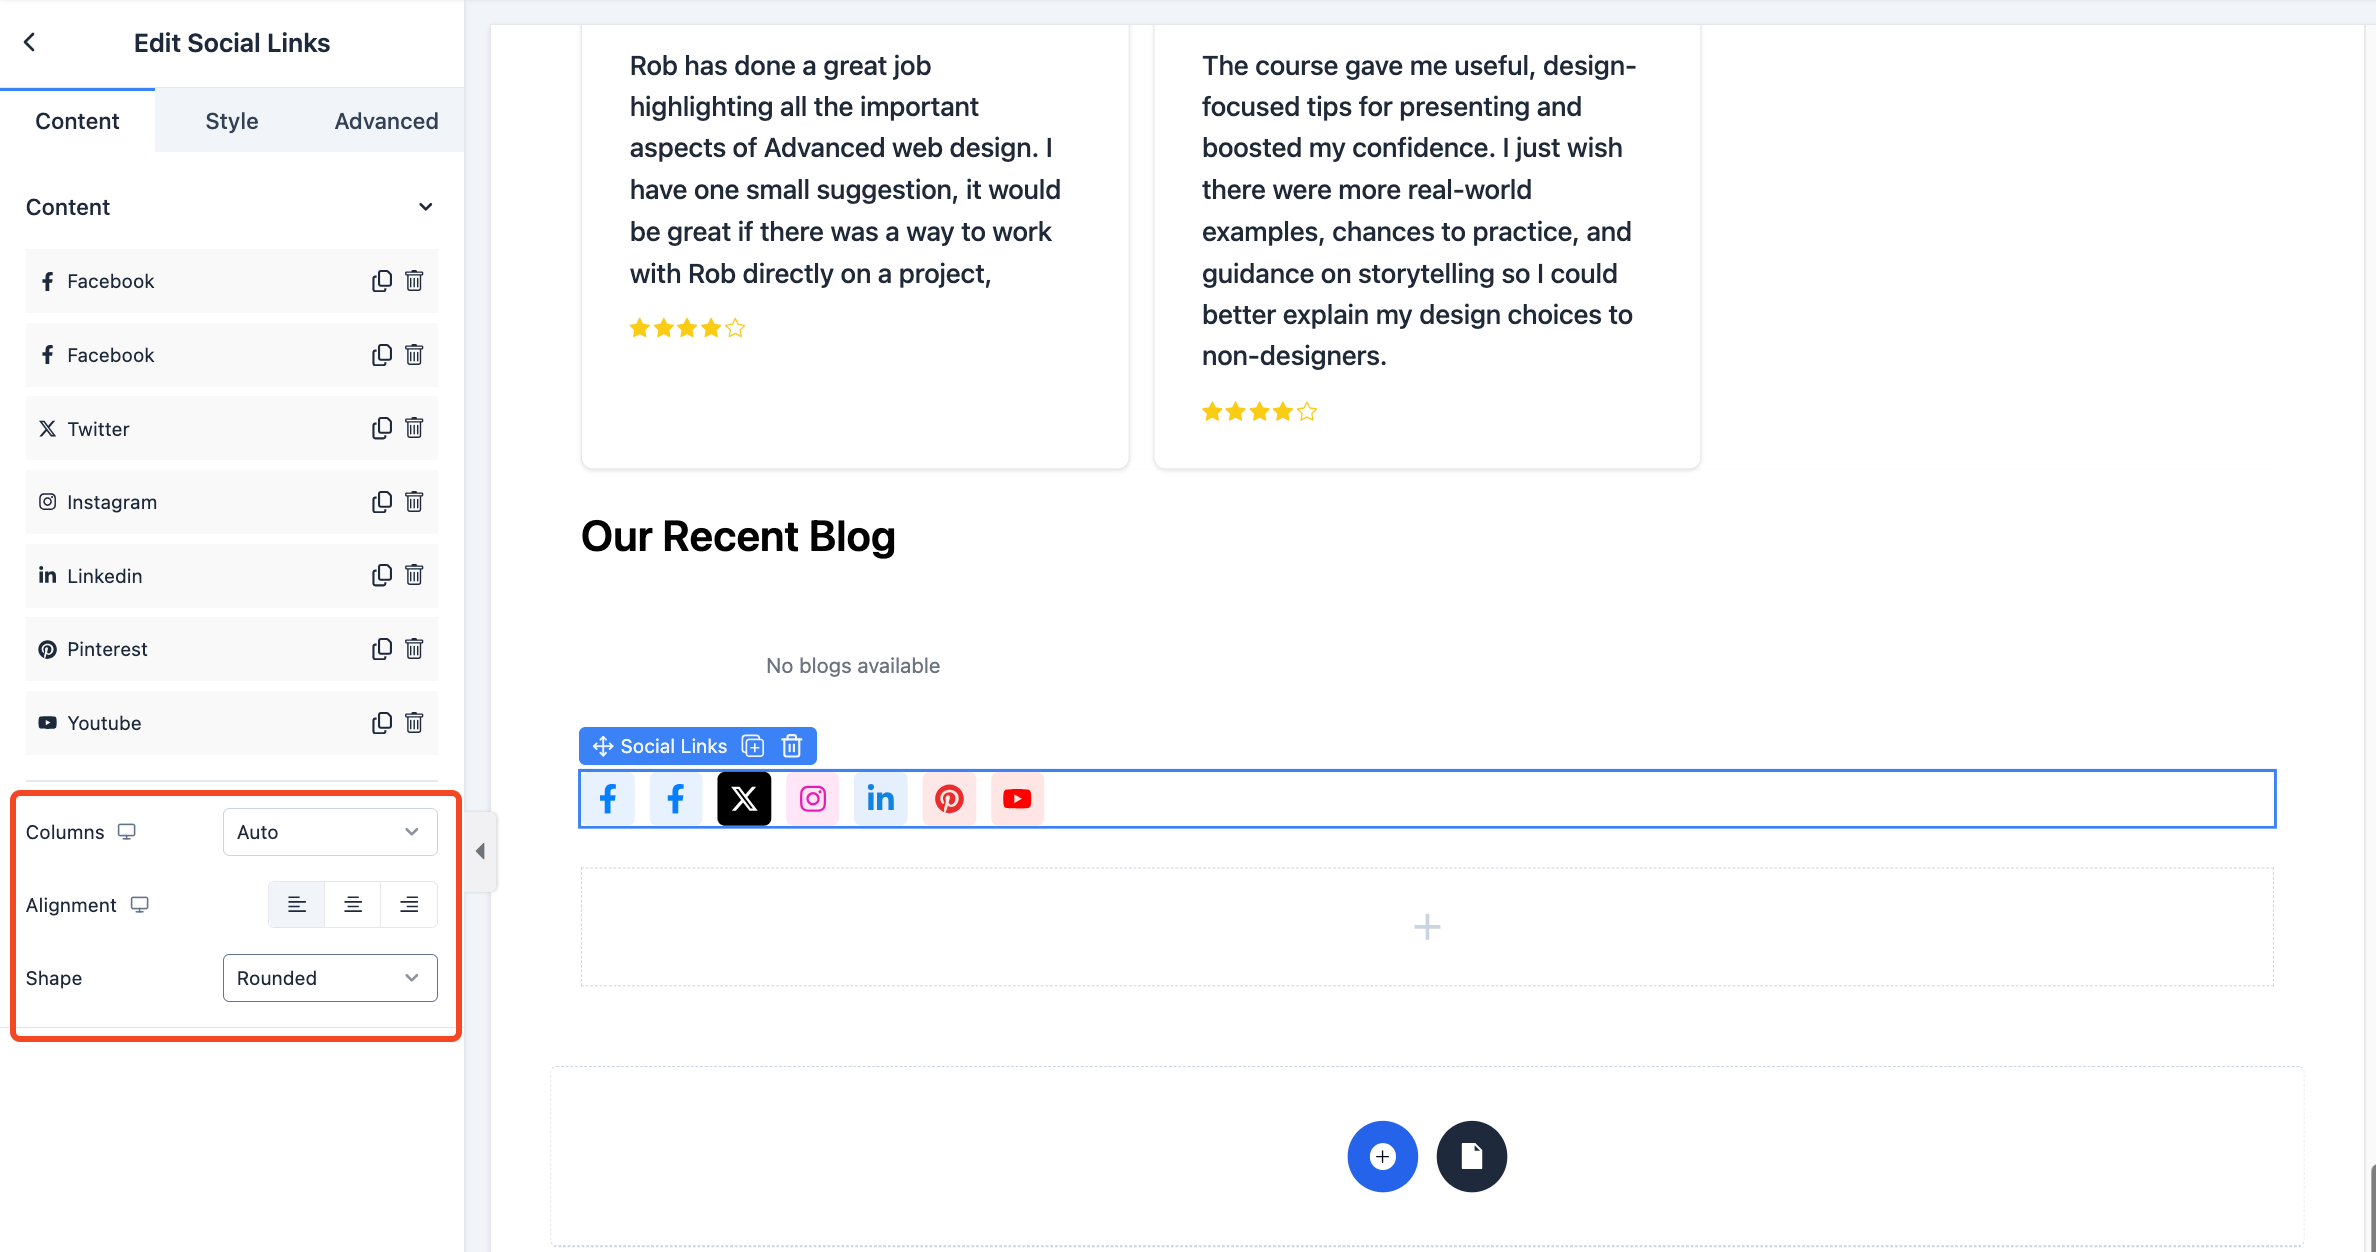
7. Now, if you want to further customize the icons, you can do so using the options available from the Content, Style, and Advanced tab. For starters, here’s an overview of the rest of the option of the Content tab:
- Columns: Specify how many columns the icons should be displayed in by selecting a value between 1 and 8, or choose Auto for automatic alignment.
- Alignment: Define the horizontal placement of the icons within the block container.
- Shape: Choose the shape of the icons. You have three options: Rounded, Circle, and Square.
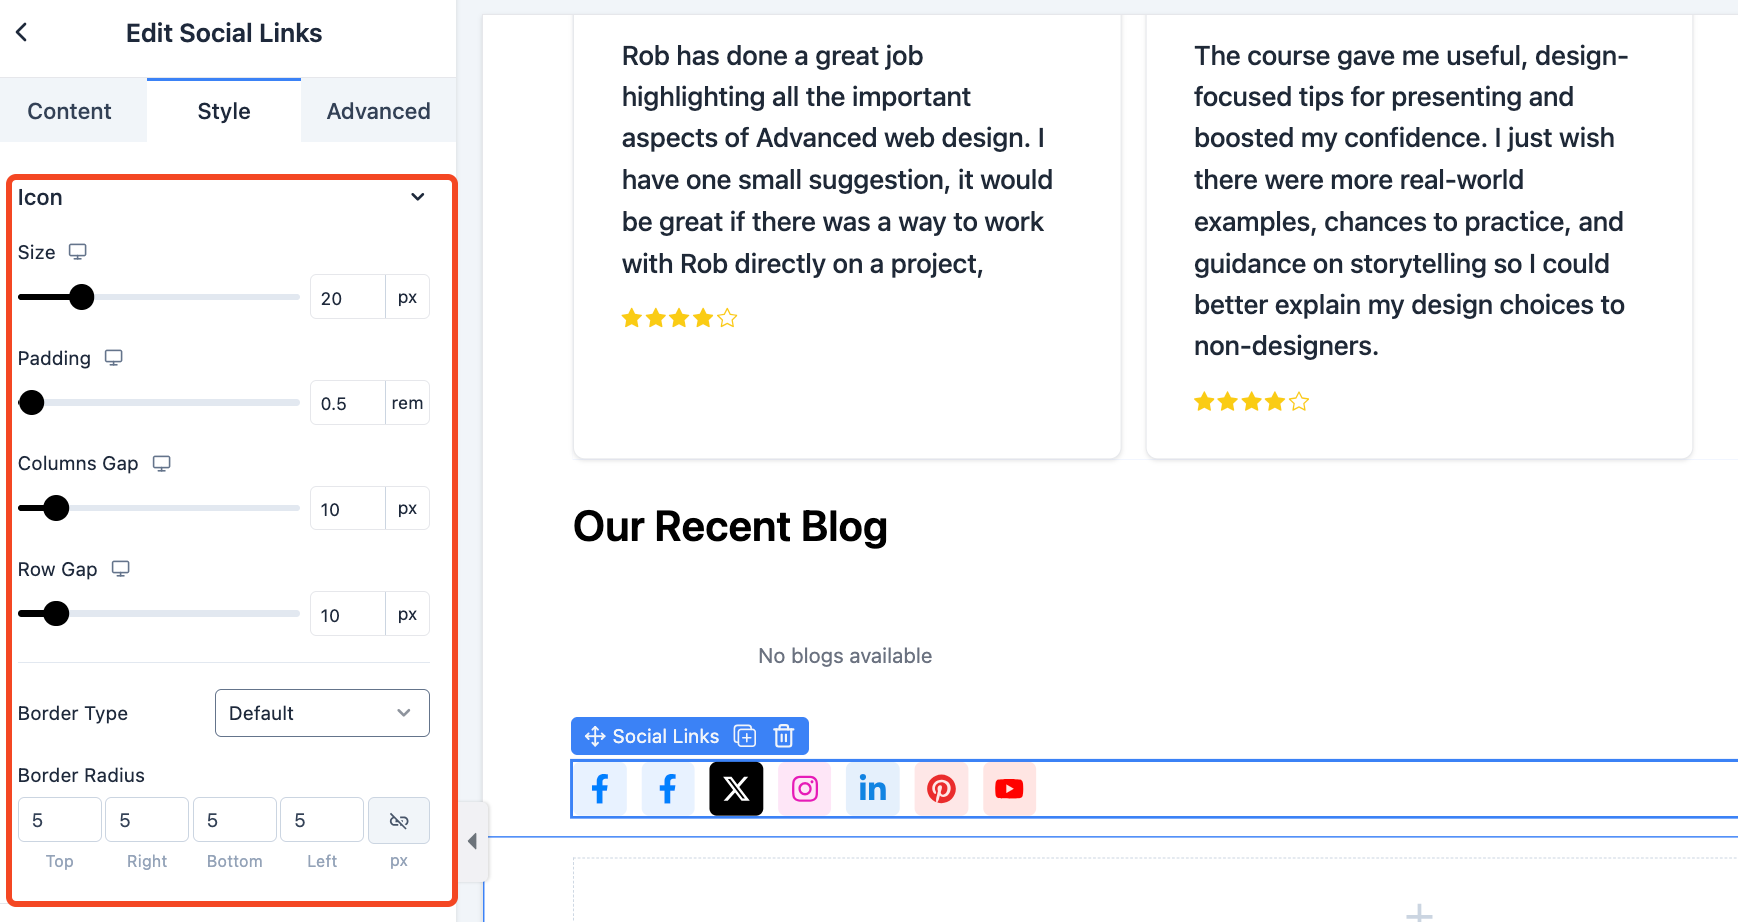
Overview of the Style tab:
- Size: Adjusts the size of the social media icons. The value is set in pixels (px).
- Padding: Controls the space inside each icon container, between the icon and its border. The value is set in rem units.
- Columns Gap: Defines the horizontal spacing between icon columns. The value is set in pixels (px).
- Row Gap: Defines the vertical spacing between icon rows. The value is set in pixels (px).
- Border Type: Select the style of the icon border (e.g., default or other available styles).
- Border Radius: Controls how rounded the corners of the icon container appear.
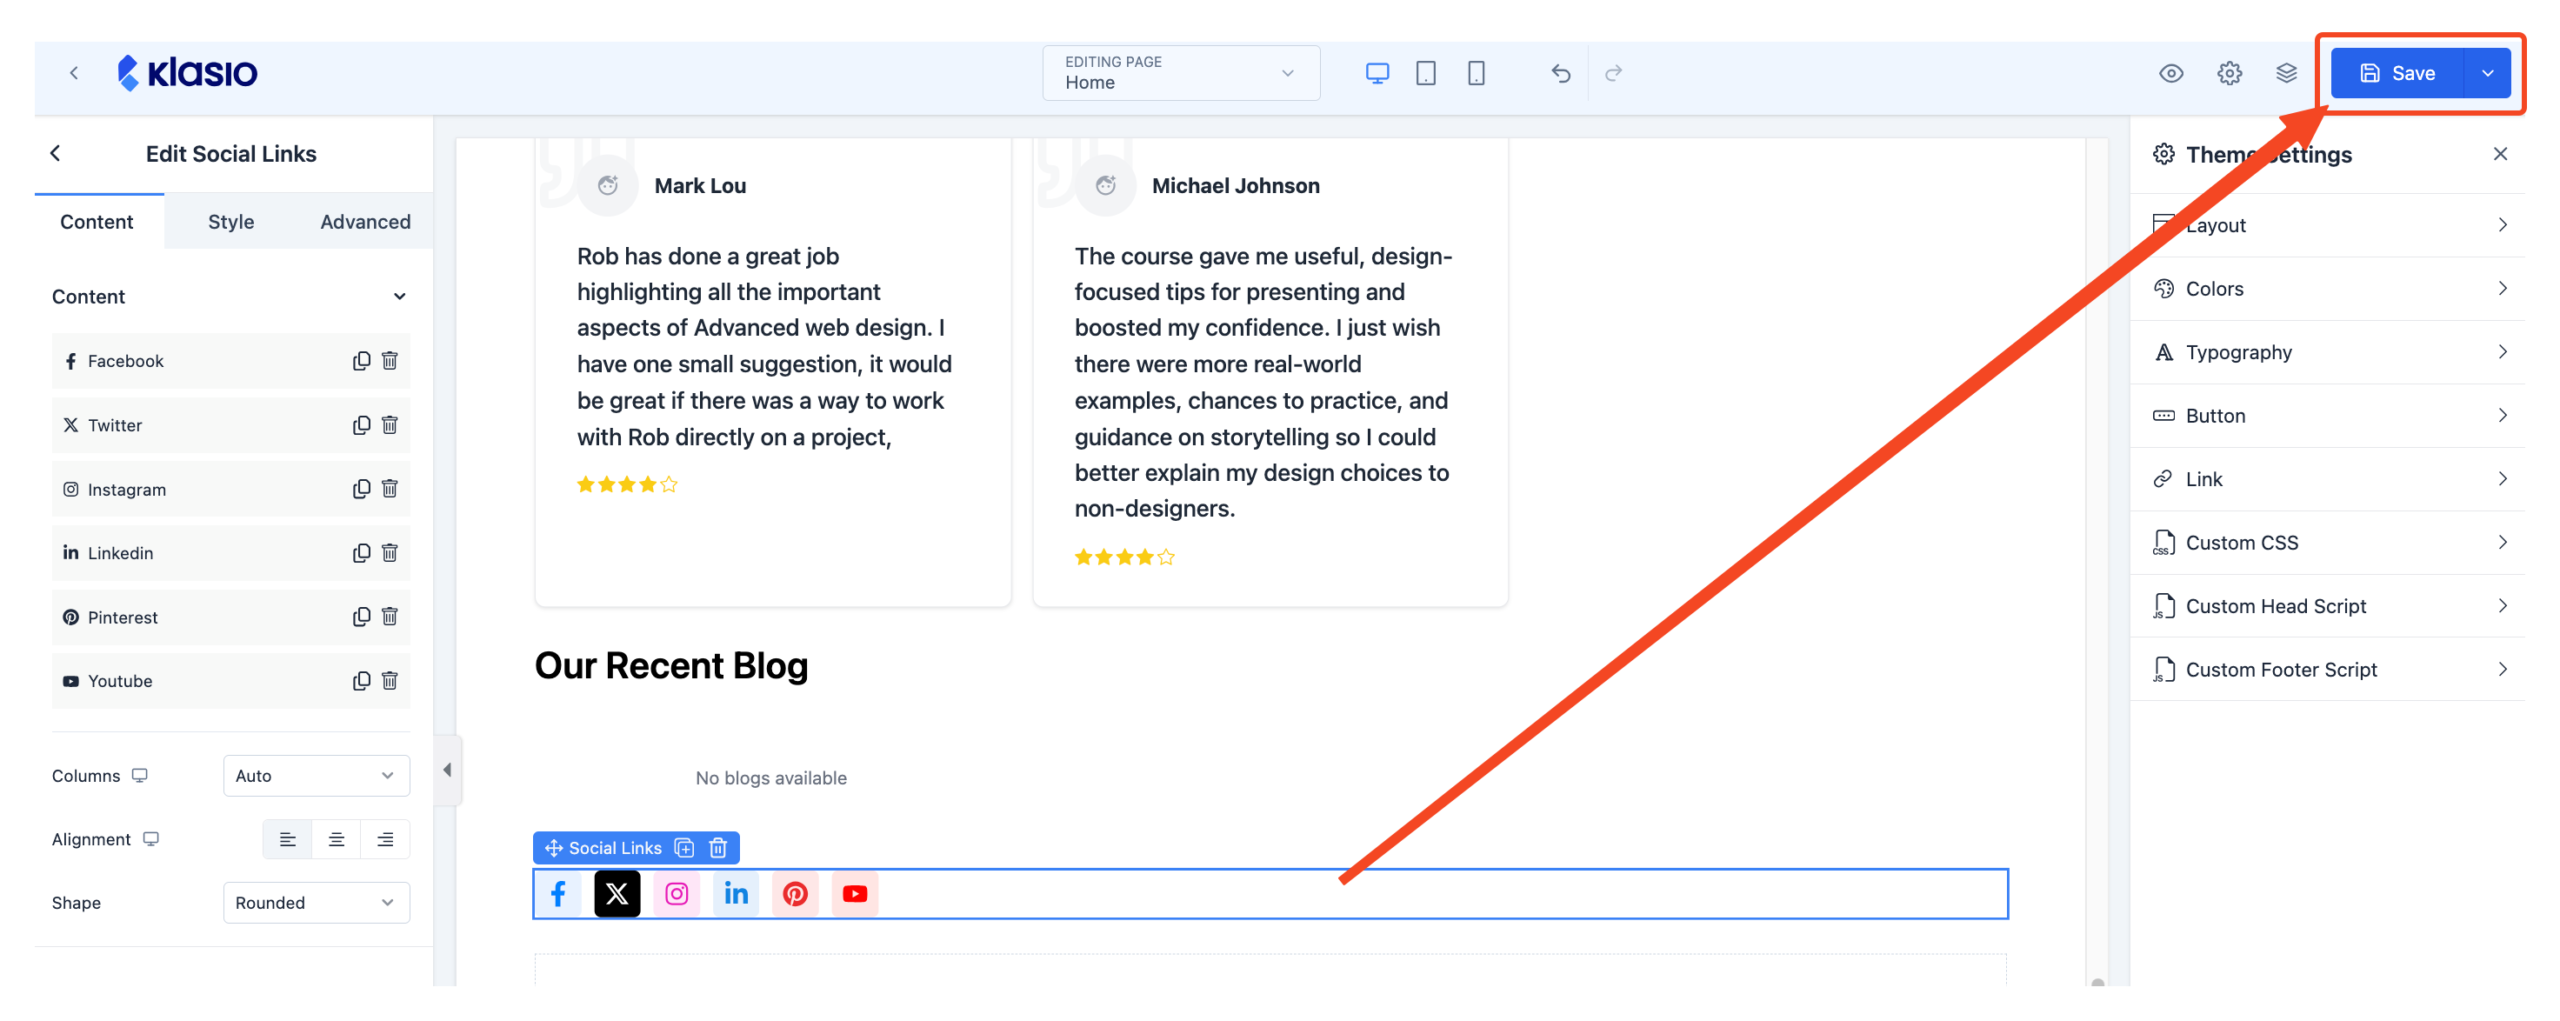
8. Once you are done, click on the “Save” button on the top right.