Subscriptions are an important part of a course creator’s journey. The good news is that Klasio now supports creating subscription plans.
Here’s how you can create subscription plans in Klasio:
Disclaimer: Before you want to create a subscription plan, you will have to integrate Stripe since Subscription will only work when Stripe is used as the payment integration.
1. From your dashboard, go to subscriptions, then plans. Find the “New Plan” button on the top right.
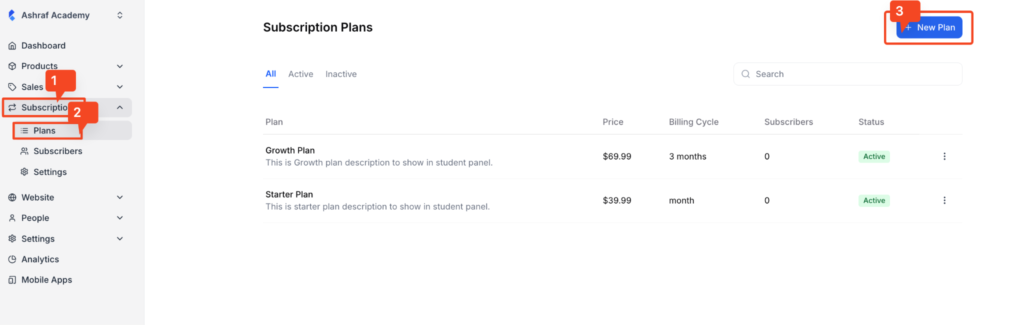
2. Once you do, you will be taken to the subscription editor, where you will see multiple tabs to create your subscription plan.
First, you will be prompted to add your subscription plan details.
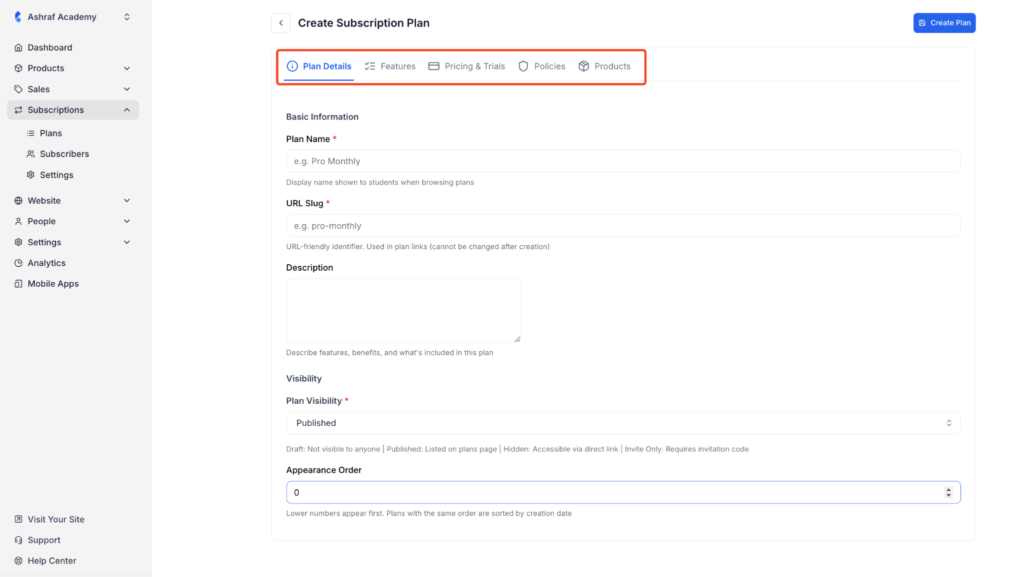
3. Fill out all the information that is required, including your Plan Name, URL Slug, and Description. In the visibility field, you can choose whether or not you want to publish your plan or keep it as a draft.
Also, using the appearance order, you can assign a number to your subscription plan. If you have multiple plans, then the plan with the lower number appears first, and so on.
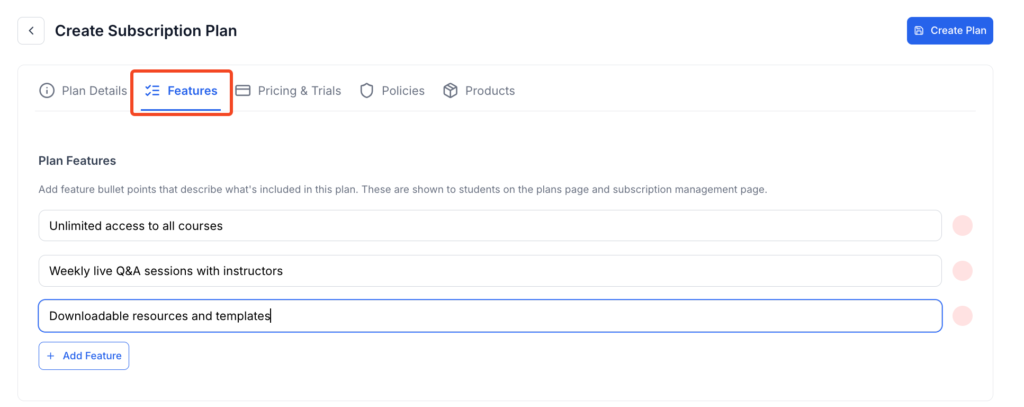
4. Now, let’s move on to the next tab, which is “Features.” Using this tab, you can add features to your plan. You can add as many features as you want.
Remember to write features as clear, benefit-focused bullet points that highlight what learners get. Keep them specific and concise so users can quickly compare plans and understand the value.
Example:
- Unlimited access to all courses
- Weekly live Q&A sessions with instructors
- Downloadable resources and templates
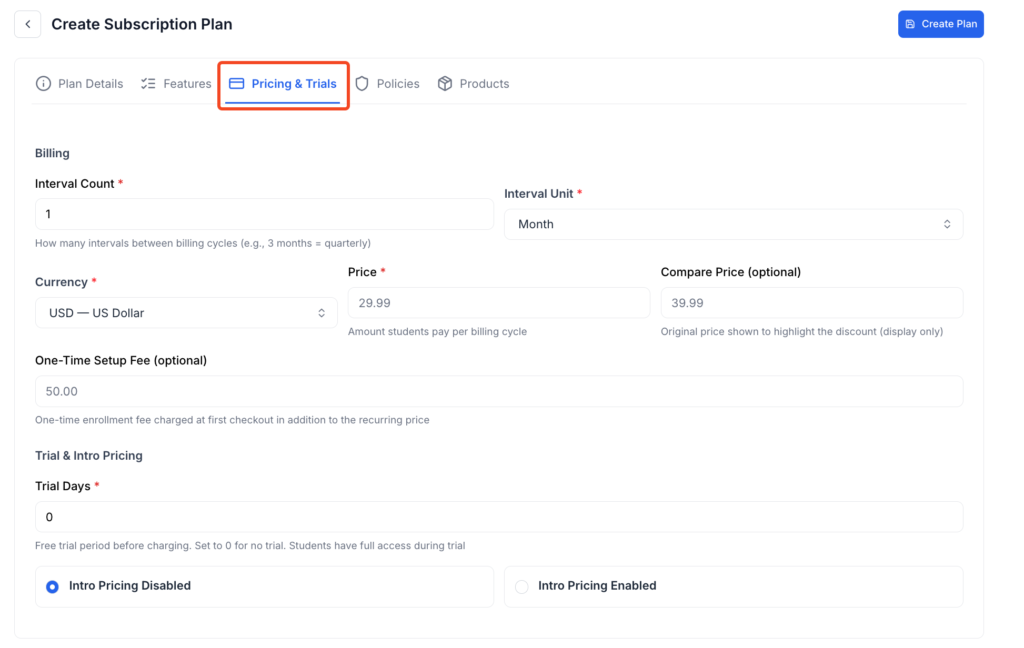
5. The next tab is the “Pricing & Trials” tab, where you can set up your pricing, billing cycle, and more.
Billing
- Interval Count: Define the number of intervals between billing cycles.
- Interval Unit: Define the unit of the billing cycle interval, such as day, month, or year.
- Currency: Set up currency.
- Price: Set your price.
- Compare price: Use this field to set a higher price that will appear as a strikethrough.
- One-time setup fee: Define a one-time setup fee if applicable.
Trial and Intro Pricing
- Trial days: If your plan has a free trial, define the number of trial days here.
- Intro pricing: Choose to enable or disable intro pricing. If you want to offer a discount at the beginning of the subscription, you will need to enable intro pricing.
- Intro price/discount: This additional field will appear if you choose to enable intro pricing. You can use it to define the number of intro price or discounts.
- Intro price type: Choose if you want to offer a flat discount or a percentage off based on the intro price you have defined.
6. Now, let’s set up the next tab, which is “Policies,” where you can define your cancellation policies.
Cancellation & Payment Policy
- Access after cancellation: If a subscriber cancels their subscription, choose how long they will retain access to your content. You have 4 options:
- Allow Current Period: The subscriber will be able to access the content until their subscription actually expires.
- Immediate Lock: The content will be locked immediately.
- Grace Period: Allow a grace period after which the access will be revoked. If you select the grace period, an additional field will appear where you can define the grace period.
- Keep Completed Courses: Let the subscriber access the courses they completed.
- Payment Failure Grace: Choose a number of days the subscriber will retain access to your content in case a payment fails.
After Purchase Navigation
- Redirect After Purchase: Choose where you want the subscriber to redirect once they purchase your plan.
7. Now we move to the 5th and final tab, which is products. This is where you select the products you want to include for the subscription plan.
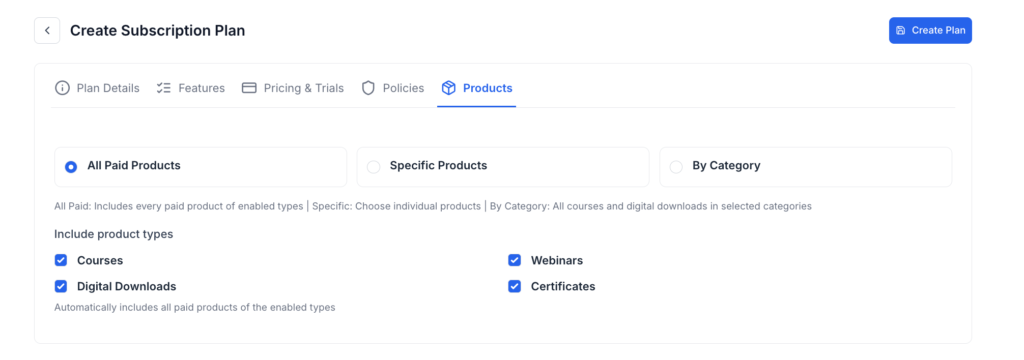
You have three options: All Paid Products, Specific Products, and By Category.
- All Paid Products: Once you select all paid products, you have additional options to choose the type of products, such as courses, webinars, digital downloads, and certificates.
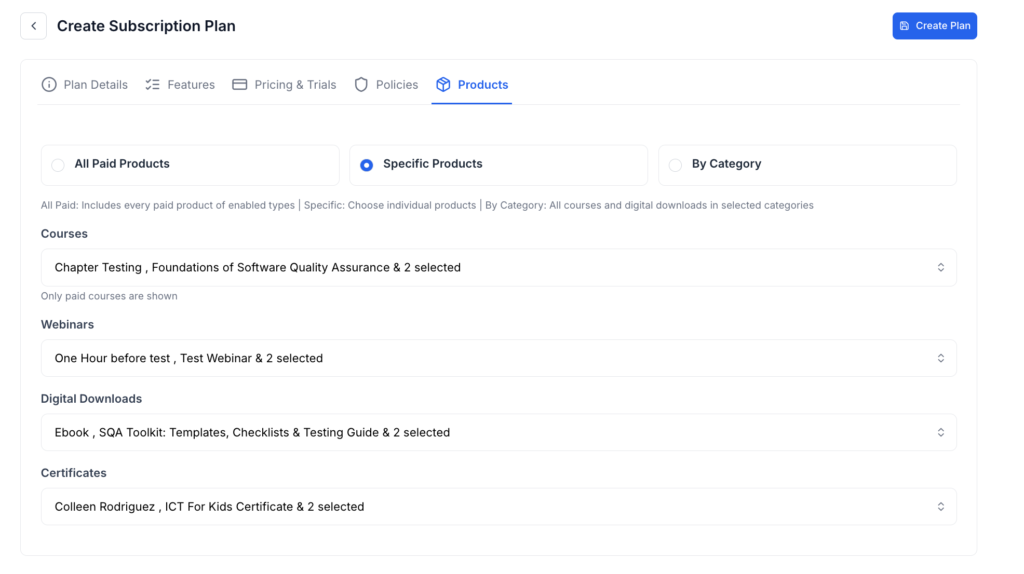
- Specific Products: If you select specific products, a dropdown menu will appear for each product type. You will need to select the specific products from each type.
- By Category: This option lets you include all the products in a single of multiple categories into your plan.
8. Now that we have gone through every option, you can click on the “Create Plan” button to make your plan live. However, to properly publish your subscription plan on your Klasio website, you will need to use the subscription block on the page builder.
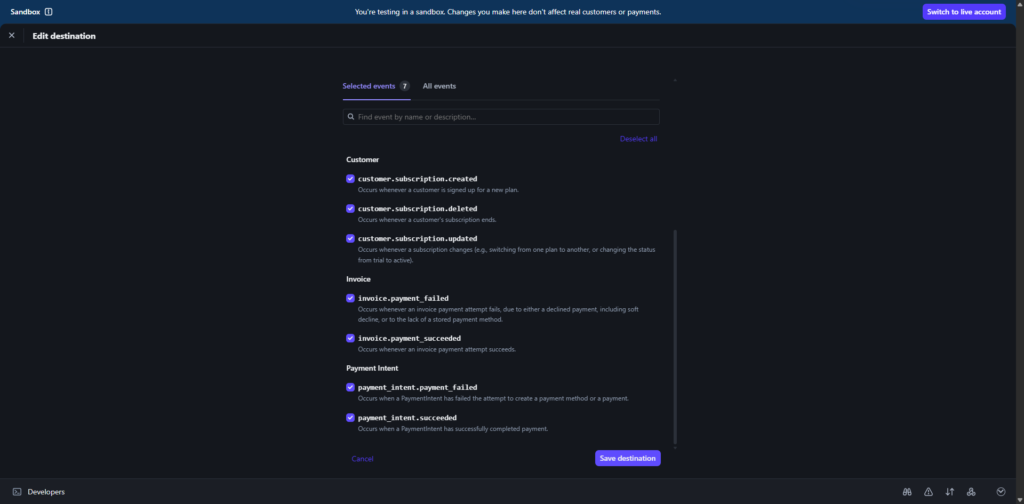
Configuring Stripe for Subscription
You need to add the following events in webhooks to use Subscription through Stripe:
- invoice.payment_succeeded
- invoice.payment_failed
- customer.subscription.created
- customer.subscription.updated
- customer.subscription.deleted
Once these events have been added, you’re now ready to receive payments from your students in a subscription manner.