Sending your students and staff email notifications is an effective way to communicate with them for important updates, announcements, and course-related information. In Klasio, you have email automation templates that you can customize as you see fit. Here’s how:
1. From your dashboard, expand “Settings” and then click on “Email”.

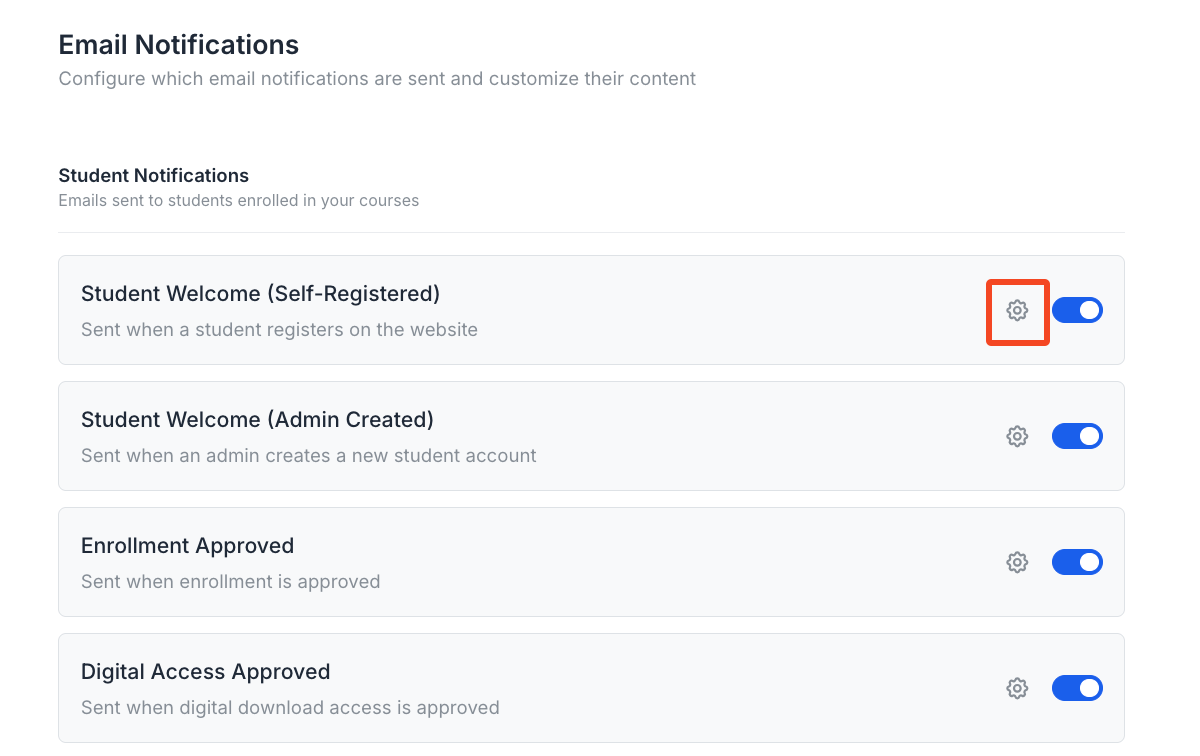
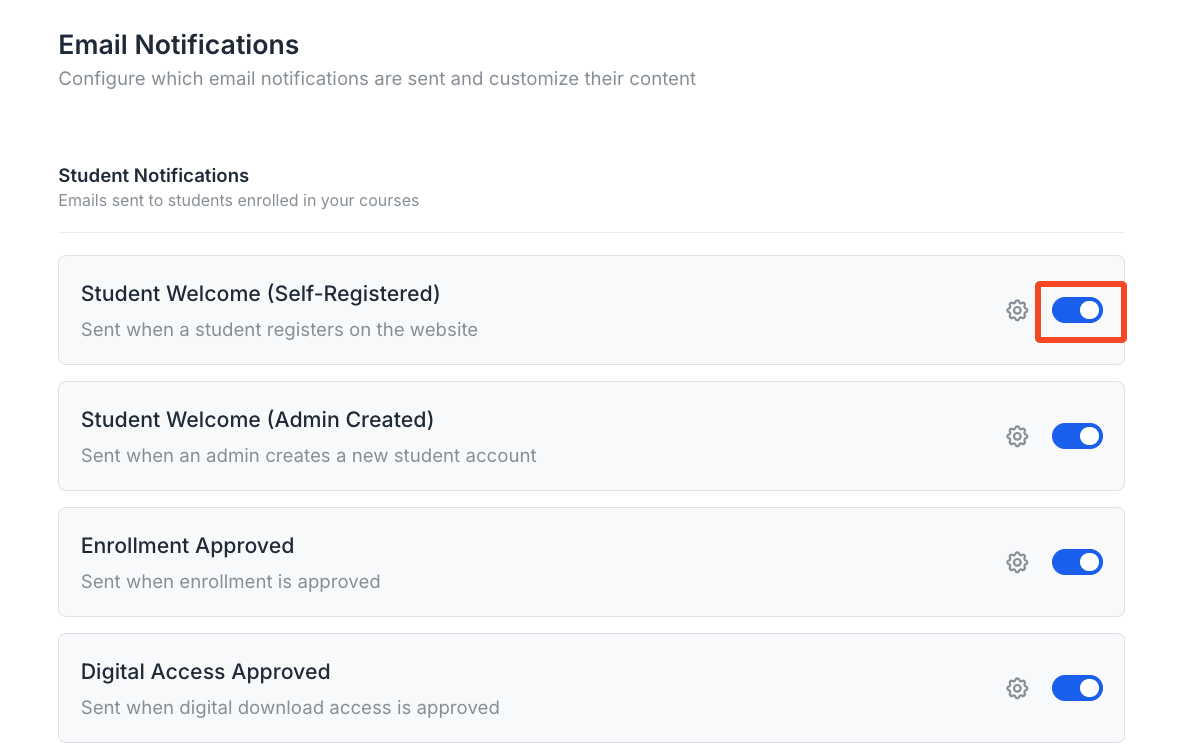
2. On the new screen, you will see all the email automations for your students, staff, and instructors. For now, there are email automation templates for 16 different use cases.
Student Notifications:
- Student Welcome (Self-Registered): This email is sent to welcome a new student who has registered themselves on the website.
- Student Welcome (Admin Created): This is a welcome email sent when an administrator manually creates a new student account.
- Enrollment Approved: This notification is sent to a student once their course enrollment has been approved.
- Digital Access Approved: This email confirms that a student’s access to digital download materials has been granted.
- Notice Published: This is sent to notify students when a new notice or announcement has been published.
- Guest Password Setup: This email is sent to guests to guide them through the process of setting up their password.
- Order Verification: This email is sent to a user to verify their email address before they can complete an order.
- Inactive Student Reminder: This is an automated reminder sent to students who have not been active in their lessons recently.
- Webinar Reminder: This email reminds registered attendees about an upcoming webinar.
Admin & Staff Notifications
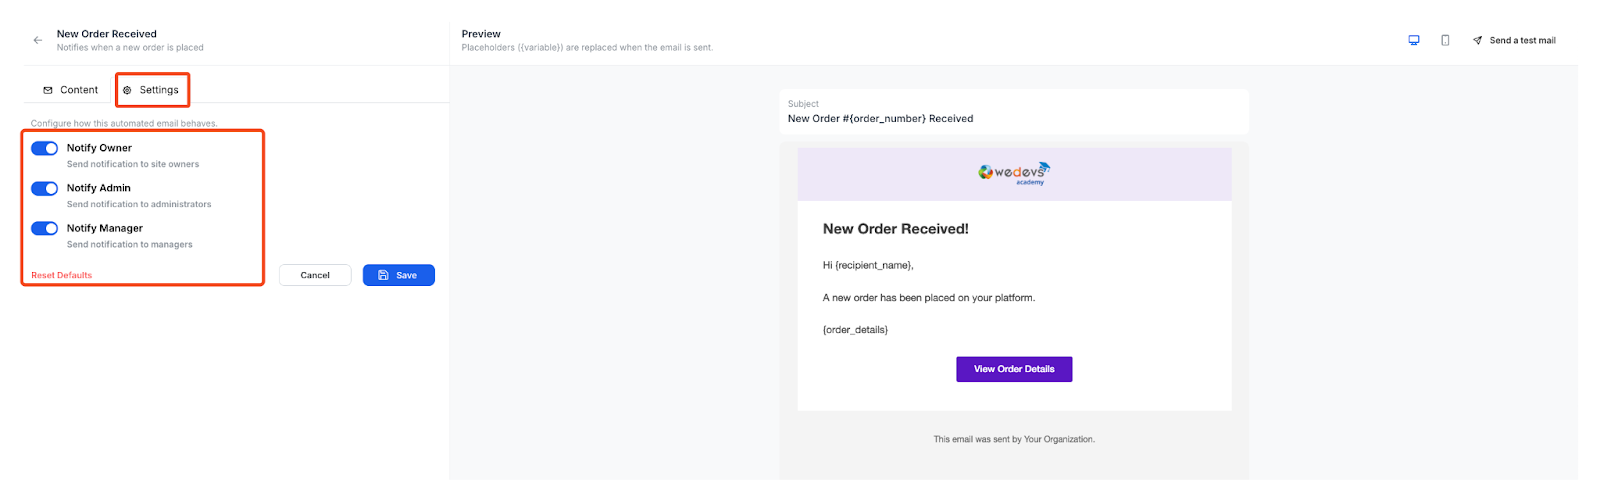
- New Order Received: This notifies owners, admins, and managers when a new order has been placed.
- New Review Submitted: This sends a notification when a new review is submitted.
- Student Import Report: This email is sent after a bulk import of student data has been completed.
- Quiz Question Import Report: This is sent after a bulk import of quiz questions is finished.
- Staff Welcome: This email is sent to welcome a new staff member who has been added to the system.
Instructor Notifications
Instructor Welcome: This is a welcome email sent when a new instructor is added.
Lead Notifications
Lead Email Verification: This email is sent to a lead to verify their email address.
3. You will notice a gear icon and a toggle button beside each email automation template. If you do not want to use a particular email template, you can turn the toggle off.

4. If you want to customize any email templates, then you will need to click on the gear icon.
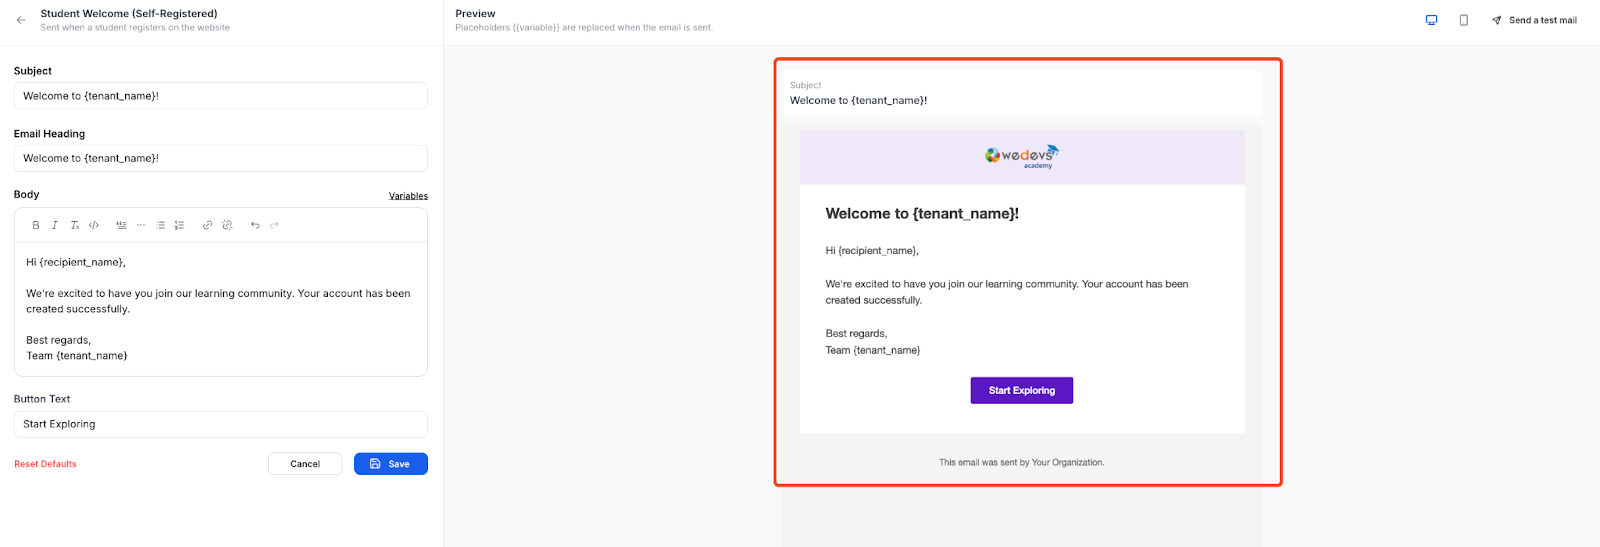
5. Once you click on the gear icon, you will be taken to the email editor. On the right, you will see a preview of the email.
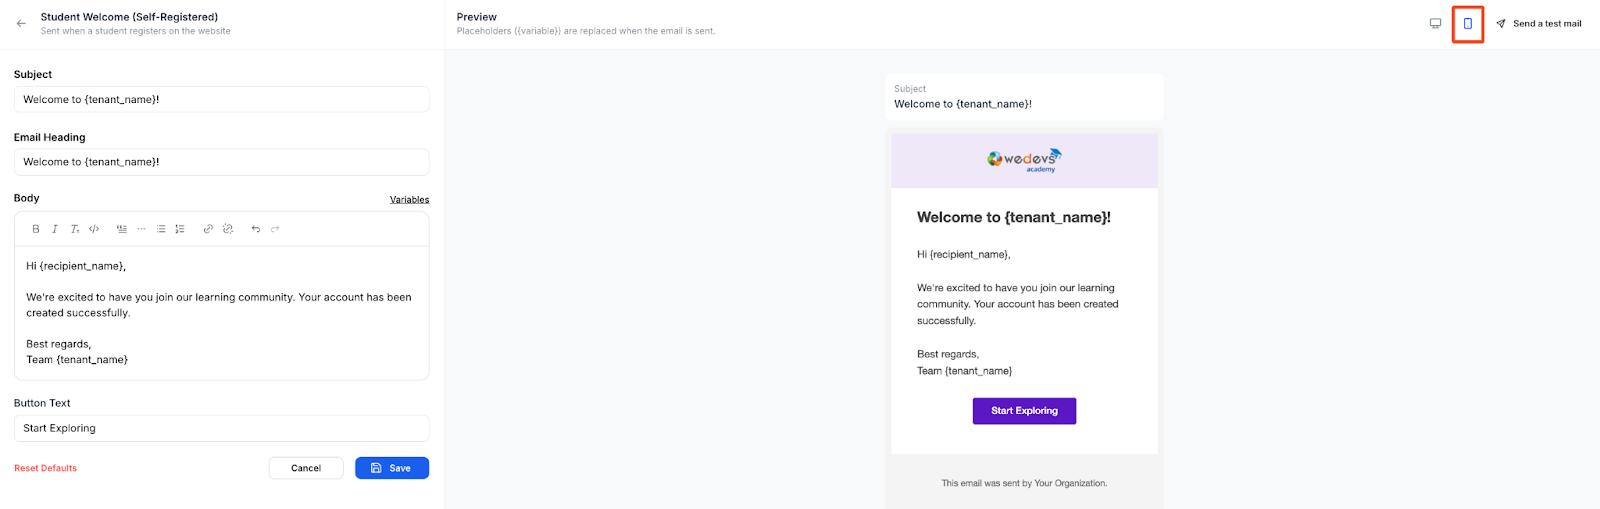
6. On the top right corner, you will see a desktop and mobile icon. These are for previewing the email for different devices. By default, the preview will be shown for the desktop devices. But clicking on the mobile icon will change that.
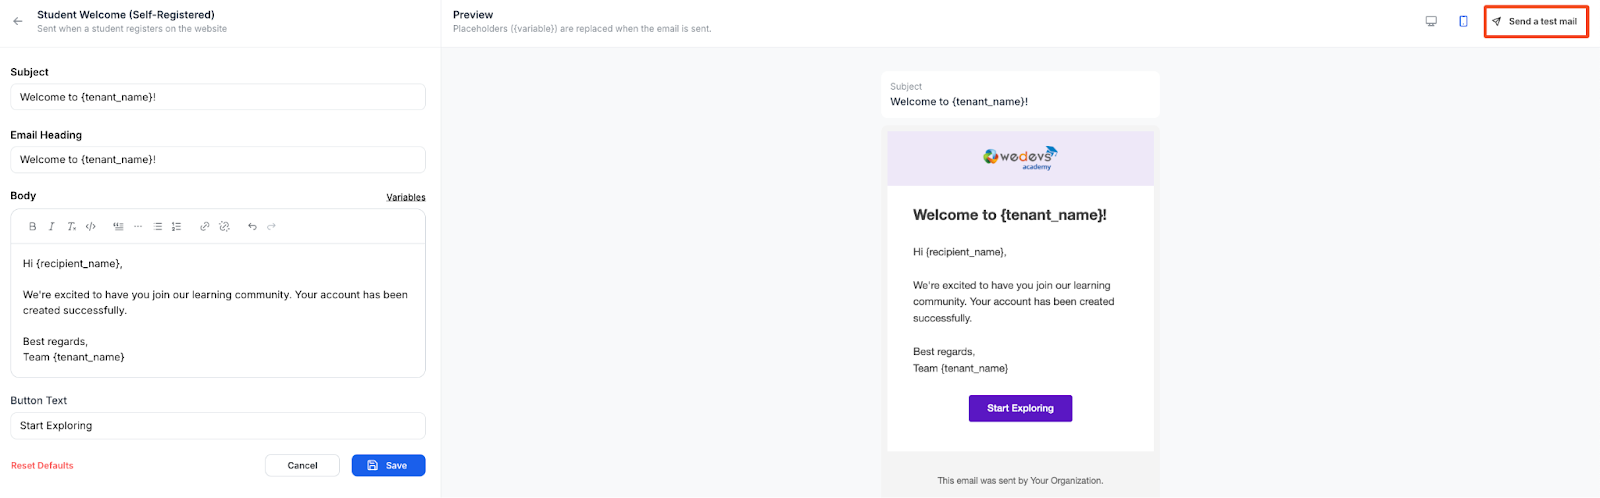
7. Besides the mobile icon, there’s a button that says, “Send a test email.” If you click on this button, the email will be sent to your registered email address.
8. On the left side of the email editor, you will see fields for editing the subject, headline, body, and CTA of the email.
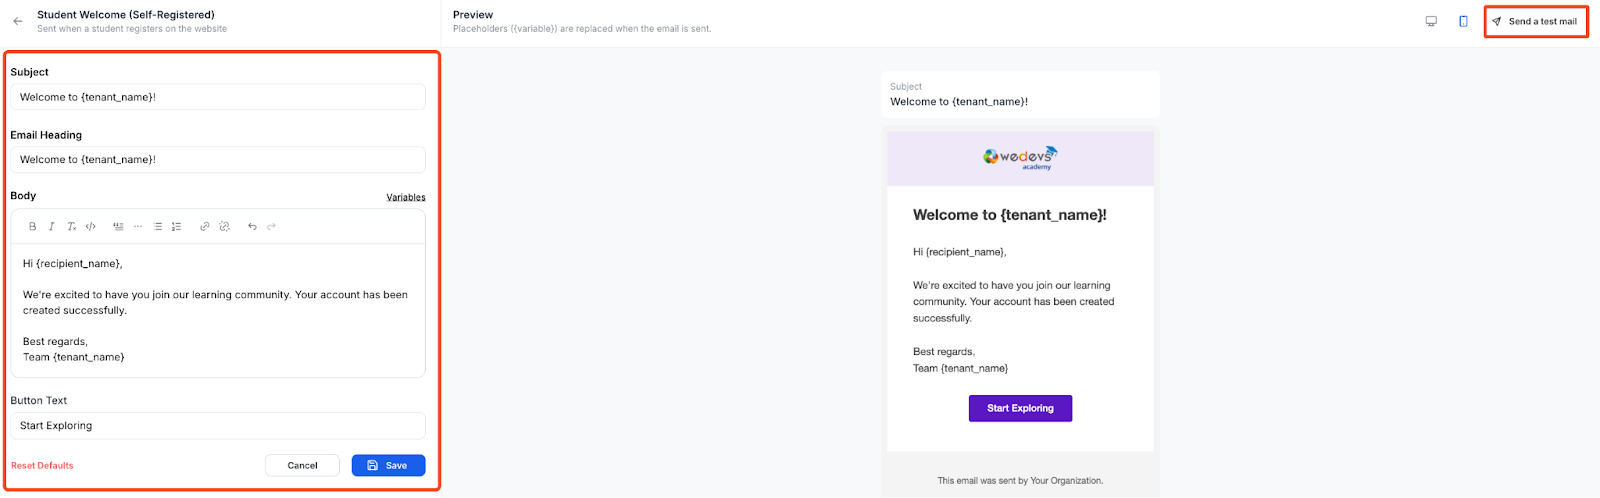
9. Beside the “Body”, you will see a small clickable text named “Variables.” Clicking on the text will show you a list of the variables used in the email. You can also copy them from here and reuse them in the body.
10. When you are editing the email templates for admin and staff, you will see an additional settings tab in the editor. In this tab, you can specify which categories—admins, owners, or managers—will receive the email.
11. When you are done customizing the email, click on the save button to finish.