If you serve international students or a localized audience with limited English proficiency, offering a multilingual website and app is essential. The good news is that now you can have a multilingual website and app with Klasio. Here’s how:
1. From your dashboard, expand “Settings”, click on “General”. Then, scroll down to find the Language section.
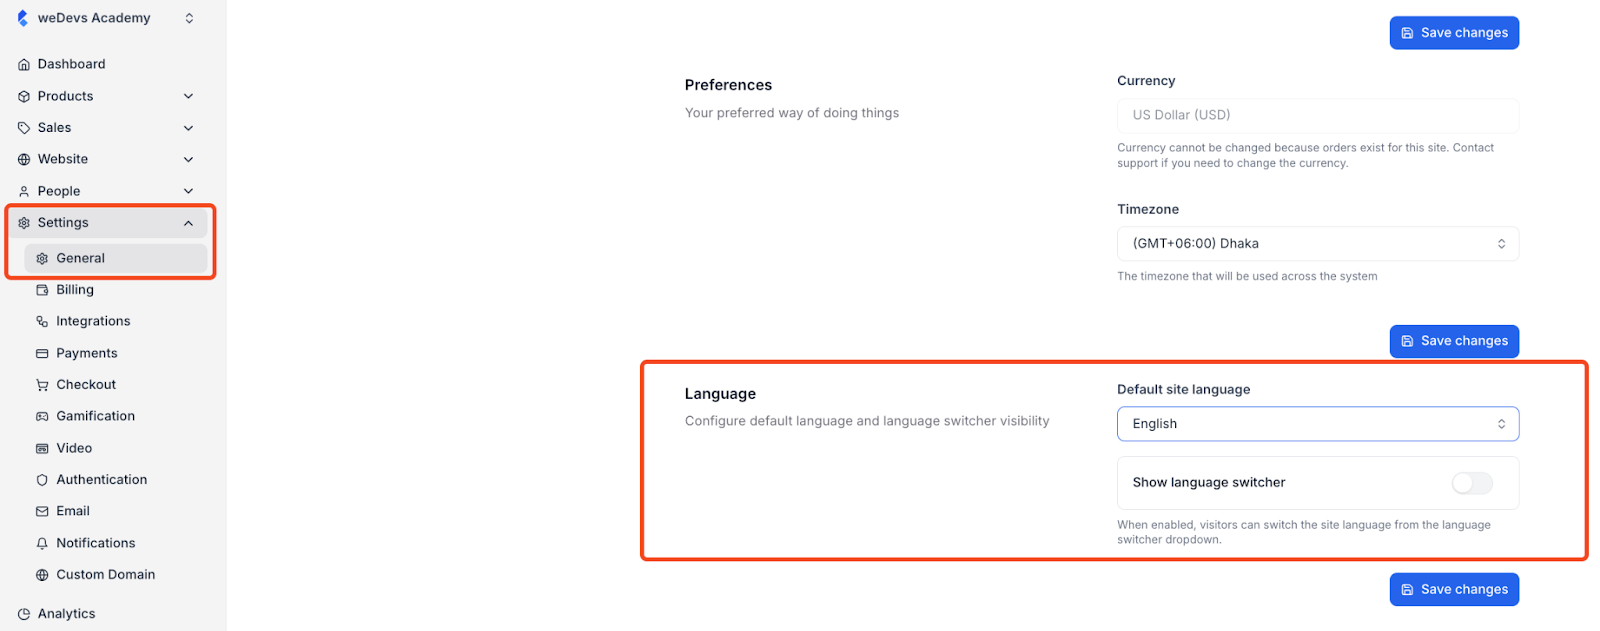
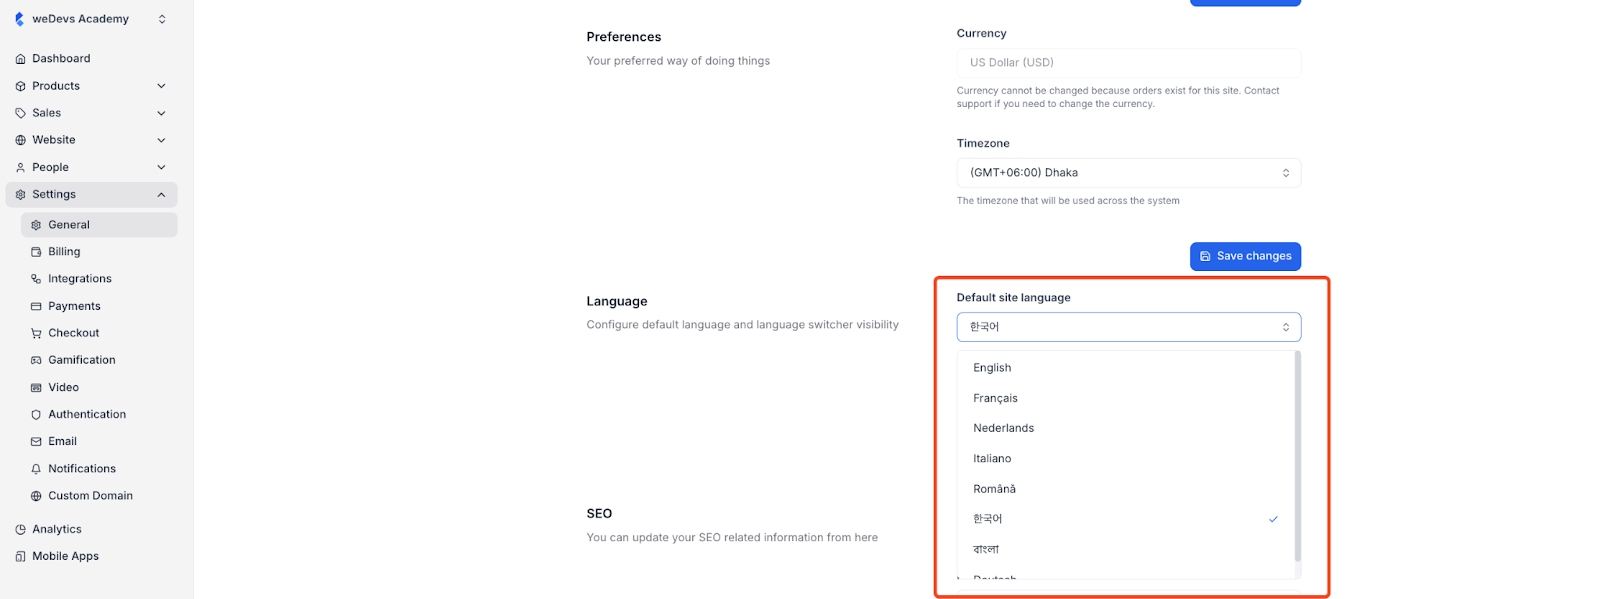
2. In the language section, you will see a dropdown where you can choose your default language. Choose the language you want and click on ” Save Changes.”
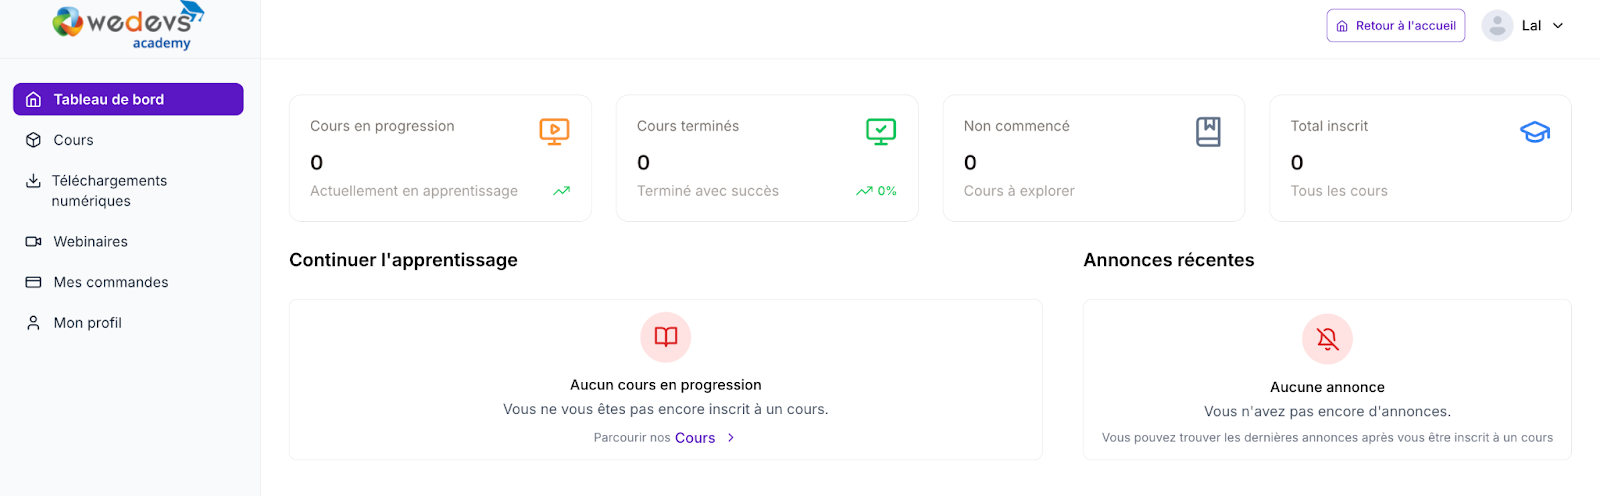
3. Once students log in to their dashboard, the interface will display the language they have chosen.
4. However, your chosen language will not be reflected in your course website immediately. That’s because the texts in the student dashboard are static, and there is no way for you to change them, which is why Klasio translates them automatically.
On the other hand, all the text on your website is fully editable and depends on your preference. That’s why we’ve left the translations up to you so you can decide exactly what you want to display.
This means that to translate the text on your course website, you have to provide the translations manually.
To do that, you need to go to Website > Templates > Customize > Edit to access the page builder. Then, select any text you want to translate by clicking on it.
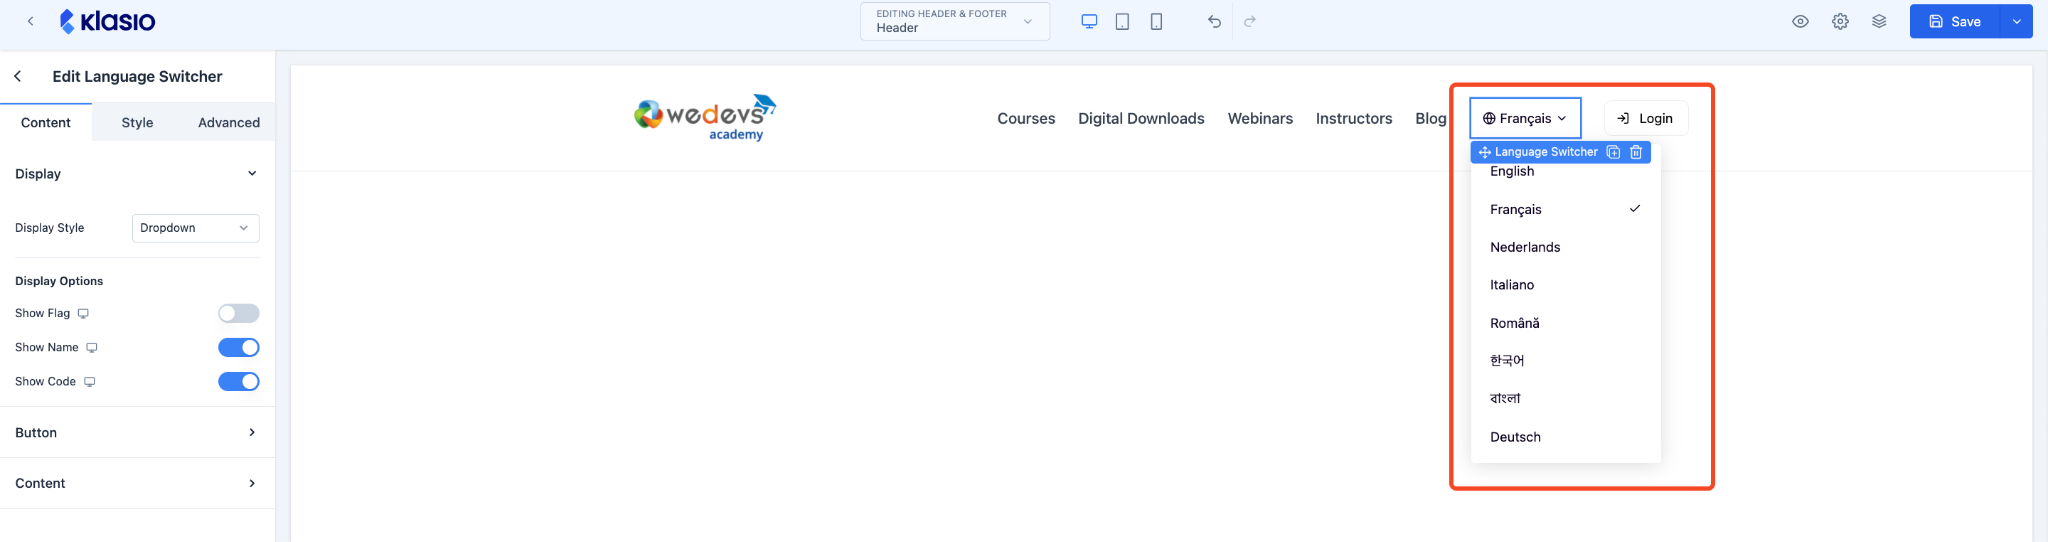
Once you’ve done that, you’ll see a language selector in the top-left corner.
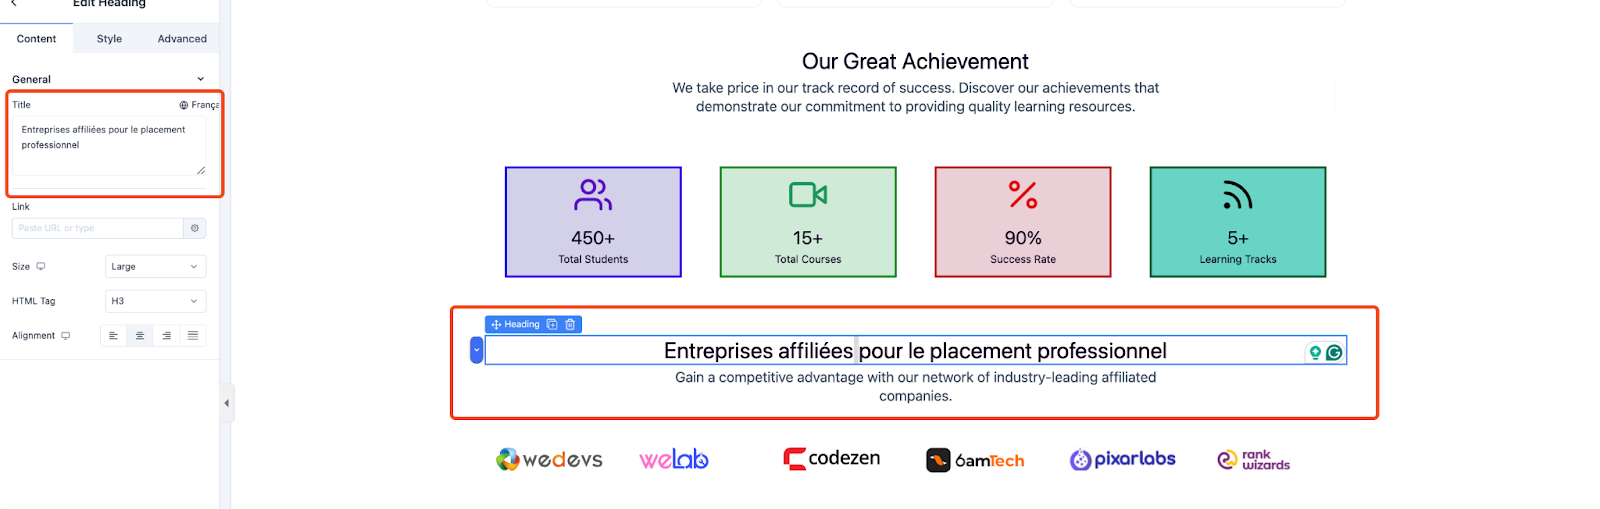
5. Click on it to open the dropdown menu and choose the language you want to translate into. Then put the translated text in the field. Once you do, the text will be changed to your preferred language.
How to Use the Language Switcher Block
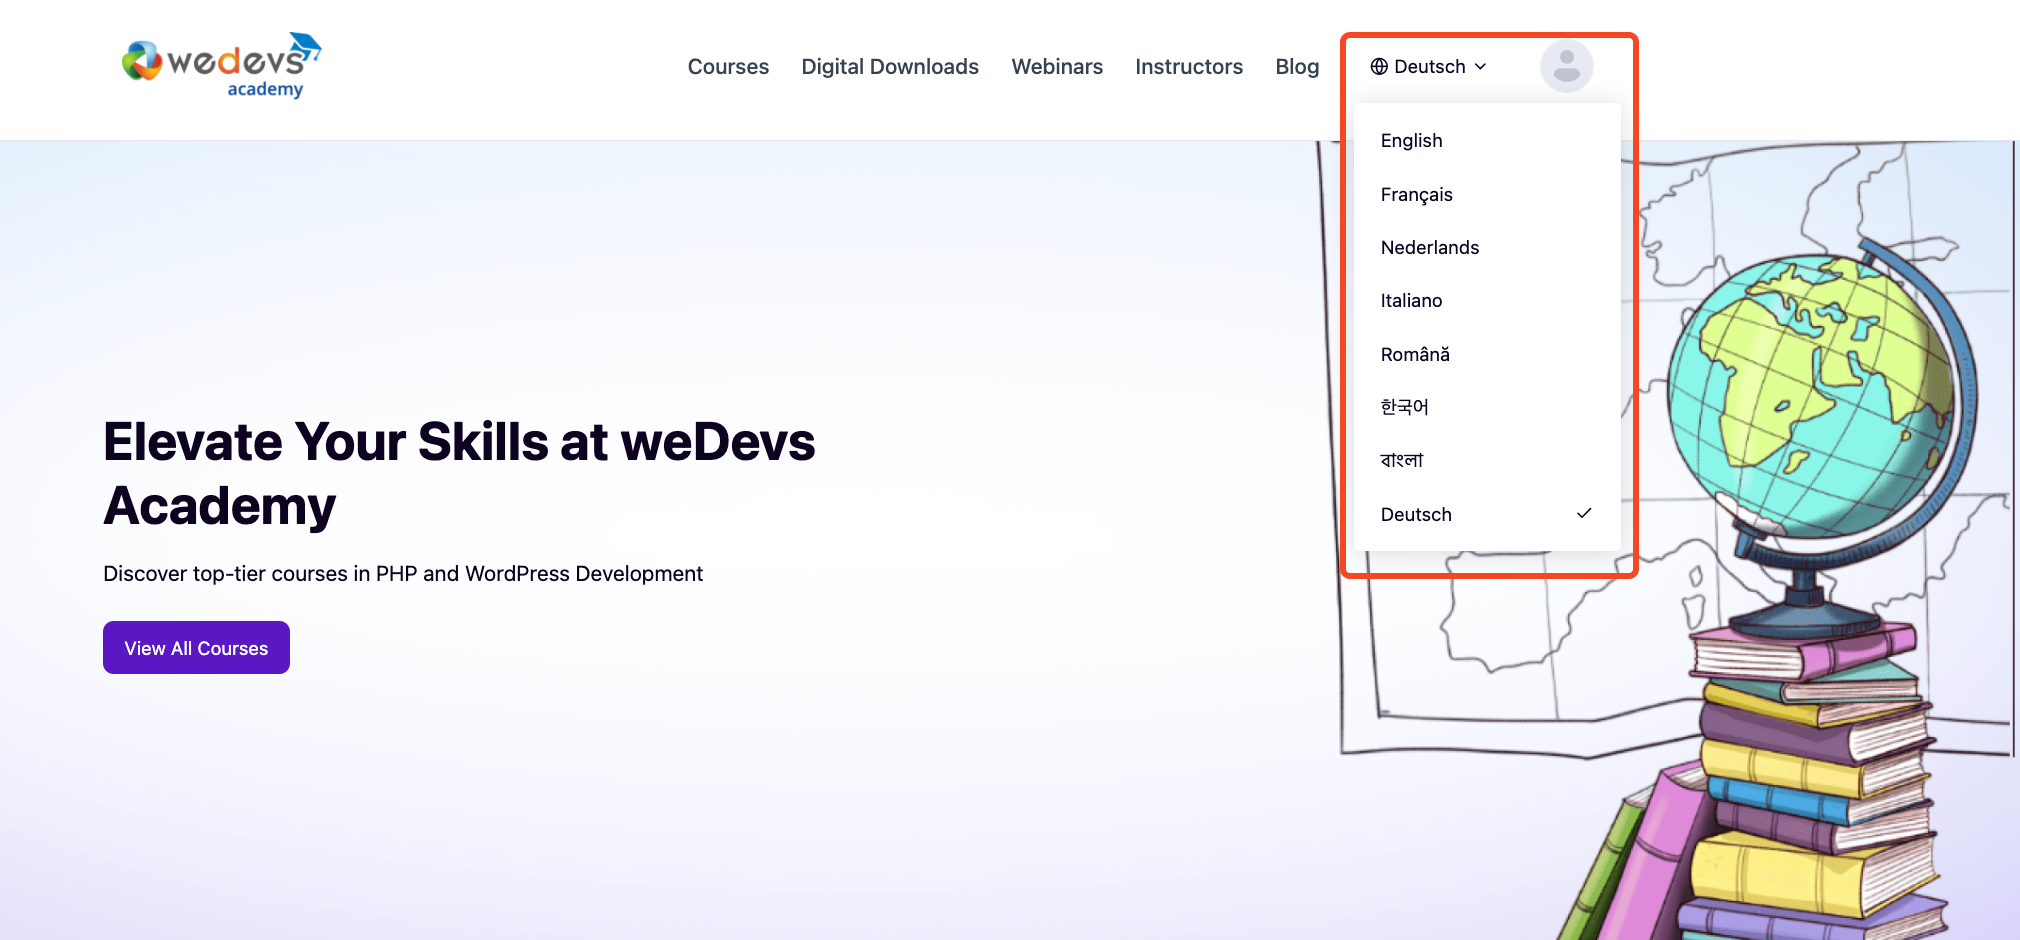
6. Now, let’s go back to the language dropdown in Settings > General. You should notice that there is a toggle button named “Show Language Switcher.” Once you turn it on, all the available languages will appear with checkboxes.

7. Select the languages you want to include in the language switcher, then click “Save Changes.”
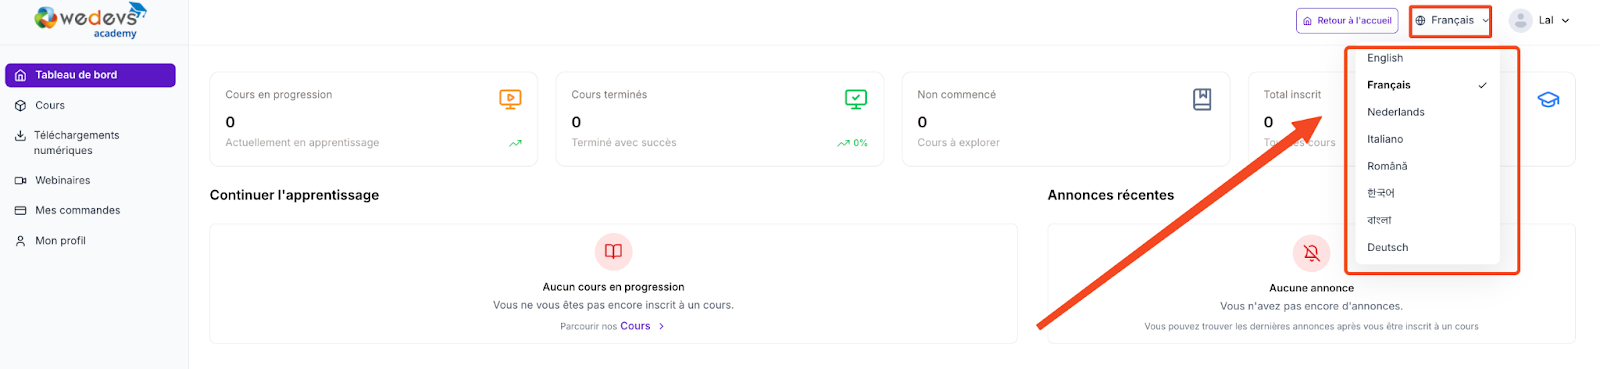
8. Now, when your students log in, they will see the language switcher in the top right corner of the dashboard. When your students change the language from here, their dashboard language will change accordingly.
9. However, the website doesn’t work that way. Once you enable the language switcher, a “language switcher” block will be available in the page builder.
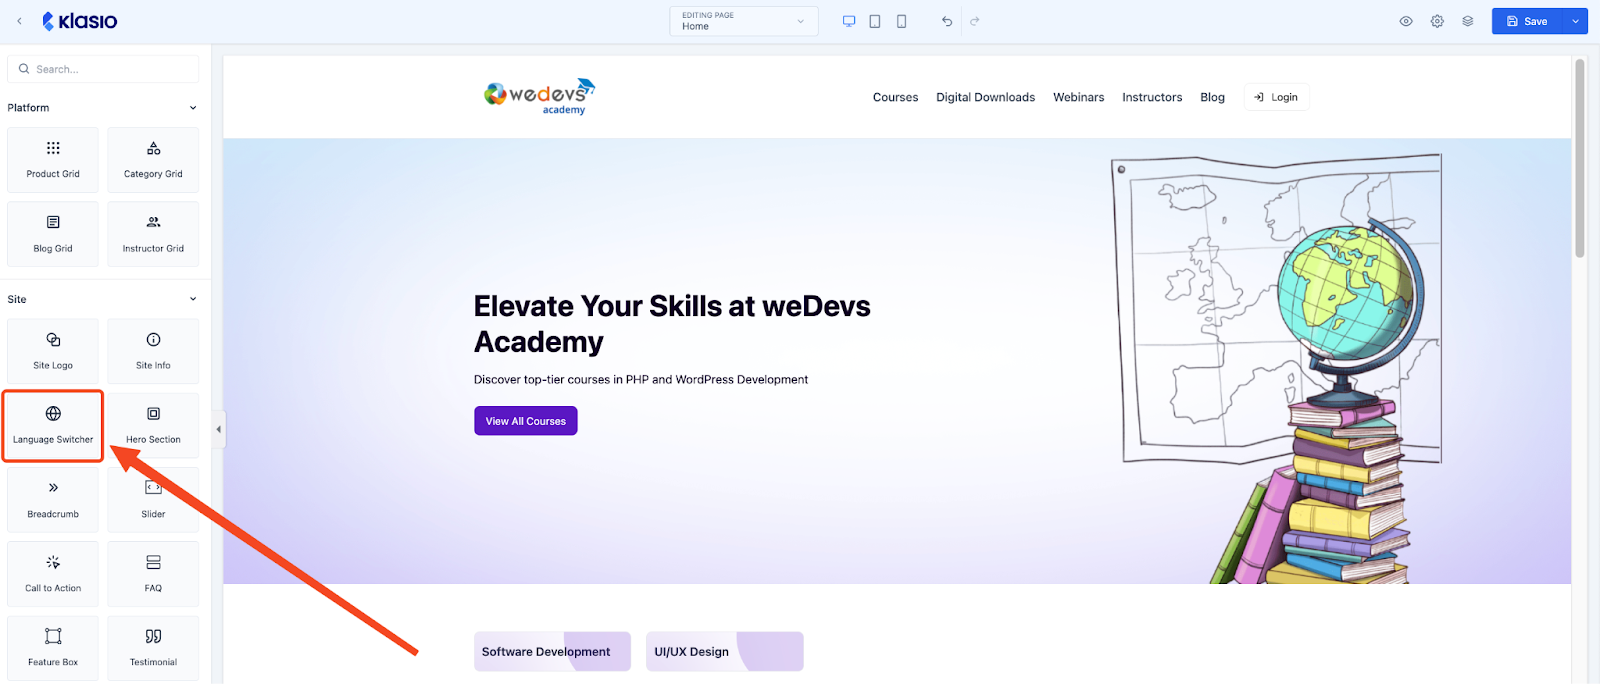
10. Simply drag and drop the block wherever you want the language switcher dropdown. However, we recommend you add it to the header. This way, all of the pages will have the language switcher.
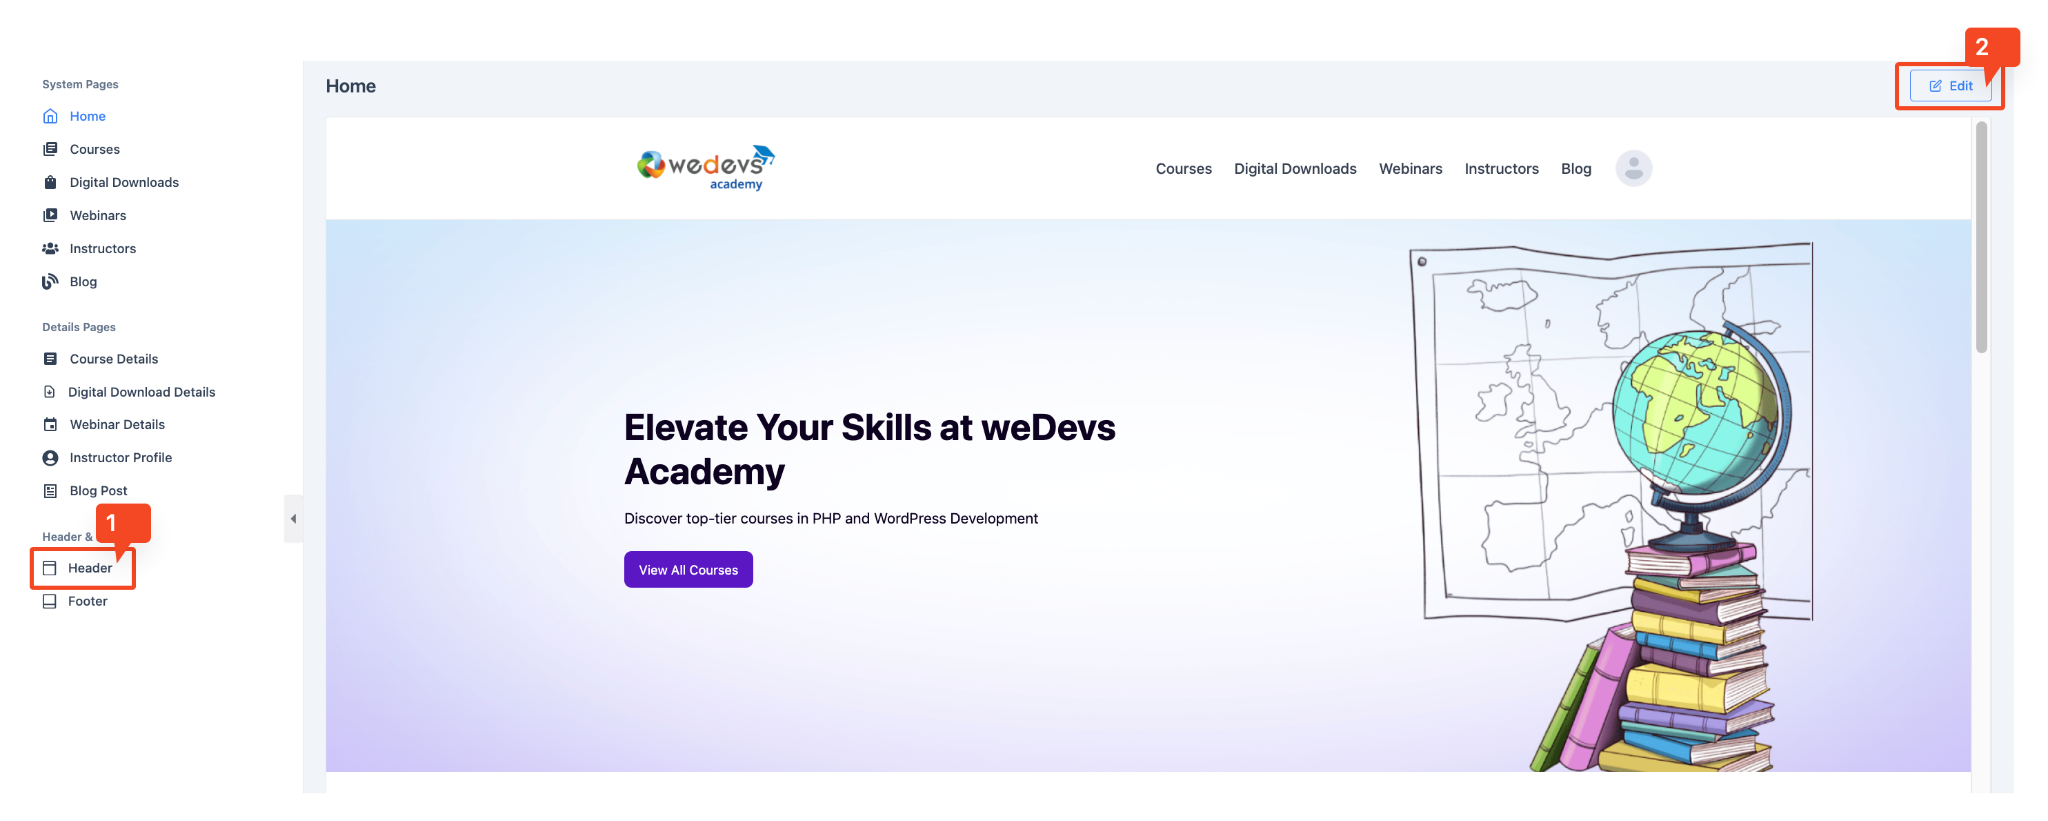
To add the language switcher in the header, Website > Templates > Customize. Then choose Header and click on “Edit.”
Then, simply drag the language switcher and drop it in the header.
Once you are done, click on the “Save” button in the top right corner.
11. Now, your website visitors can change the language of your website, given that the translations for the languages that you have selected.
That’s all about setting up multilingual websites in Klasio. If you face any difficulties, please contact us at [email protected].