Managing your students and leads is now easier than ever with Klasio because of Google Sheets CRM integration. With this integration enabled, whenever a student signs up for your academy or subscribes to your lead magnet, their emails and other information will be collected in a Google Sheet.
There are 4 steps to set up Google Sheets CRM with Klasio.
Step 01: Create a Google Cloud Project and enable the Google Sheets API
To create a Google Cloud project, follow these steps:
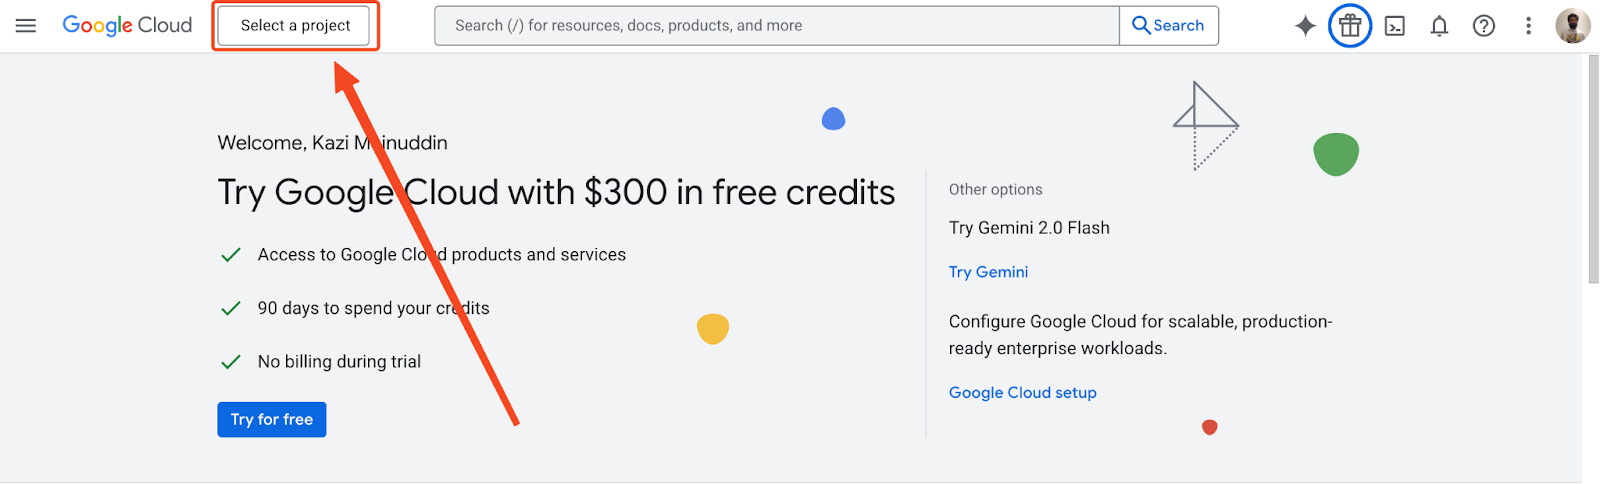
1. First, go to console.cloud.google.com. Then, click on the “Select Project” button in the top left corner.
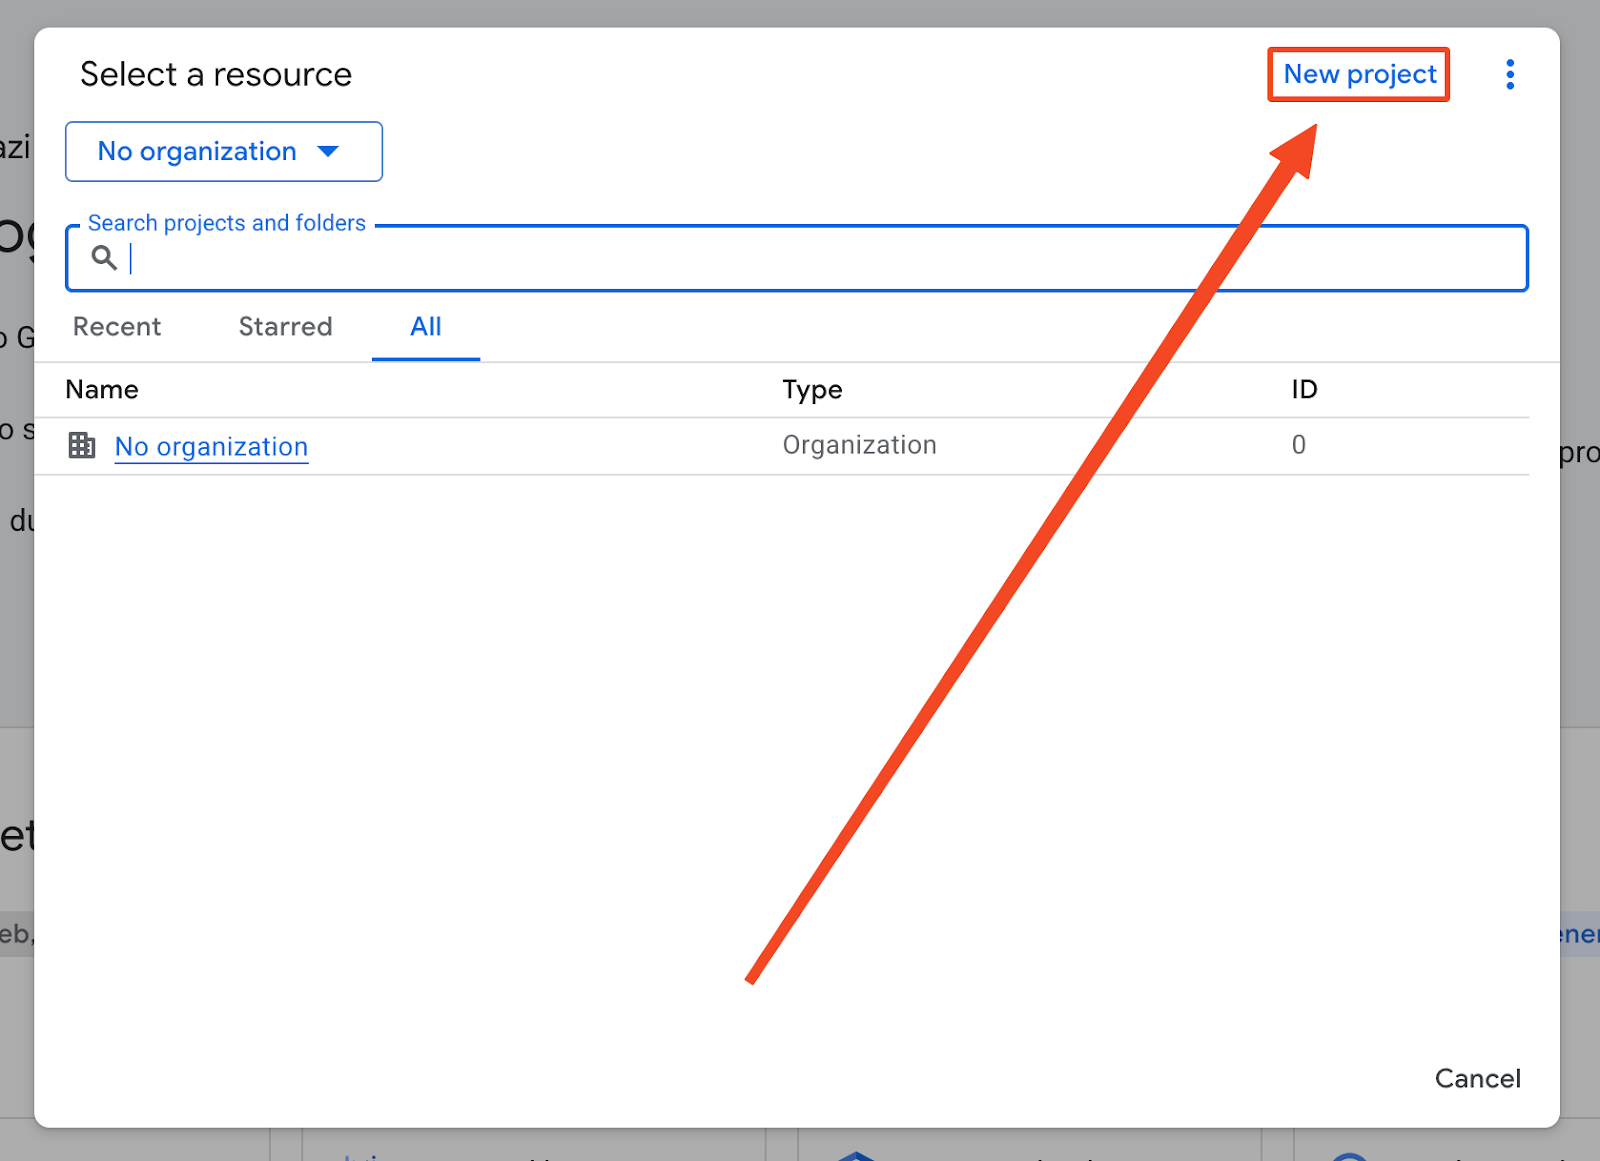
2. After clicking on the “Select Project” button, a popup will appear, where you will see all of your existing projects if you have some. Click on the “New Project” button on the top right.
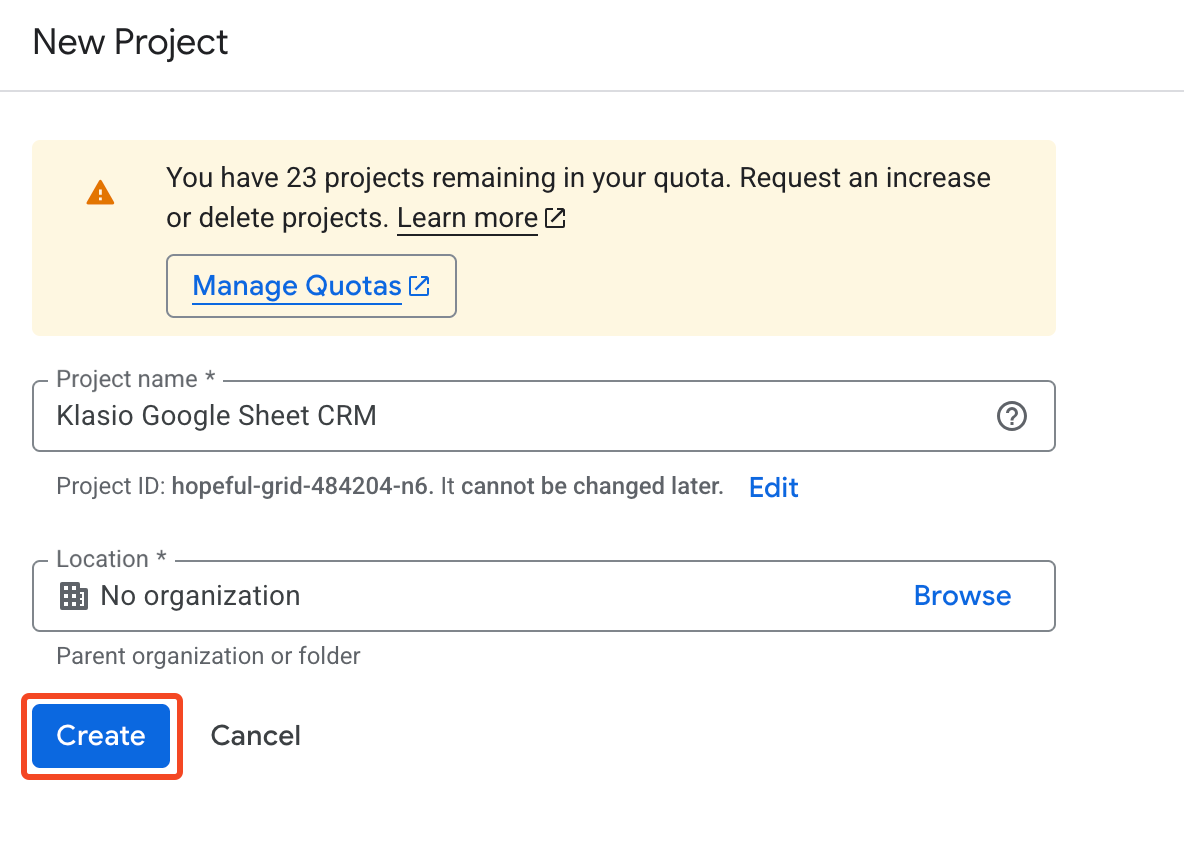
3. On the new screen, you will be prompted to input a name for your project. Choose a name and then click on “Create.”
With this, we have successfully created a Google Cloud Project. Now, let’s move to step two.
Step 02: Create a Service Account and download the JSON credentials
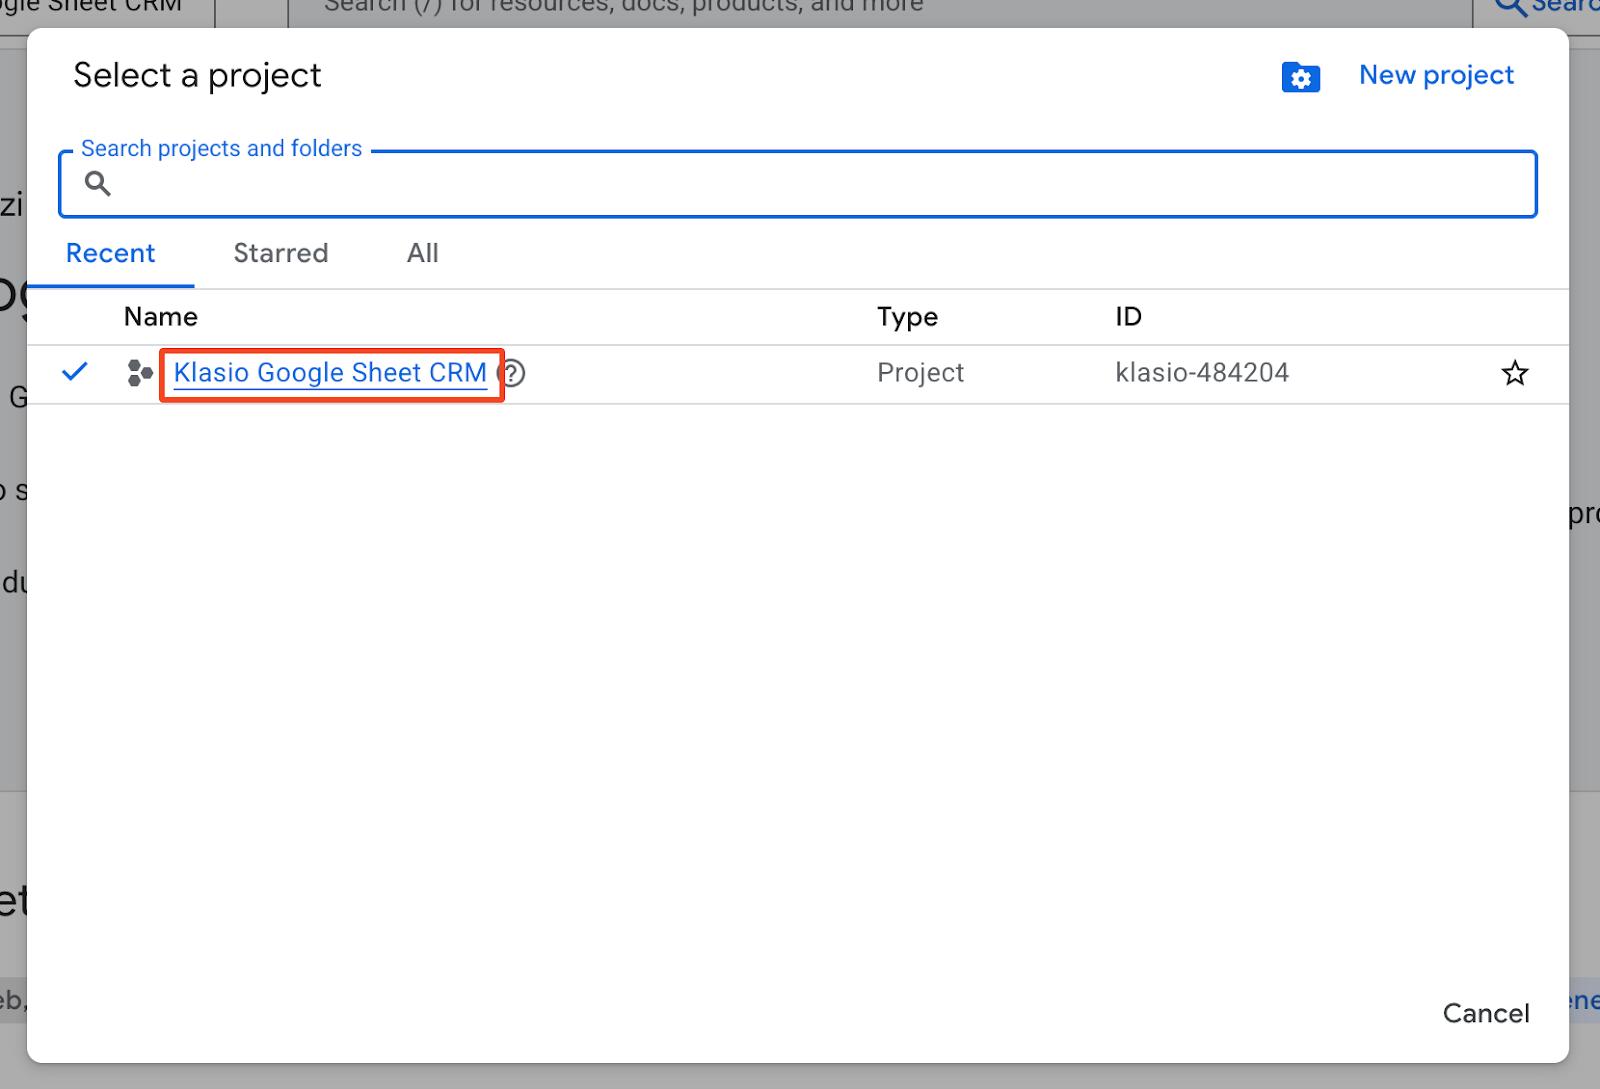
4. After you click on the “Create” button, you will be taken back to the console page, where you will have to select the project we just created.

5. After opening the list of projects, click on the project name to select it.
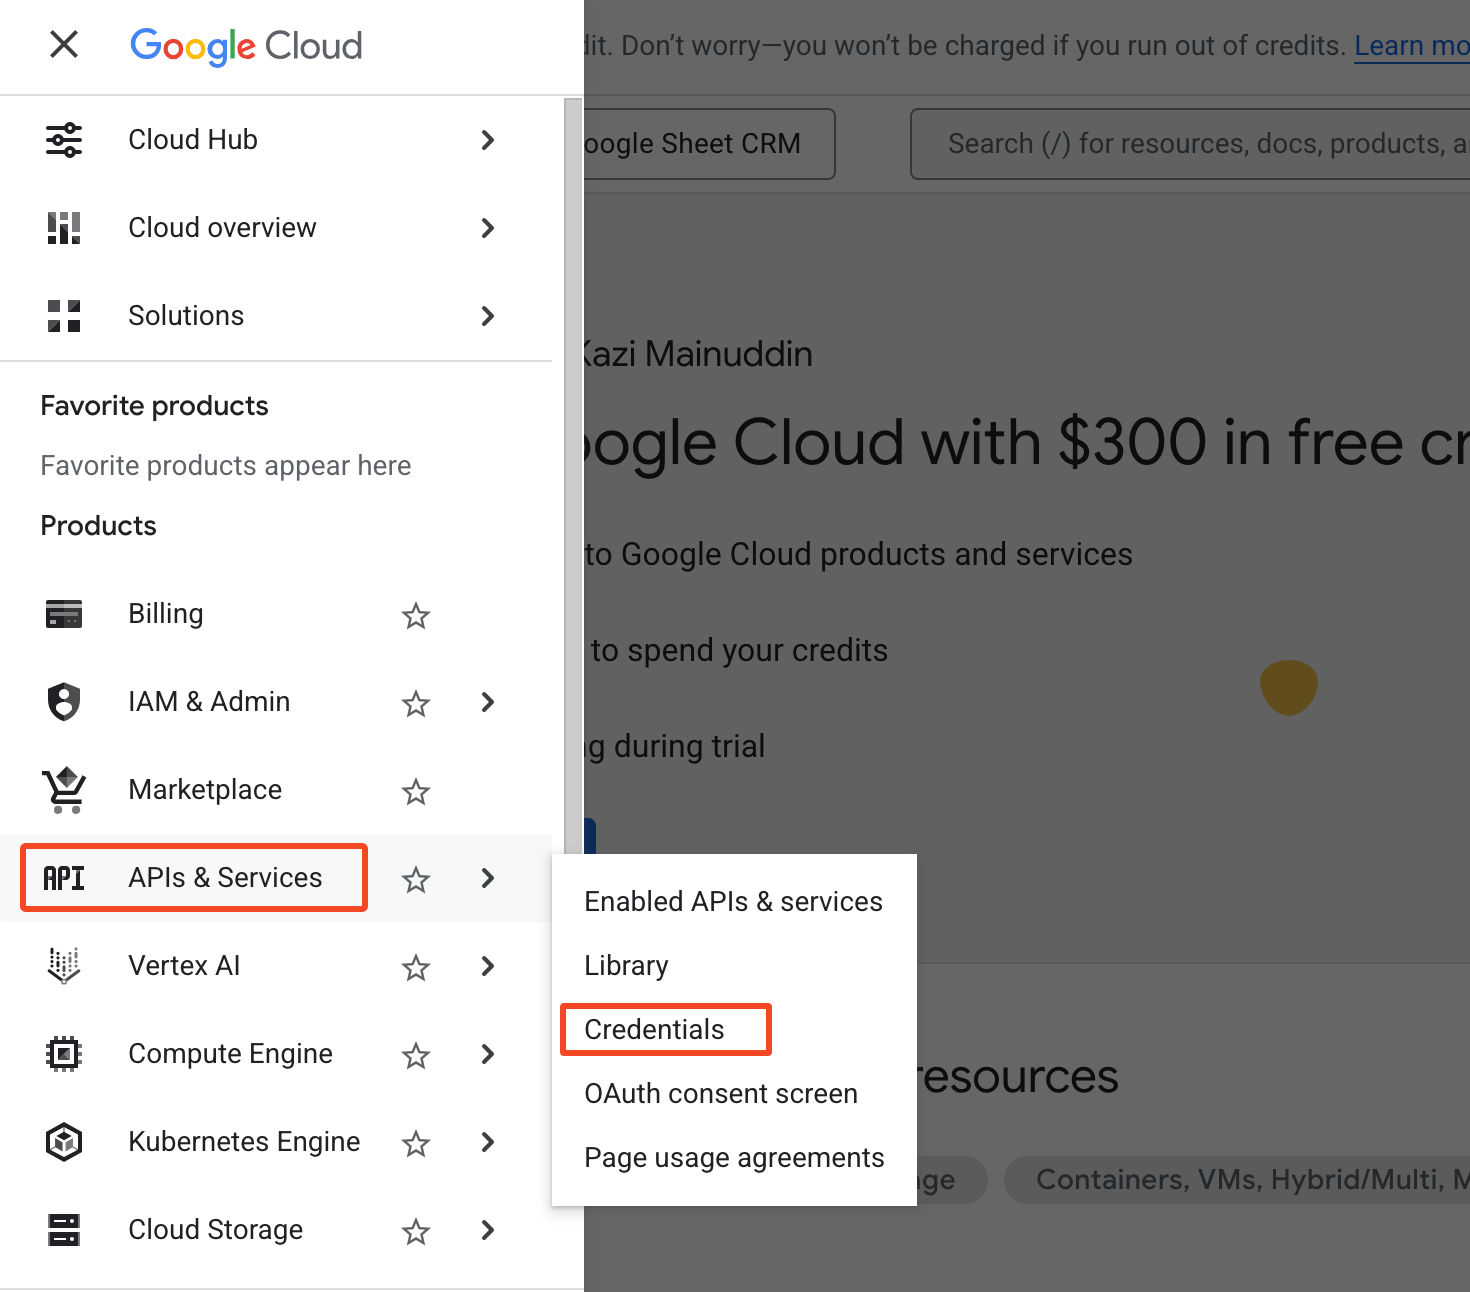
6. Now, you will be back at the console page again. From there, click on the three bars in the top left corner to open the navigation menu.

7. From the navigation bar, go to APIs and Services > Credentials.
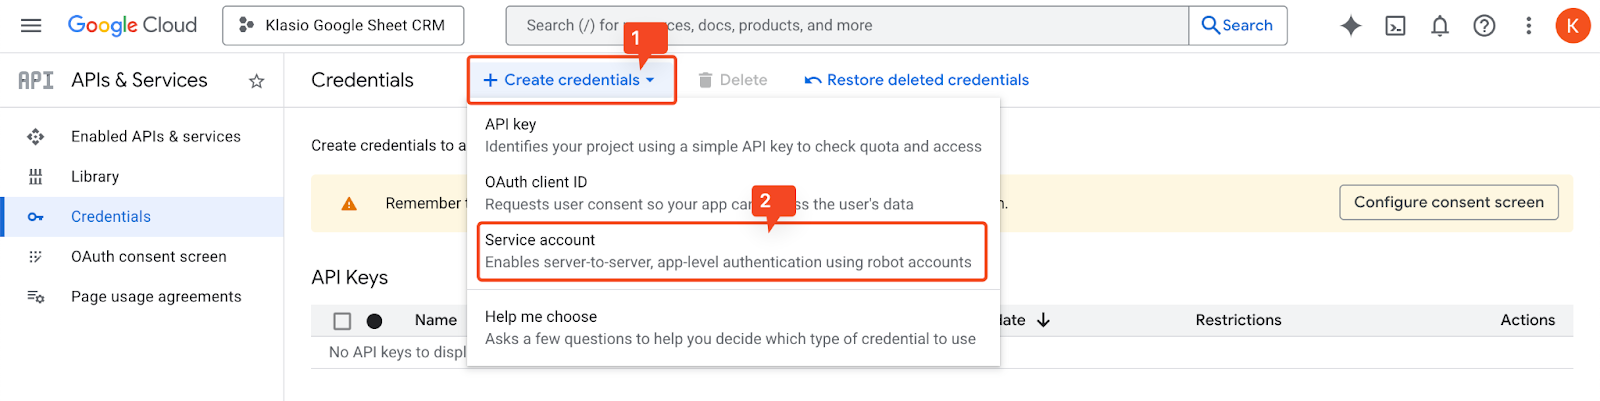
8. On the new screen, click on the “Create Credential” button and then click on “Service Account” from the dropdown.
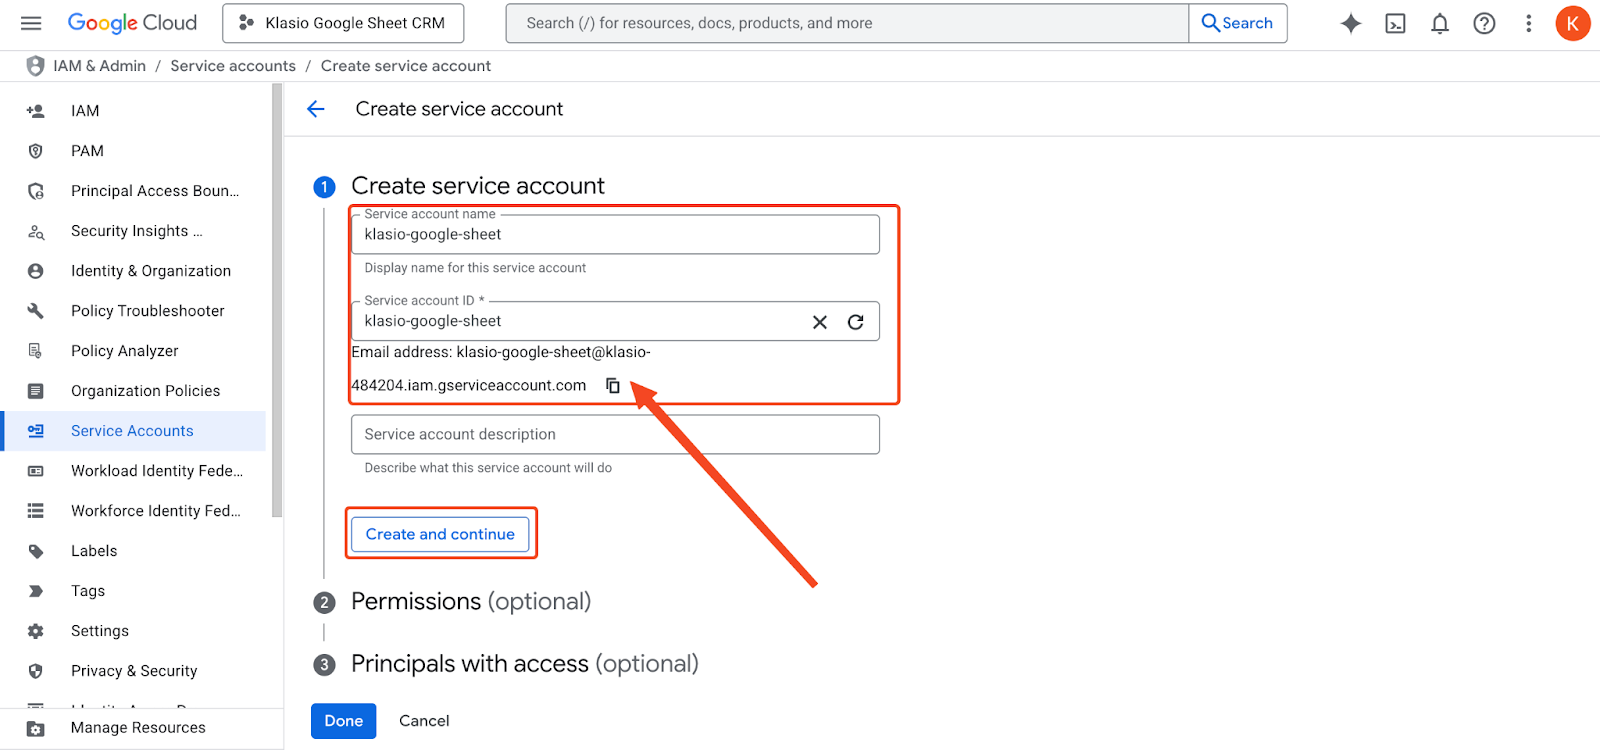
9. Once you do that, you will be taken to a new screen where you will be asked to input the service account name. Based on the name you input, the service account ID and a Gmail address will be automatically generated.
There’s also a field for Service Account Description, which is optional.
Once you are done, click on the “Create and Continue” button.
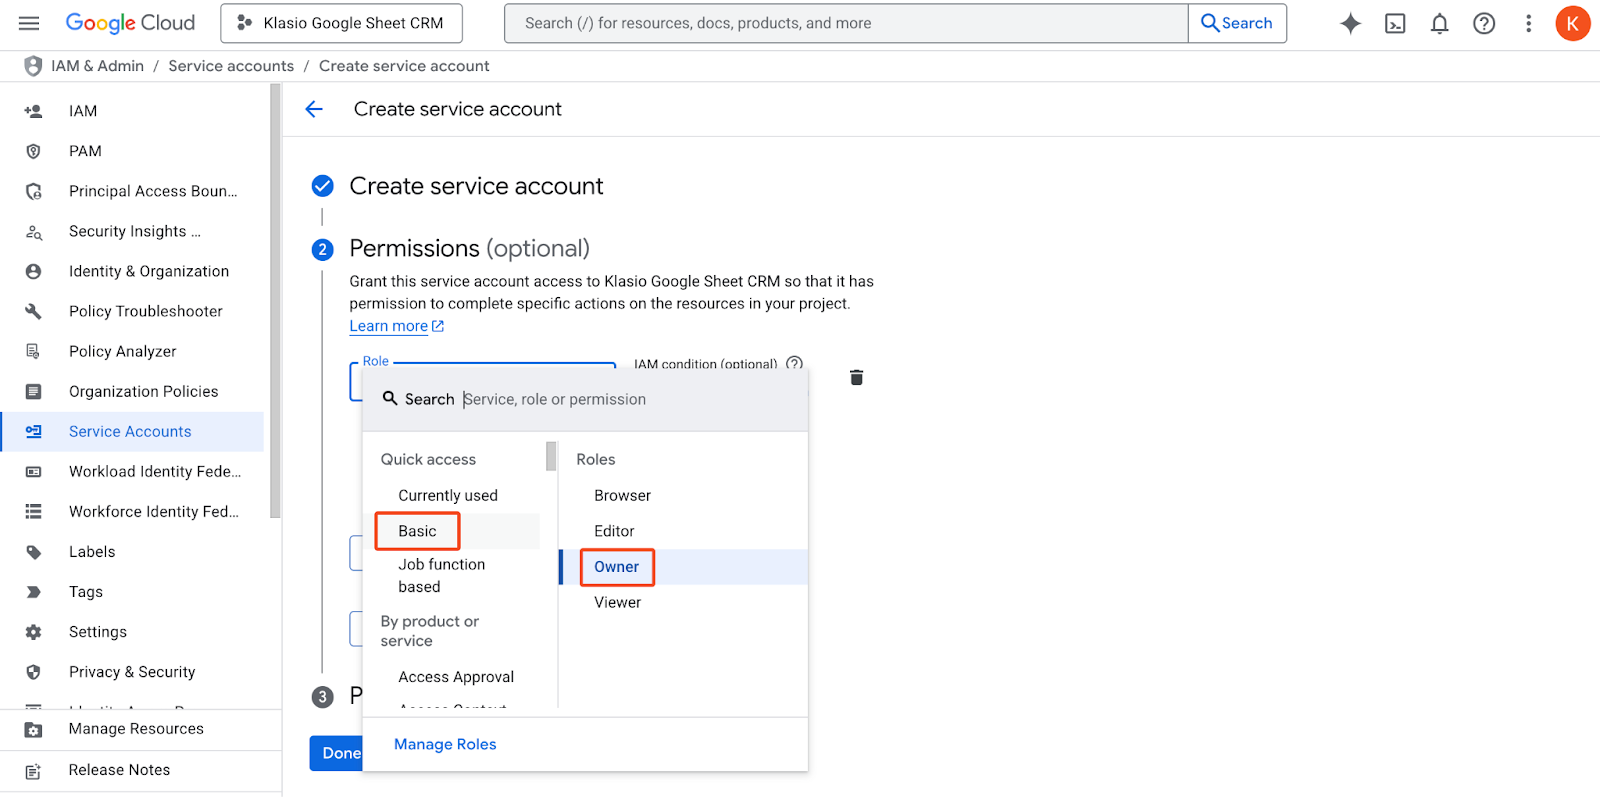
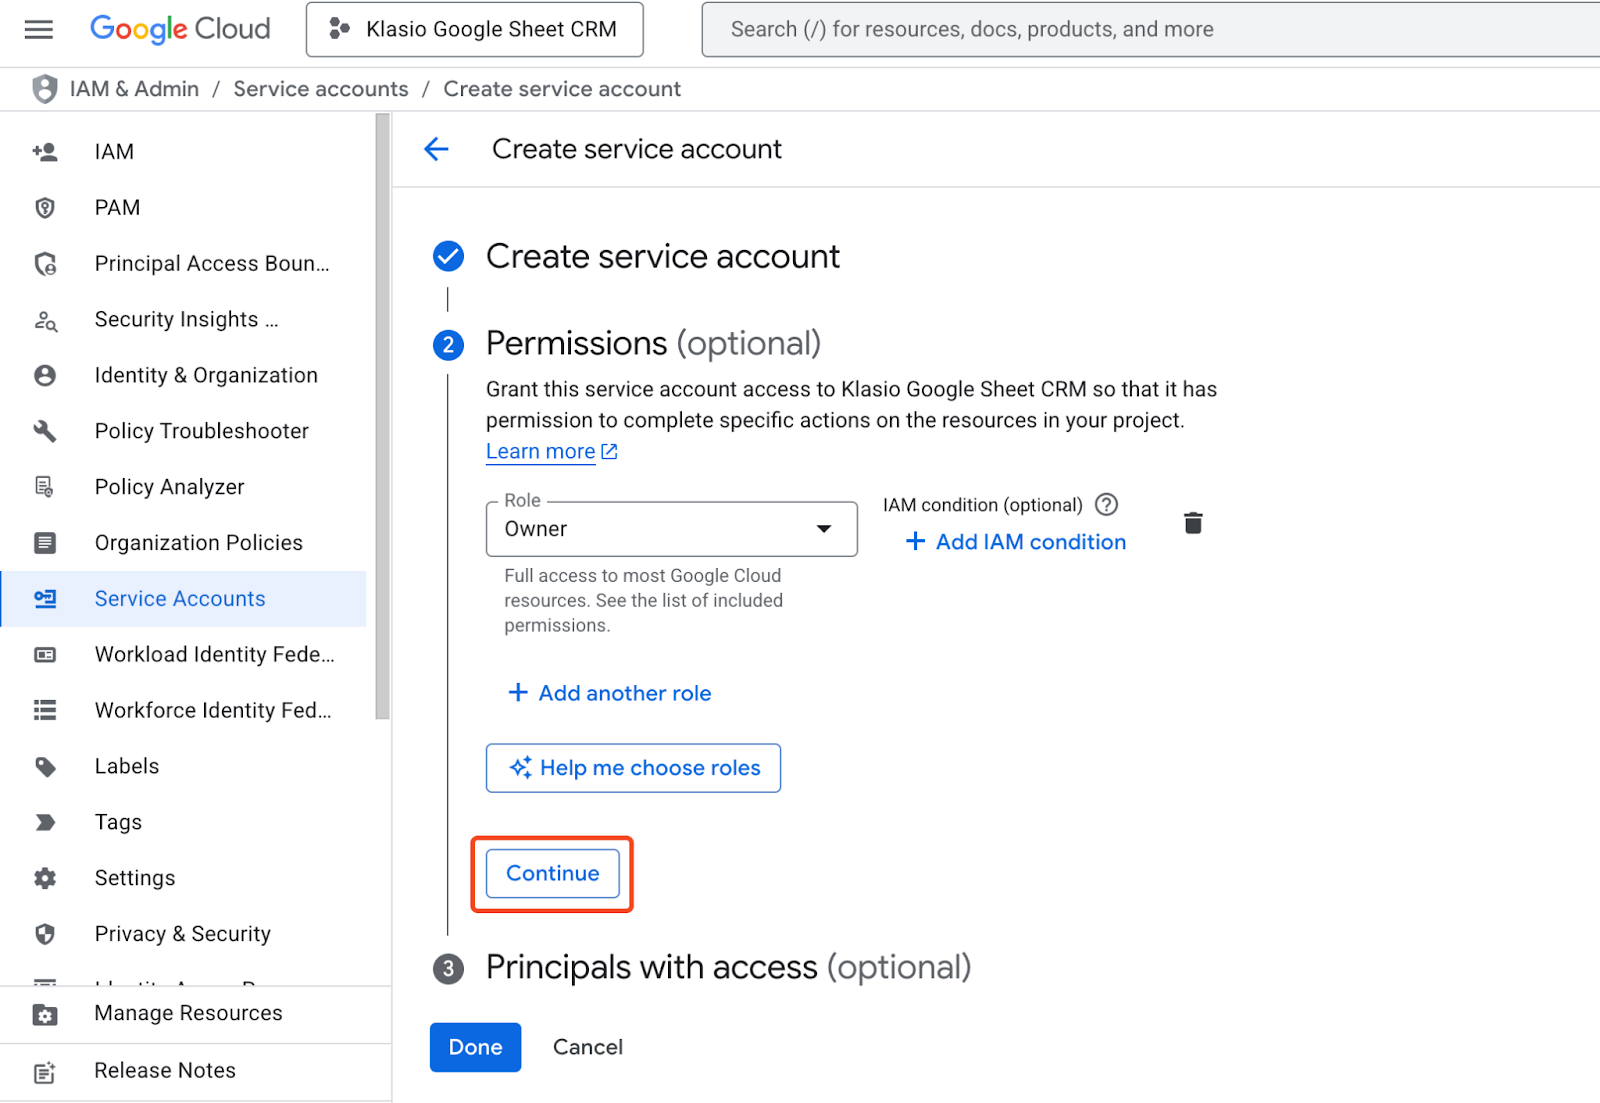
10. The next step is to grant permission to the service account. Click on the dropdown and under “Quick Access” select “Basic,” then select “Owner.”
11. After granting permission, click on “Continue” to move forward.
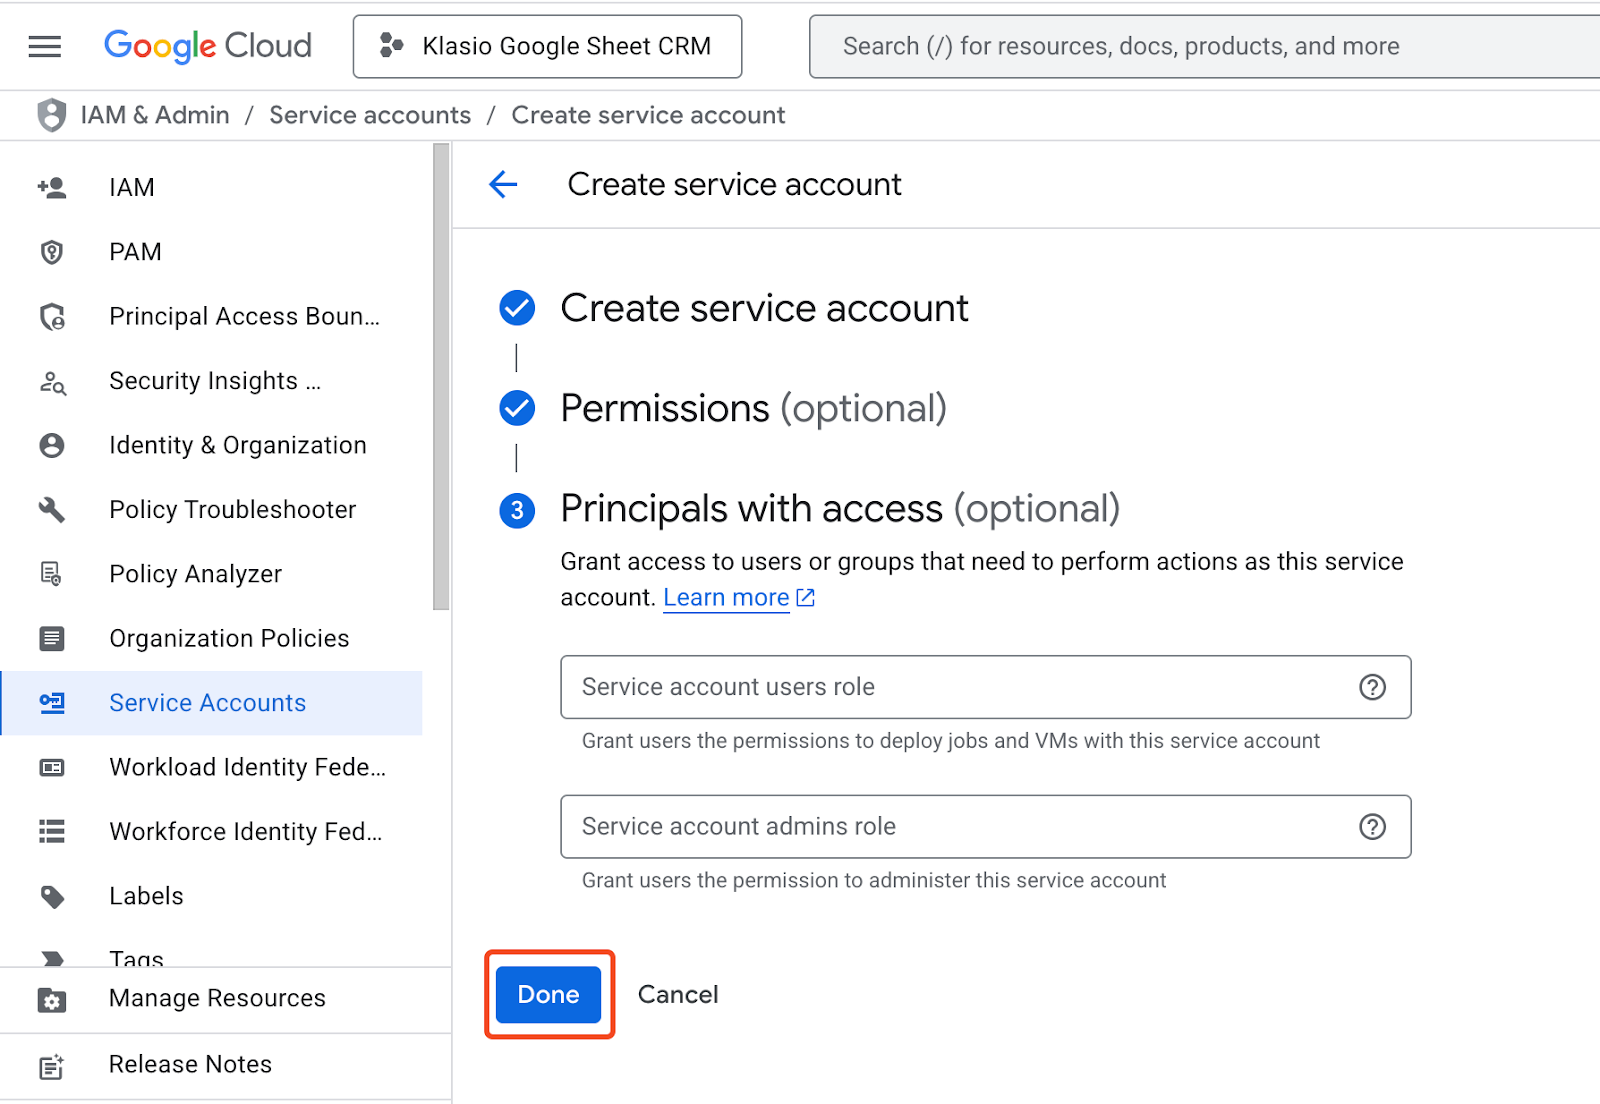
12. Now, we will move on to the third step, which is optional, and we can skip it. So, just skip it and click on “Done.”
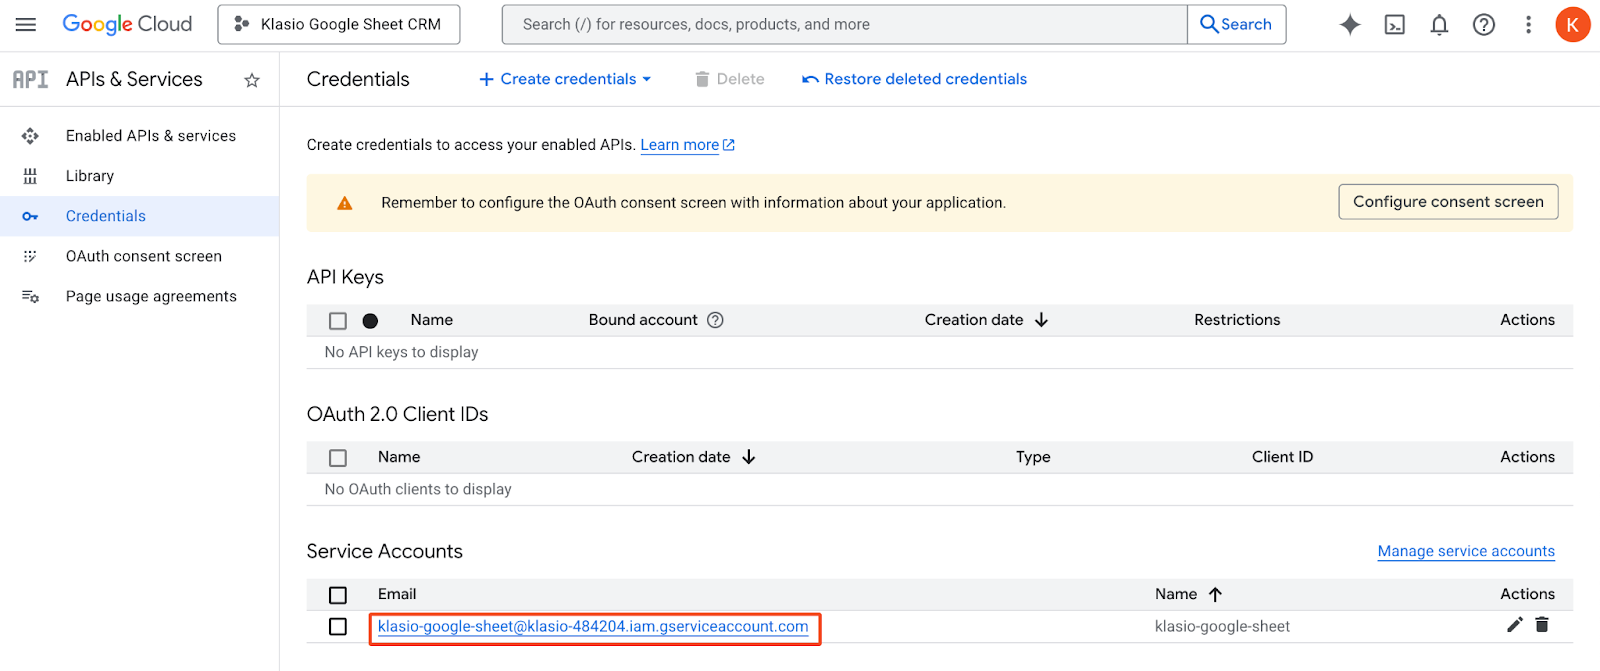
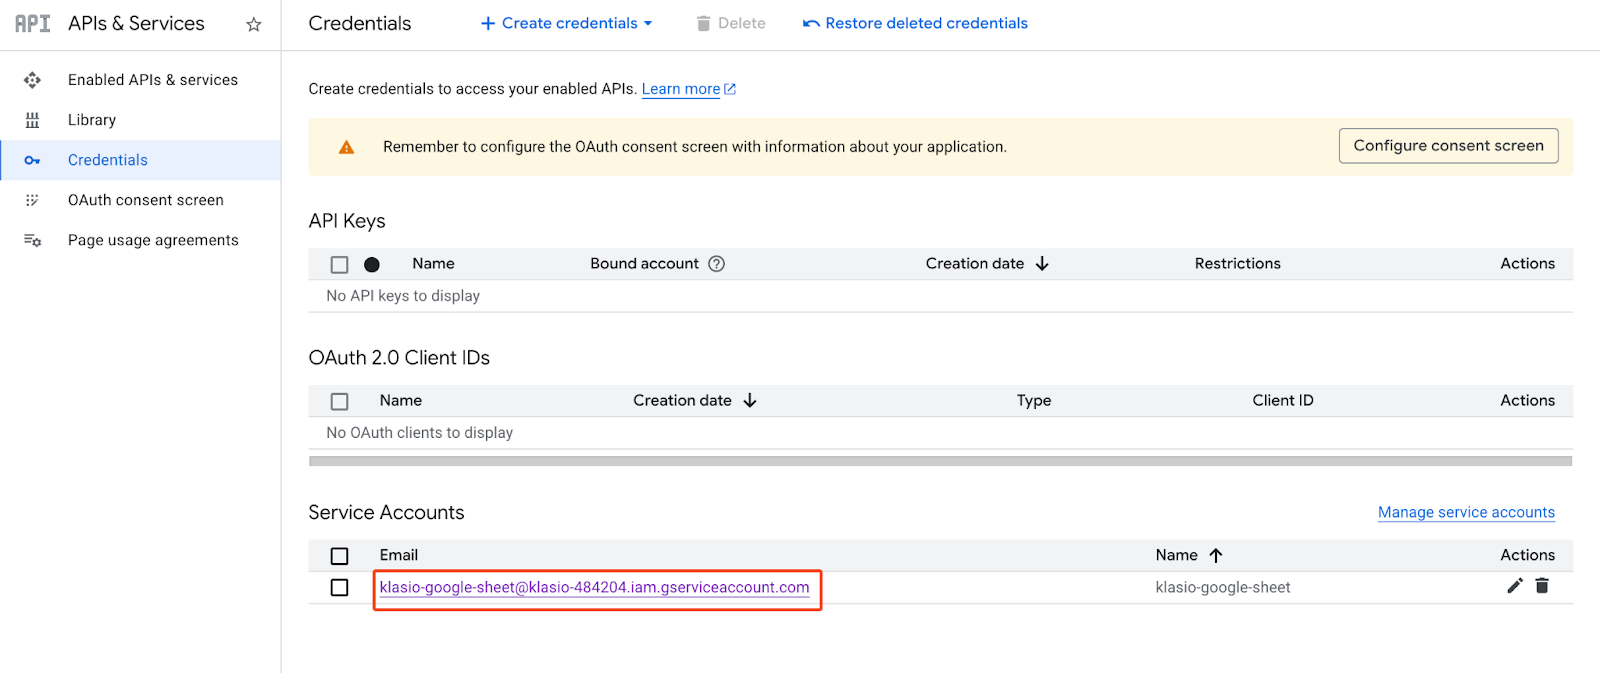
13. Once you click on the “Done” button, you will be taken back to the credentials page, where you can see the service account you just created. Click on the email of the service account.
14. On the new screen, go to the “Keys” tab. Click on “Add Key” and then “Create Key” from the dropdown.

15. A popup will appear and ask you to choose the type of key you want to create. By default, JSON is selected. Keep it that way and hit “Create.”
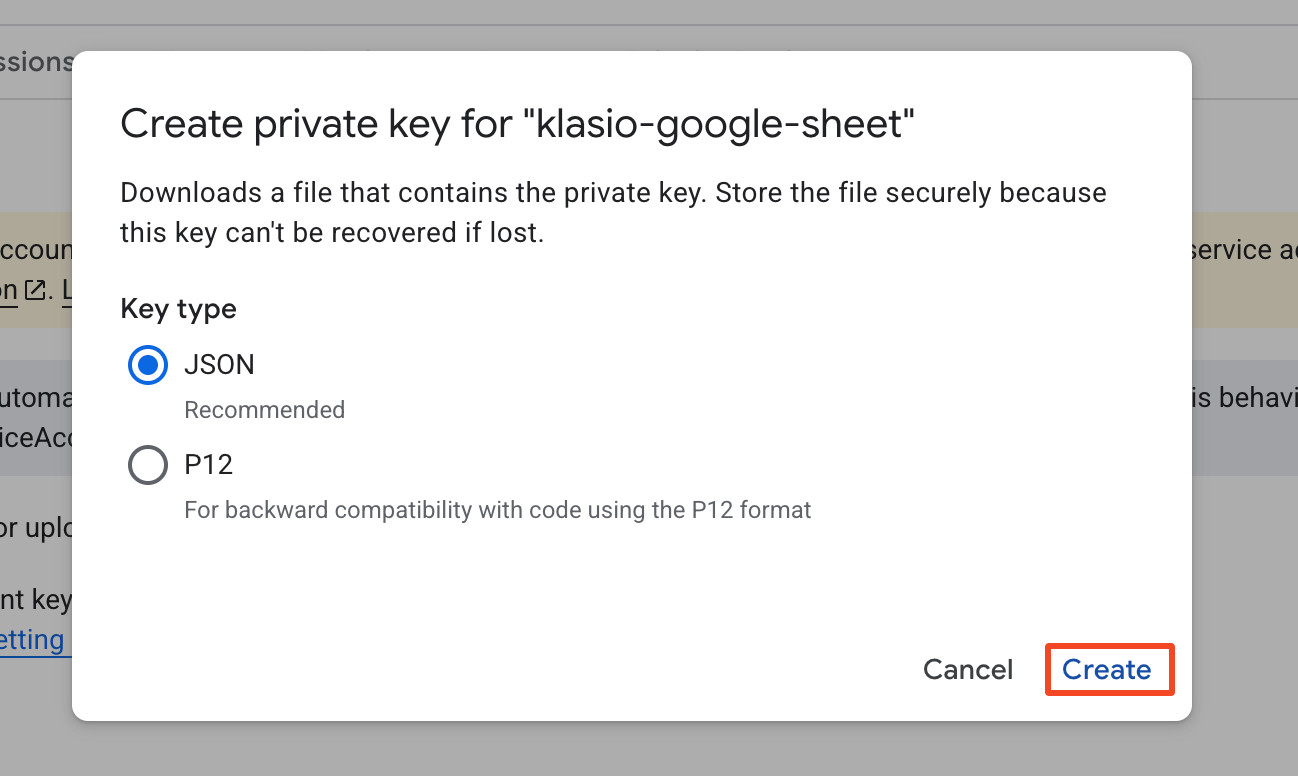
16. Once you hit “Create,” a JSON file will be downloaded with the private key.
With this, we have successfully created a service account and downloaded the JSON credentials.
Step 03: Enable the Google Sheets API
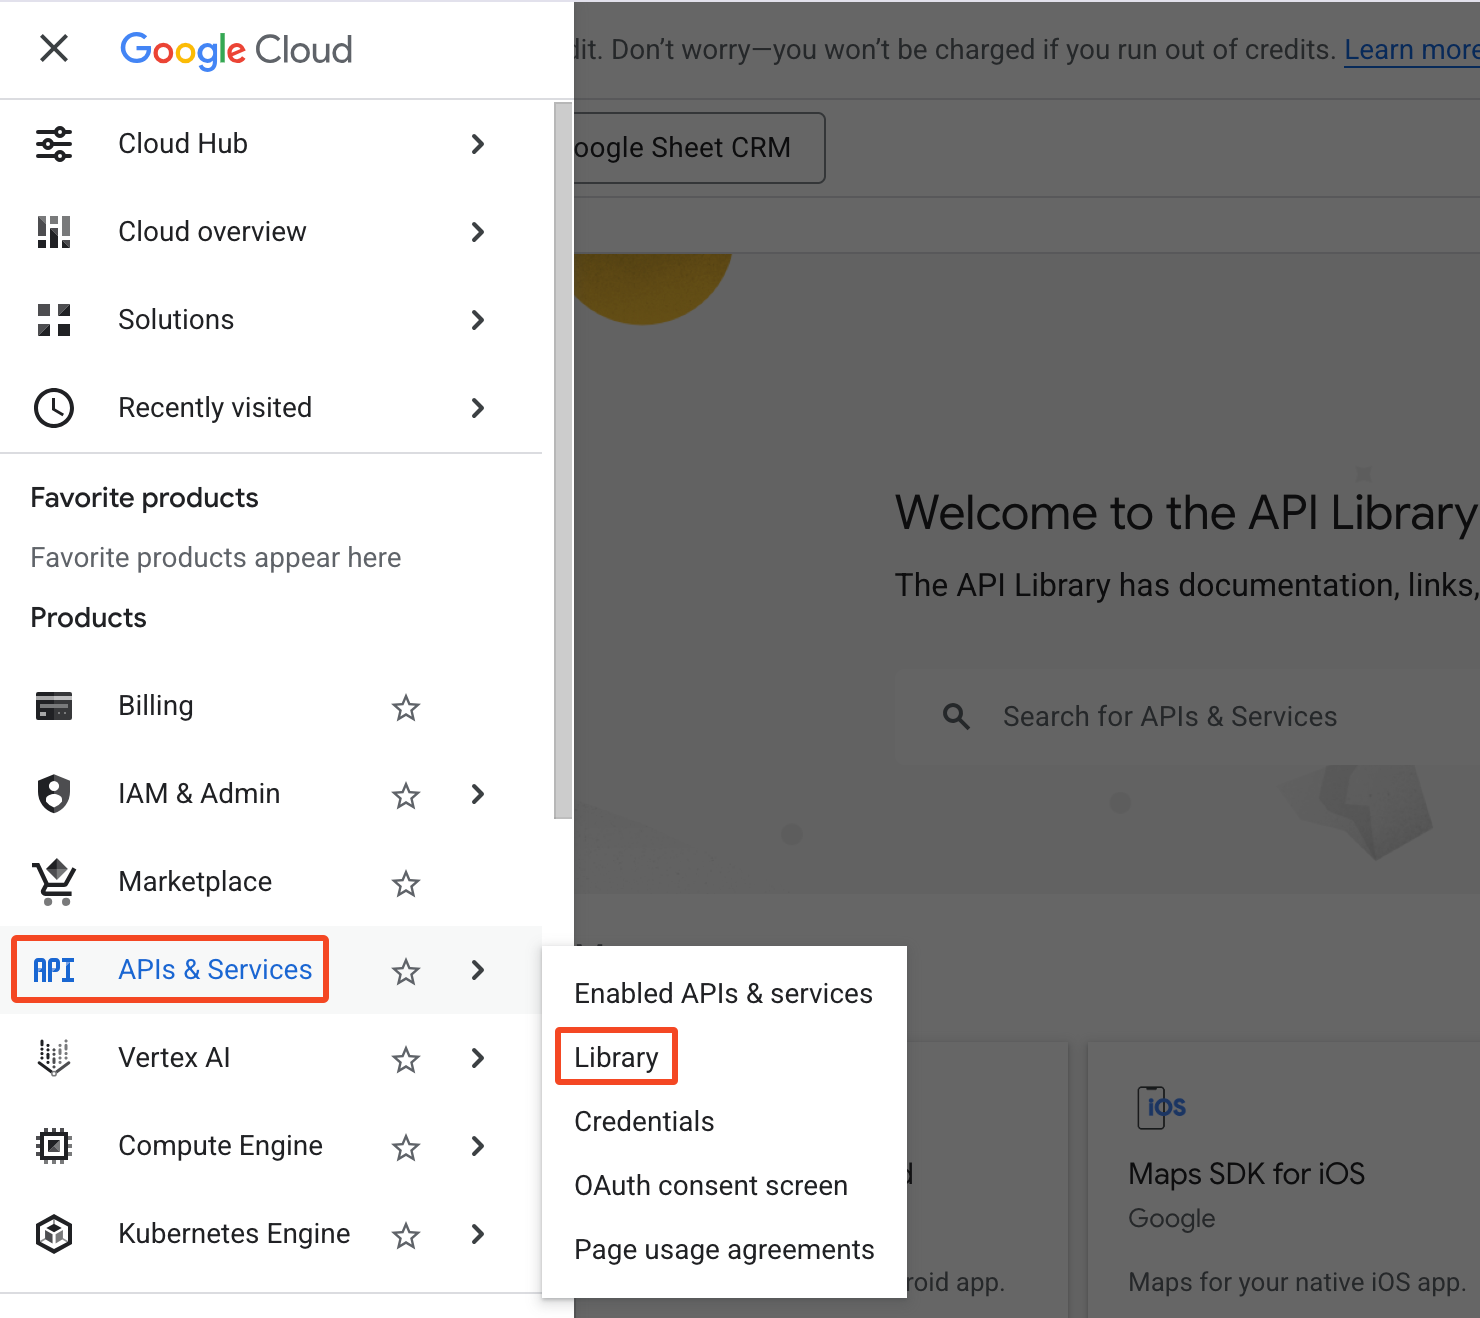
17. To enable the Google Sheets API, expand the navigation menu by clicking on the three bars at the top left corner. Then go to API and Services > Library.
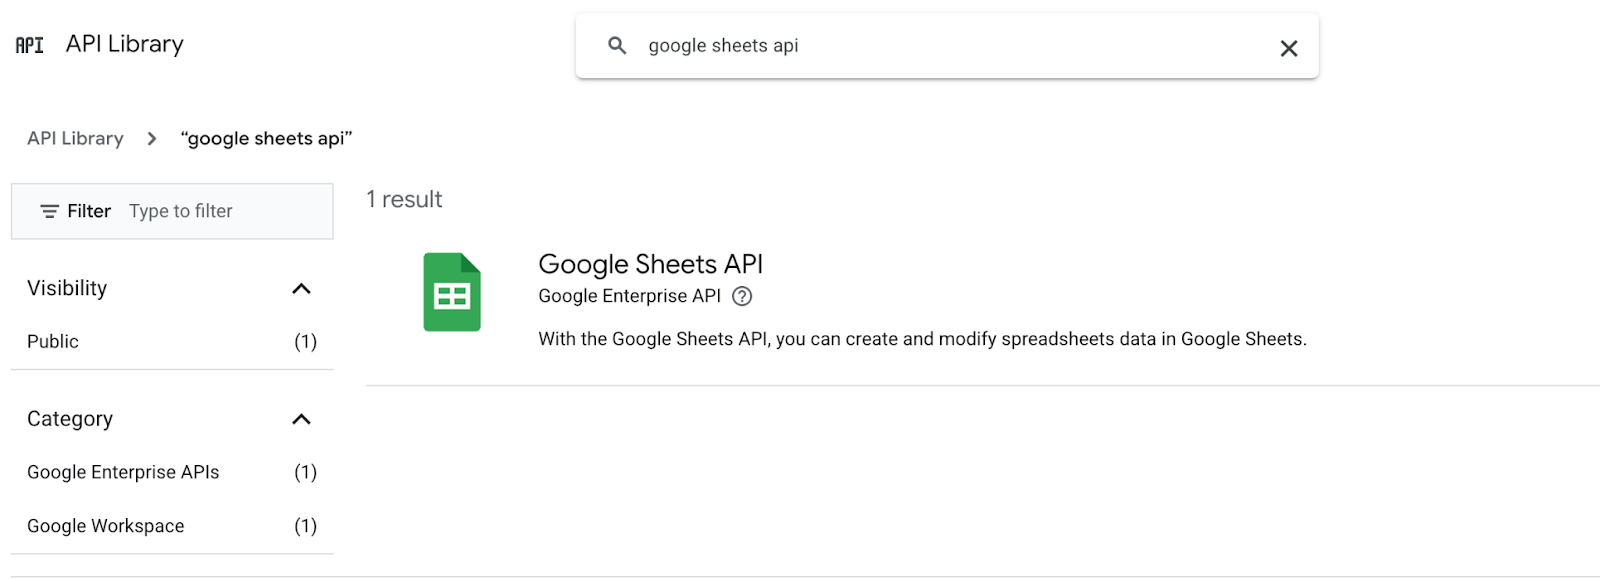
18. Once you do so, you will be taken to the API library. Use the search bar to search for “Google Sheets API.” Click on the Google Sheets API once it appears as the search result.
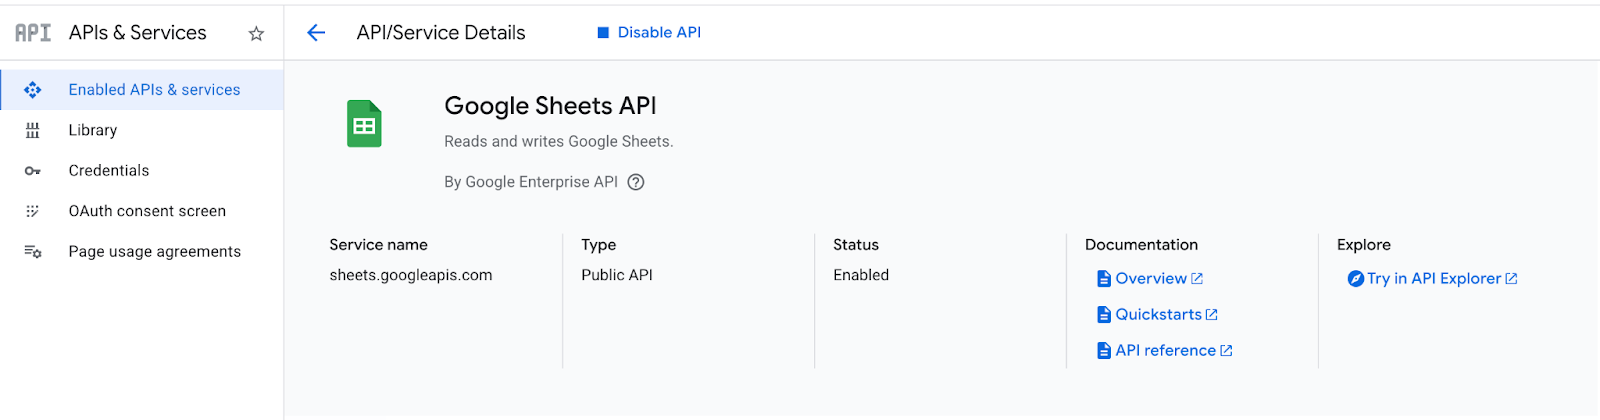
19. Once you click it, you will be taken to the API page, where you will see the button for enabling it. Click on the “Enable” button.
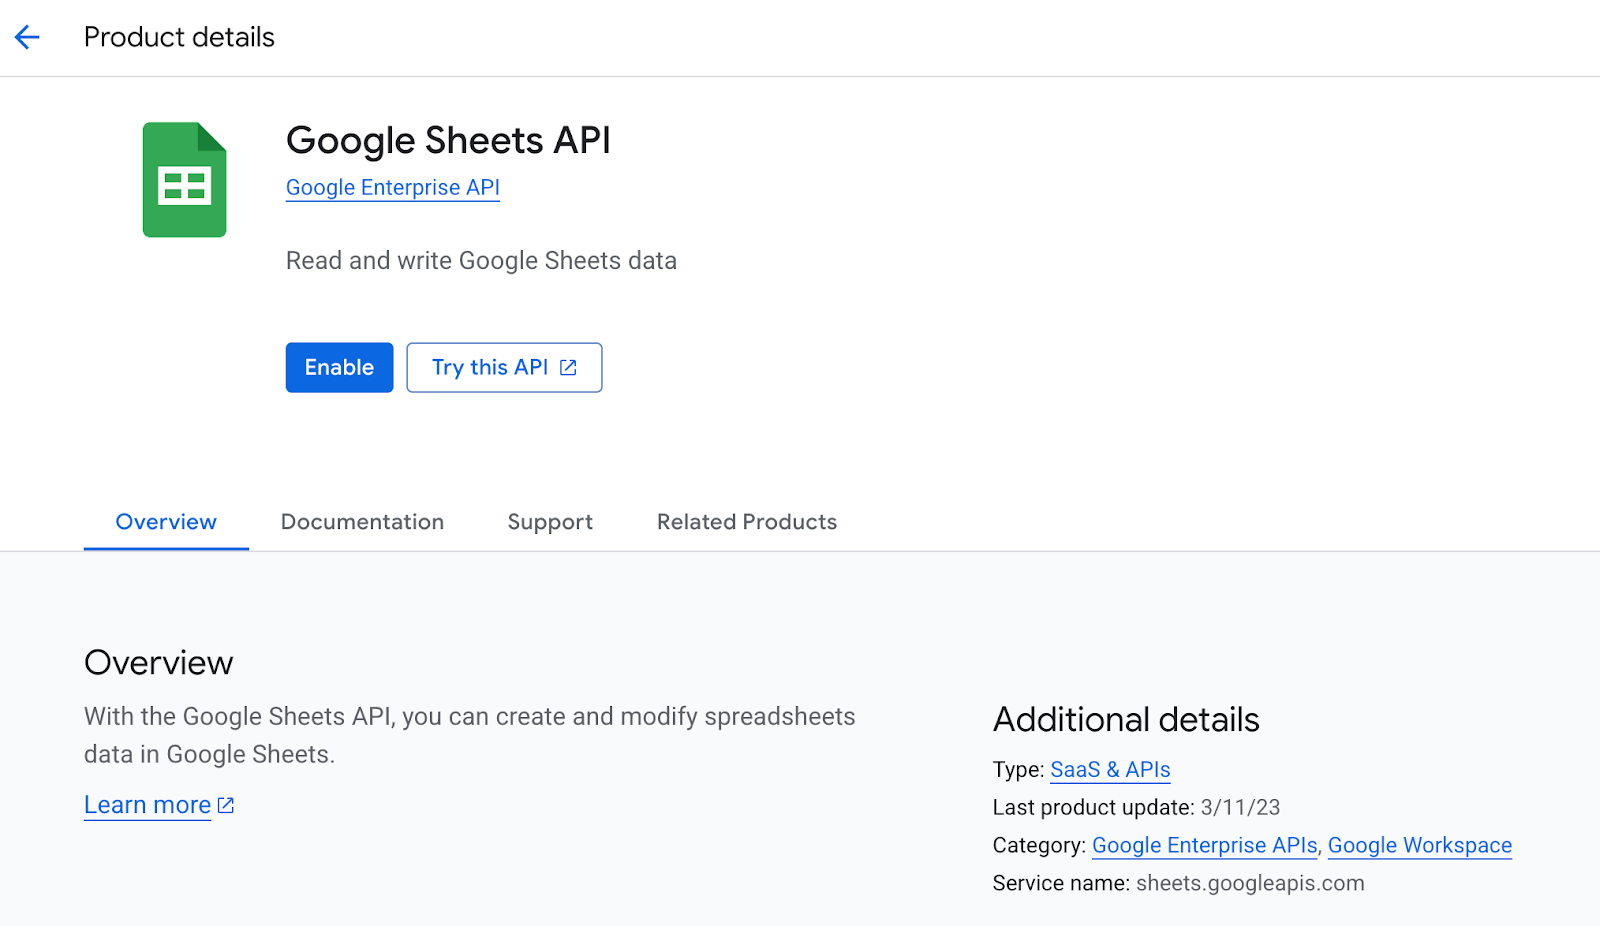
20. By doing so, we have successfully enabled the Google Sheets API.
Step 04: Set Up the Google Sheet with the Service Account and Connect With Klasio
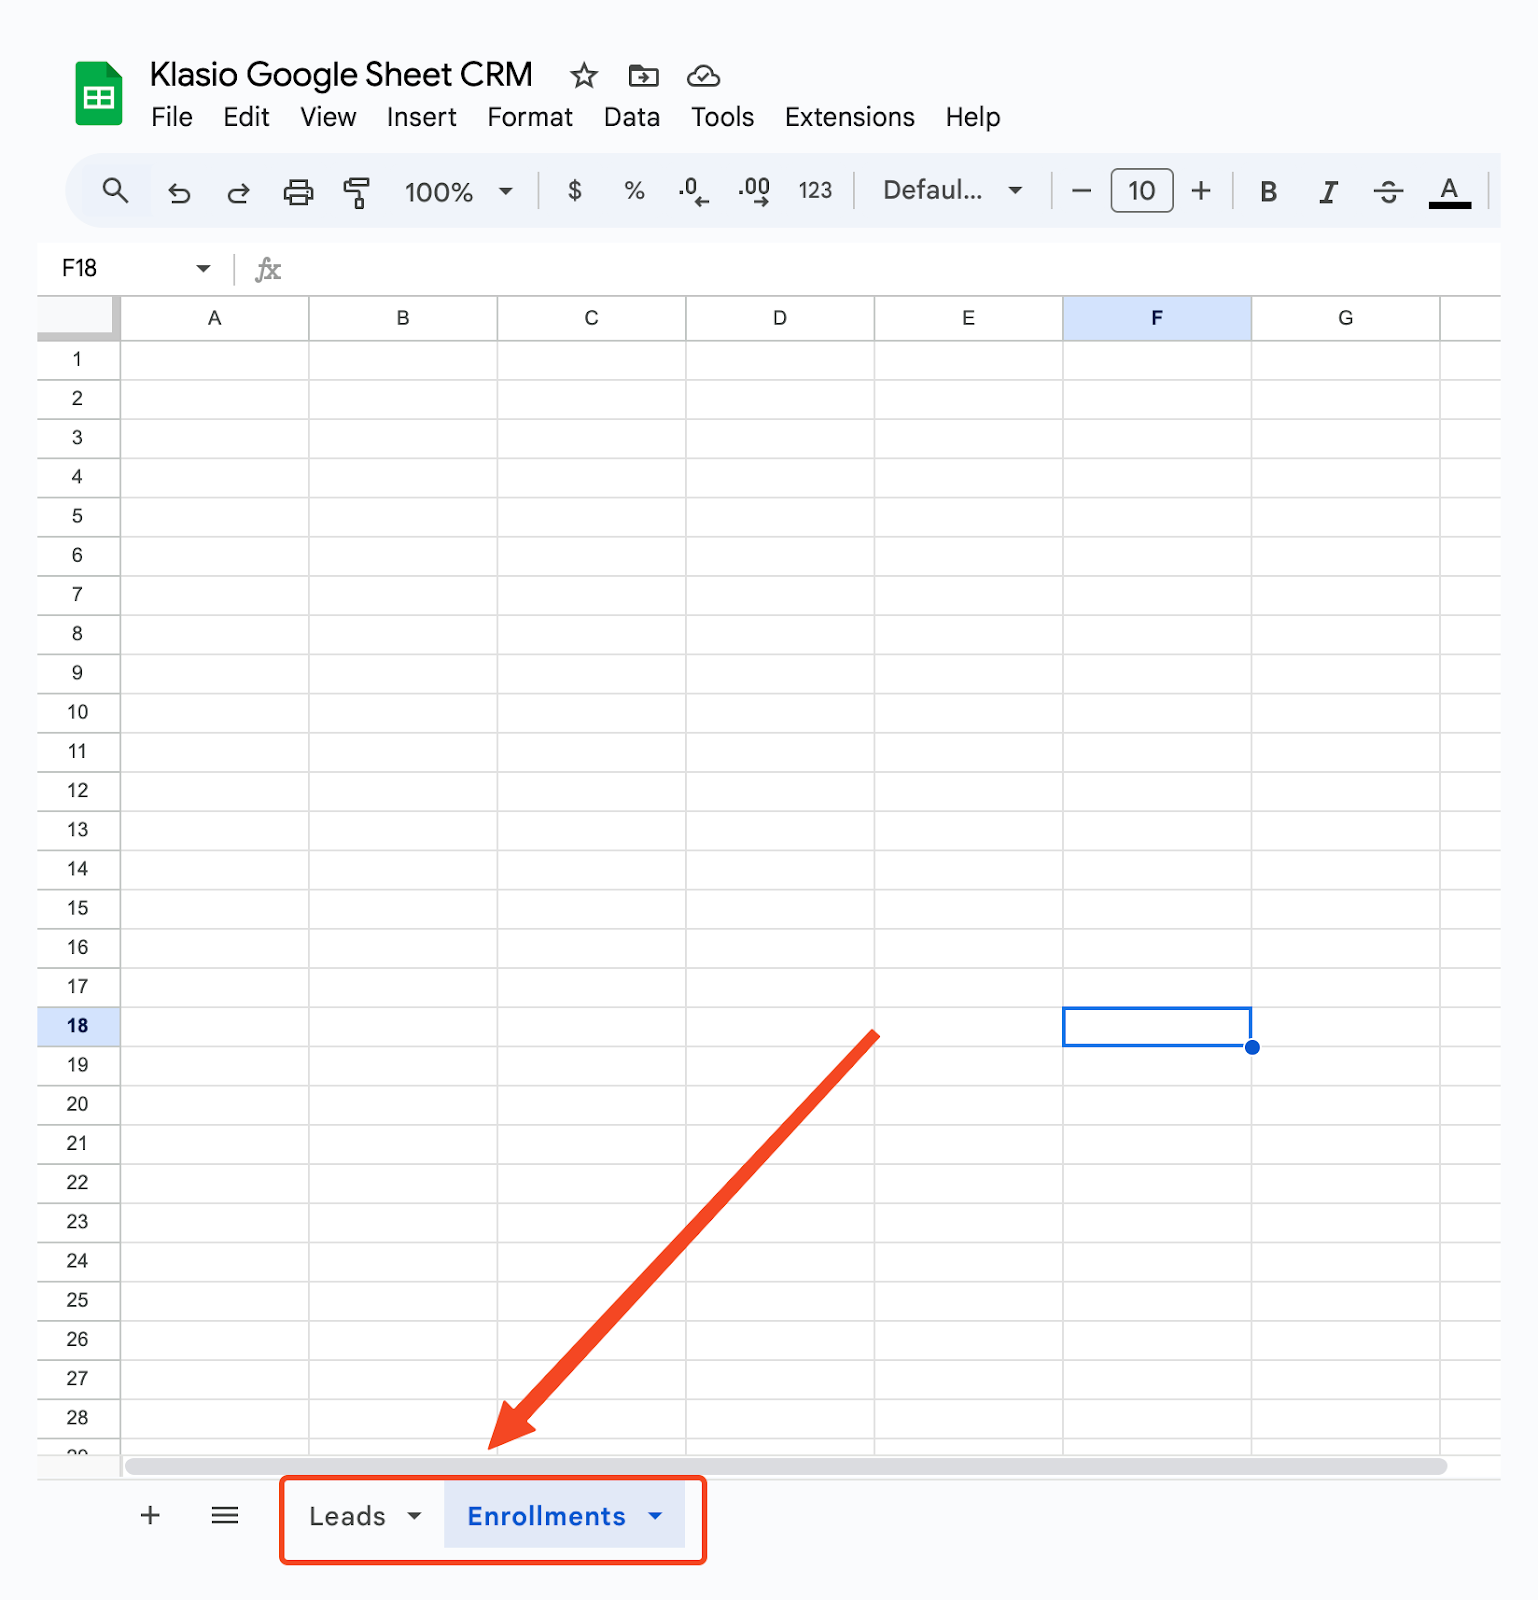
21. Now, we need to create a Google Sheet. The sheet should have two tabs, one for collecting leads and the other for collecting sign-ups. Give distinguishable names for each tab.
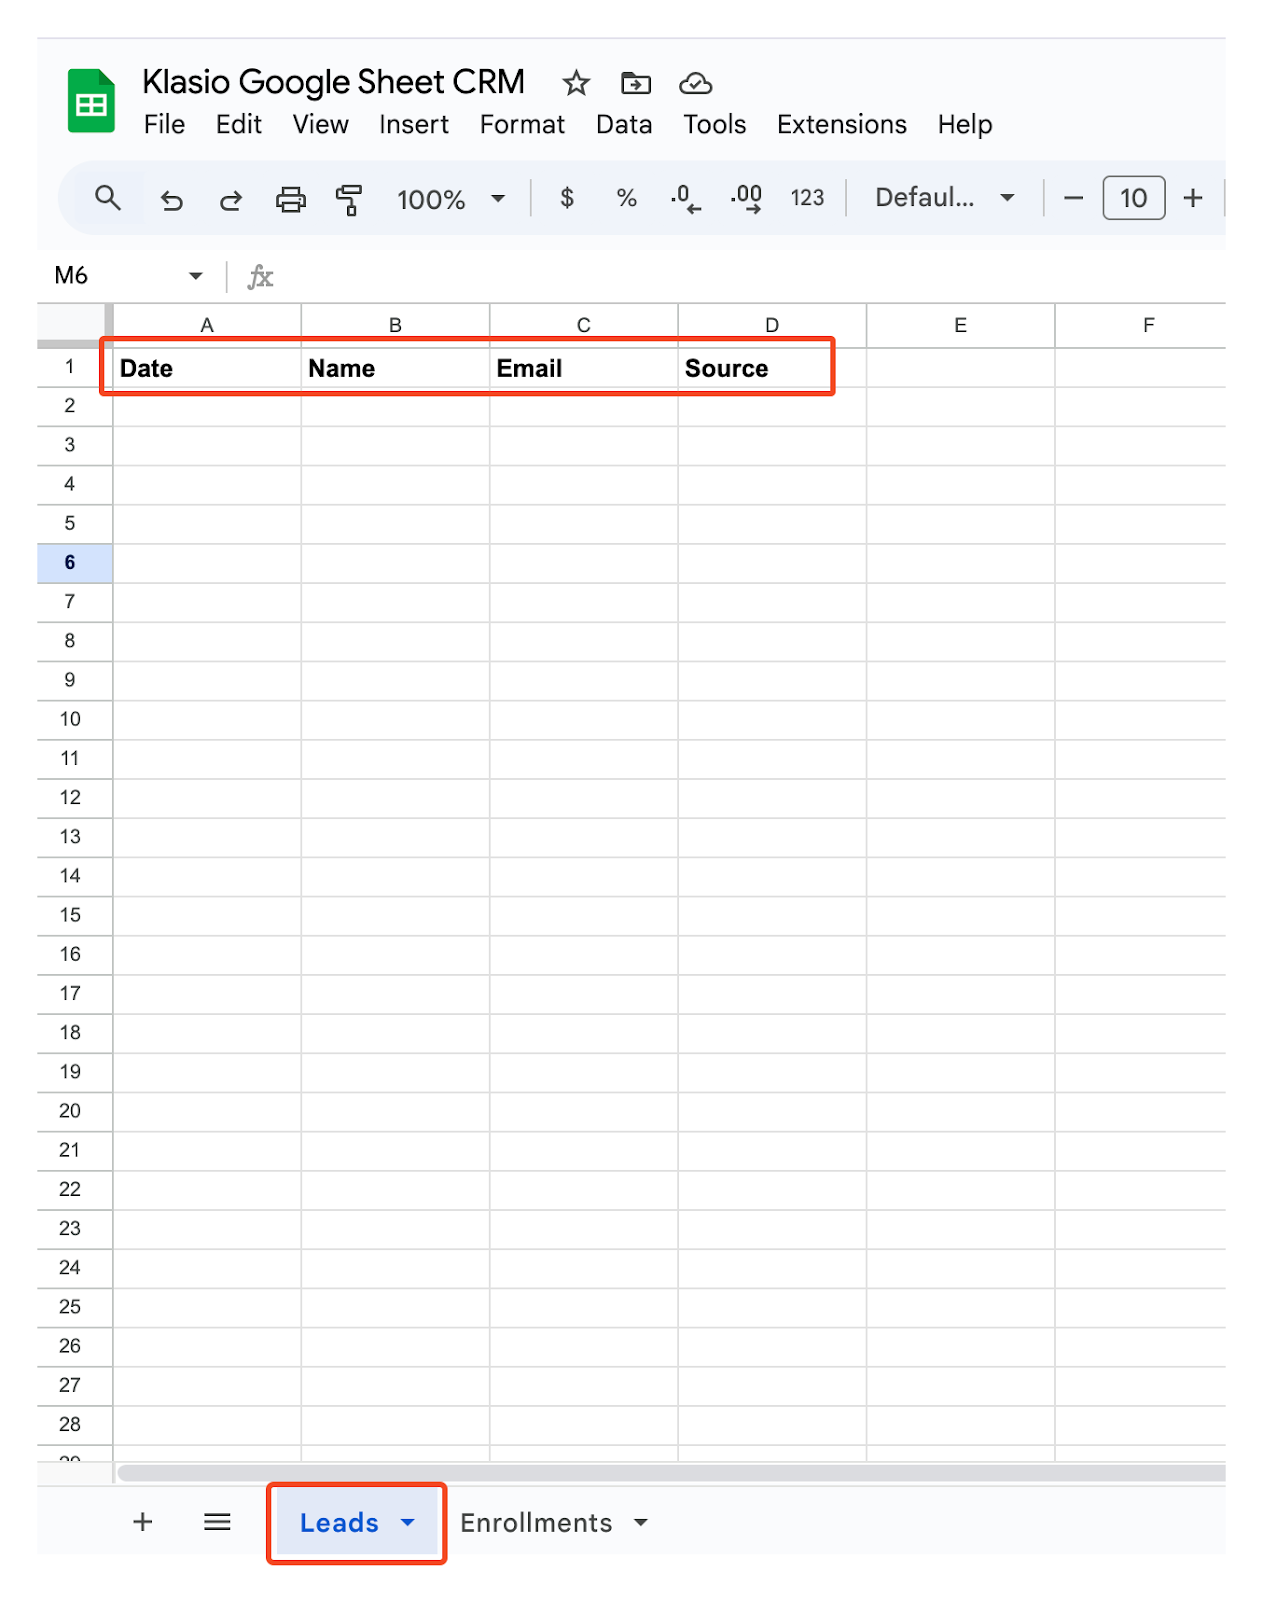
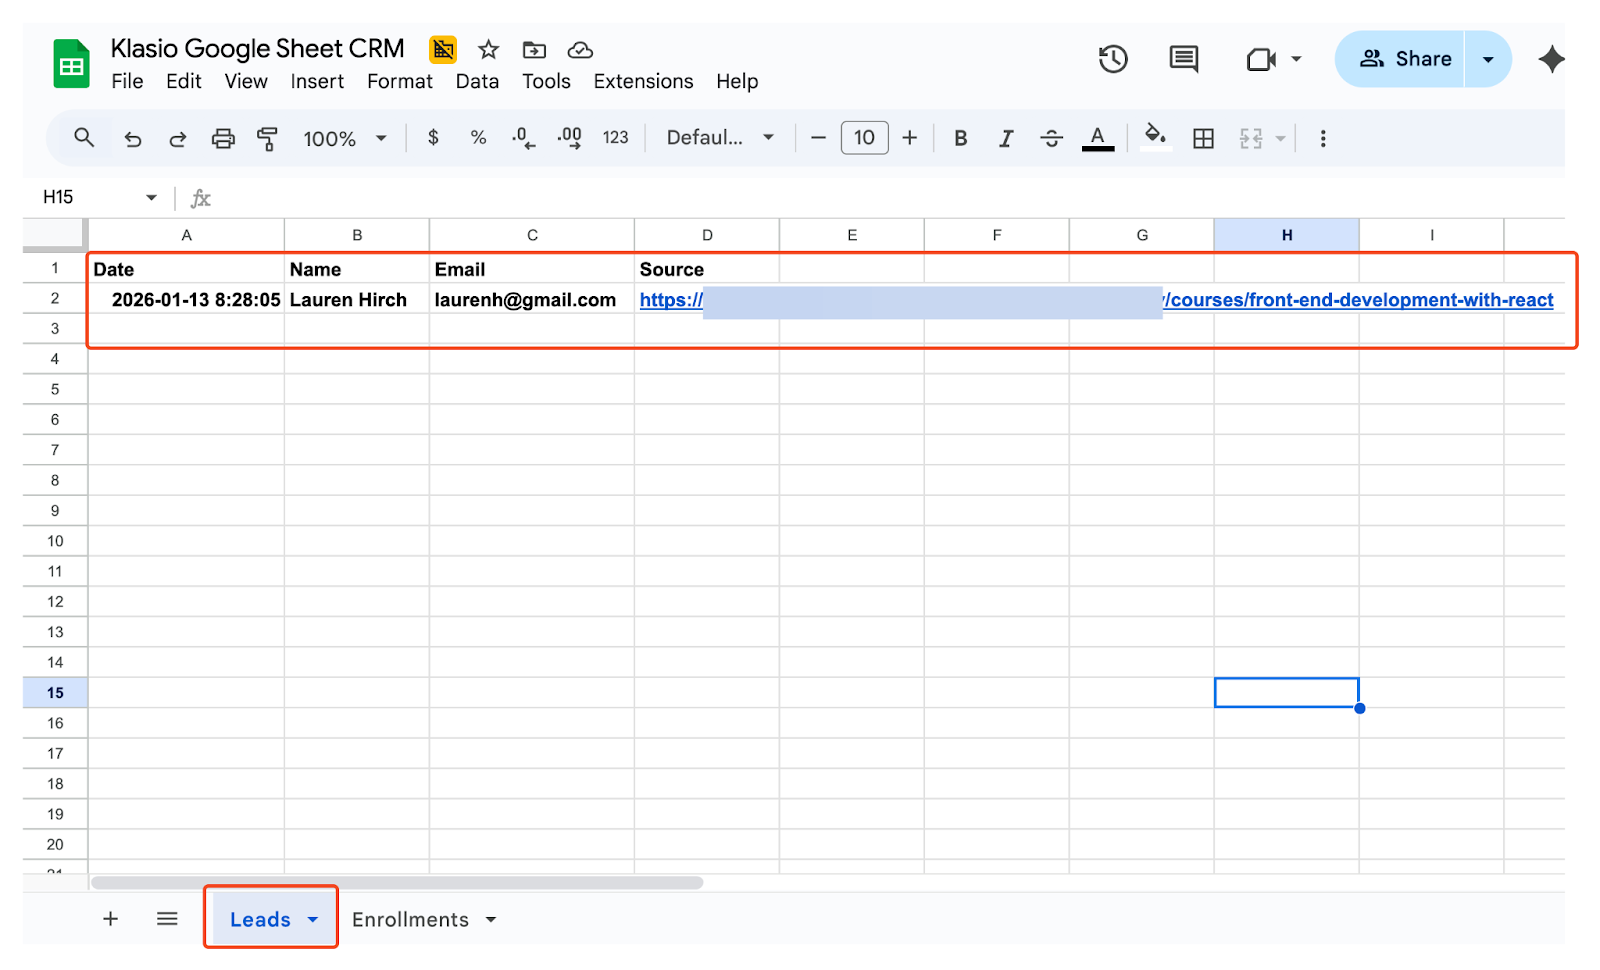
22. The leads tab must have the following columns: Date, Name, Email, Source
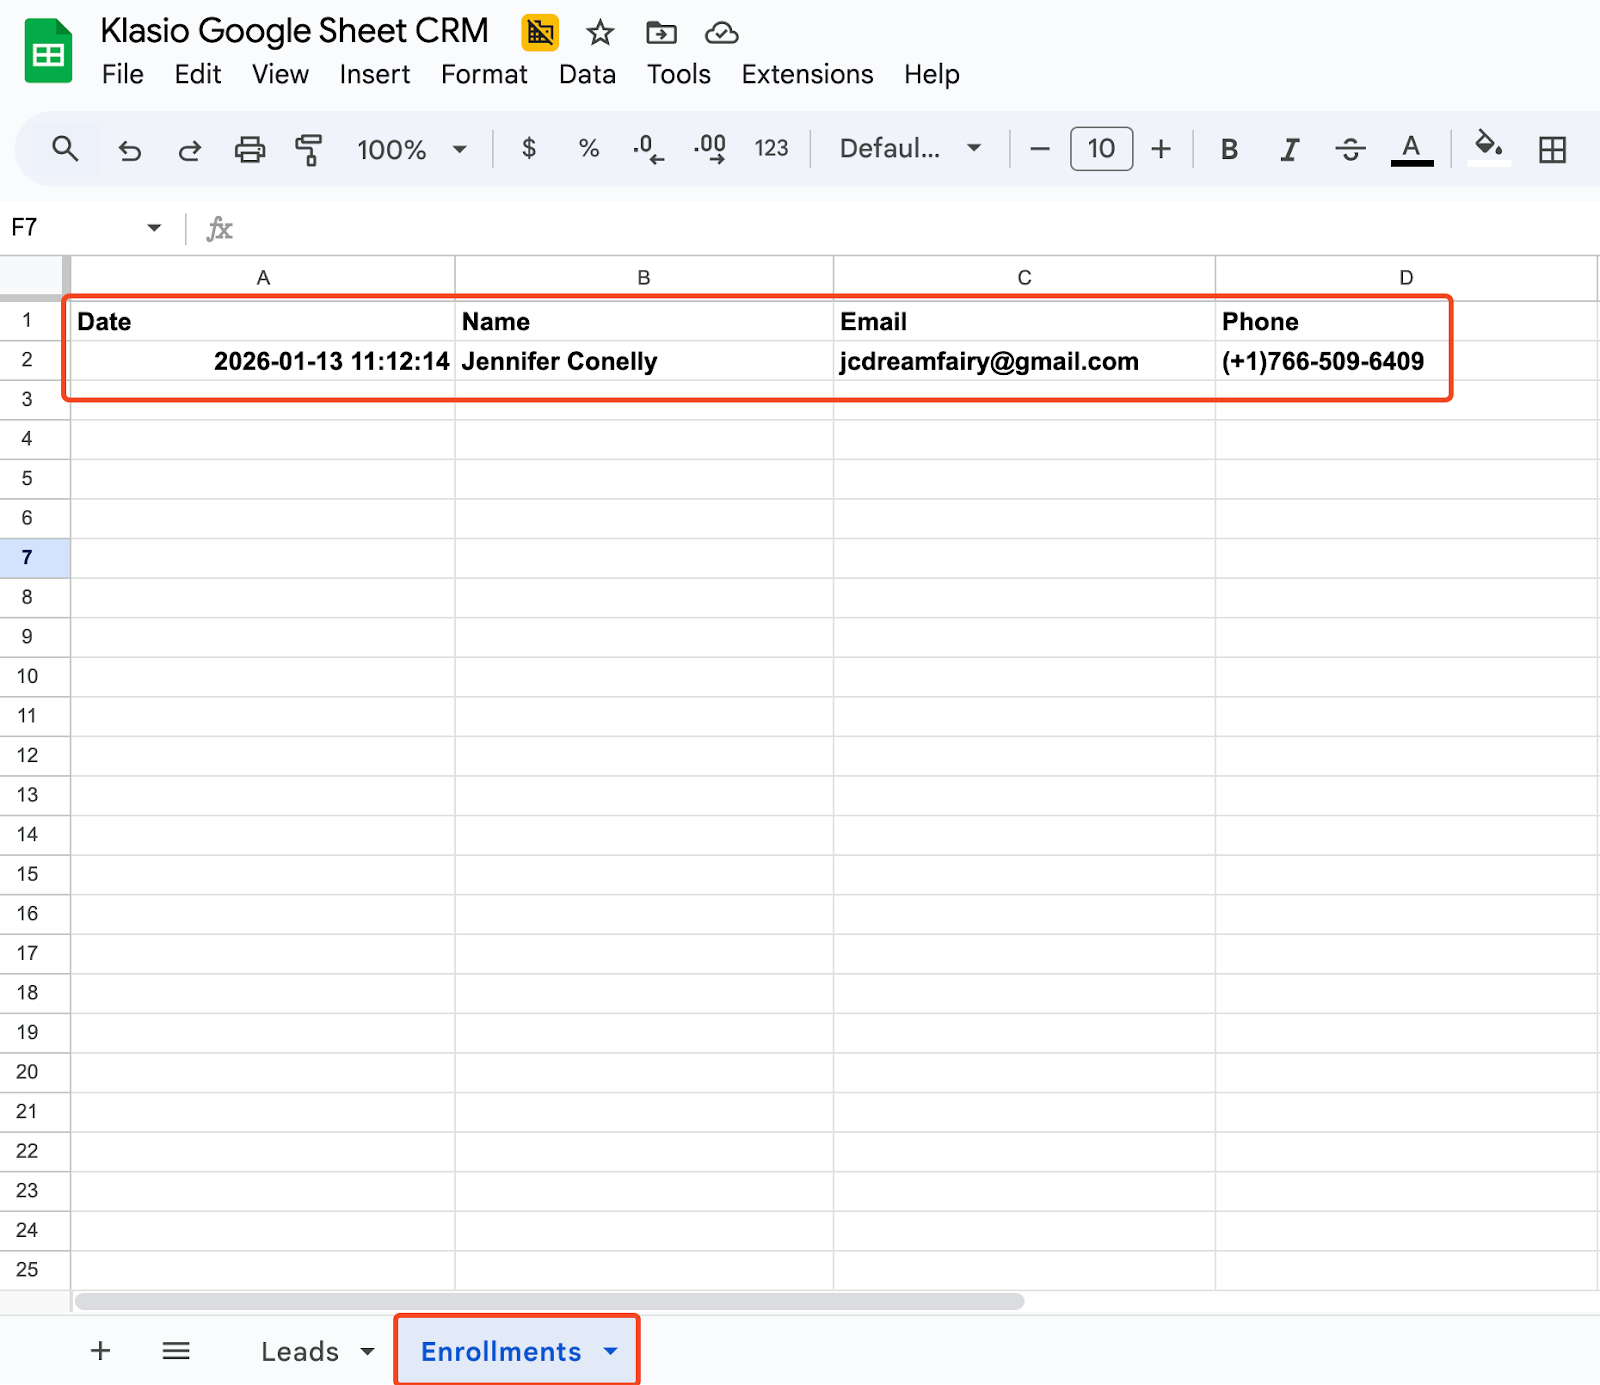
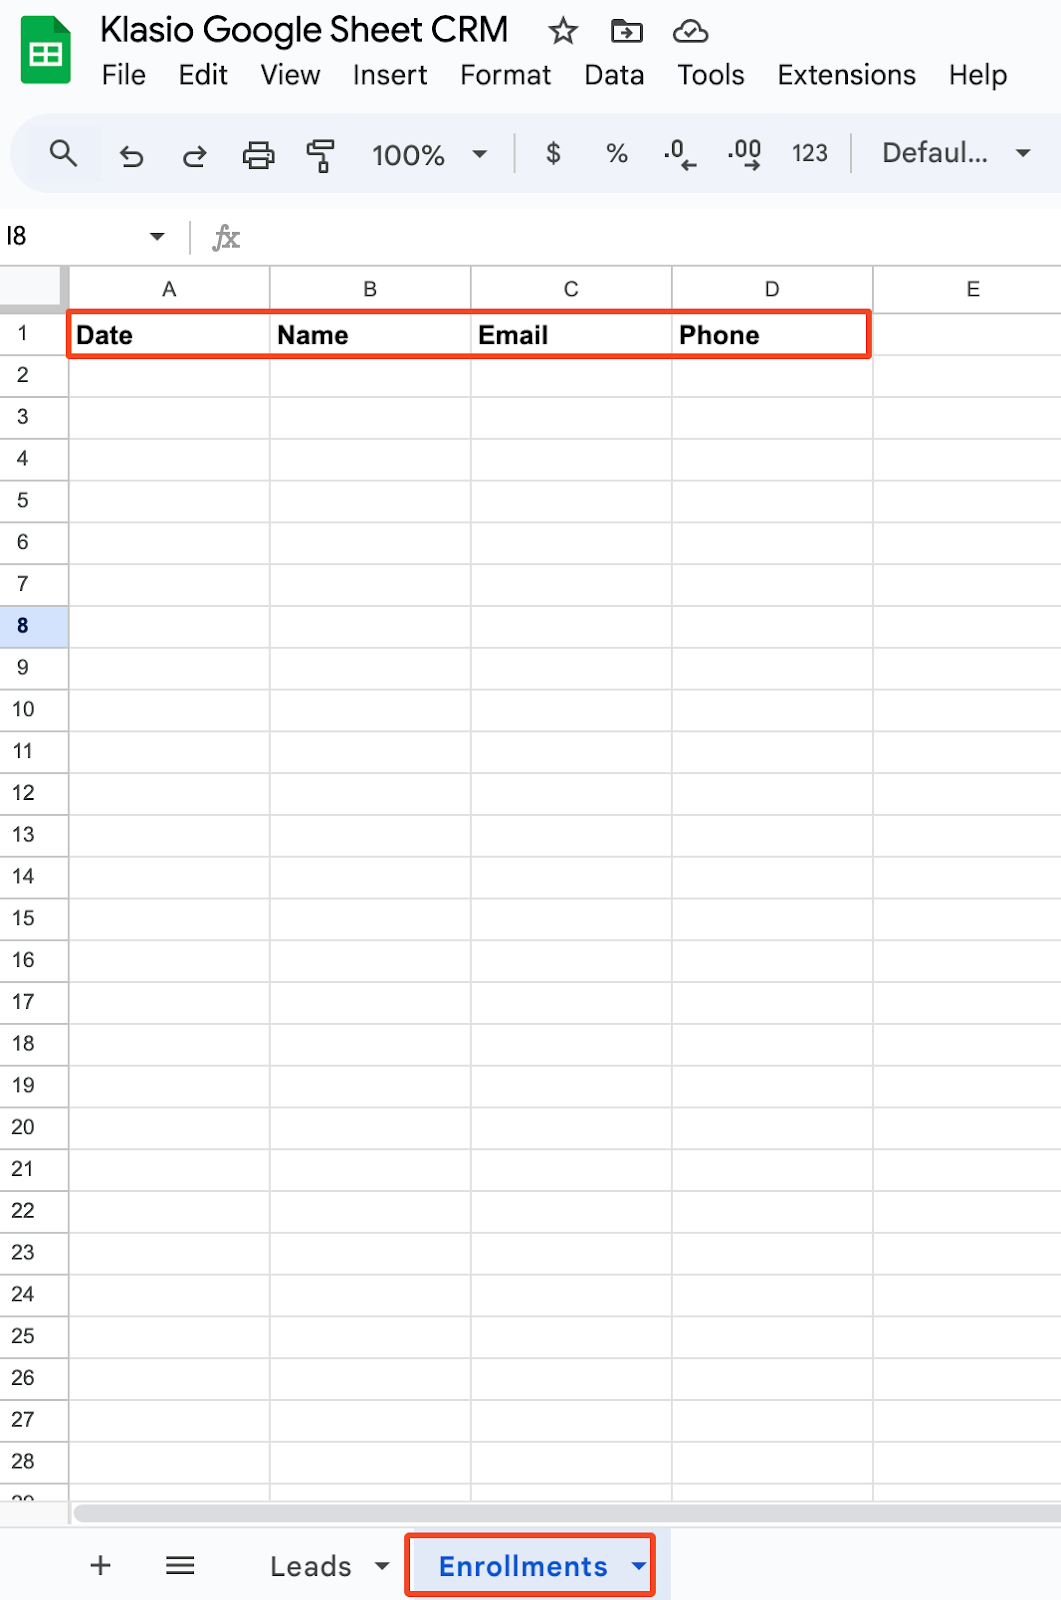
23. The enrollments tab must have the following columns: Date, Name, Email, Phone.
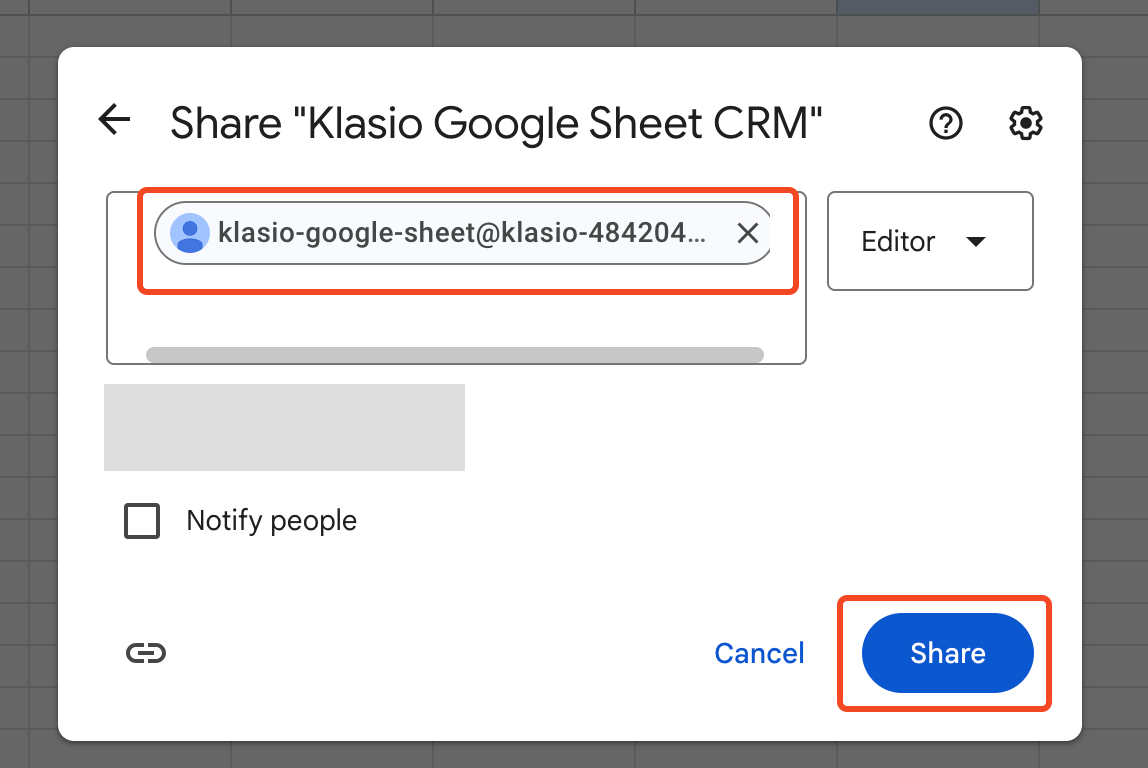
24. Now, you need to share this spreadsheet with the service account email. Go back to your Google Cloud Project. Then from the navigation menu, go to APIs and Services > Credentials. Then copy the email address.
25. Once you have this email, give the email editor access to this spreadsheet.
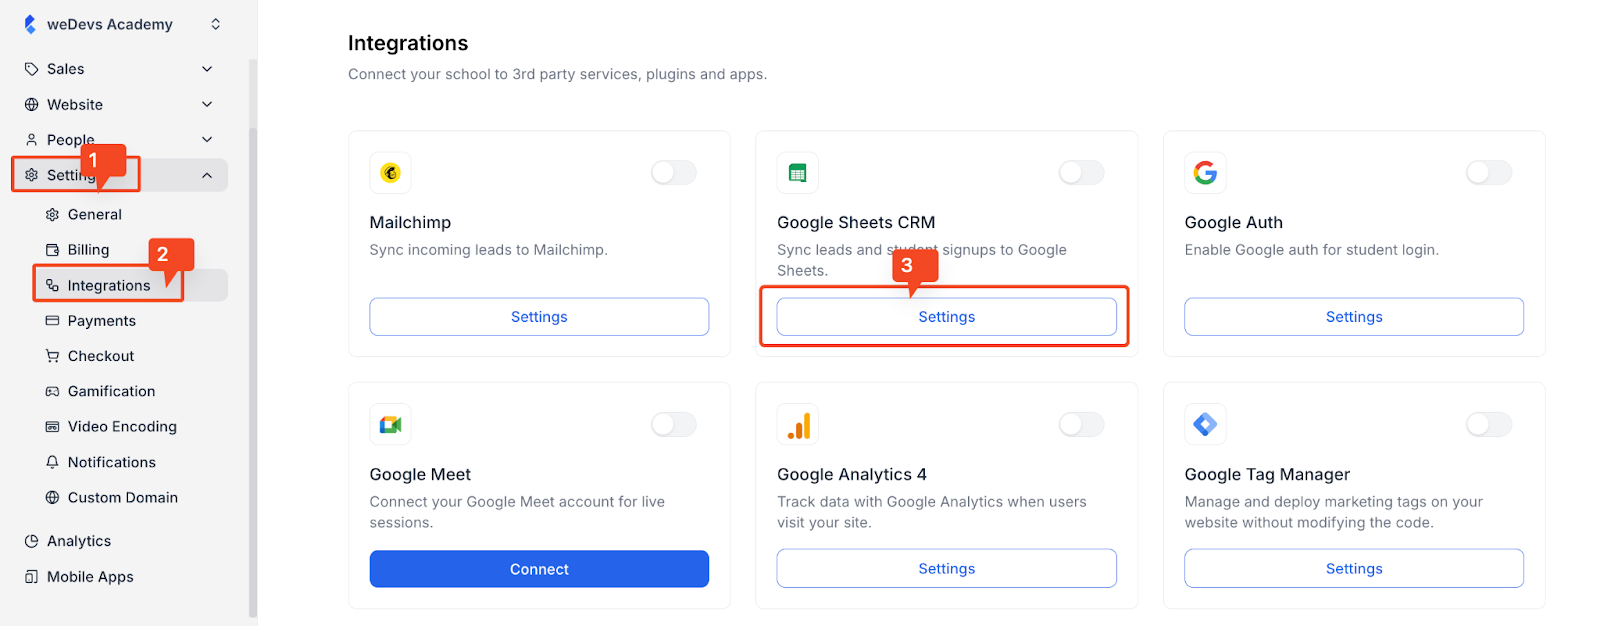
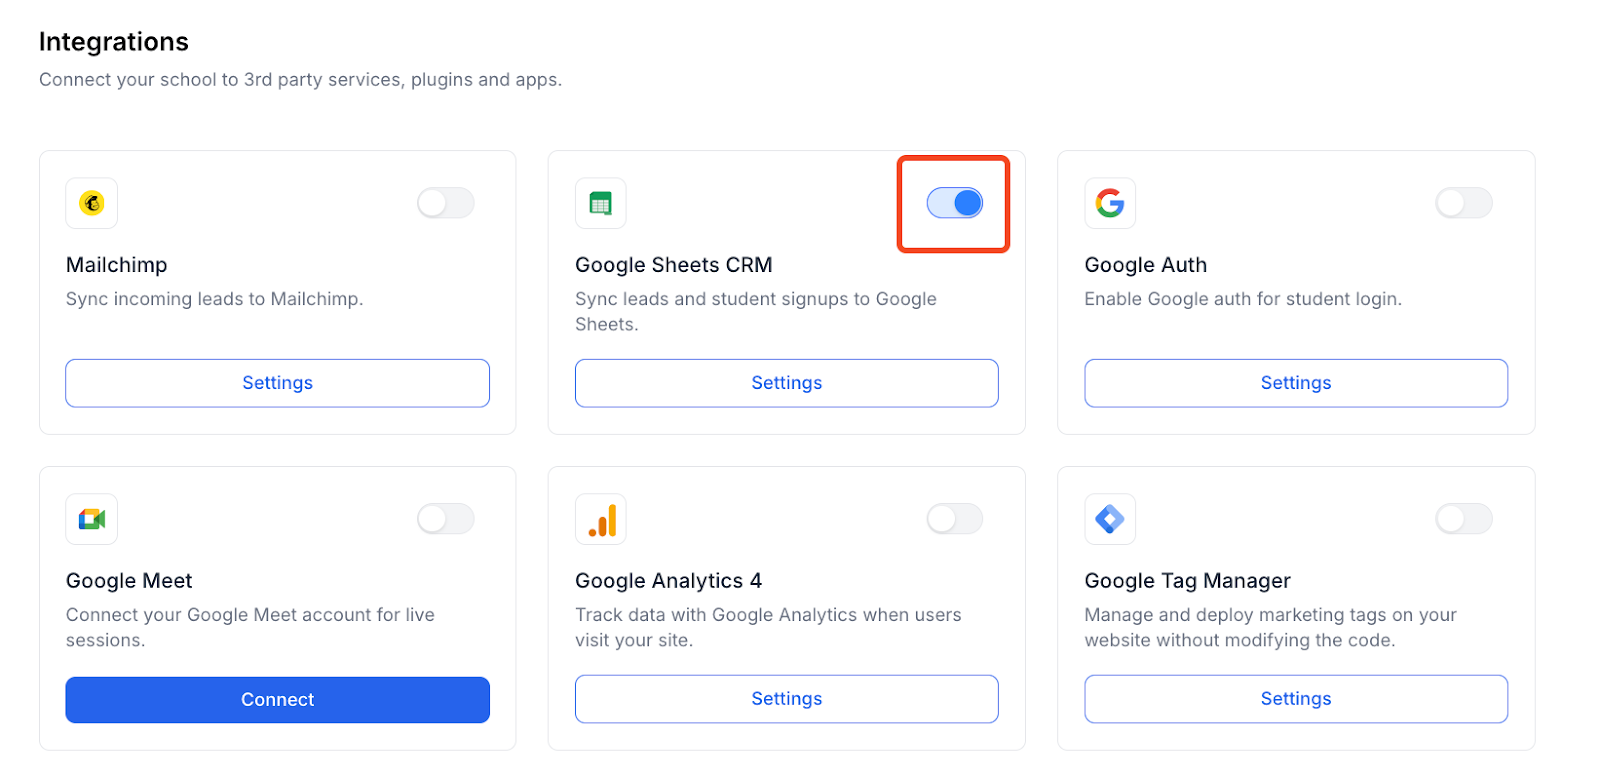
26. Now, we have to provide all of this information to Klasio to finish the setup. To do that, log in to your Klasio admin account. Then go to Settings > Integrations. Find the “Google Sheets CRM” integration card and click on its “Settings” button.
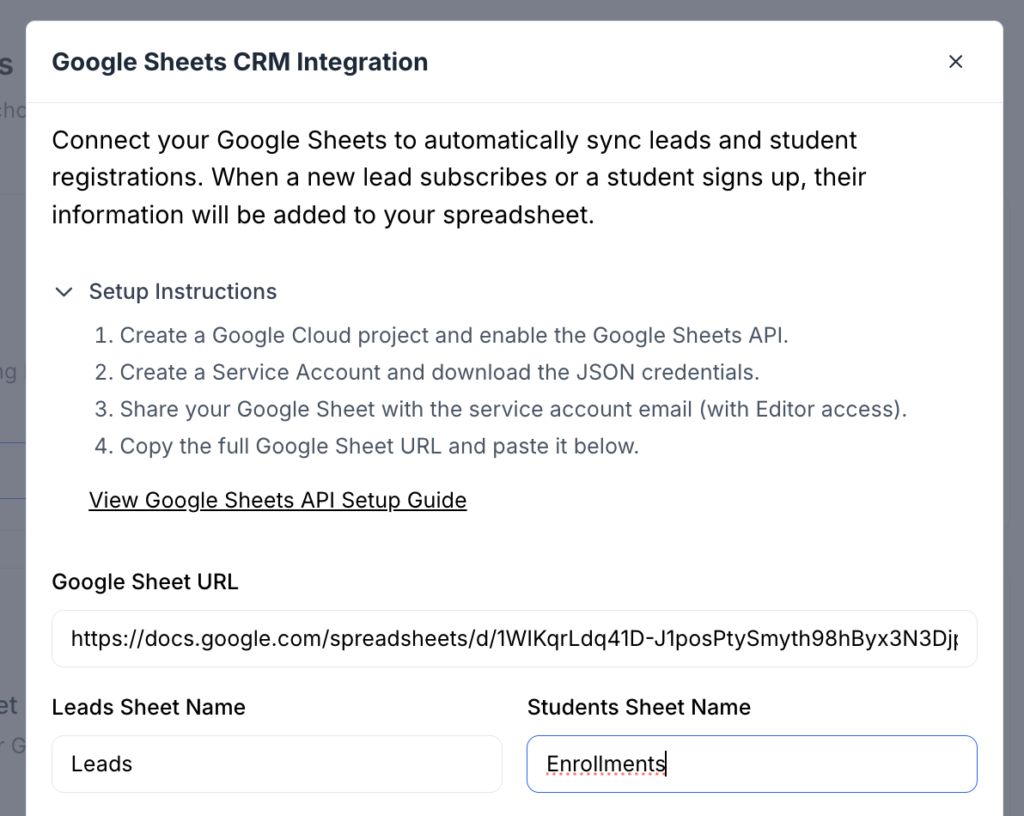
27. Once you do, a popup will appear, and it will have fields for all the required information. For starters, it will need the link of the Google Sheet we created and the name of the tabs.
So, simply copy and paste them from the sheet.
28. Remember the JSON file we have downloaded? Open it up and copy-paste its content into the “Service Account Credentials (JSON)” field.
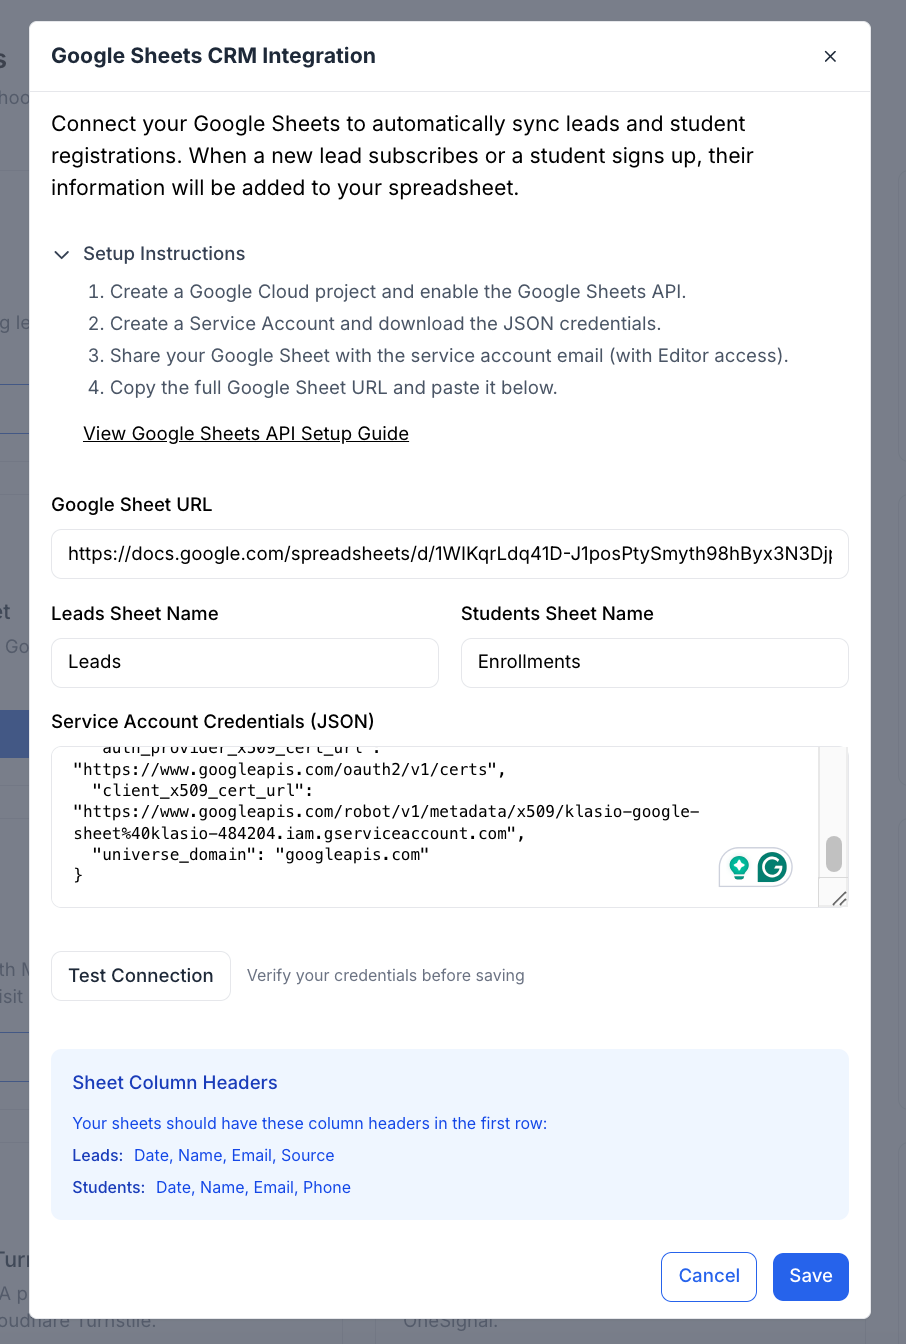
29. Now, let’s test the connection by clicking on the “Test Connection” button. If the connection is valid, it will show a success message.

30. Finally, click on the “Save” button to finish the integration process. Once you do, you will be taken back to the integrations page, where you will see that the Google Sheets CRM integration’s toggle is turned on.
With this, we have completed all four steps and successfully integrated the Google Sheets CRM with Klasio. If you encounter any issues or are unable to successfully complete the integration process, please contact [email protected].
Now, let’s see how the Google Sheet CRM will collect your students’ information.
When you students fill out the lead magnet form,
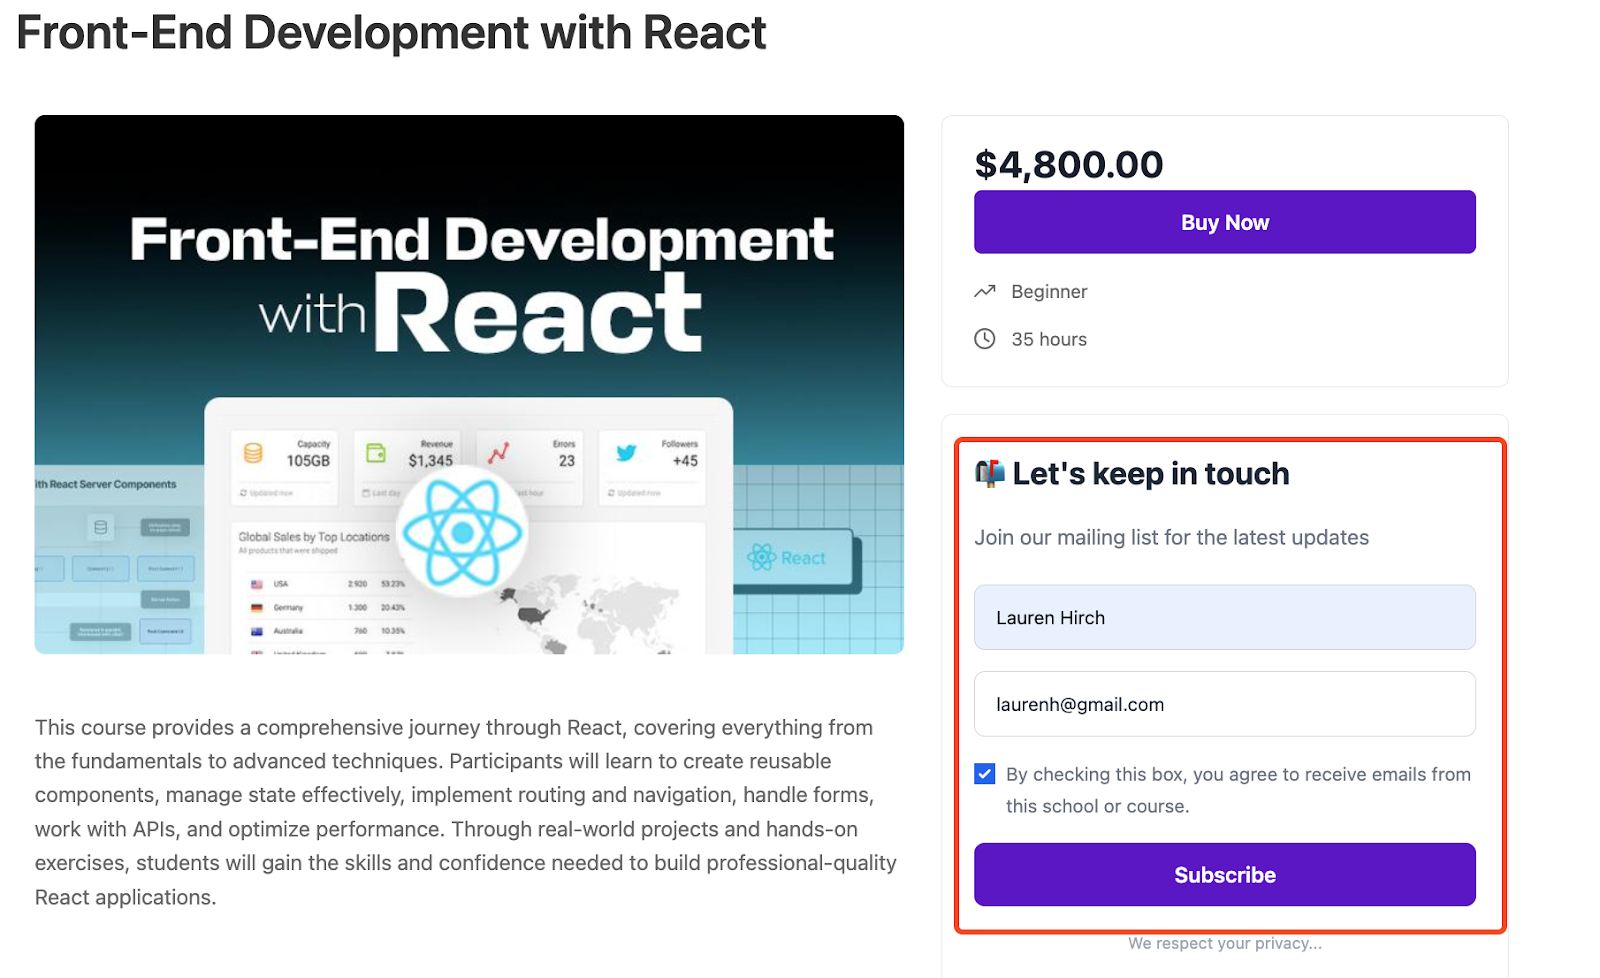
The data will be stored in the “Leads” tab in the Google Sheet automatically.
Similarly, when a student signs up for your academy,
The information will be stored in the “Enrollments” tab.