Integrating Meta Pixel with the Conversion API helps you track learner actions more accurately by sending event data directly from your server to Meta, even when browser tracking is limited.
Here’s how you can integrate Meta Pixel with your Klasio website:
Step 01: Collect Meta Pixel ID
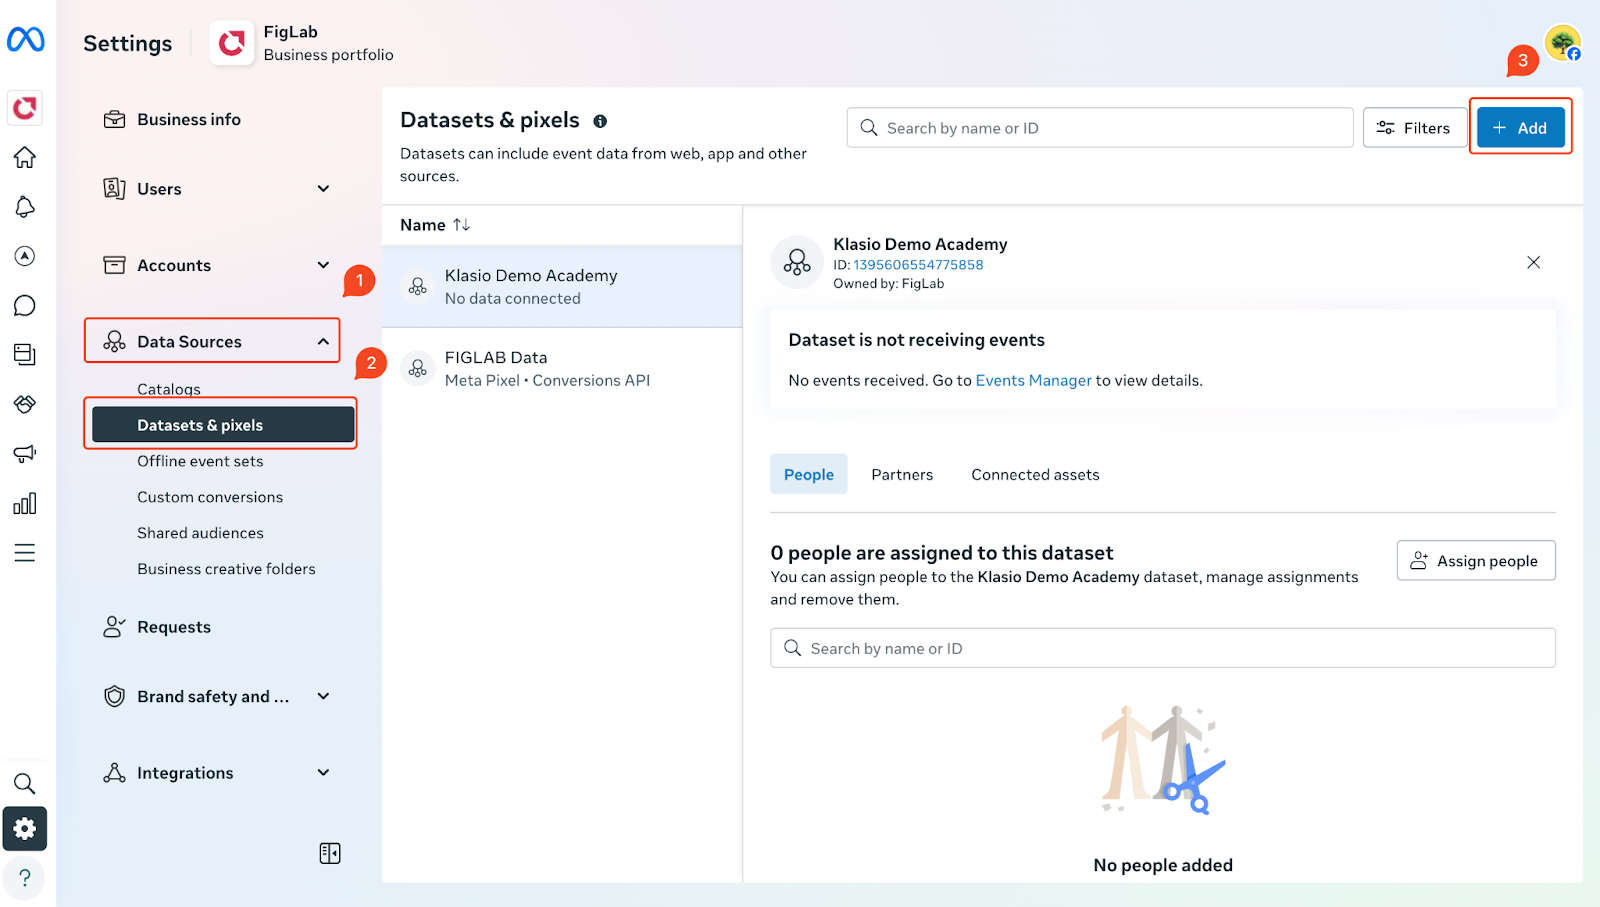
1. Go to business.facebook.com. This will take you to your Meta Business Suite. From the Business Suite page, click on Settings from the navigation menu on the left.

2. Then, go to Data Sources > Datasets & pixels > Add.
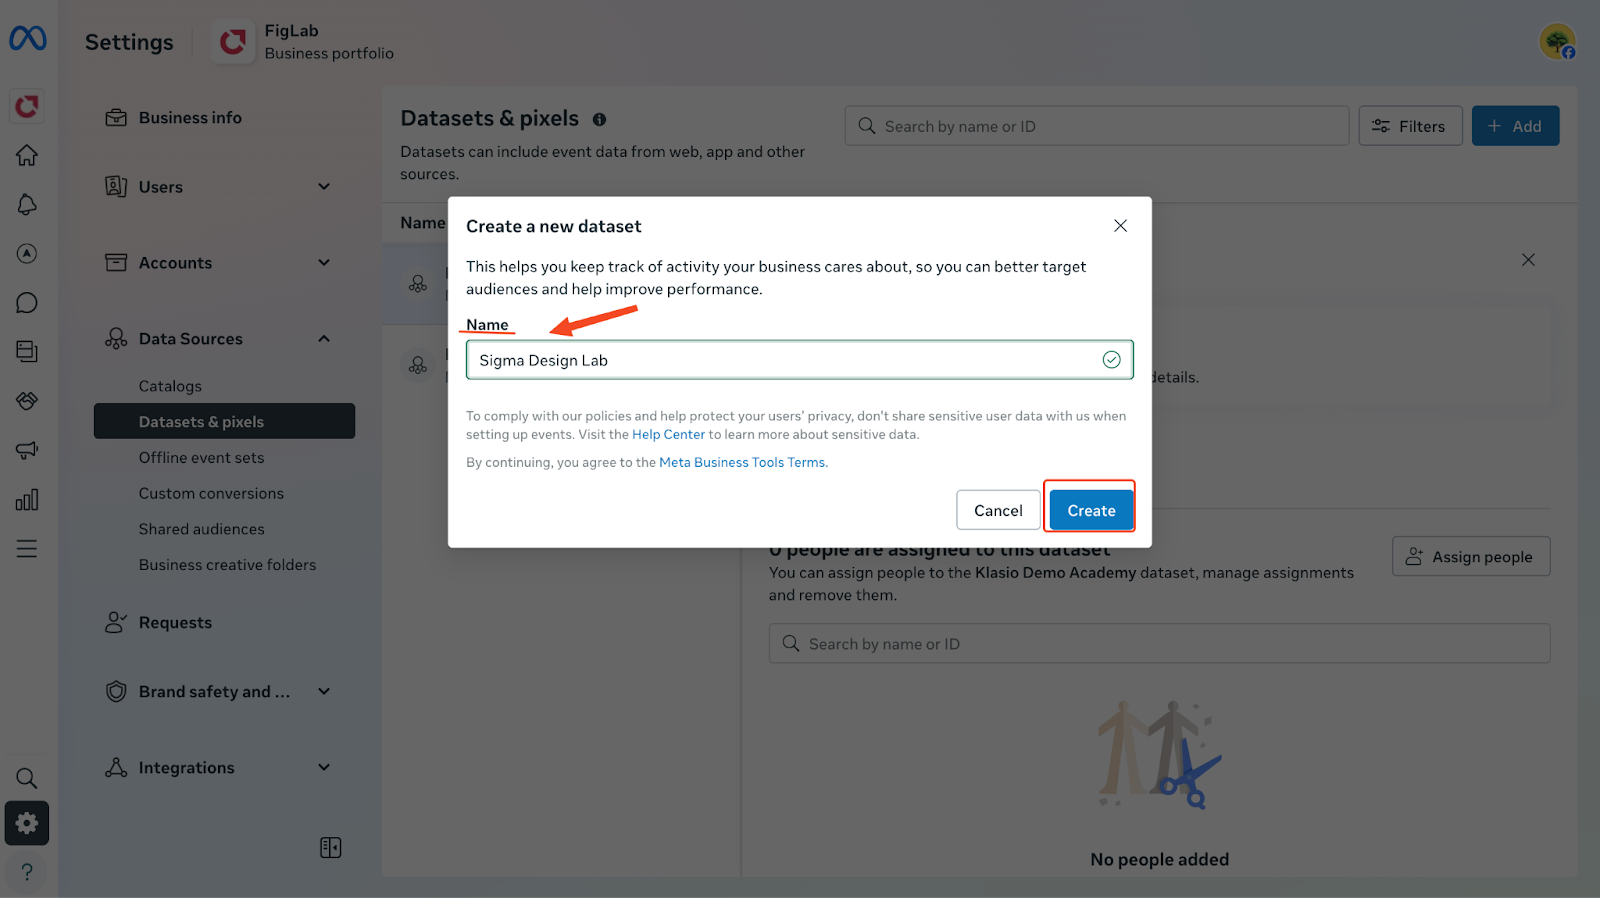
3. Give your dataset a name and click on “Create.”
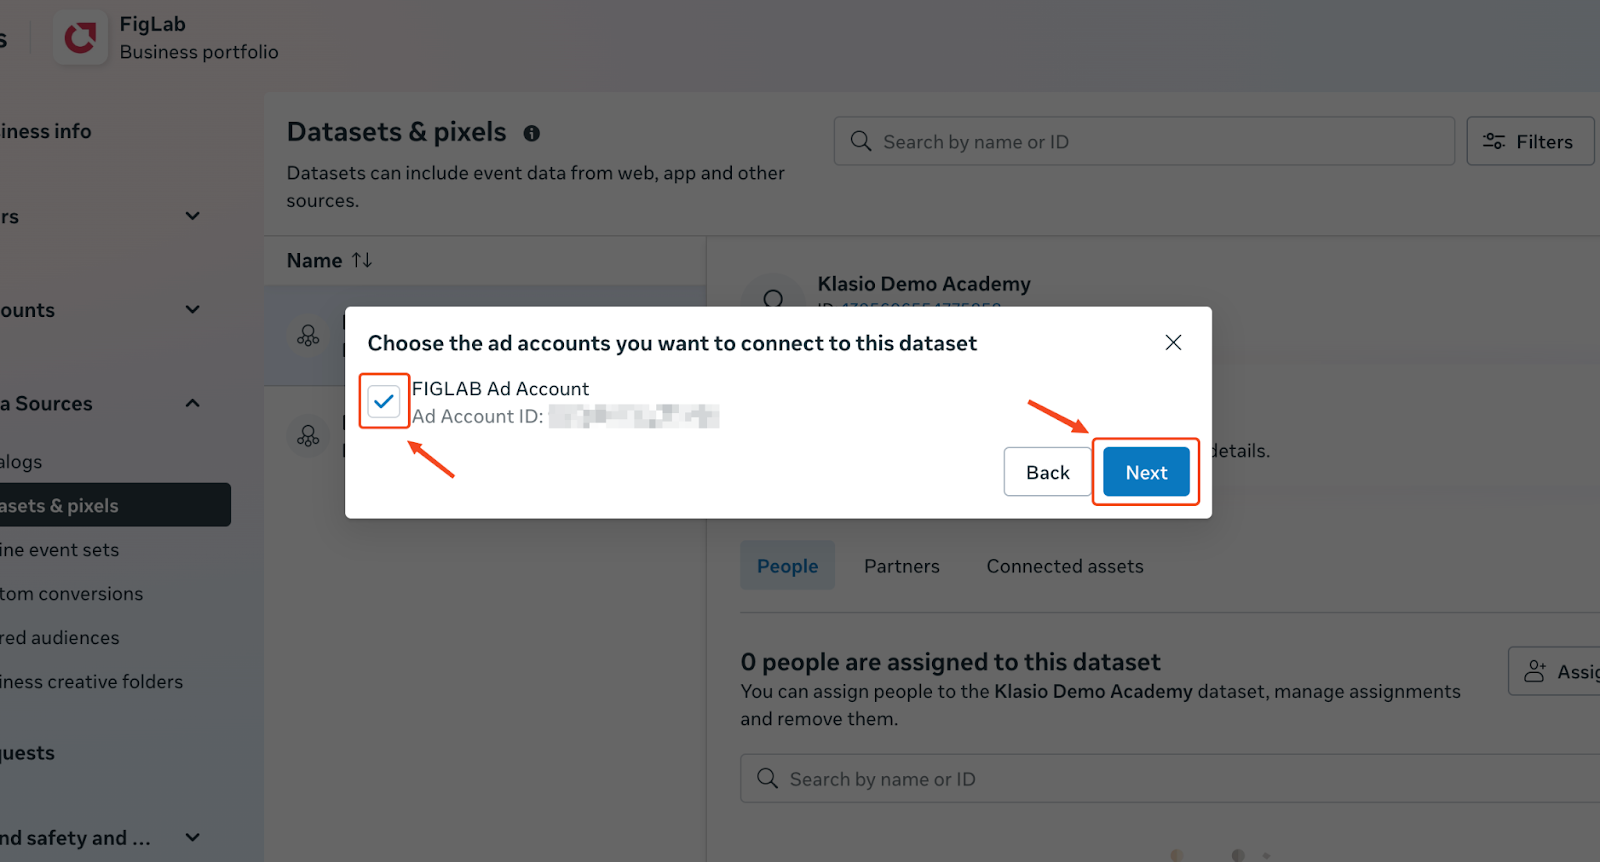
4. Choose the ad account you want to connect to this dataset and click on “Next.”
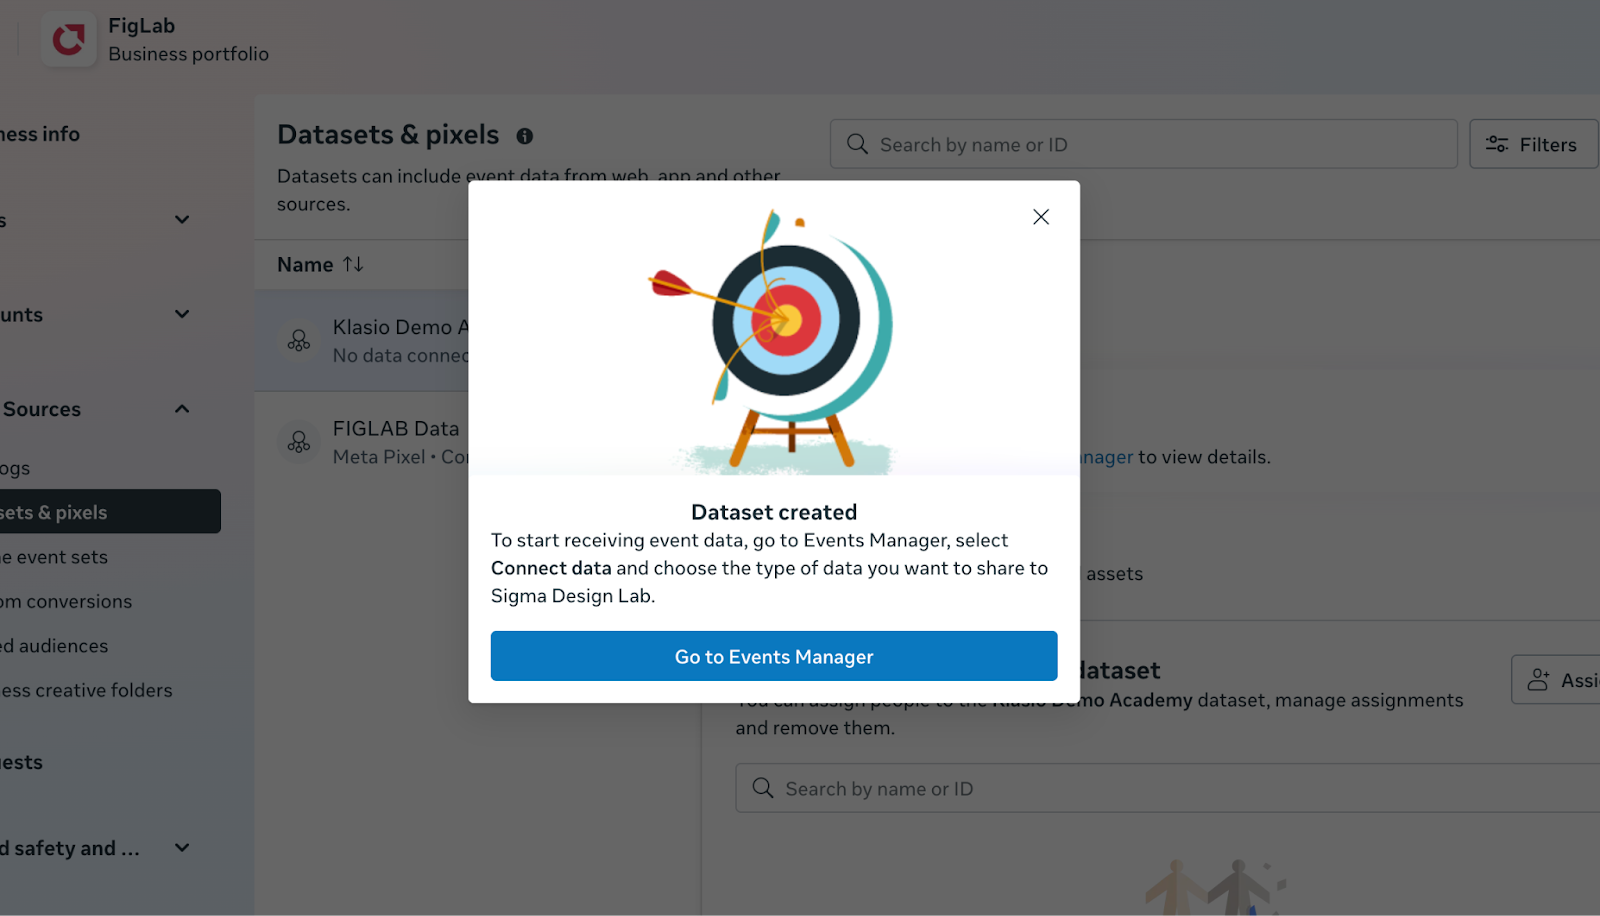
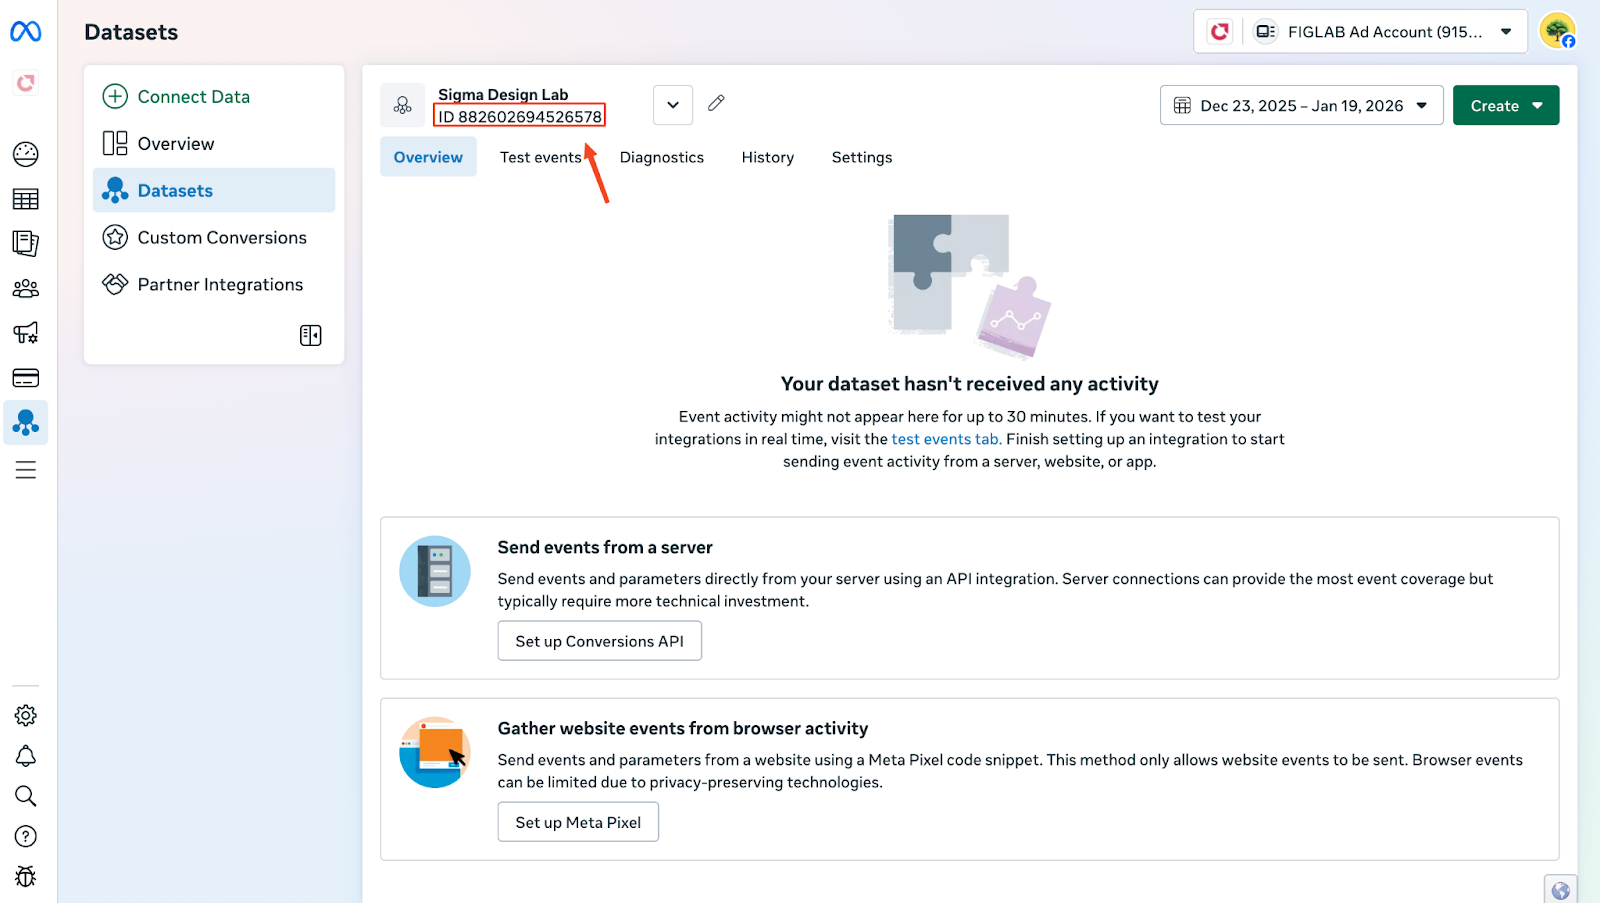
5. Then the dataset will be successfully created. A success message will appear with the button to go to the Events Manager. Click on it.
6. On the Events Manager, you will find your Pixel ID under the name of your dataset.
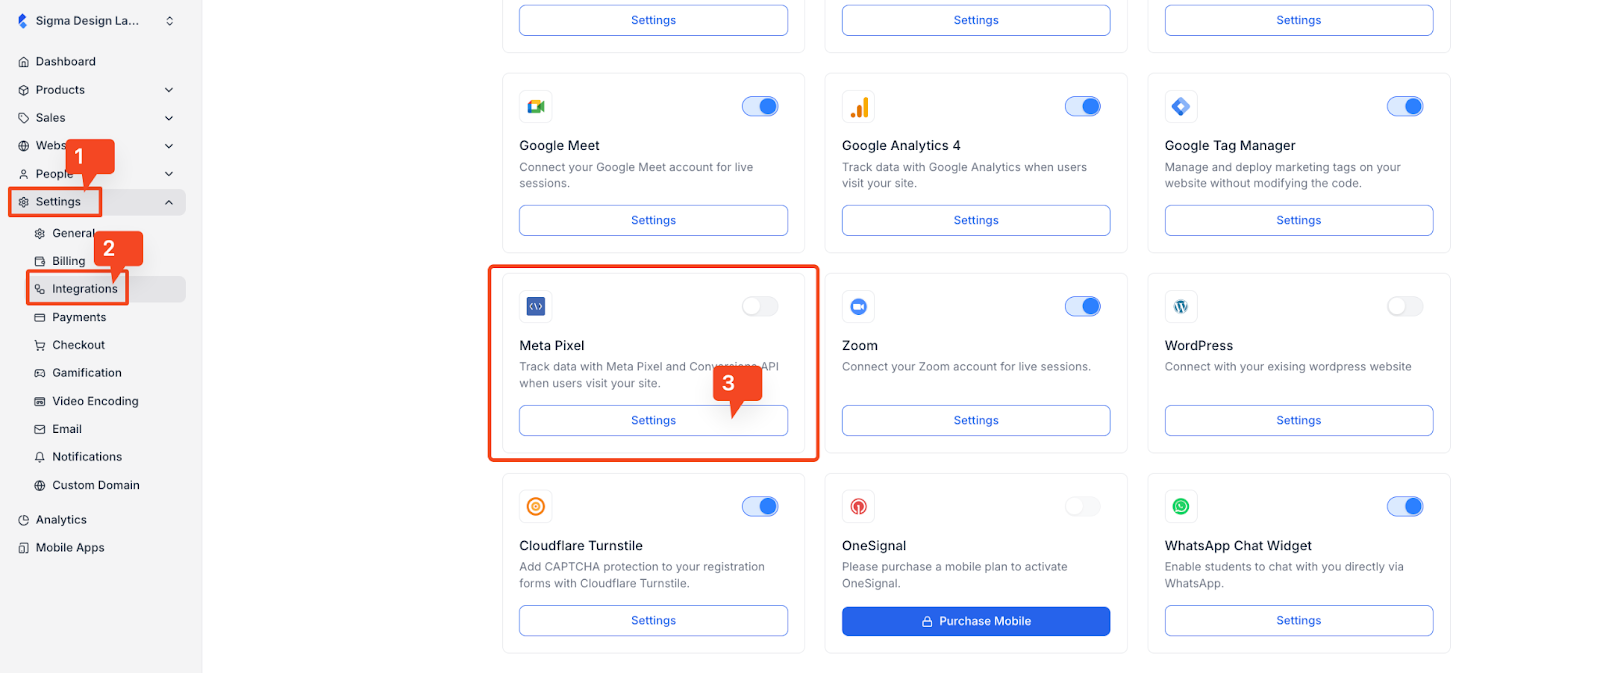
9. Copy this ID. Then, from your Klasio dashboard, go to Settings > Integrations. In the integrations page, locate the Meta Pixel card and click on the “Settings” button.
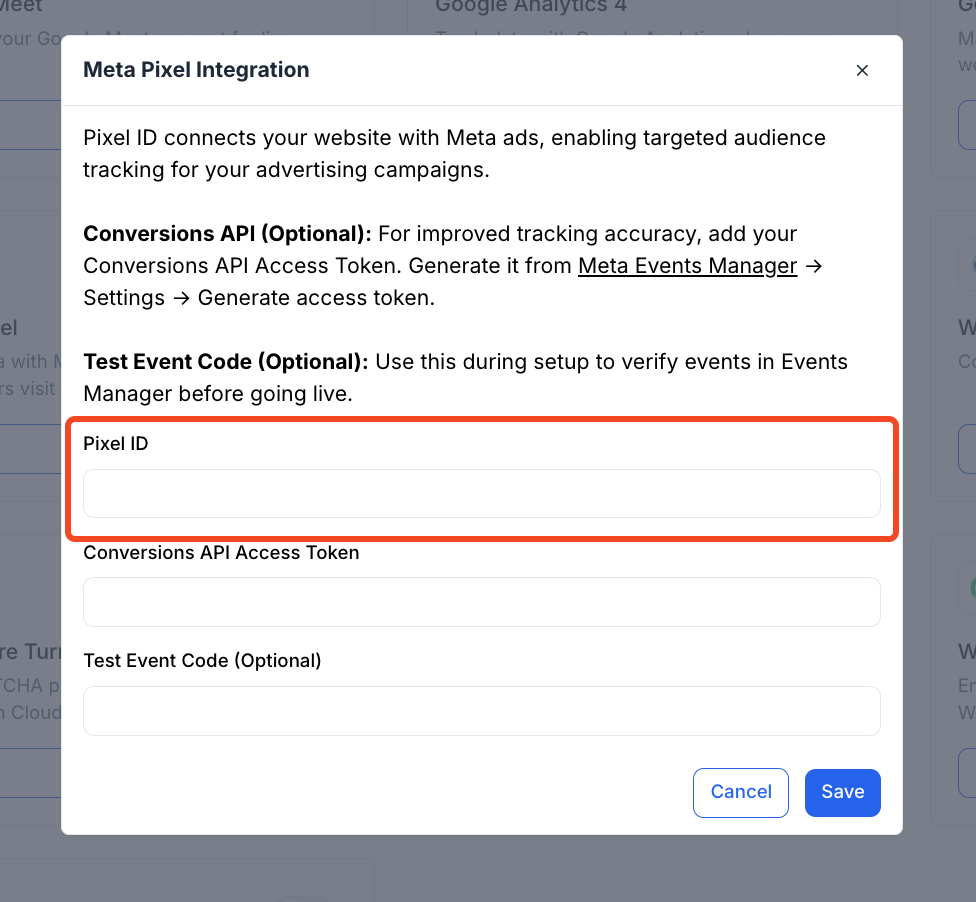
10. After clicking on the Settings button, a popup will appear. On the popup you will see all the information you need to provide to successfully integrate Meta Pixel with your Klasio website.
Paste the Pixel ID in the respective field. Then, click on the “Save” button, and Meta Pixel will be successfully integrated into Klasio.
Step 02: Setting Up Conversions API (Optional but Recommended)
Setting up CAPI is optional but recommended because it sends event data directly from your server to Meta, which improves data accuracy, reduces event loss, enhances attribution, and helps optimize ad delivery and performance more effectively.
Here’s how to set it up:
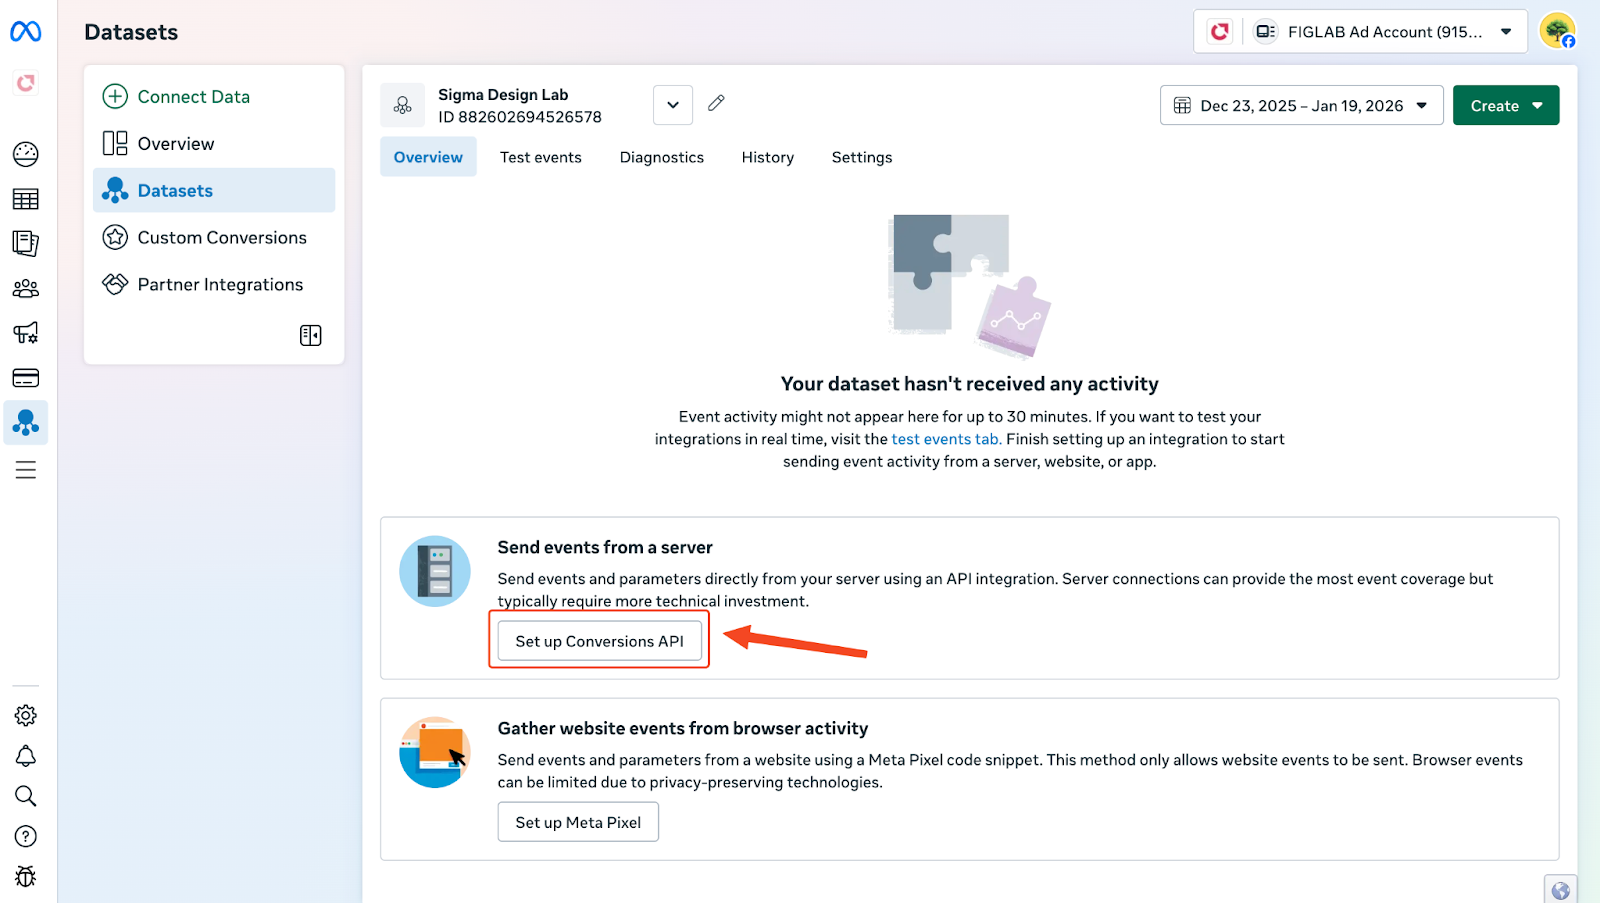
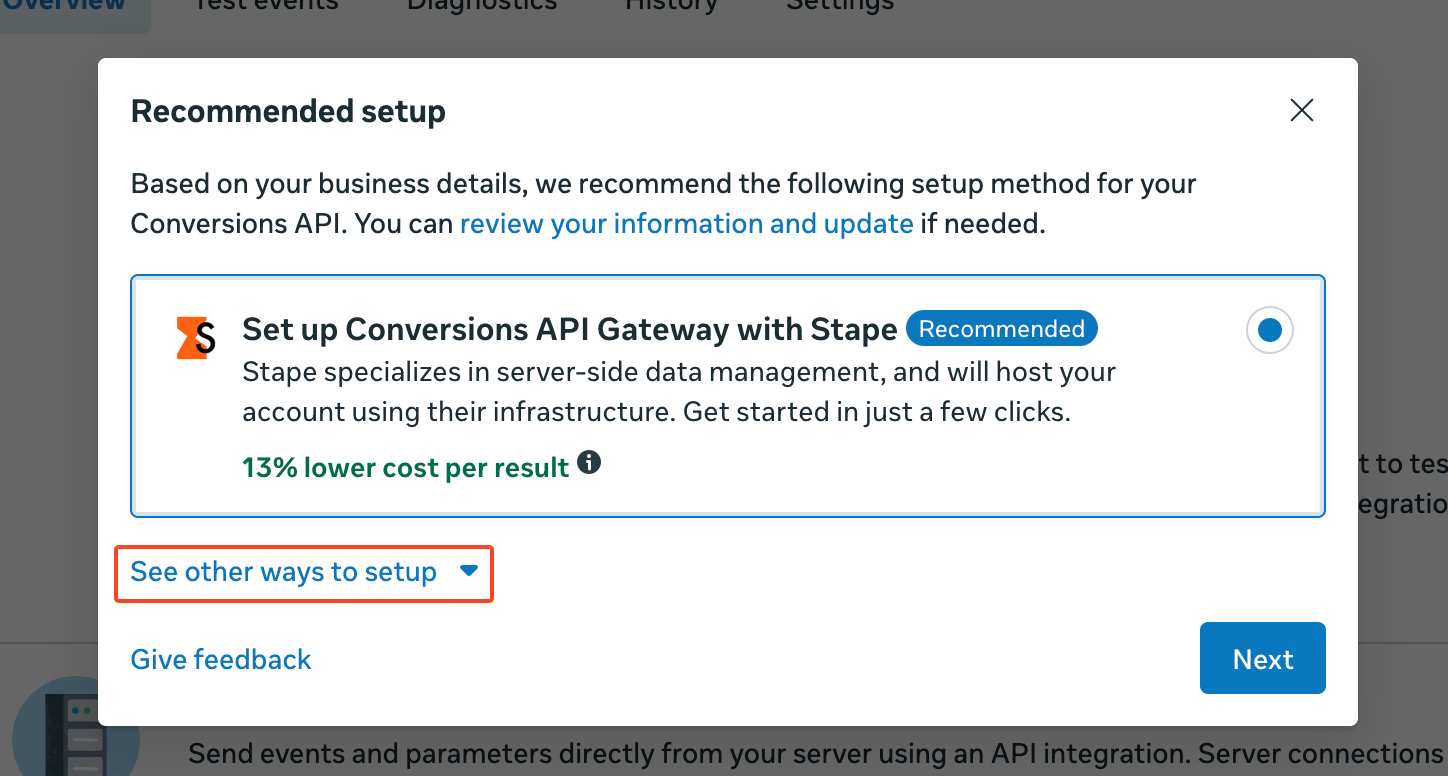
11. On your Events Manager page, you will see a button that says “Set Up Conversions API.” Click on it.
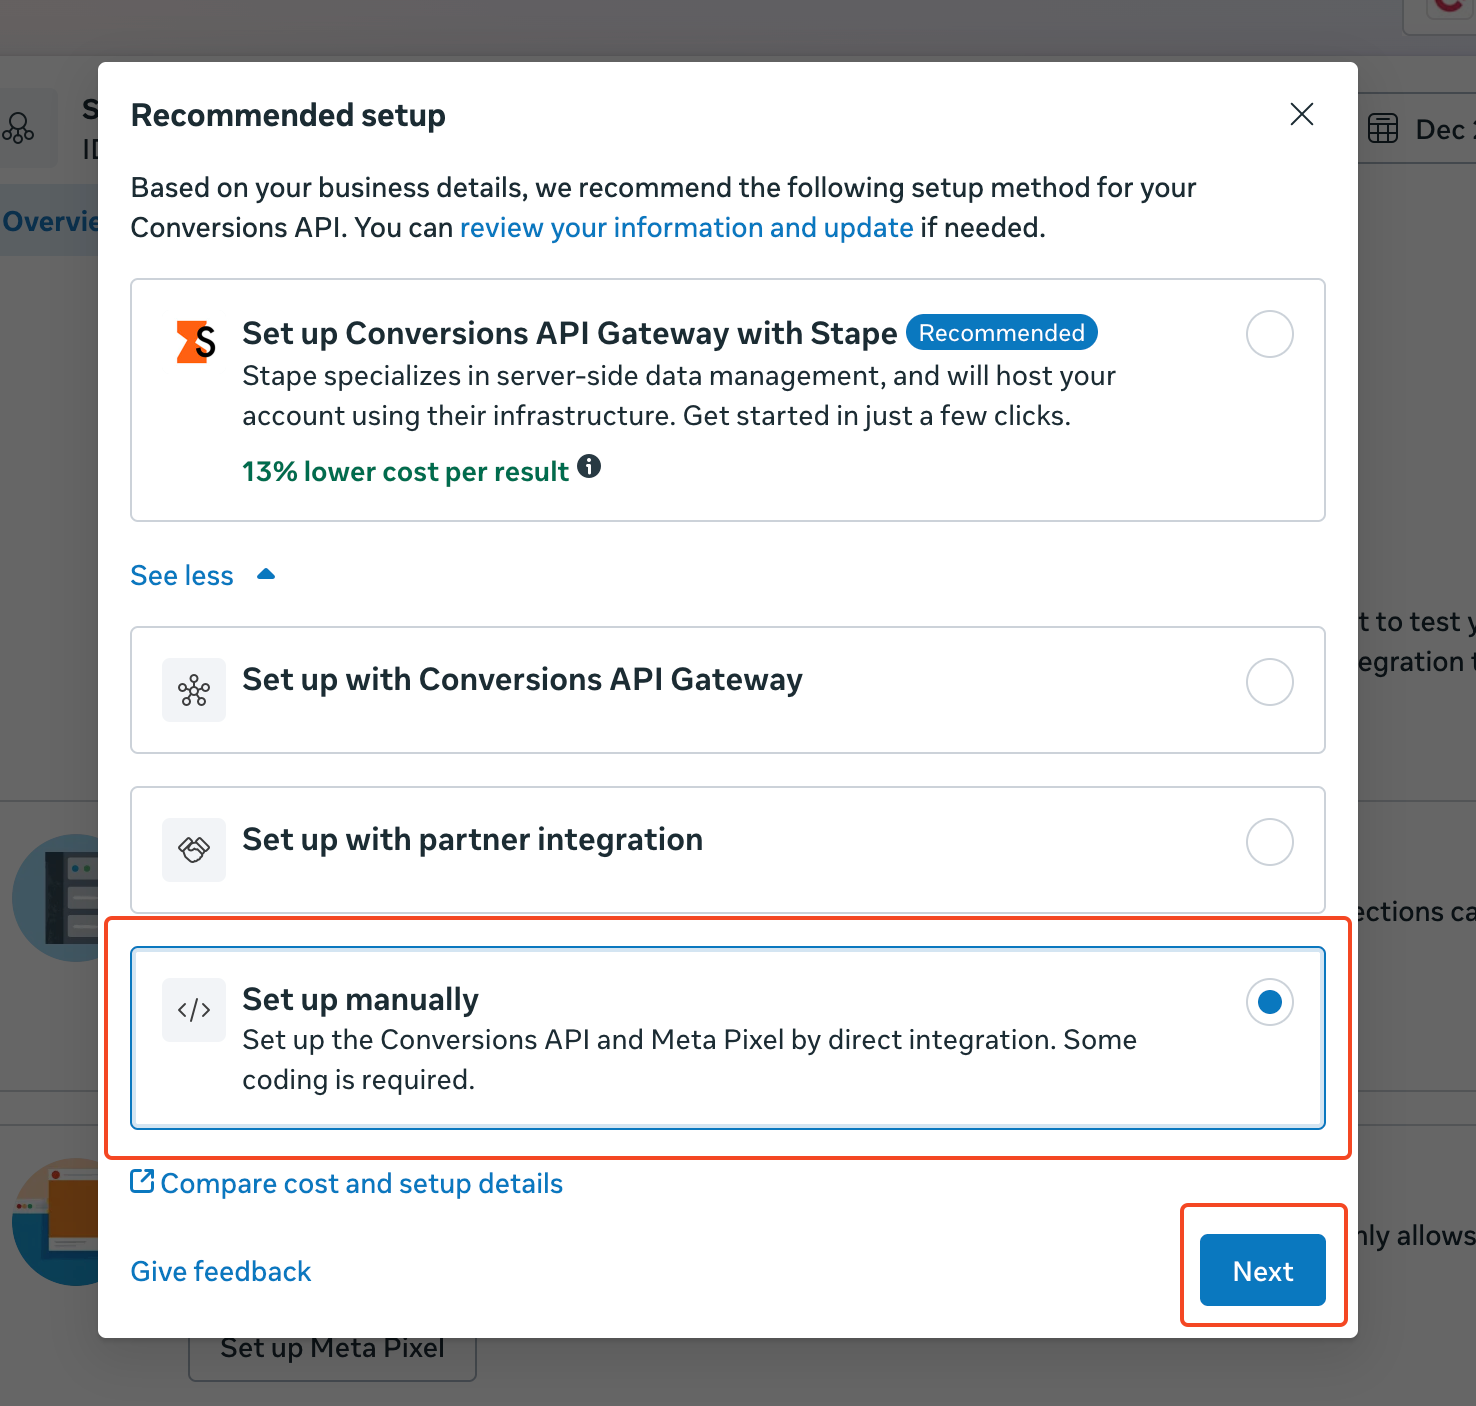
12. Once you do, a popup will appear. On the popup, click on “See other ways to setup”.
13. Three more options will appear. Select “Set up manually” and click on “Next”.
14. On the next step, select “Conversions API and Meta Pixel” and click on “Next”.
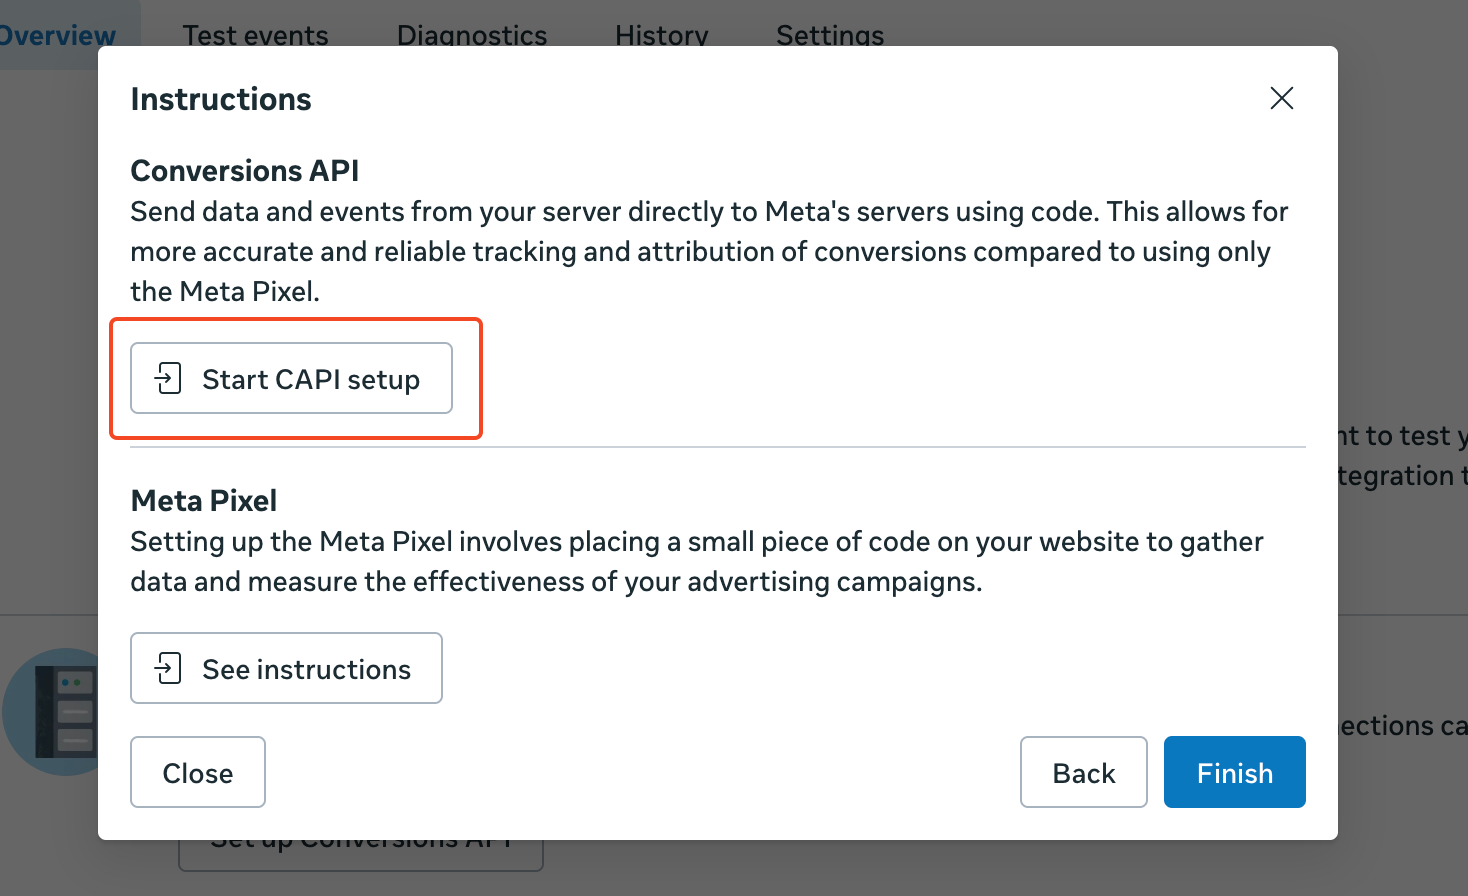
15. On the next step, click on “Start CAPI setup” and then click on “Finish”.
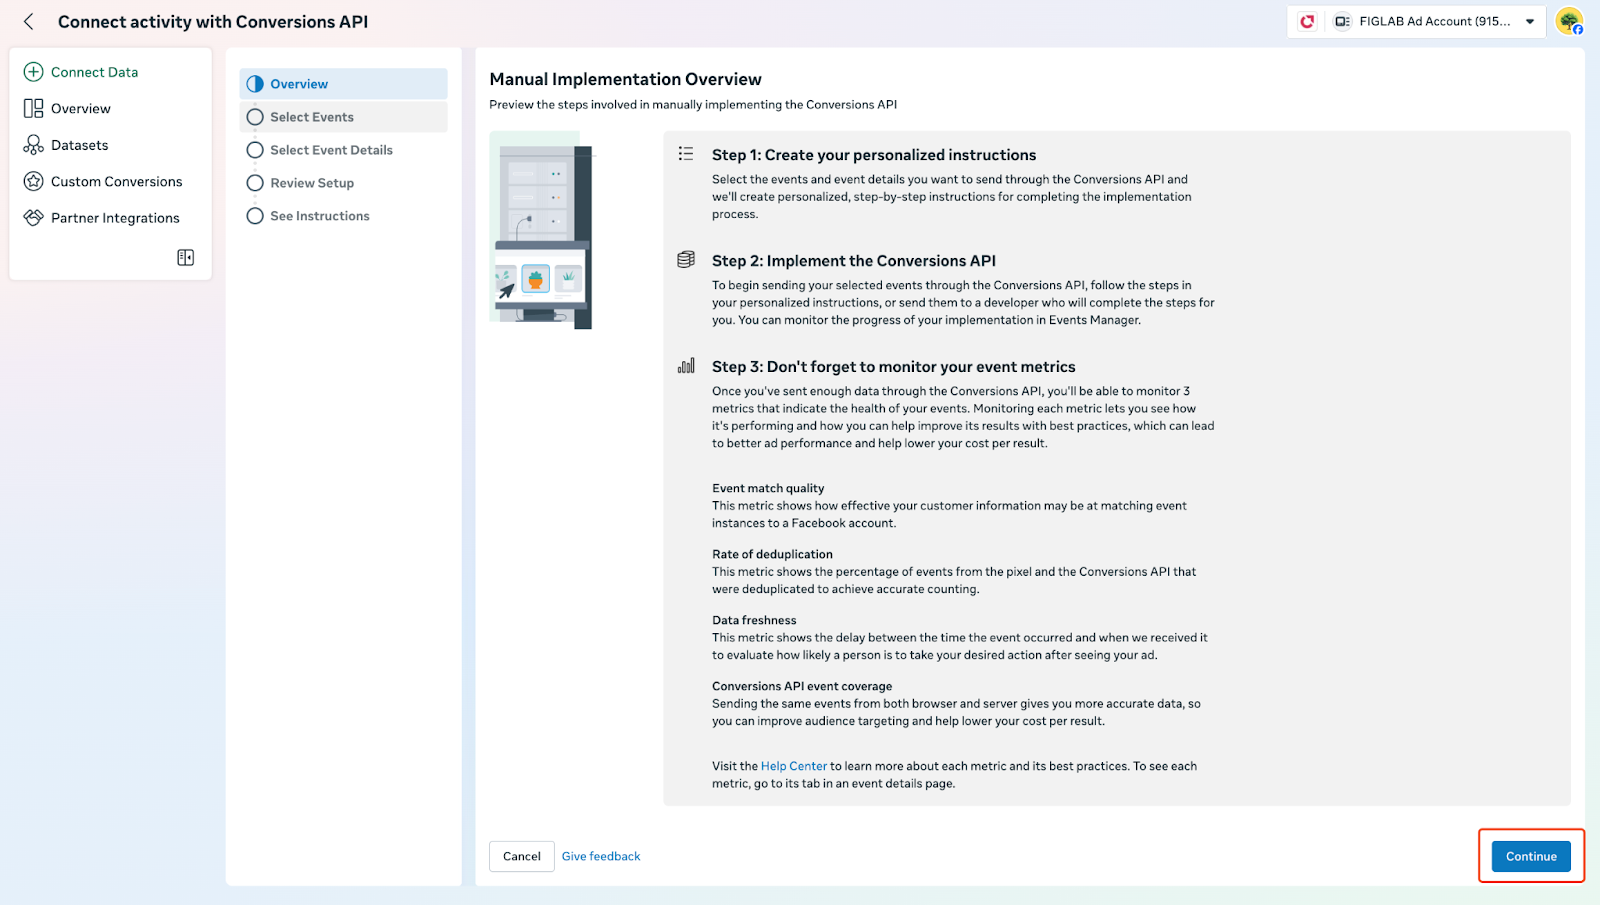
16. Now the CAPI setup will start, and Meta will guide you step by step. On the first step, there will be step-by-step instructions for the whole process. If you want, you can go through it and then click “Continue”.
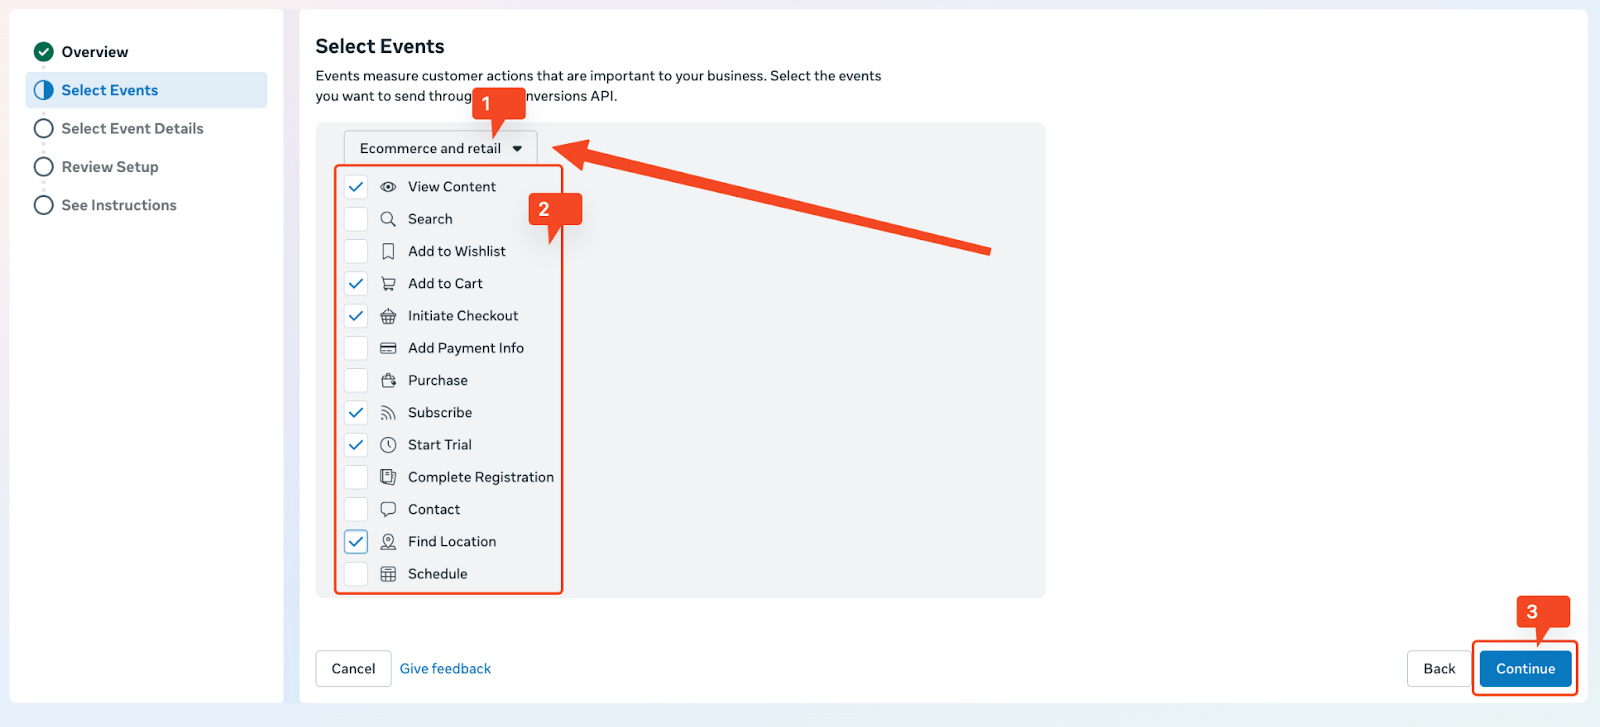
17. On the next step, you will be asked to select the events that you want to track. First, choose your industry from the dropdown, select the events that you want to track, and then click “Continue”.
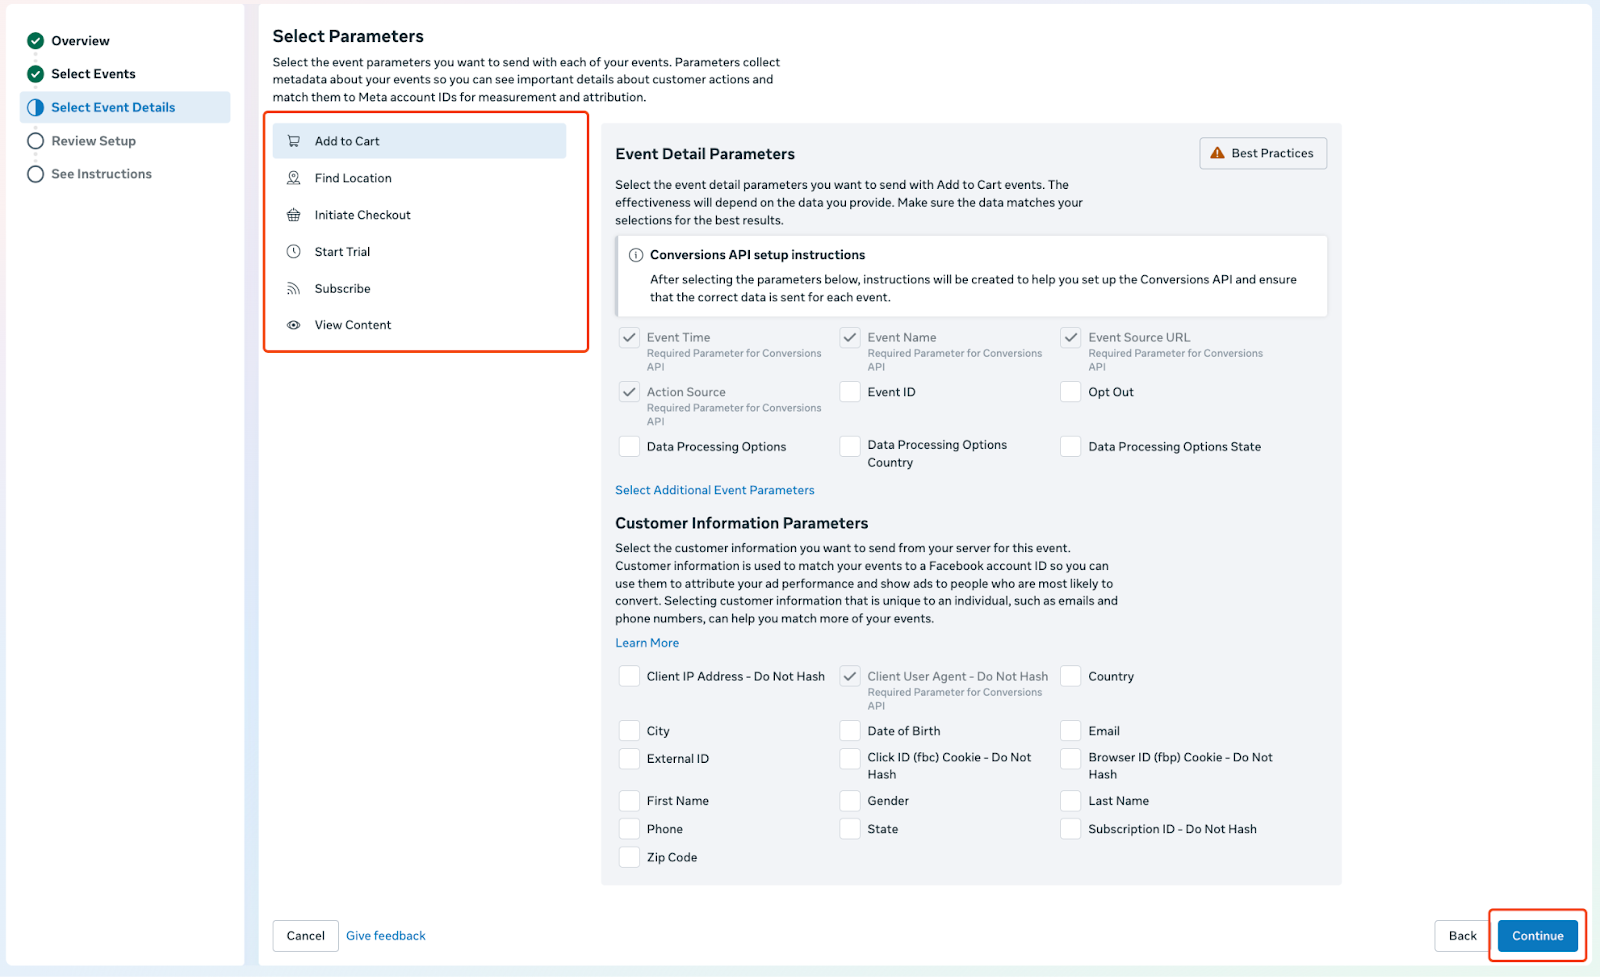
18. Next, you will need to select the event parameters. Go through each event and select all the applicable event parameters. Once you are done, click “Continue”.
19. Then, Meta will ask you to review the choices you made. If anything is not correct, you can go back and change it. If everything is okay, then click on “Continue”.

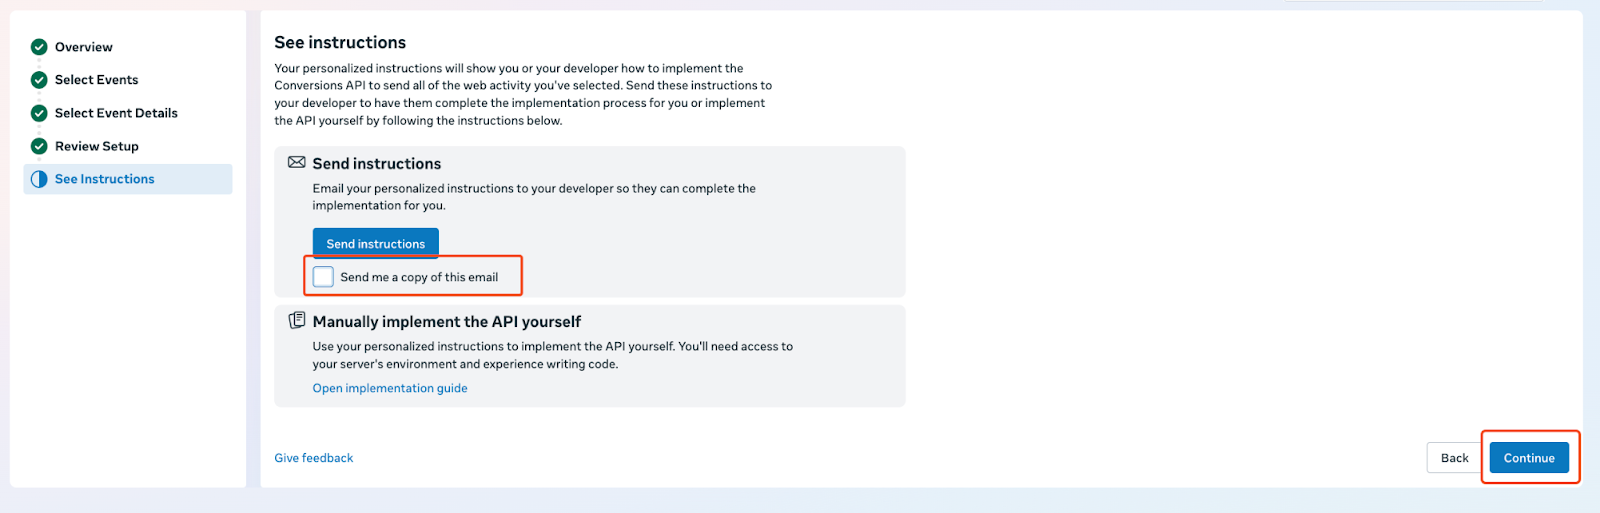
20. On the next step, Meta will ask you to read the instructions for setting up CAPI or send the instructions to someone else on your team, which is not required here. So, uncheck the “Send me a copy of this email” box and click on “Continue”.
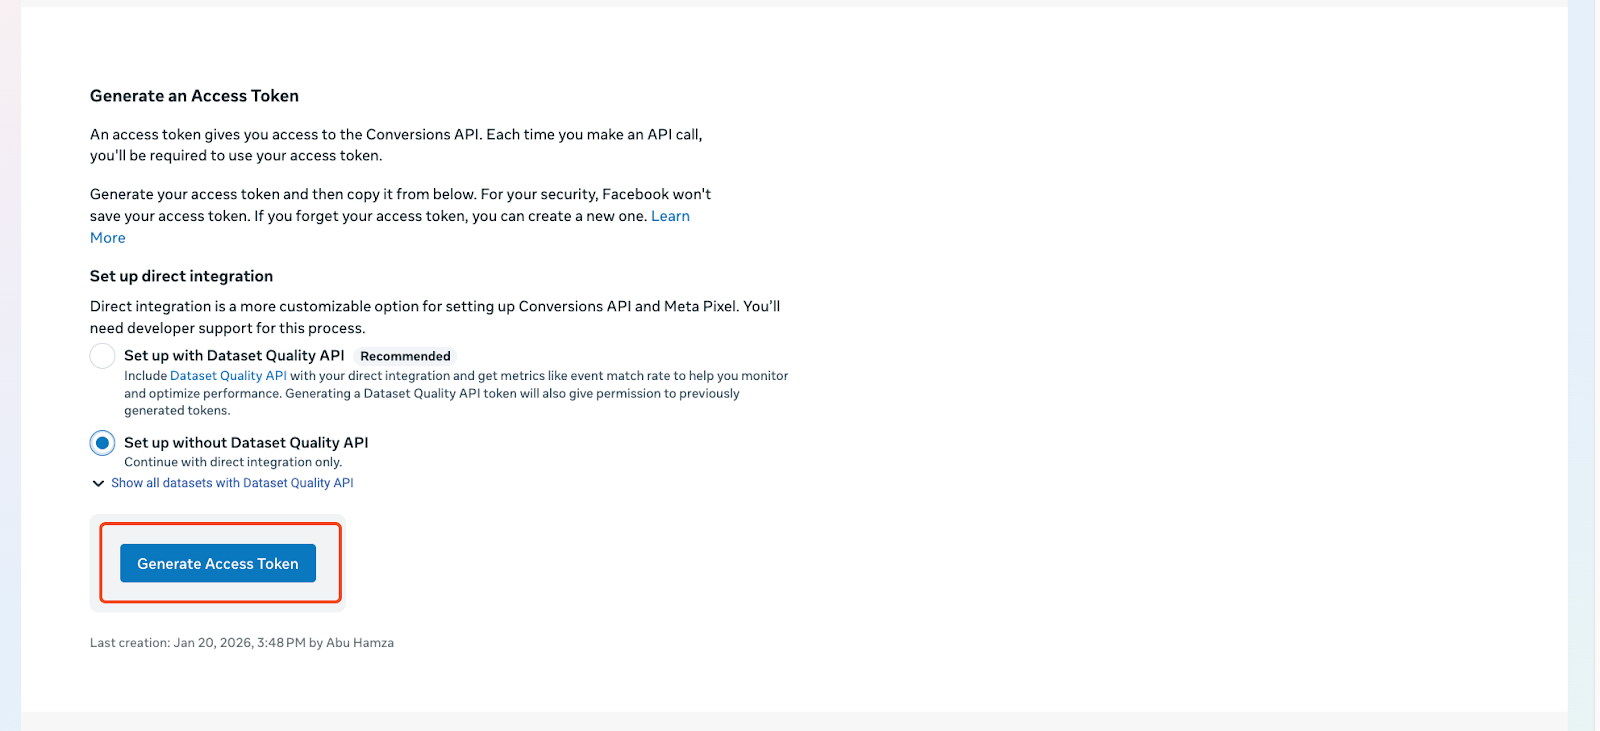
21. On the next page, scroll down and find the section named “Generate Access Token”. On that section, under “Set Up Direct Integration,” select “Setup Without Dataset Quality API”. Once you do, you will see the button for generating the access token. Once you click on this button, the access token will be generated.
22. You need to copy this access token and paste it into the “Conversions API Access Token” field.
23. Once you are done, click on “Save” to finish the Meta Pixel with CAPI integration process.