Certificates add credibility to your online courses by recognizing learner achievements and providing tangible proof of skill completion. They also motivate students to stay engaged, complete courses, and showcase their progress to employers or professional networks.
Here’s how you can create certificates on Klasio:
1. First, from your dashboard, expand “Products” and click on “Certificates.”
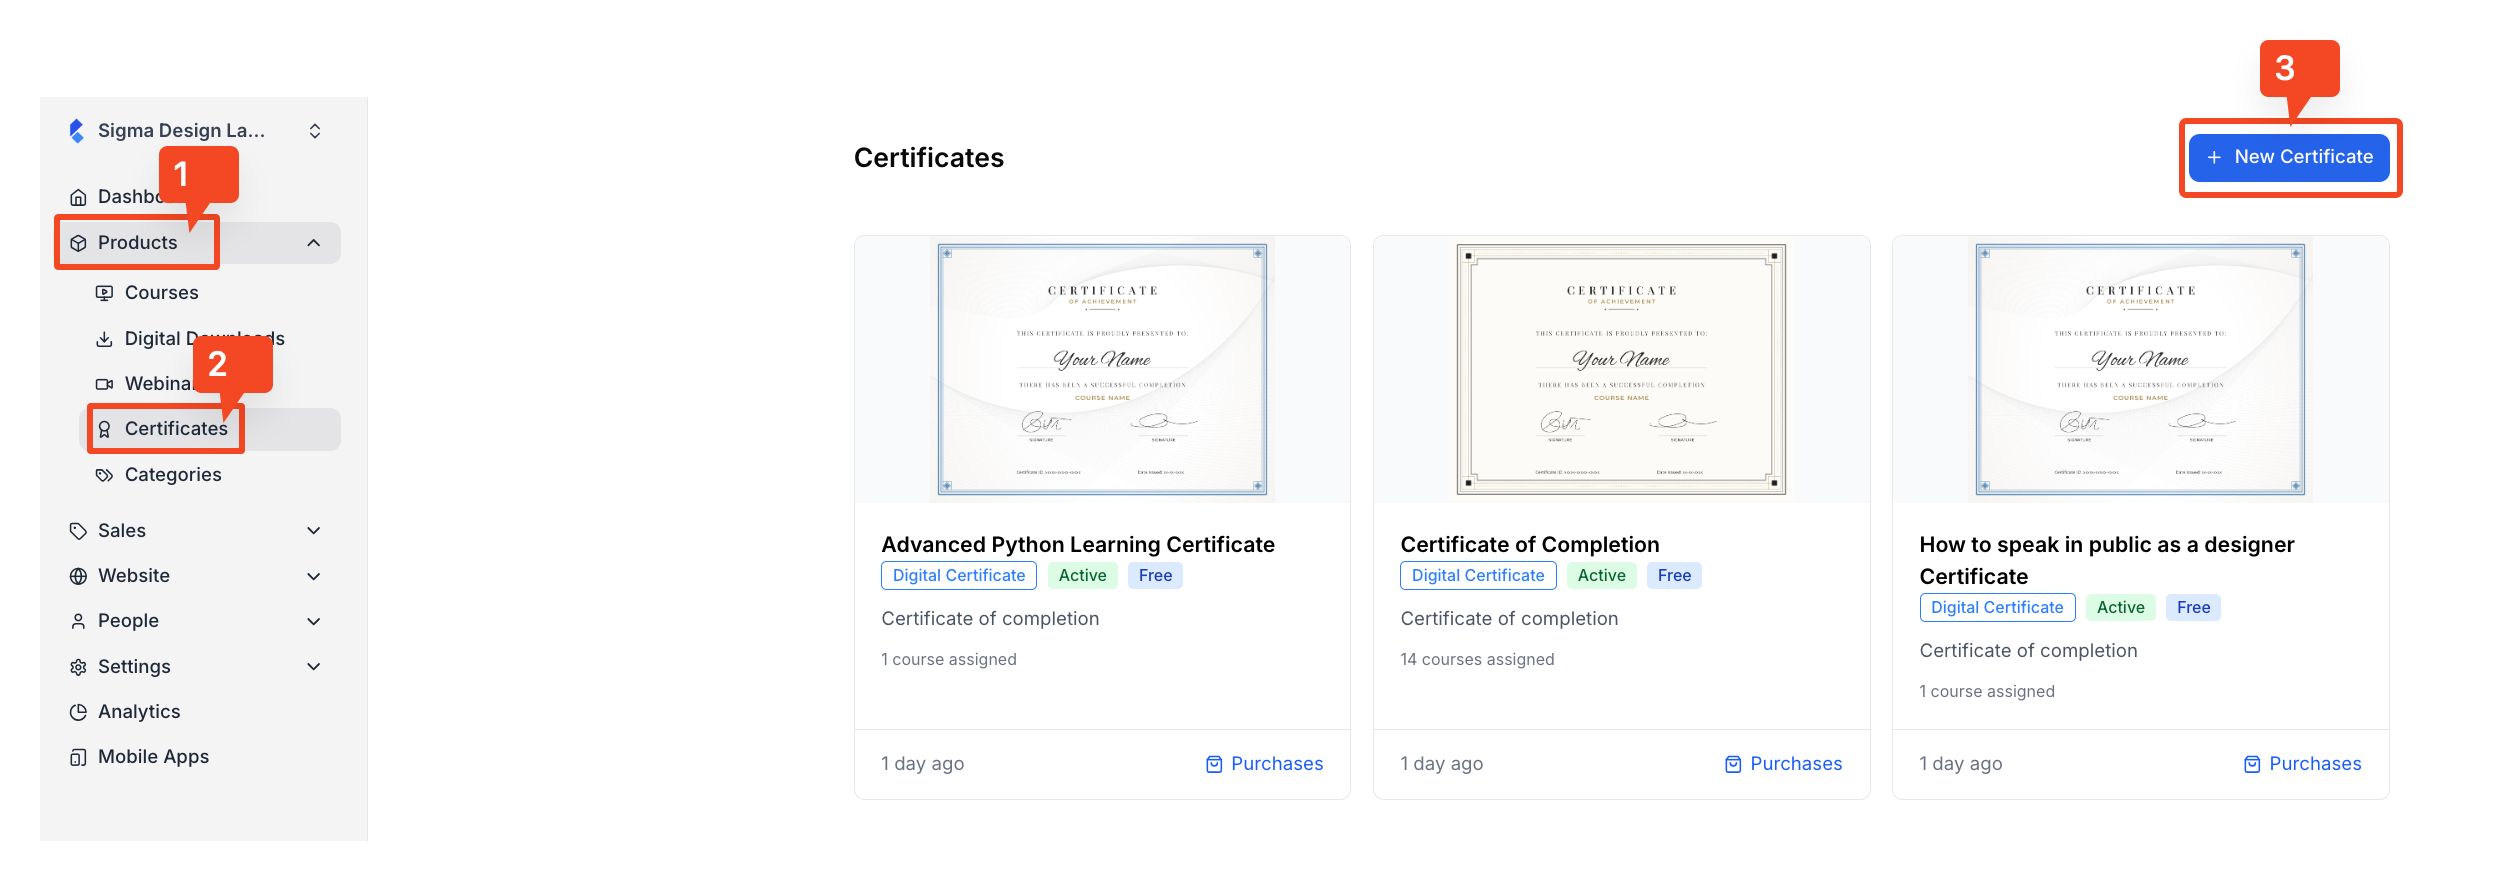
2. When you click on the “New Certificate” button, you will be taken to the certificate builder, where you can provide the information for your new certificate. For starters, you will have the option to input a name and a description for your certificate. The name and the description is for your use only, it won’t be visible to your students.

3. Then, you can choose from 4 separate certificate design templates.
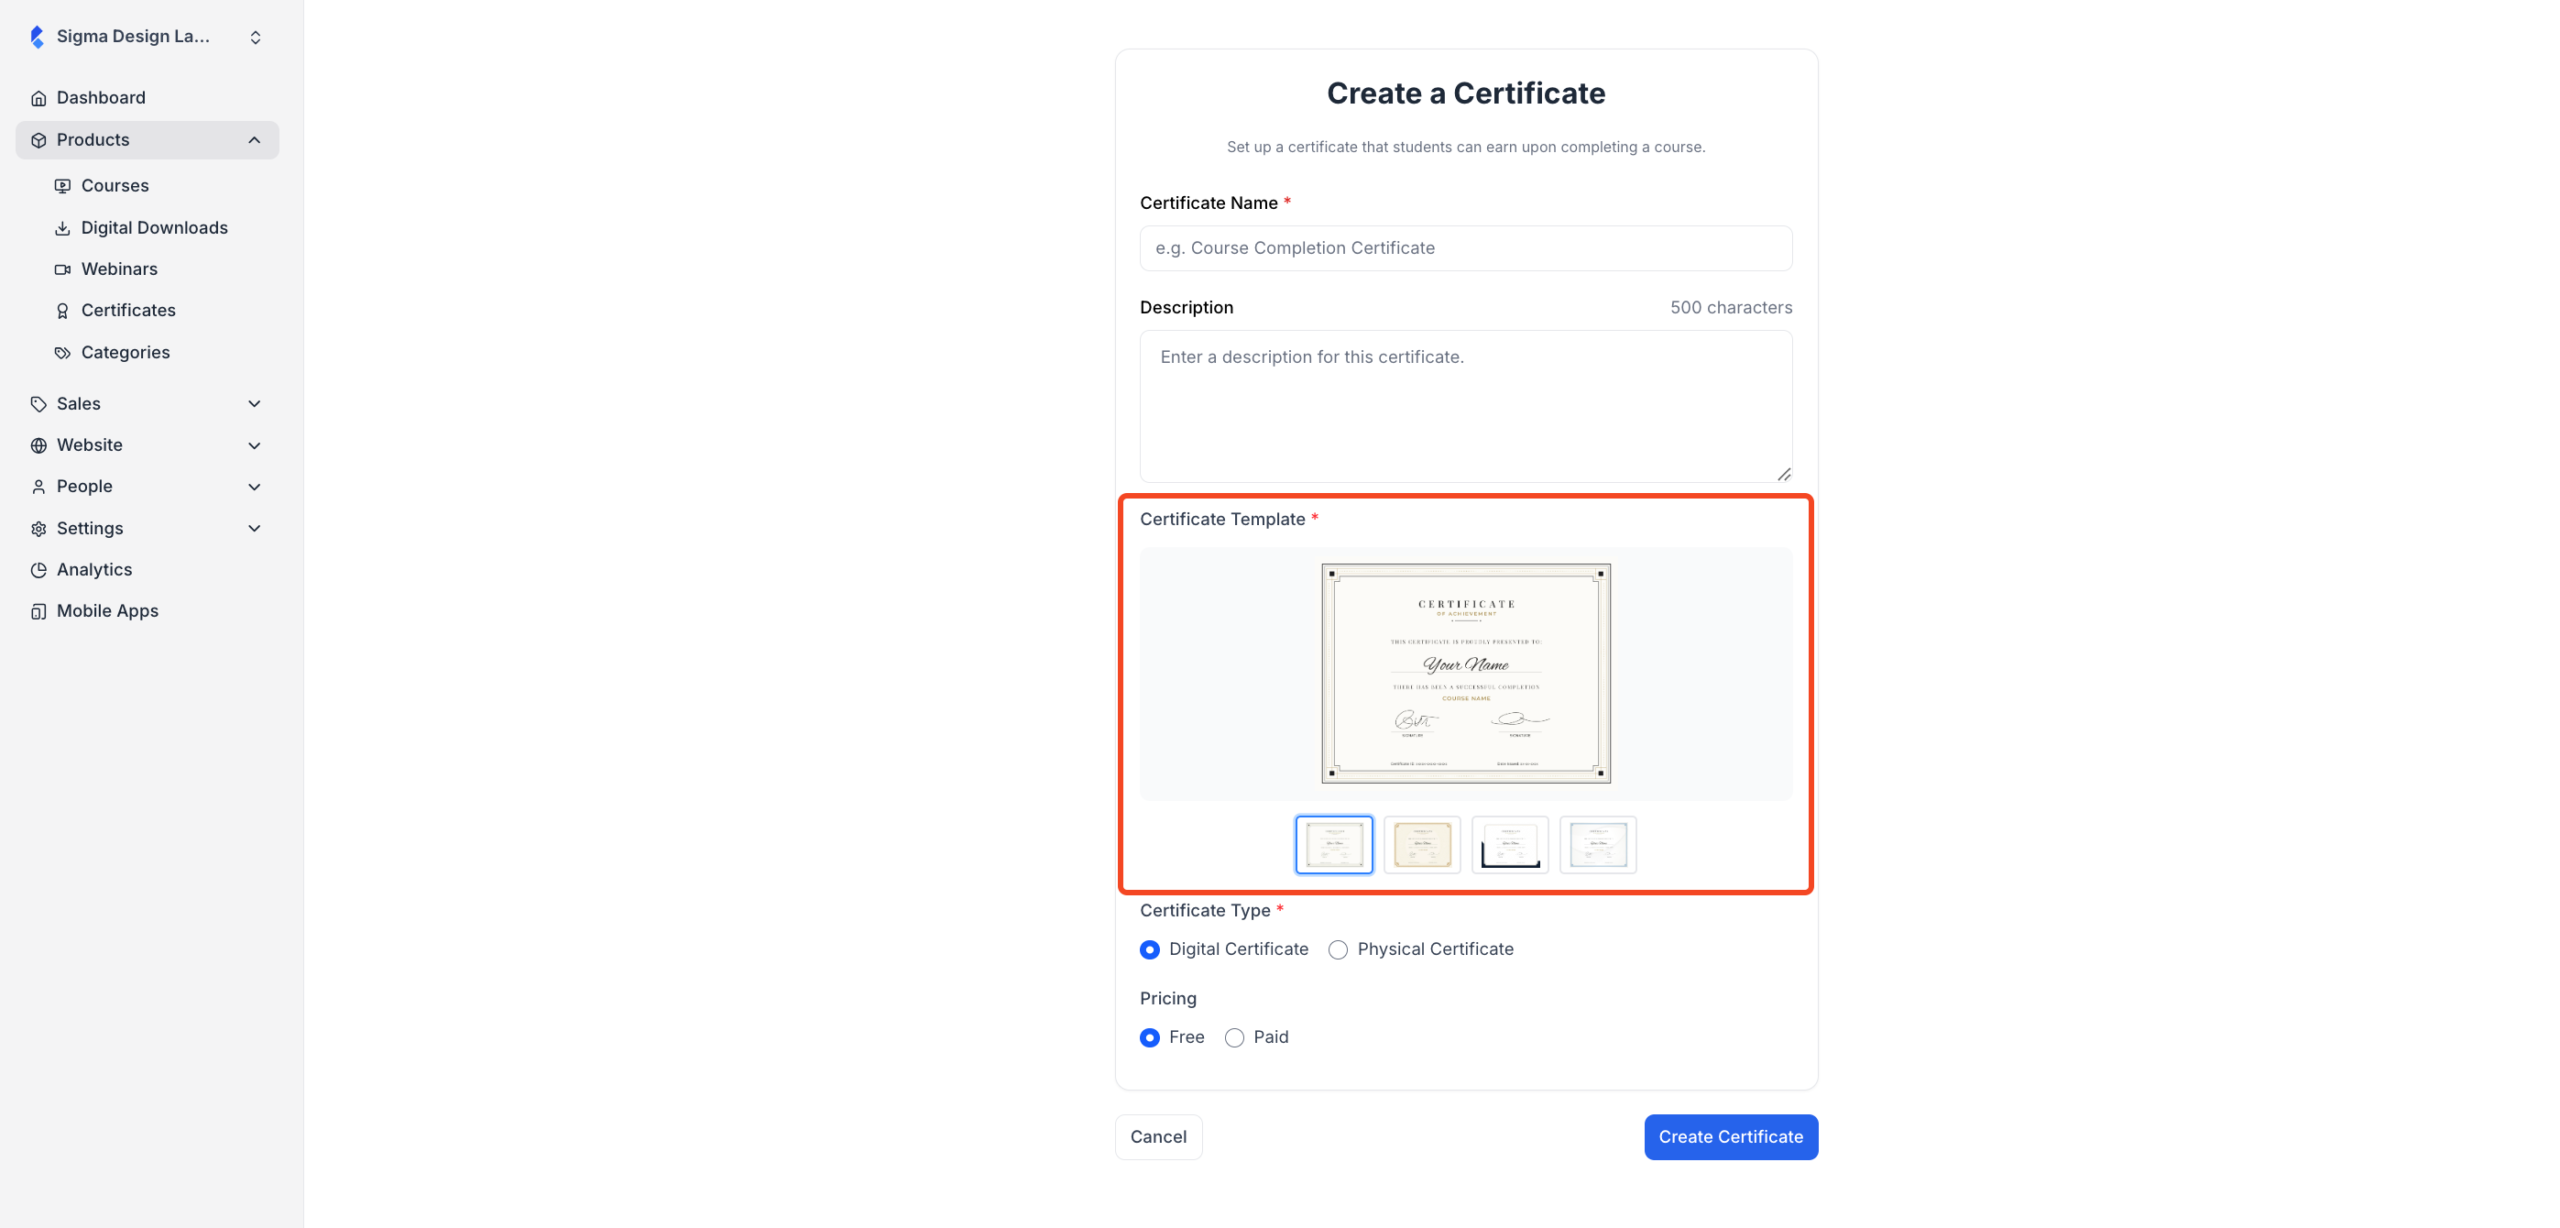
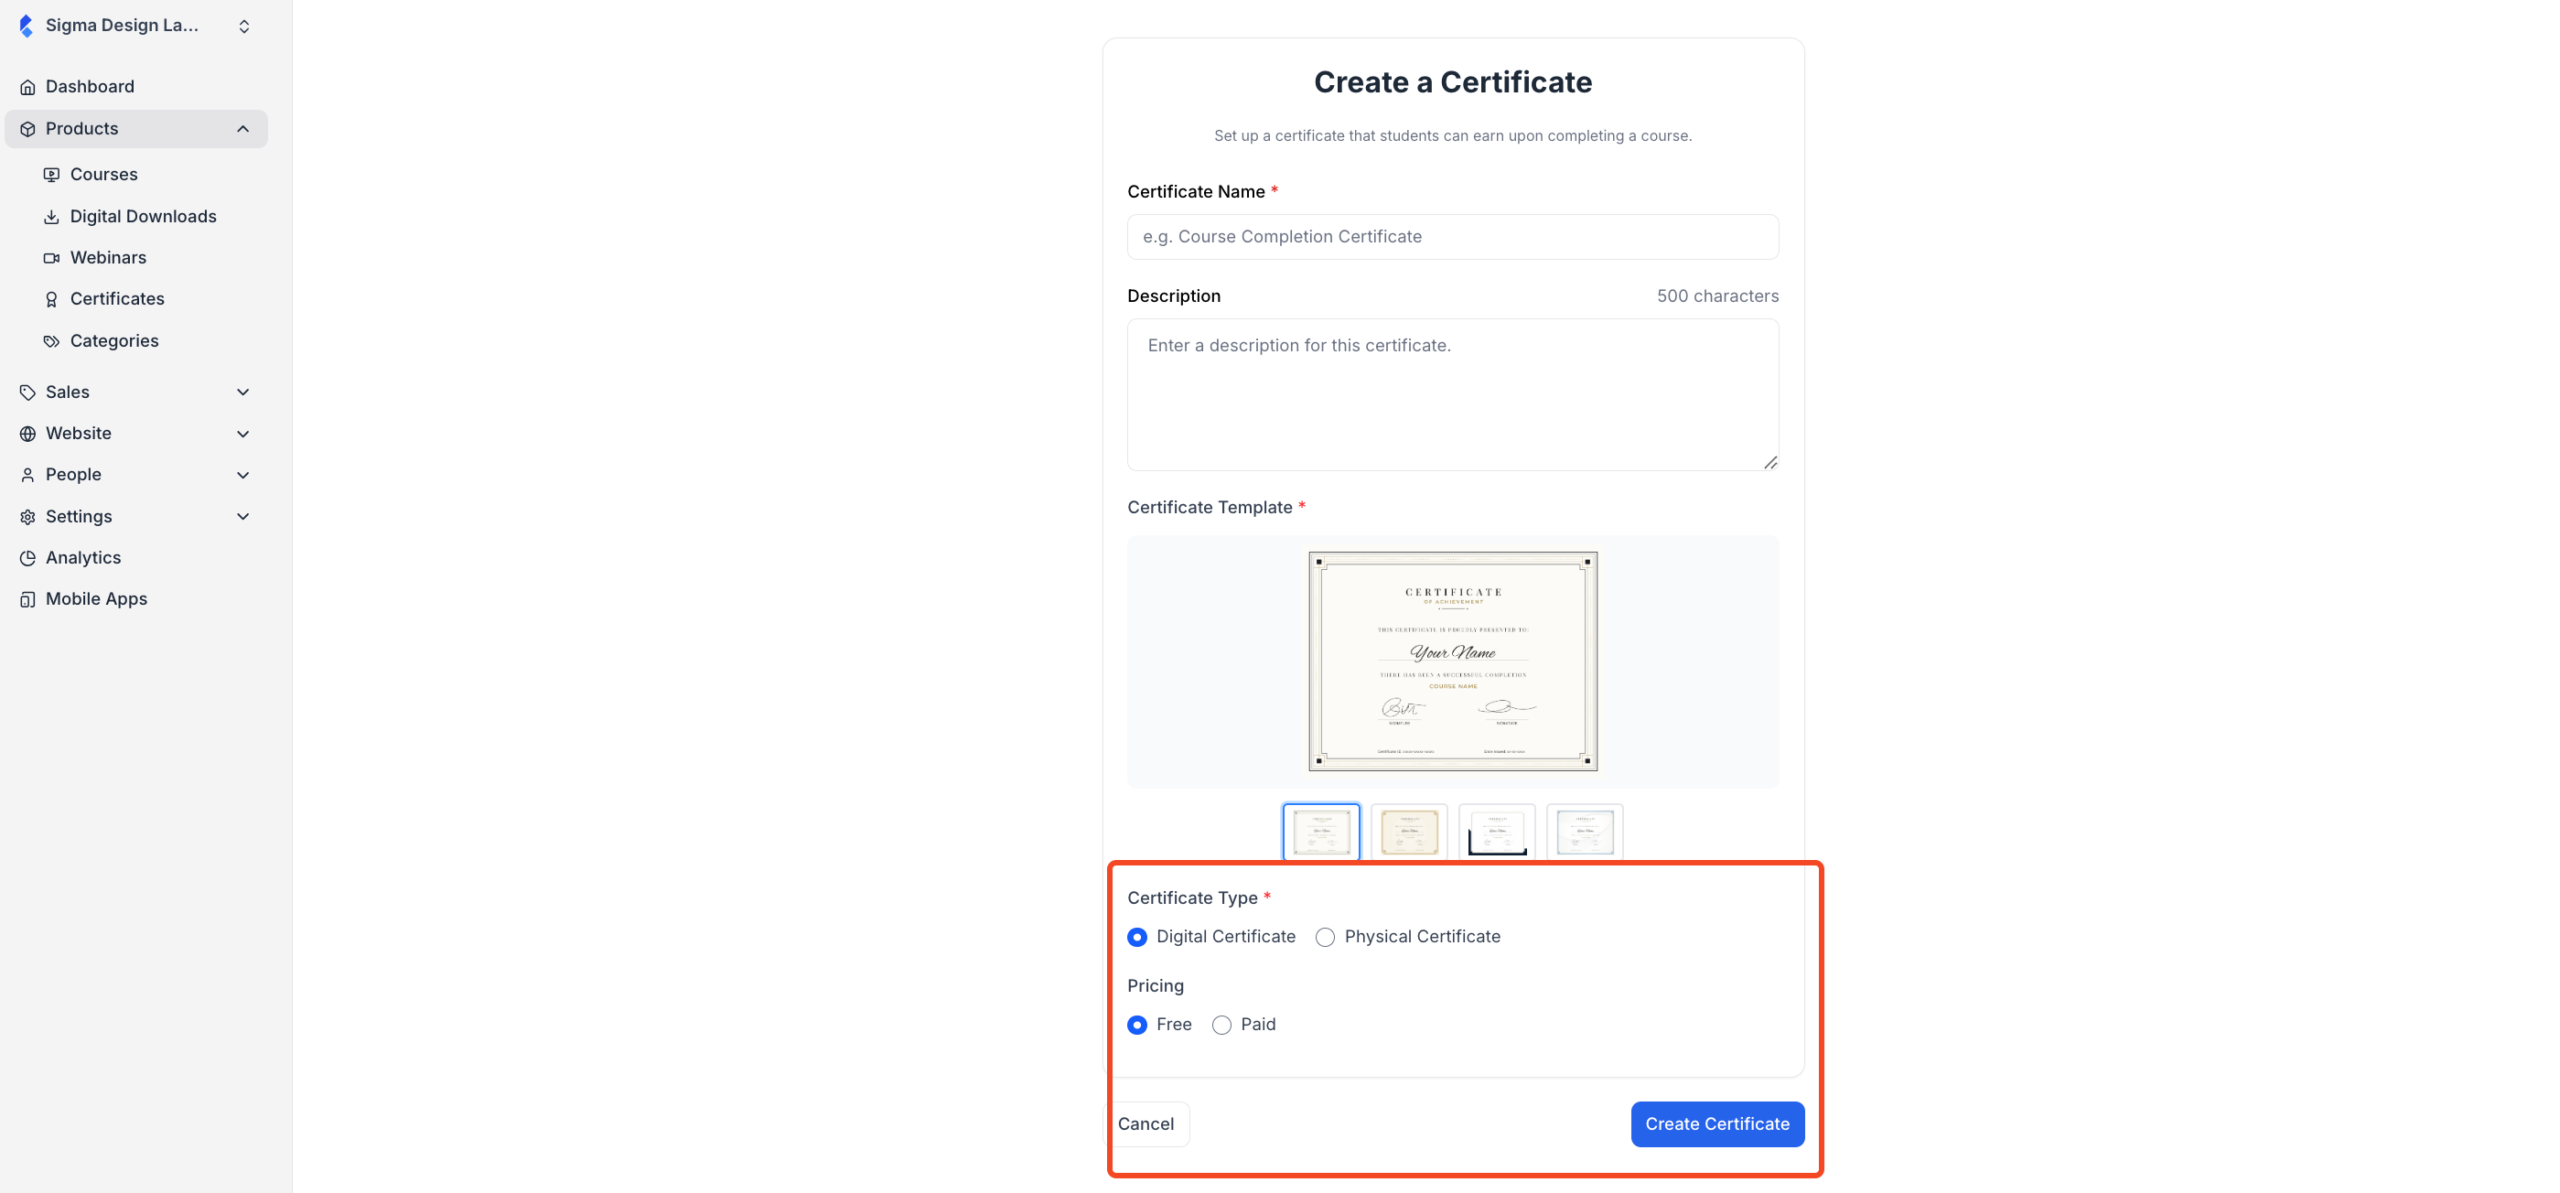
4. Next, you need to choose if you want the certificate to be physical or digital. If you choose digital, the certificate will be downloadable. Alternatively, if you choose physical, you will need to send a physical copy of the certificate to your students.
Also, you need to choose if you want to give the certificate away for free or you want to charge a payment for it.
Once you are done, click on the “Create Certificate” button.
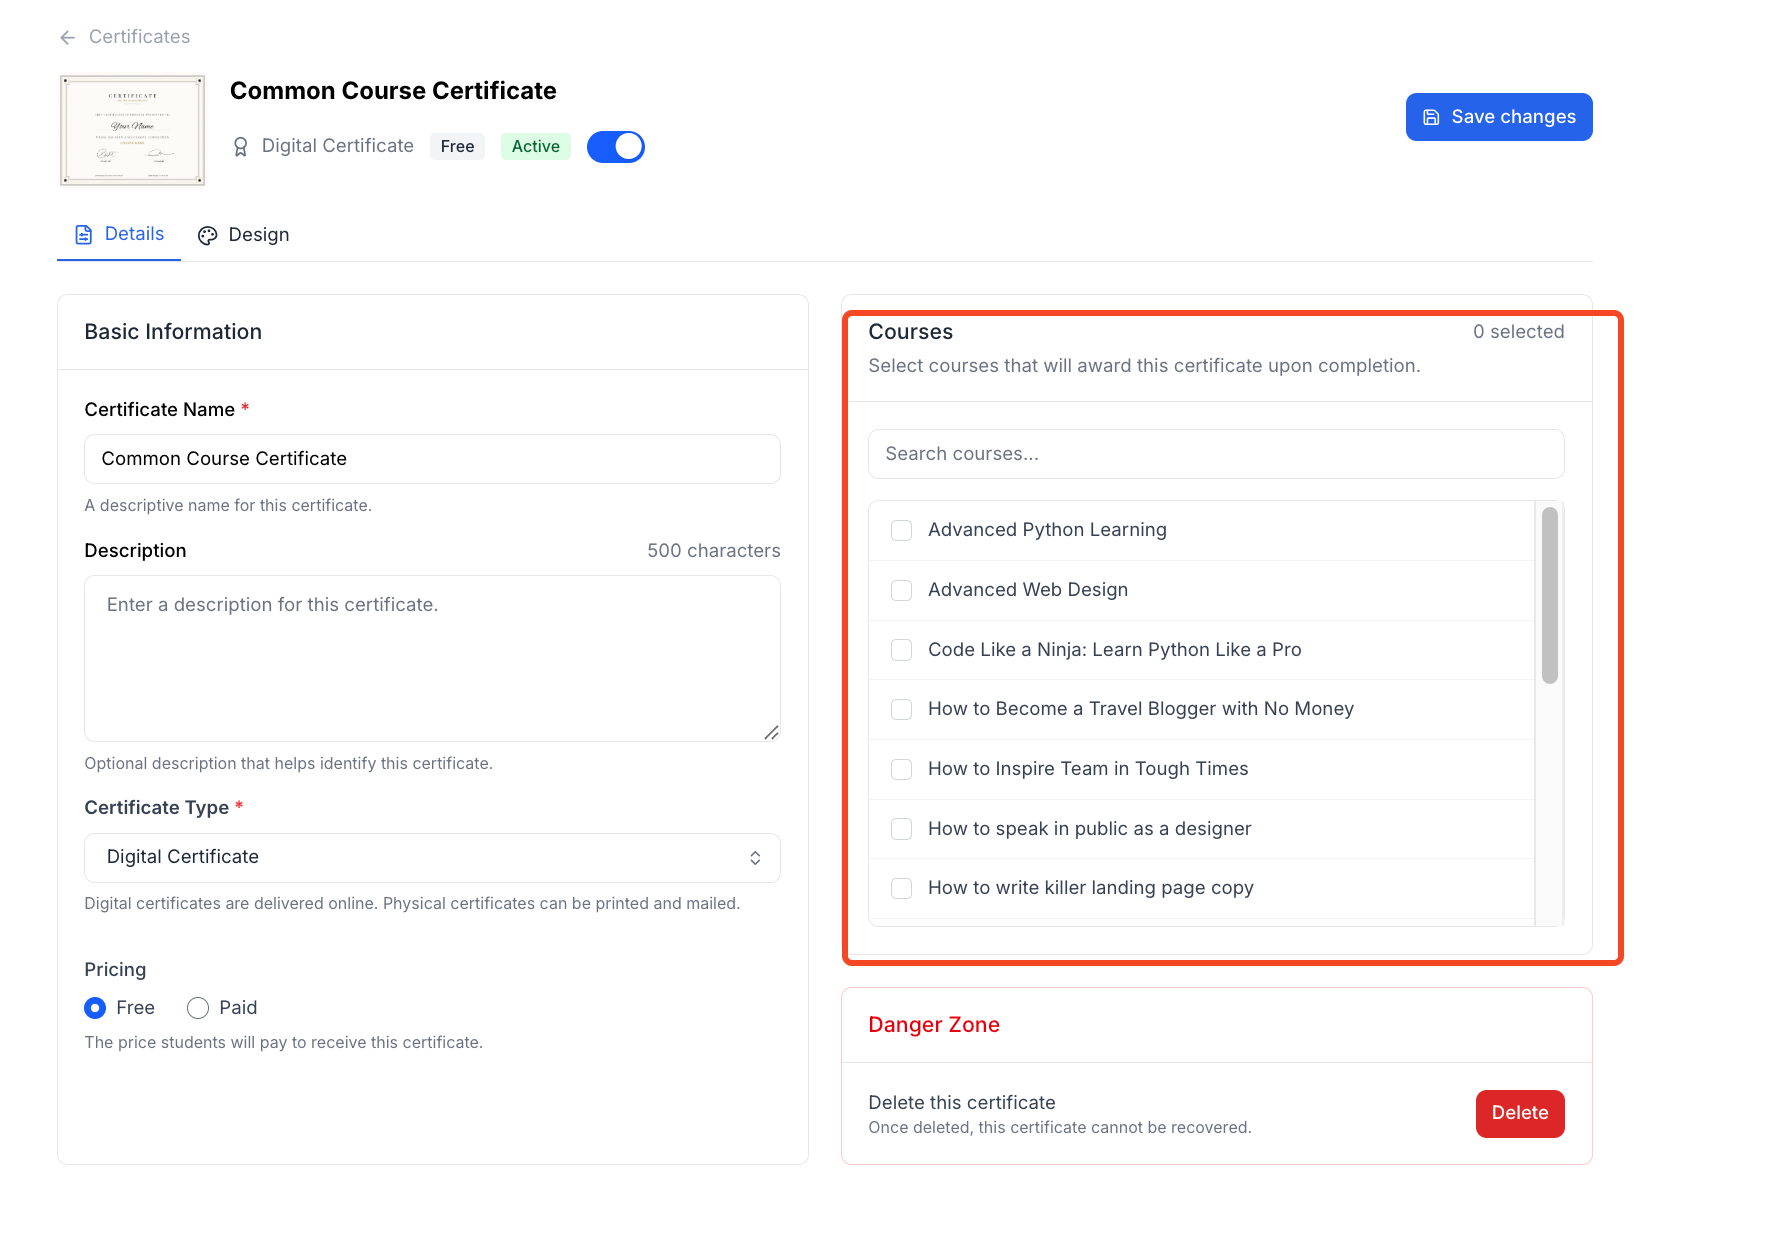
5. After clicking on the “Create Certificate” button, you will be directed to the certificate editor, where you can select the courses to which this certificate will be assigned. You can select as many courses as you want.
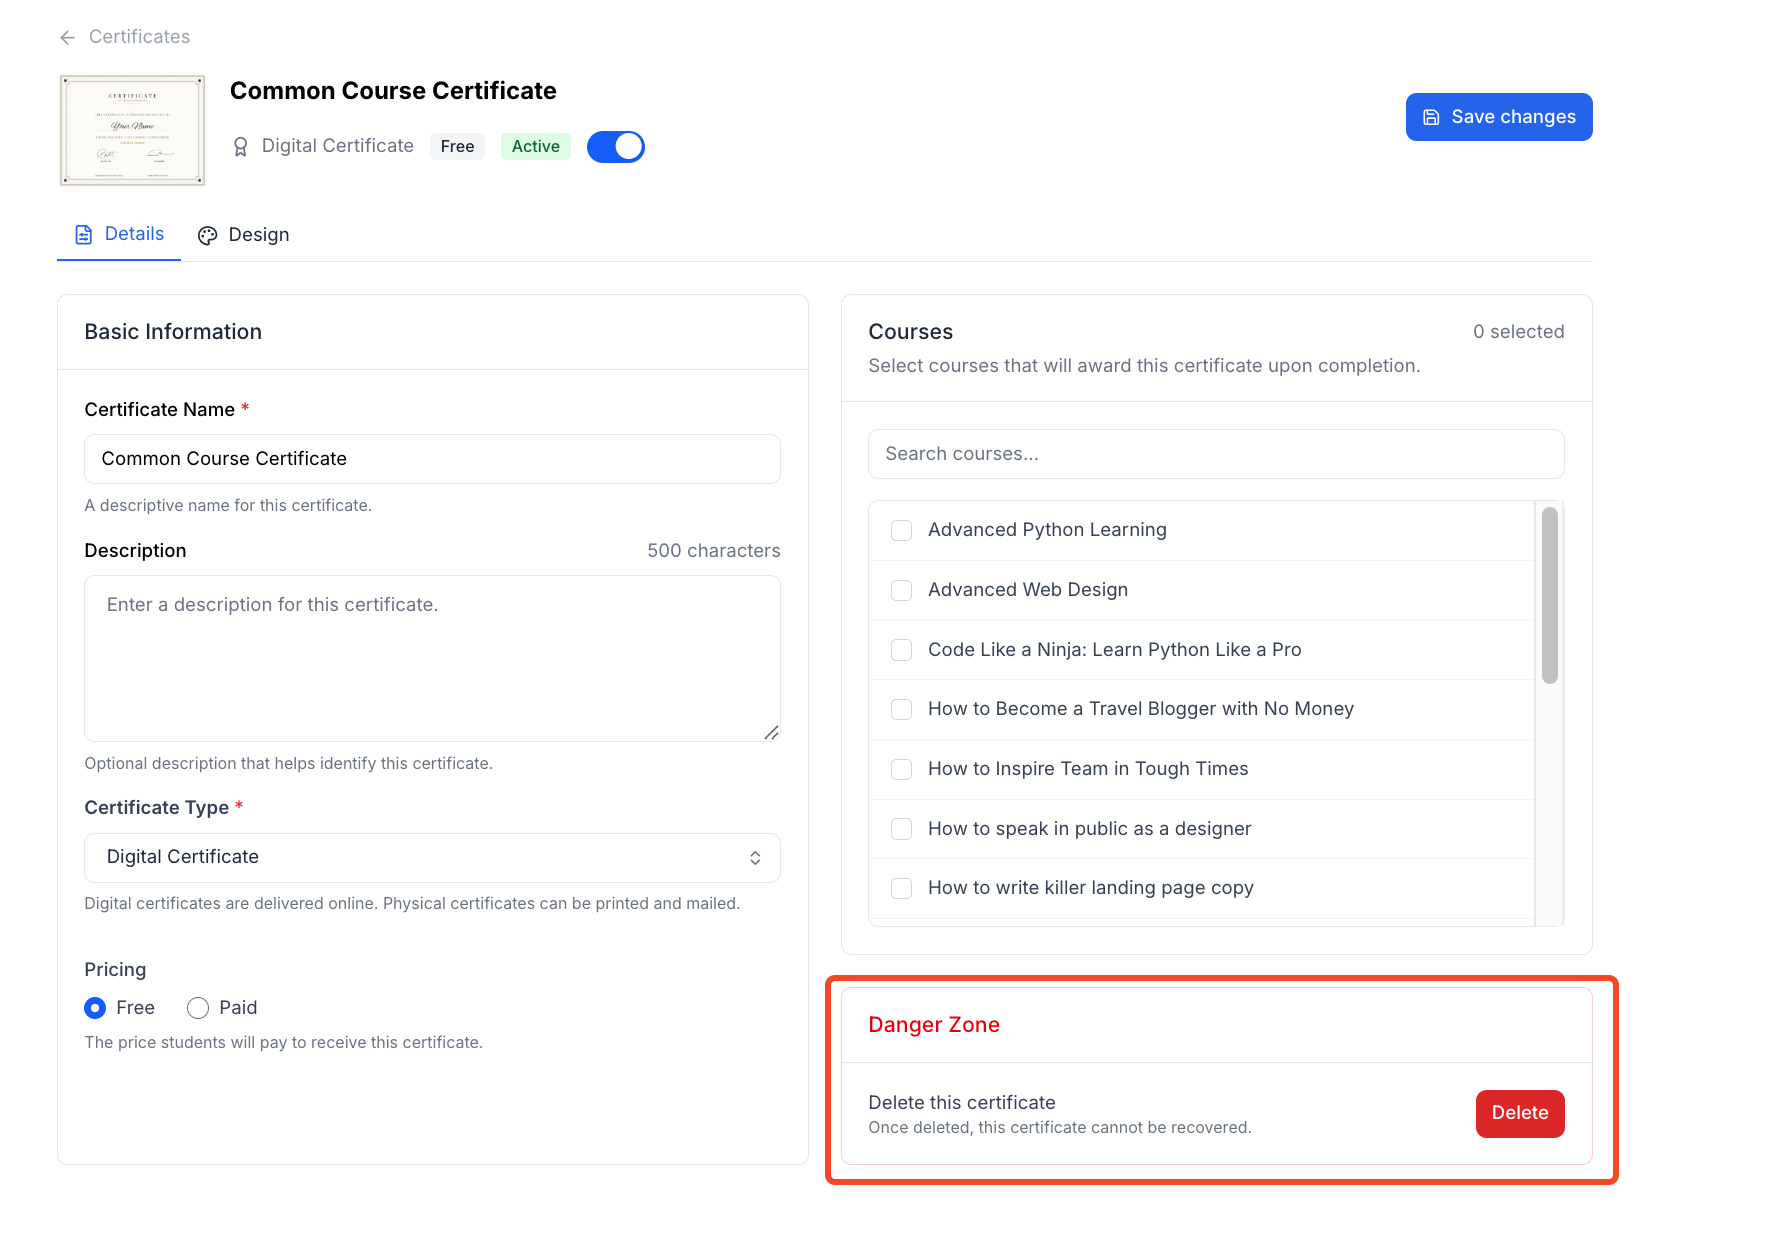
6. Now, if you want to delete the certificate, you can do so by clicking on the “Delete” button. Keep in mind that once you delete a certificate, it can’t be undone. Also, if a student purchases or downloads the certificate, you also can’t delete it.
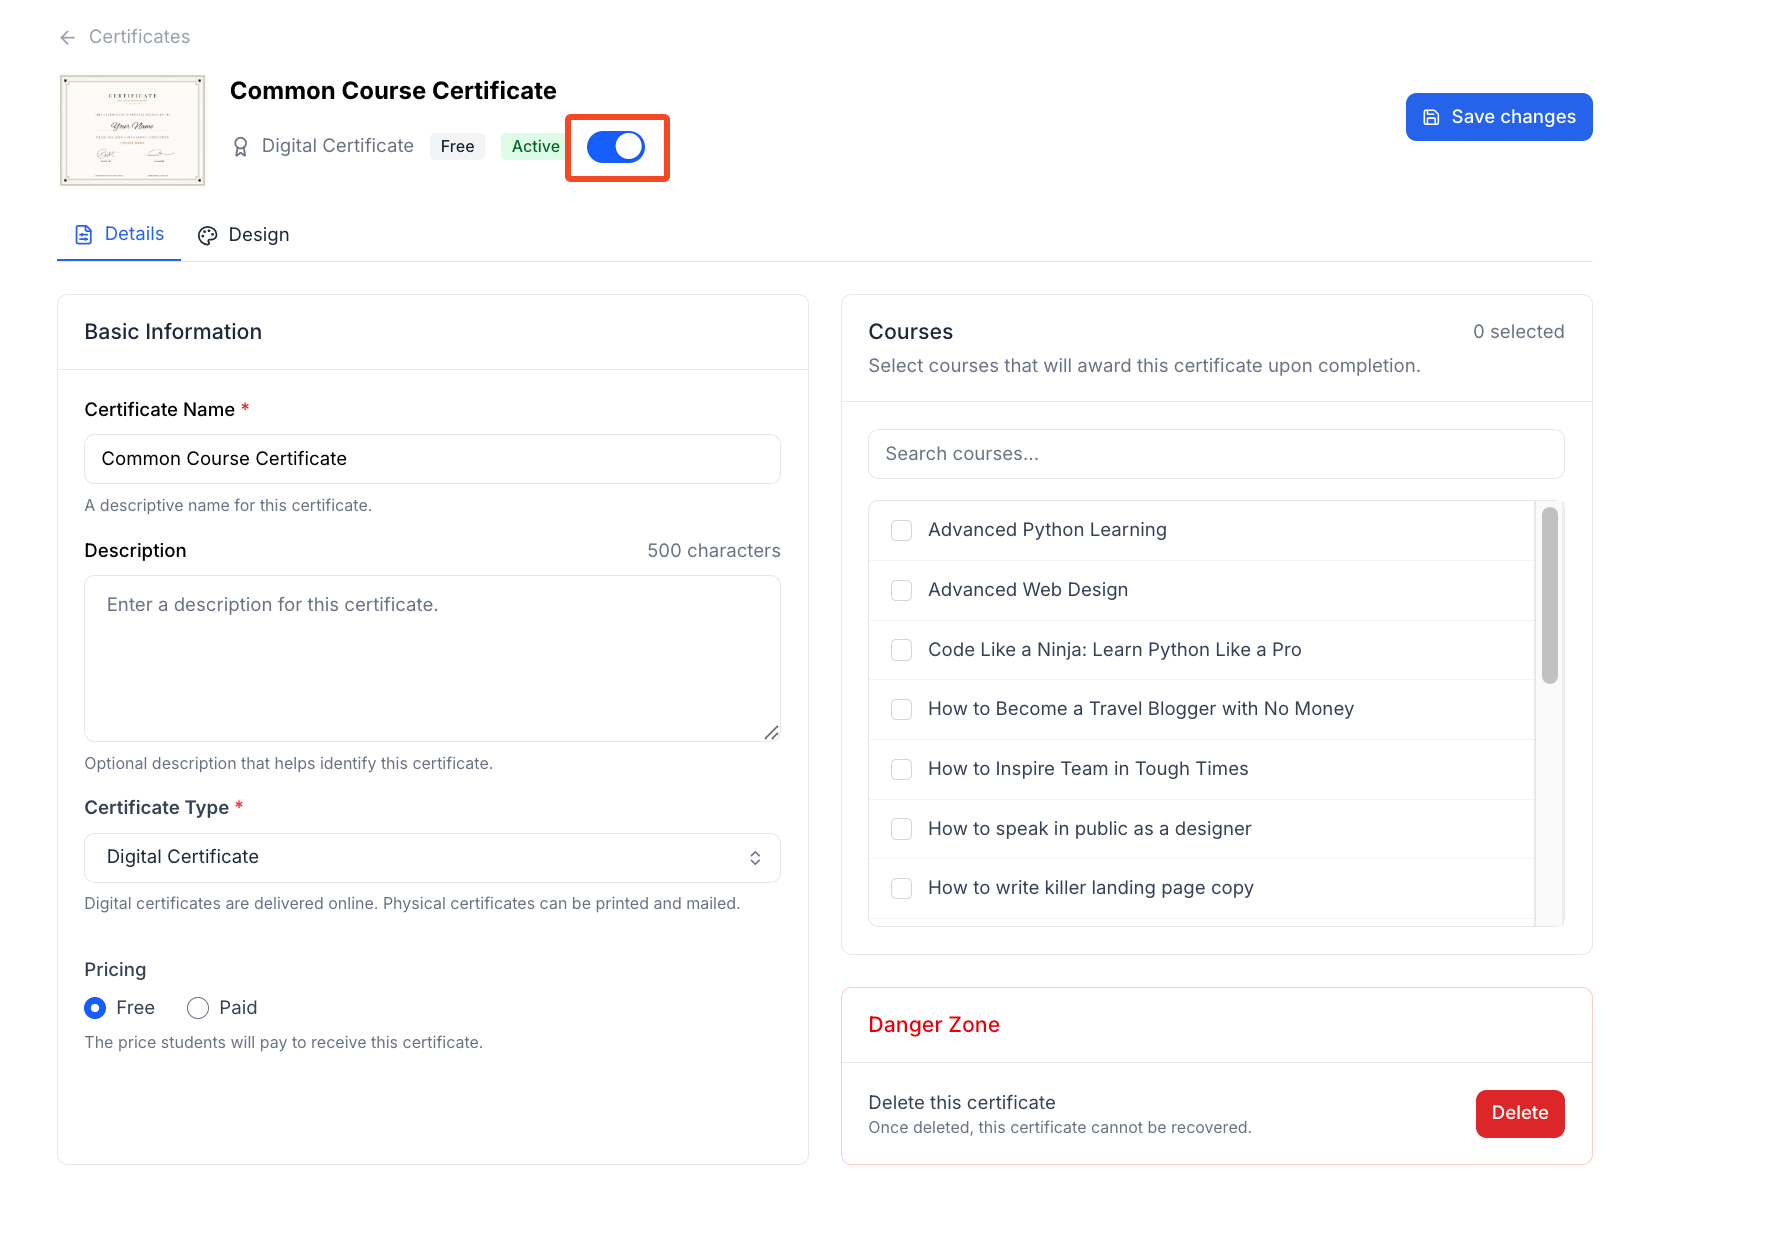
7. At the top, you will also see a toggle button that you can use to disable the certificate. In that case, this certificate will not be displayed to the students.
8. Once you are done, click on the “Save Changes” button. It will take a moment to save, and your certificate has been successfully created.
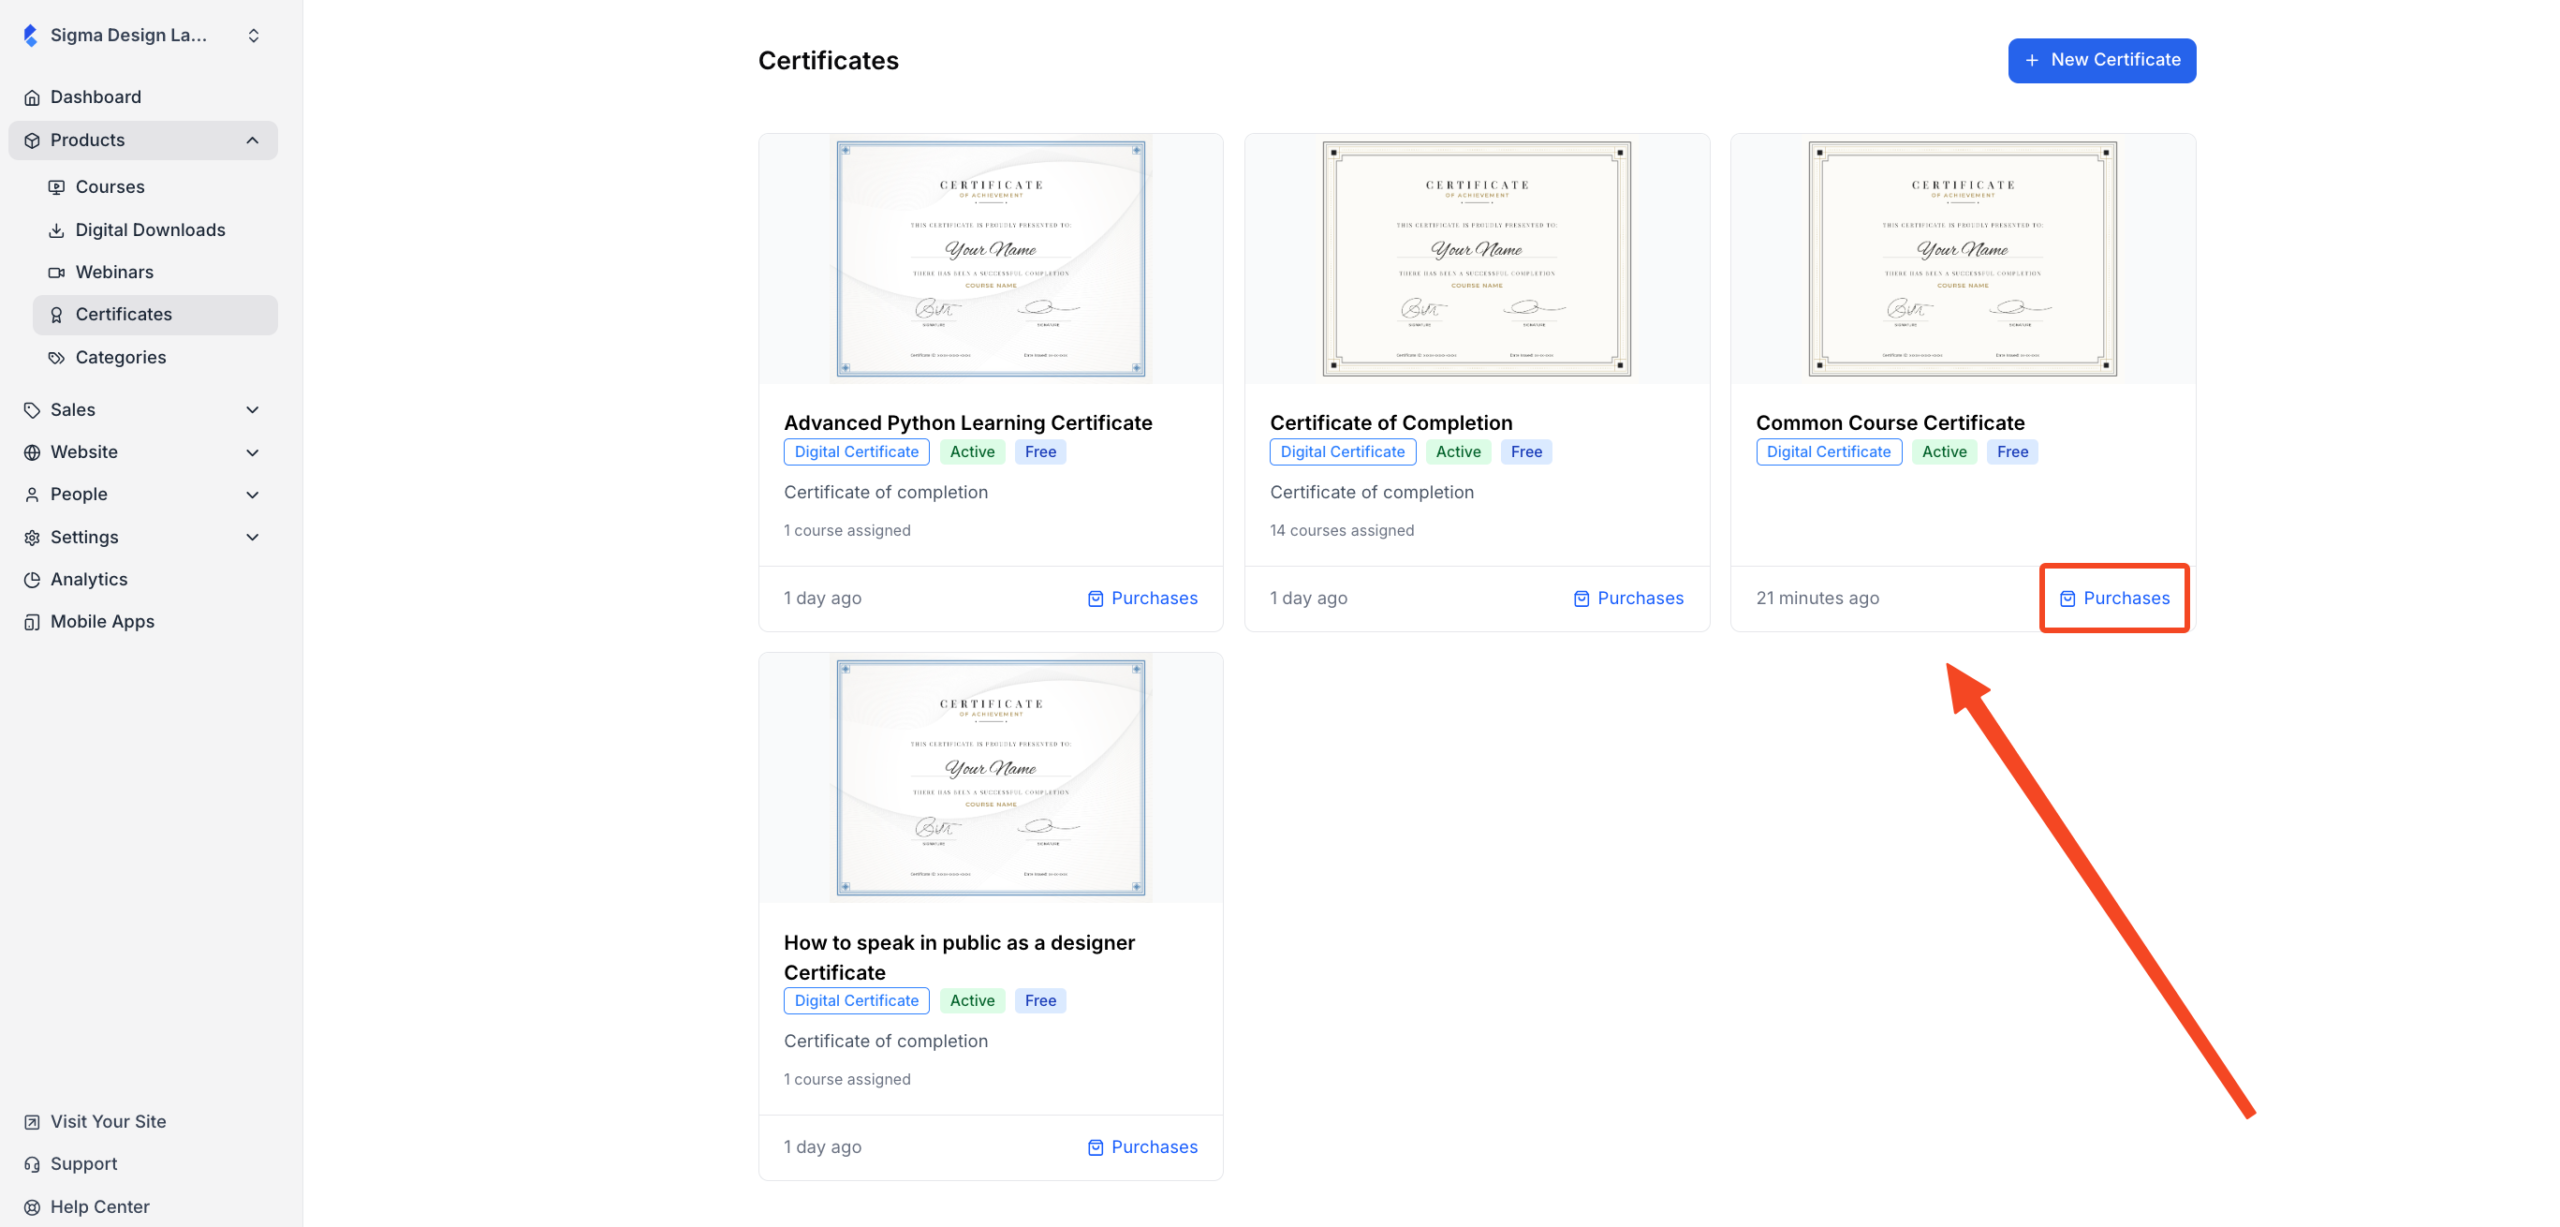
9. Now, when you go back to the “Certificates” page, you will see your certificate added there. You will also see a button named “Purchases.” Clicking this button will show you a list of students who purchased or downloaded this certificate.