Sessions define the duration and price of your coaching offering. Each session pairs a duration with a price. The default session appears on the product card and is pre-selected on the sales page.
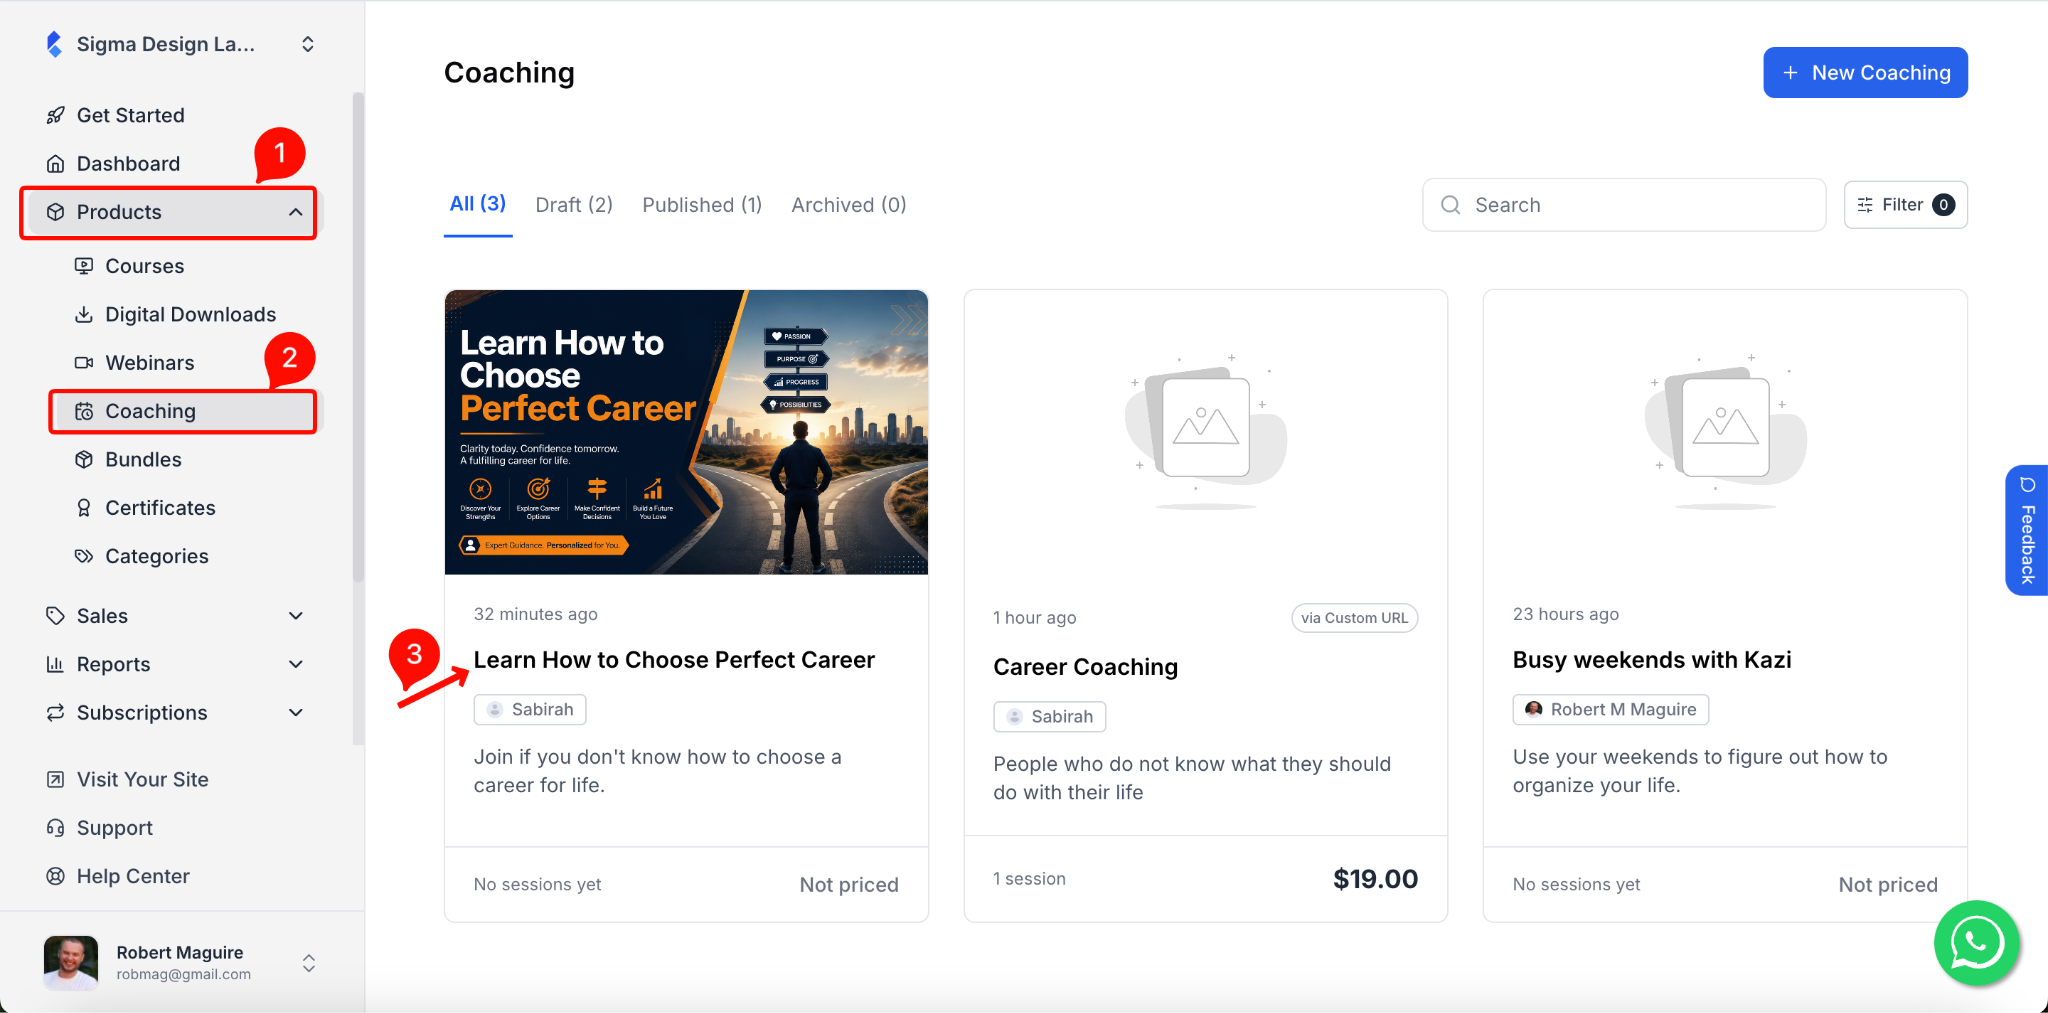
1. From your dashboard, go to Products > Coaching and select the coaching you want to add sessions to.
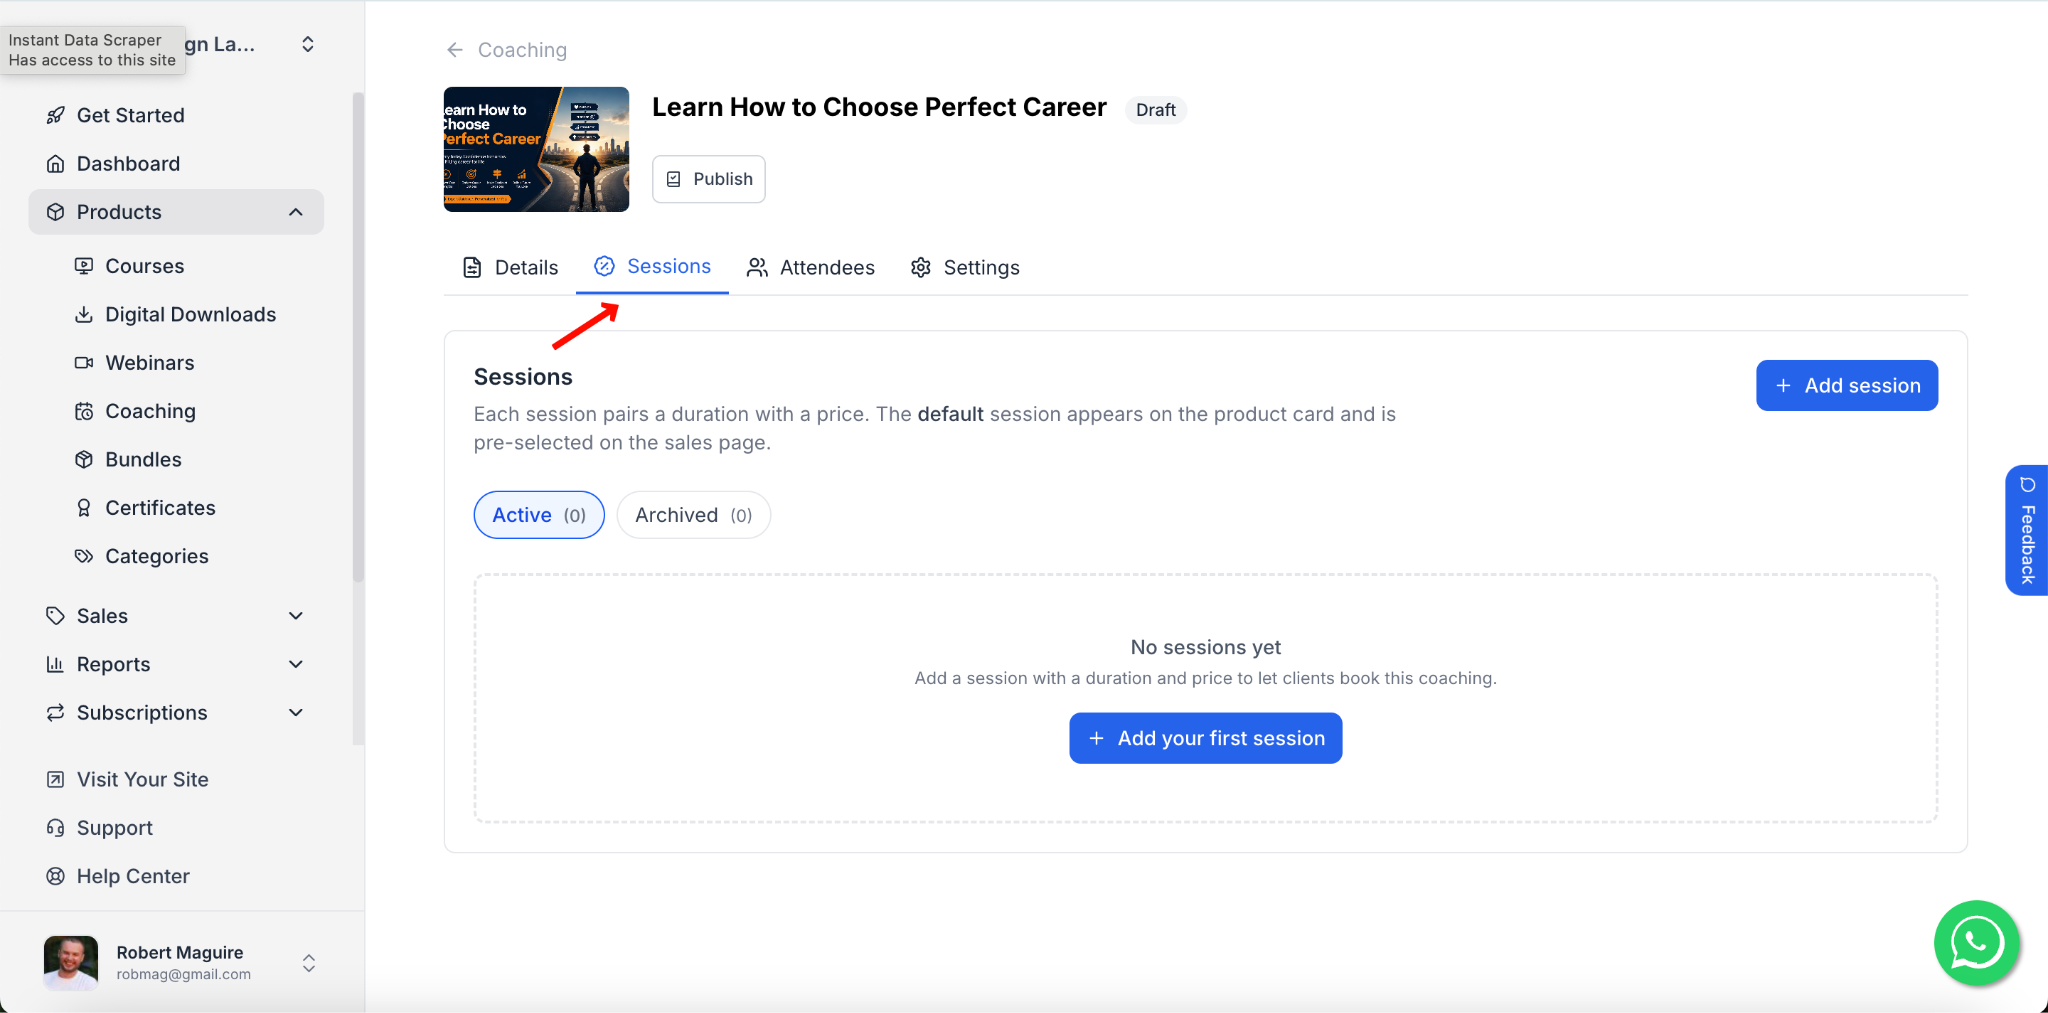
2. Inside the coaching editor, click on the Sessions tab. Then click on the “Add Session” button.
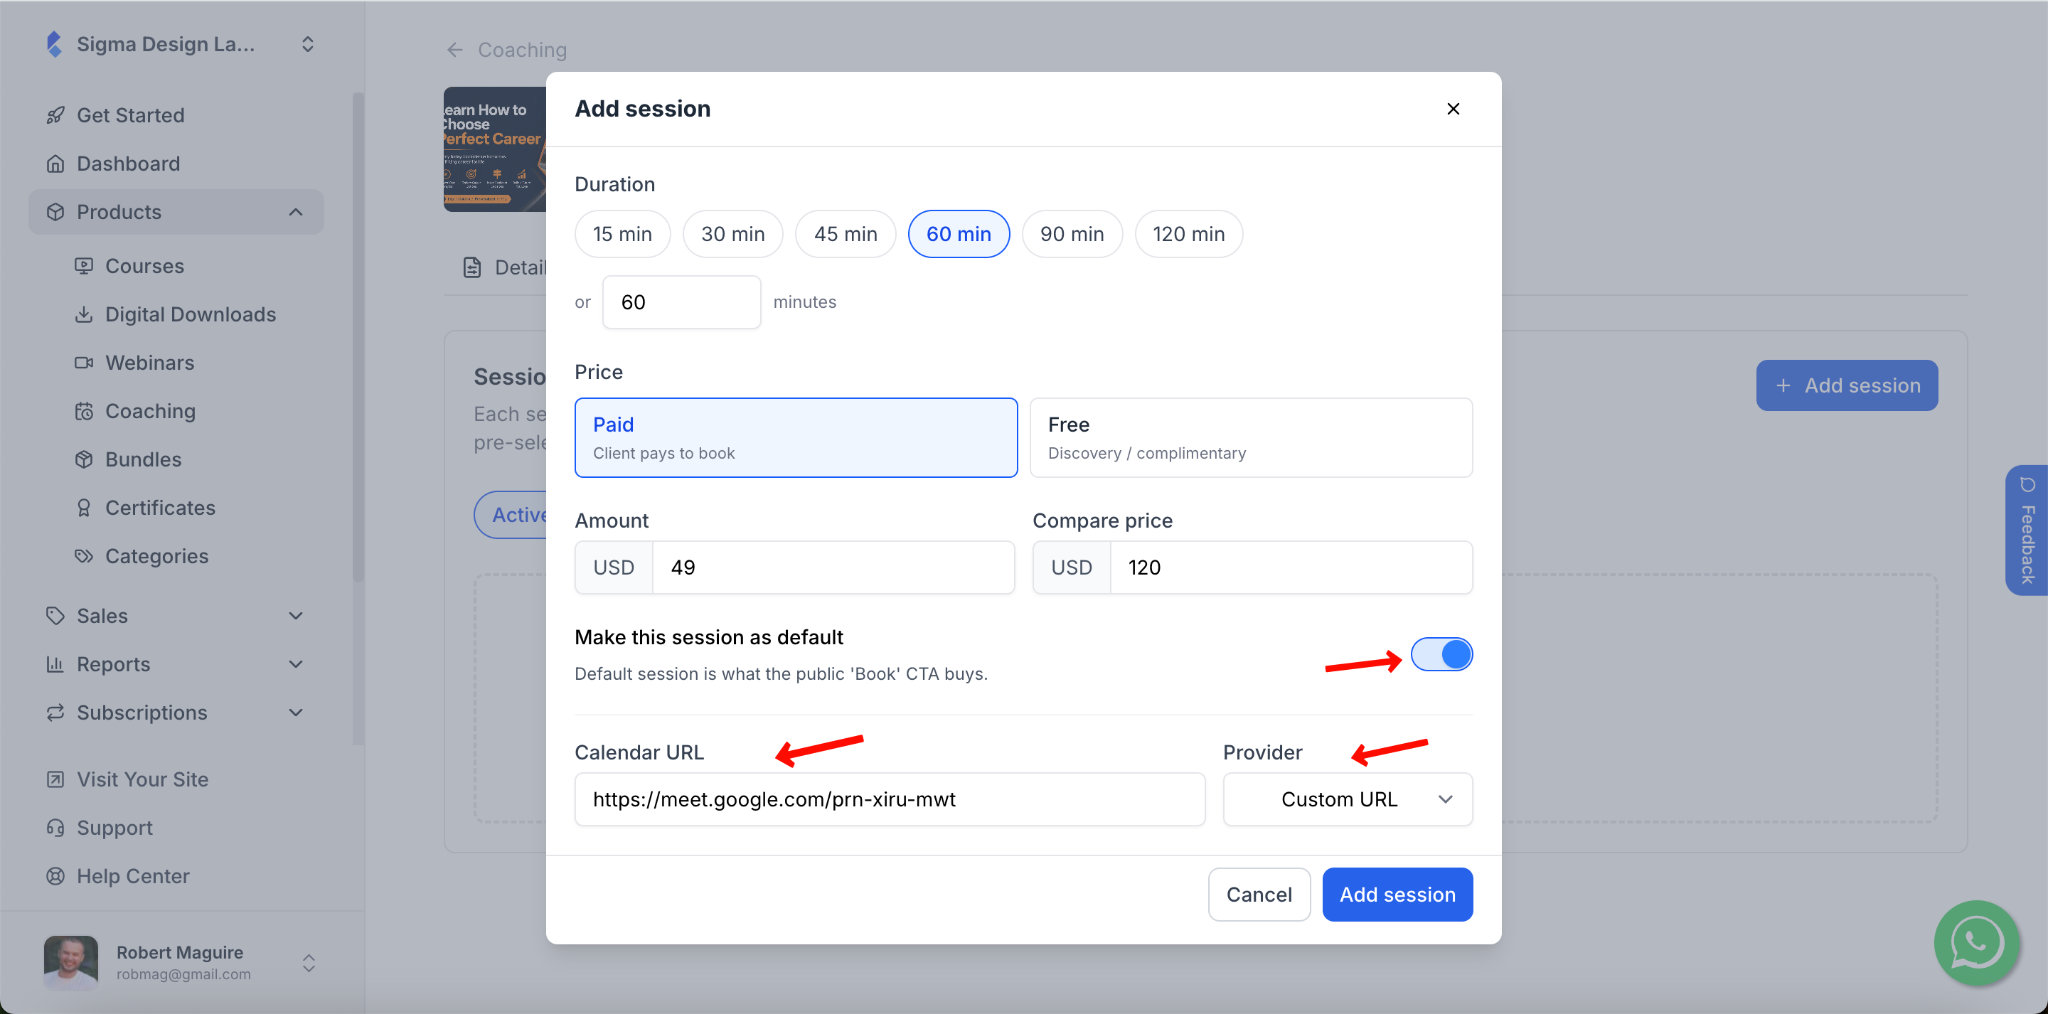
3. Once you click on the “Add Session” button, a pop-up will appear where you can configure the session. Here you can set the duration, pricing, calendar link, and more for this session.
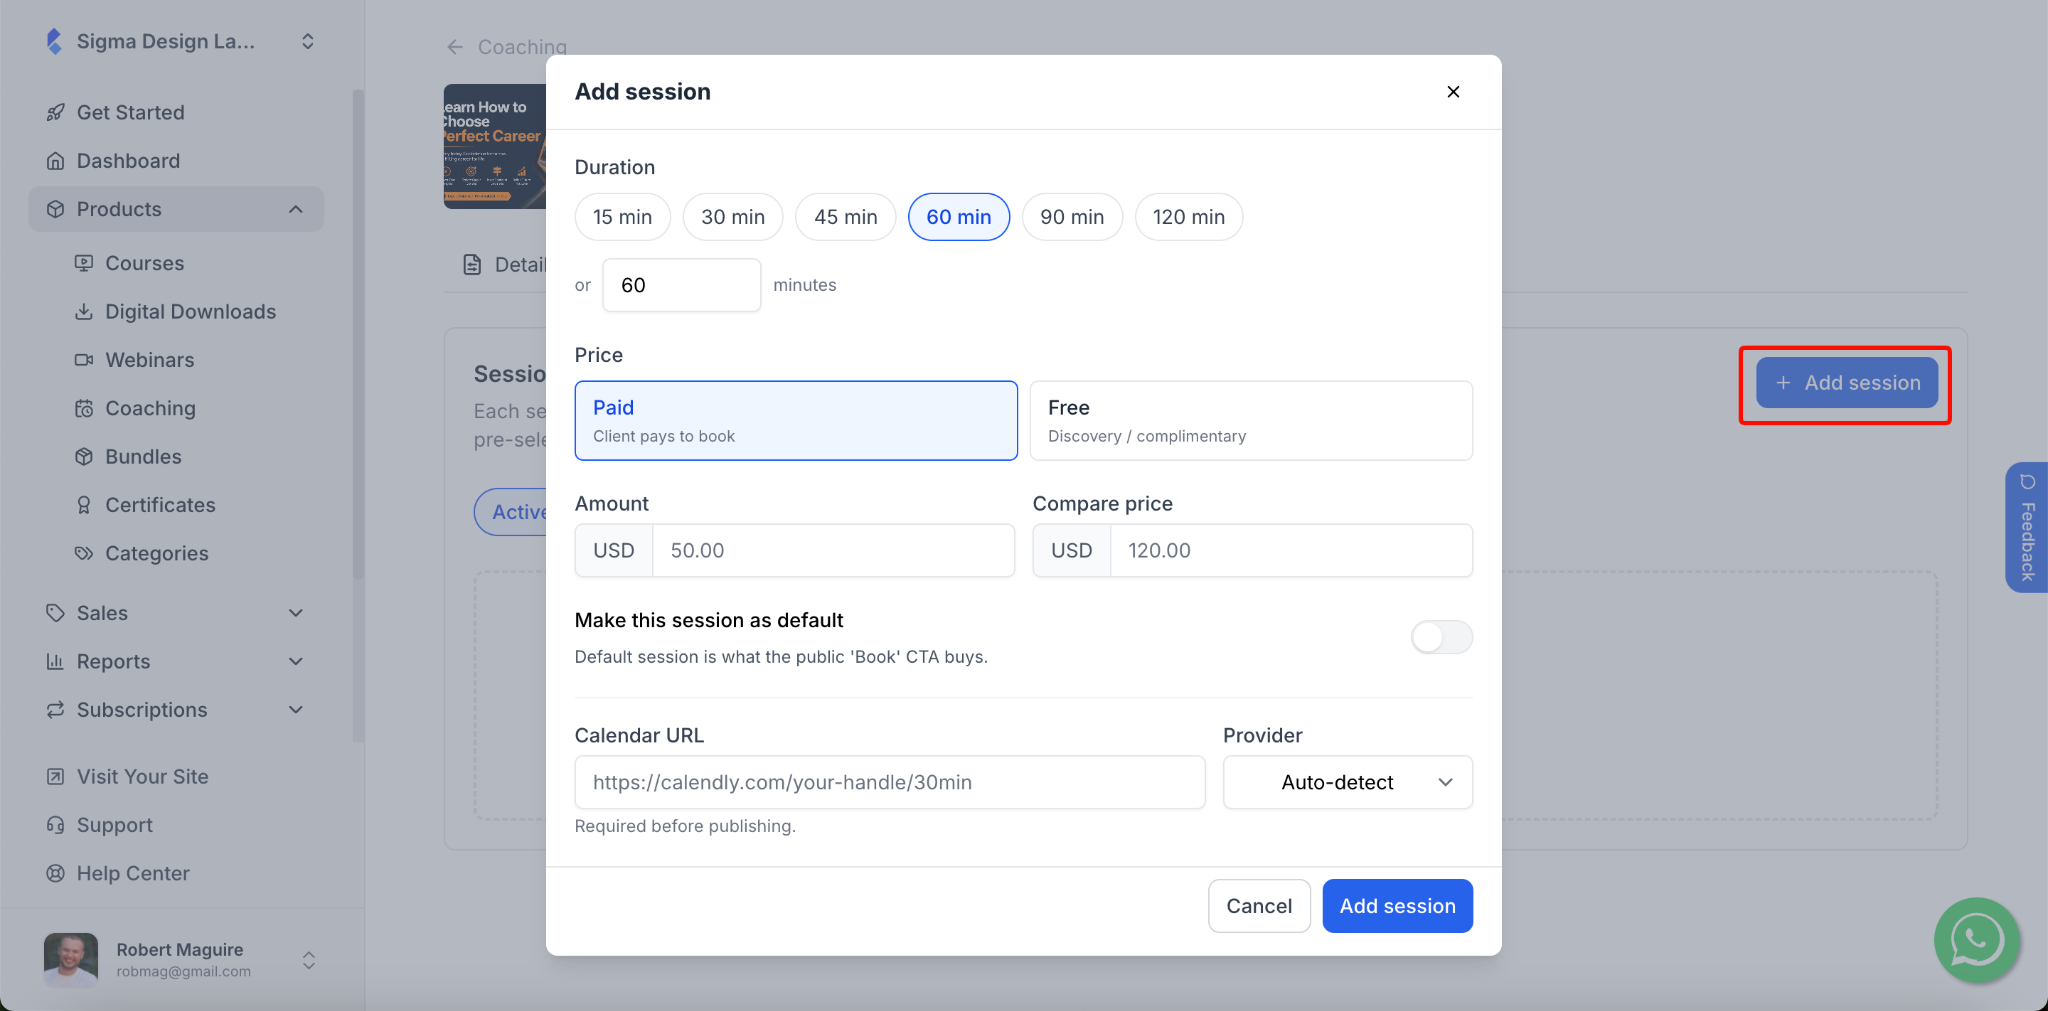
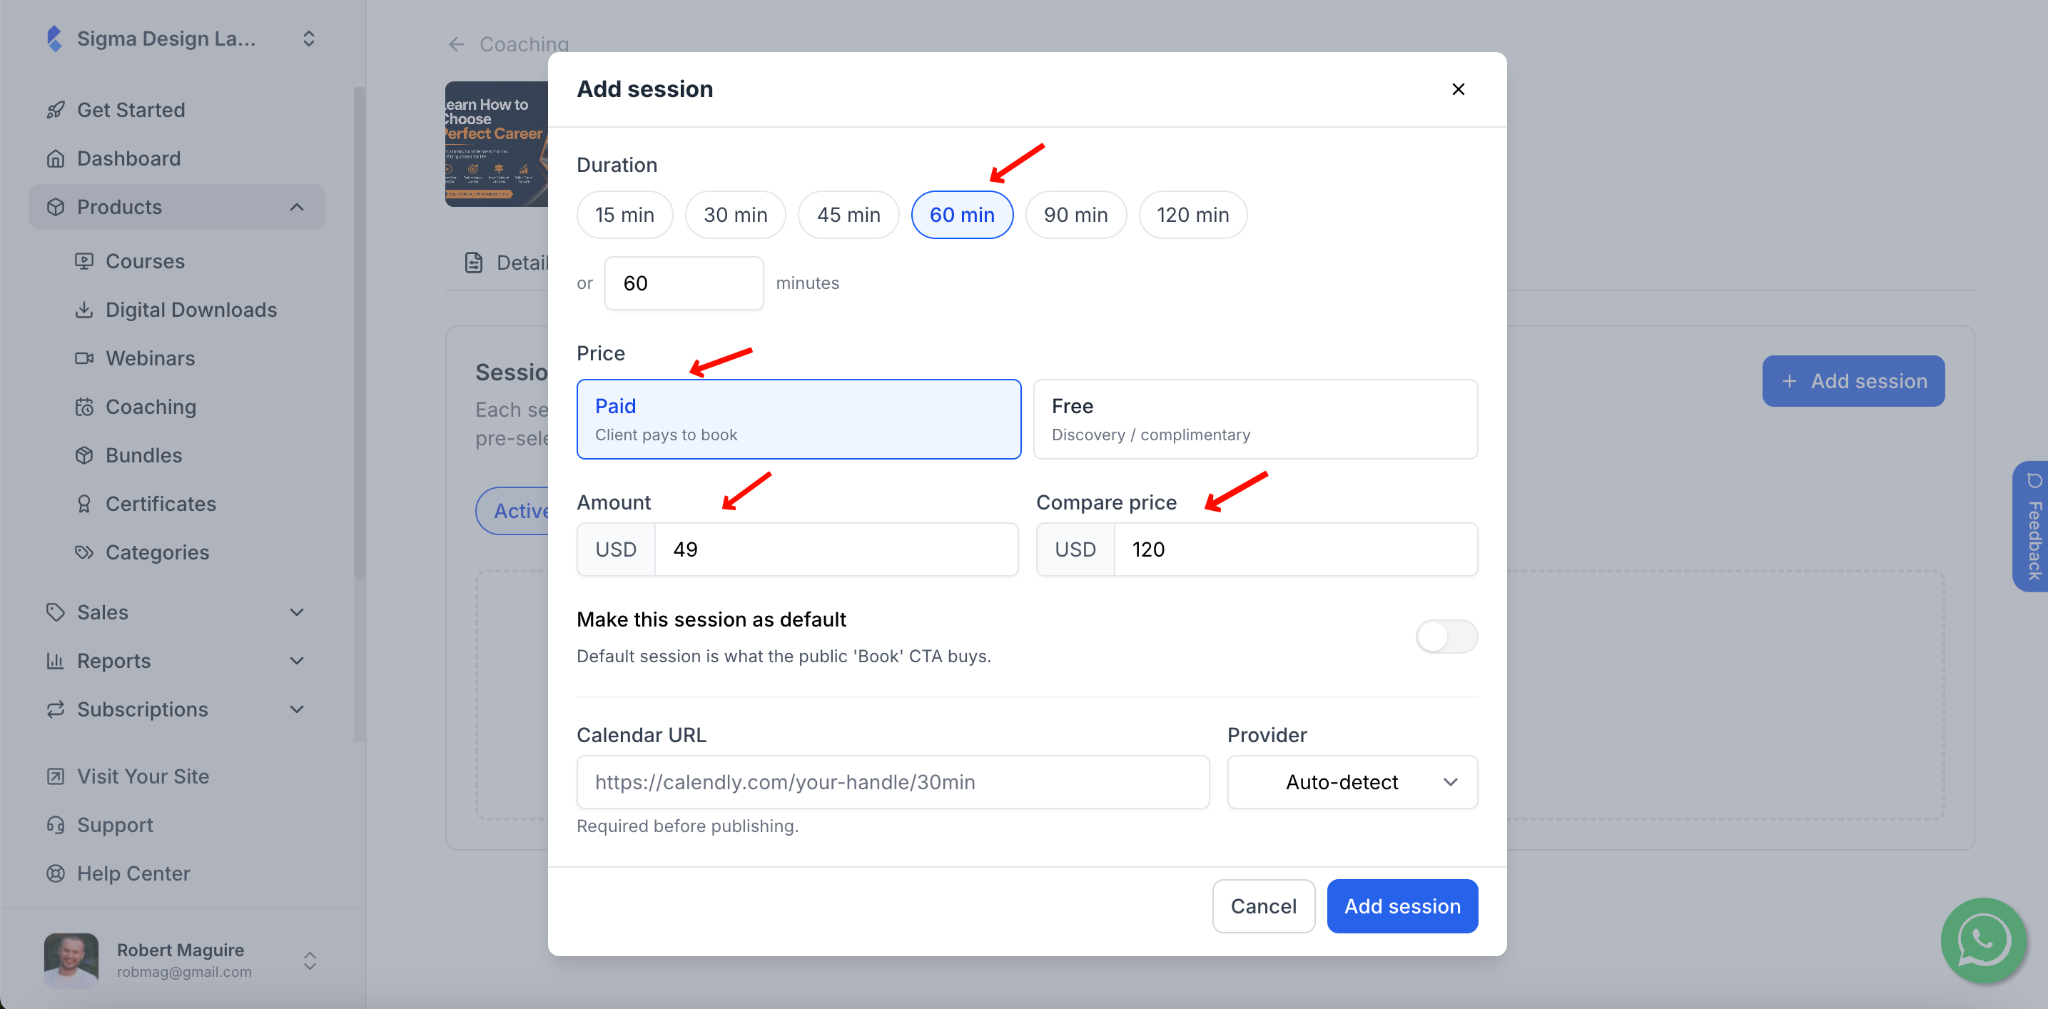
4. For starters, you can select the Duration for this session. You can choose from preset options – 15, 30, 45, 60, 90, or 120 minutes – or enter a custom duration manually.
5. Then, you can select the pricing type:
- Paid – the client pays to book this session
- Free – use this for discovery or complimentary sessions
If you selected Paid, enter the Amount. You can also set a Compare price to show a strikethrough original price on the sales page.
6. Toggle “Make this session as default” if you want this session to be pre-selected when clients visit the sales page. The default session is what the public “Book” button uses. You can only have one default session at a time, so enabling this on a new session will remove the default status from the previous one.
7. In the Calendar URL field, you can paste a specific booking link for this session. Then select the Provider from the dropdown. Available options are:
- Auto-detect – Klasio will identify the provider automatically
- Calendly
- Cal.com
- SavvyCal
- Custom URL use this if you have a different booking tool
If you have already set a default calendar URL on the coaching’s Details tab, you don’t need to add one here – Klasio will use that by default. But if you haven’t set a default URL, then you must provide a calendar link here for each session individually. Without a calendar URL on either the session or the Details tab, you won’t be able to publish the coaching.
8. Once you are satisfied with everything, click on “Add session”. The session will now appear in the Sessions tab.
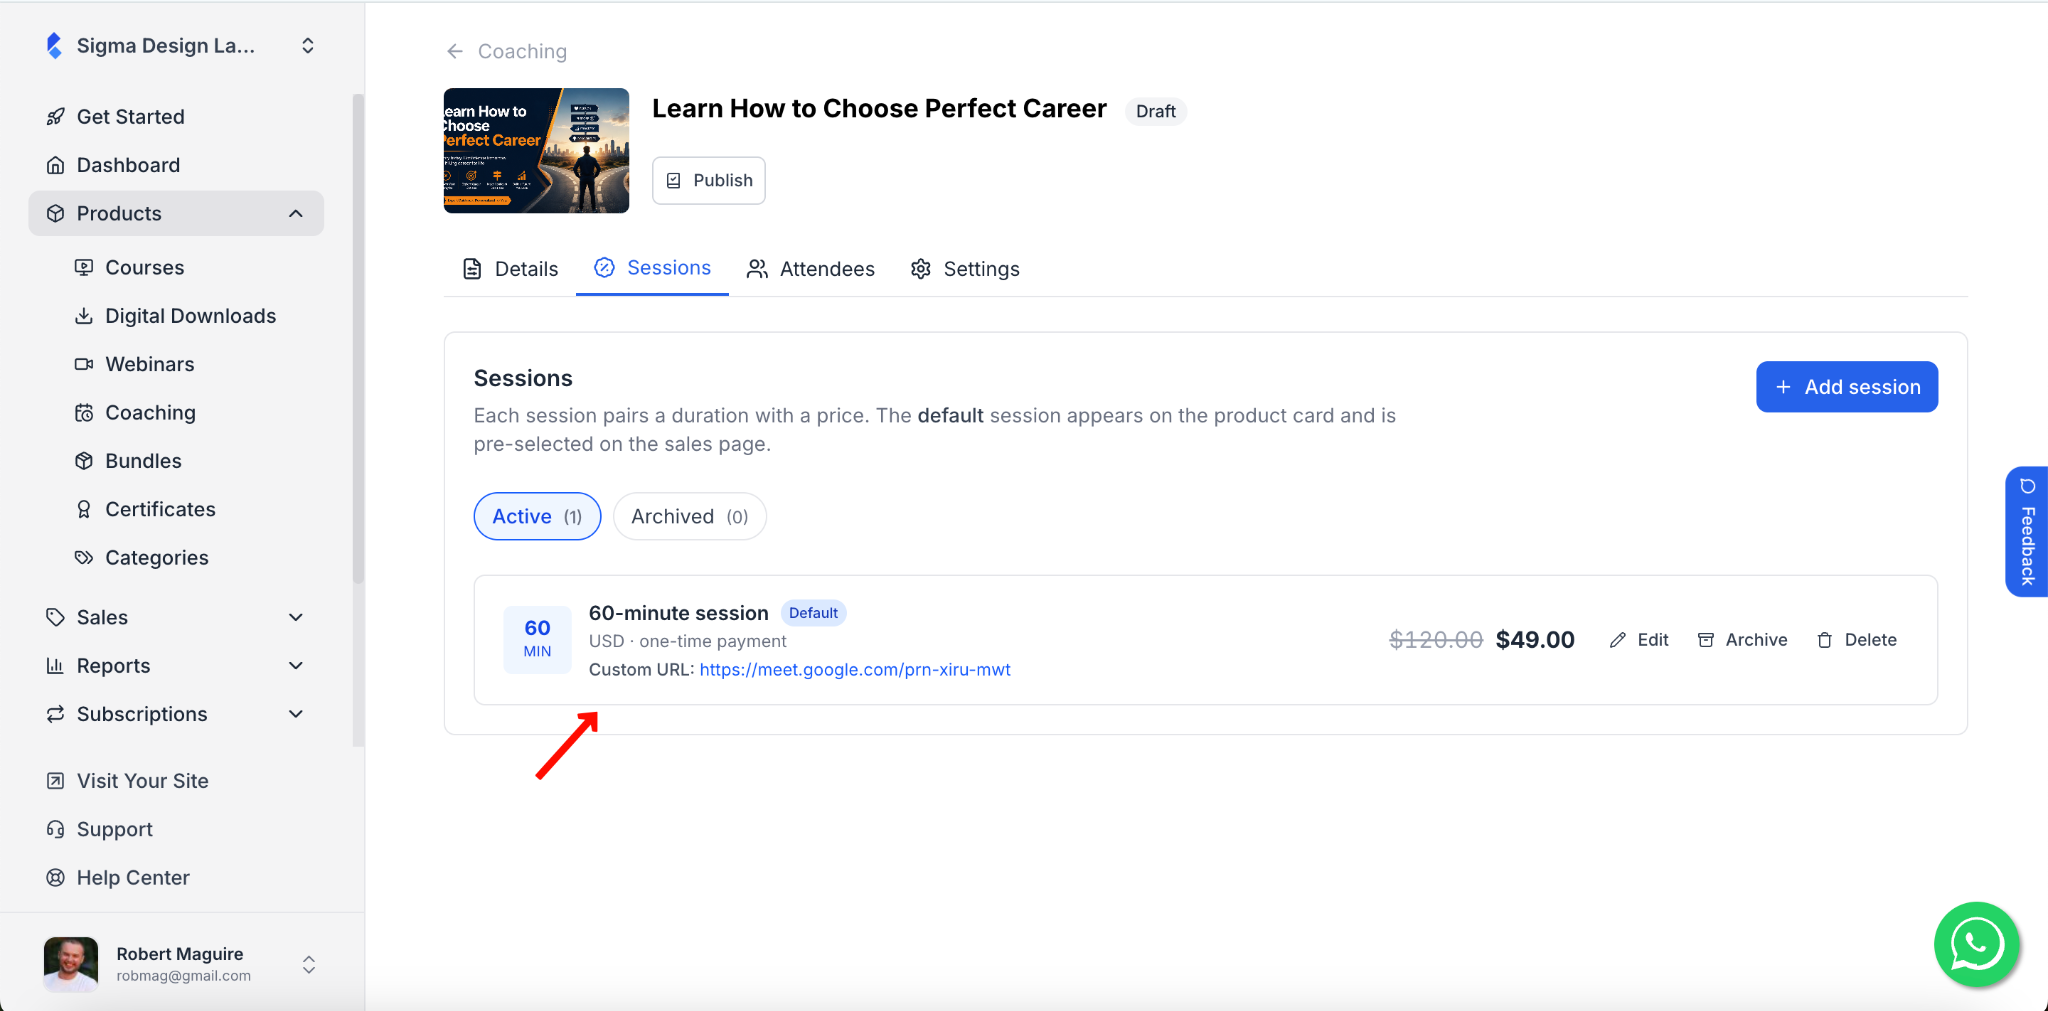
Managing Existing Sessions
From the Sessions tab, you can manage your existing sessions at any time.
- Edit – update the duration, price, or calendar link
- Archive – hide the session without deleting it
- Delete – permanently remove the session