To create a new coaching program in Klasio, follow the steps below.
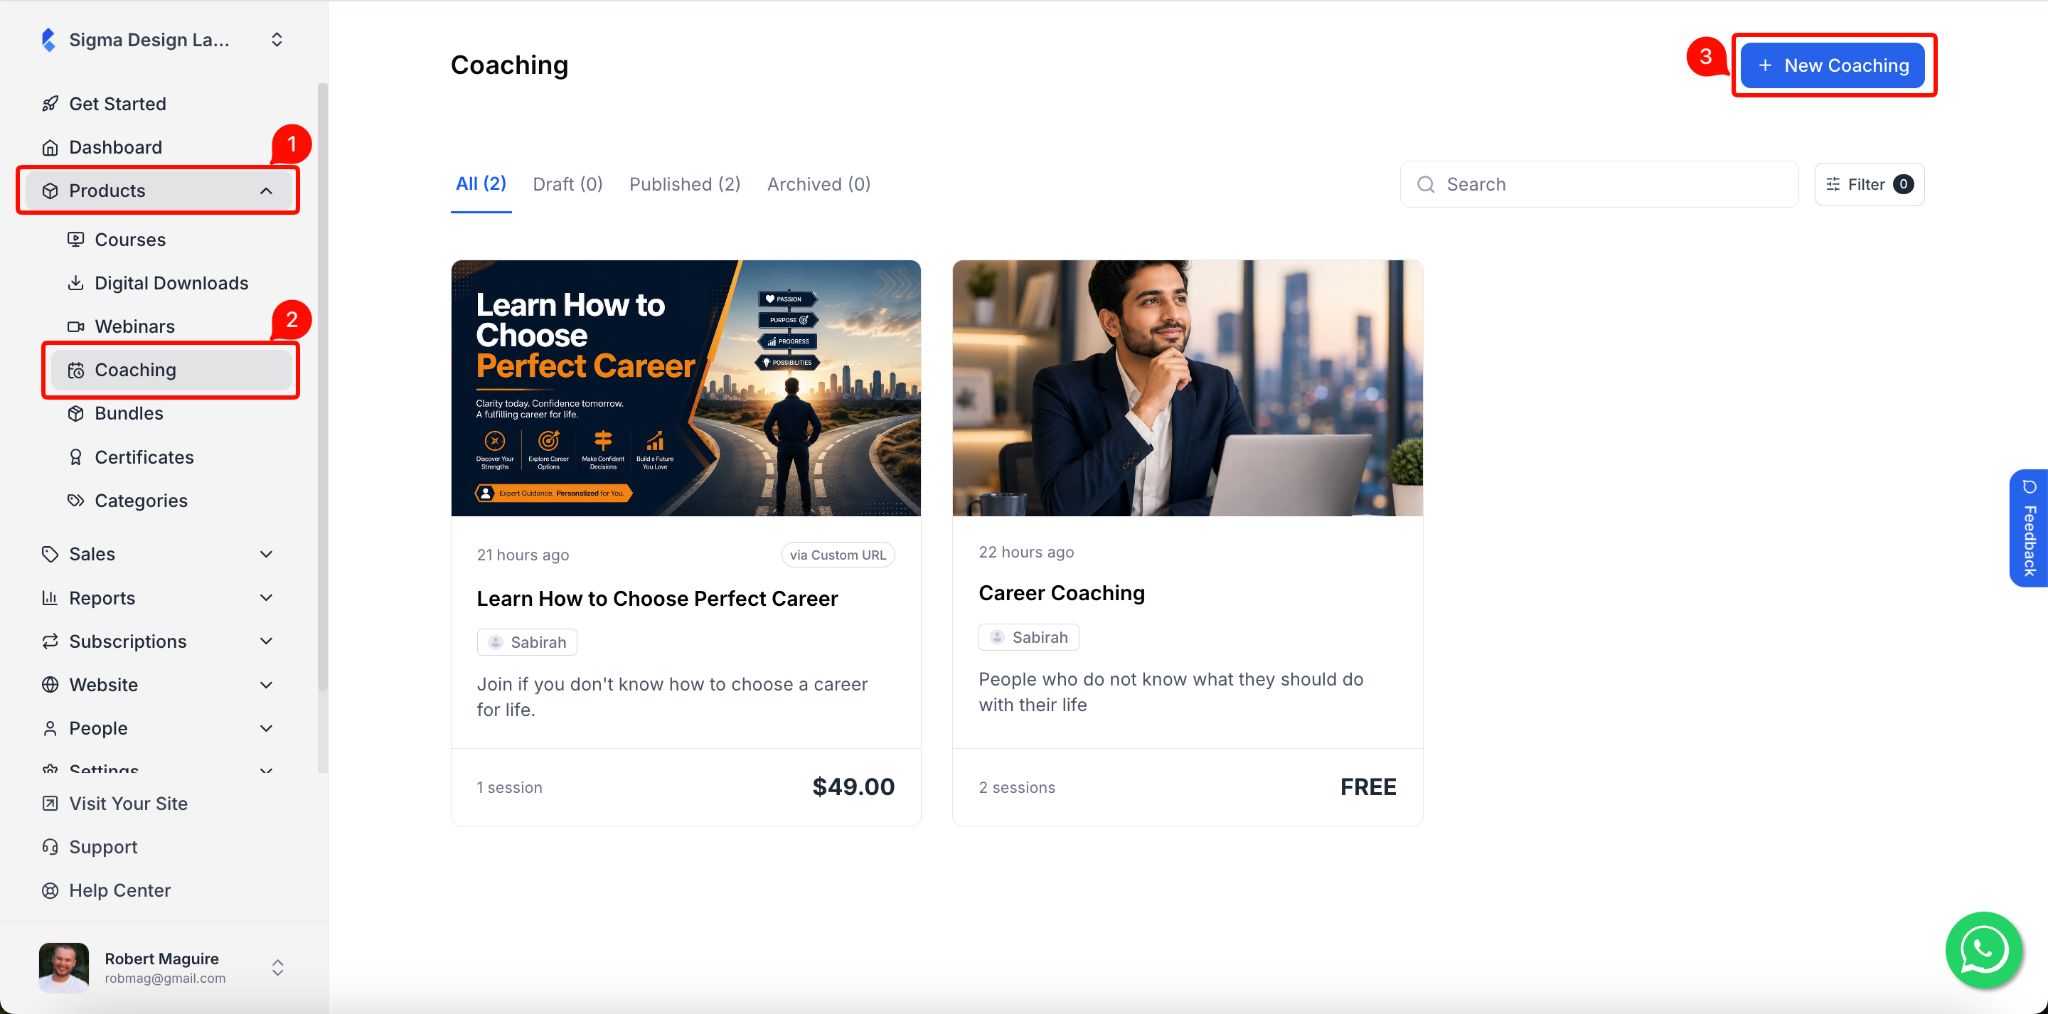
1. From your dashboard, go to Products > Coaching. Then, click the + New Coaching button in the top right corner.
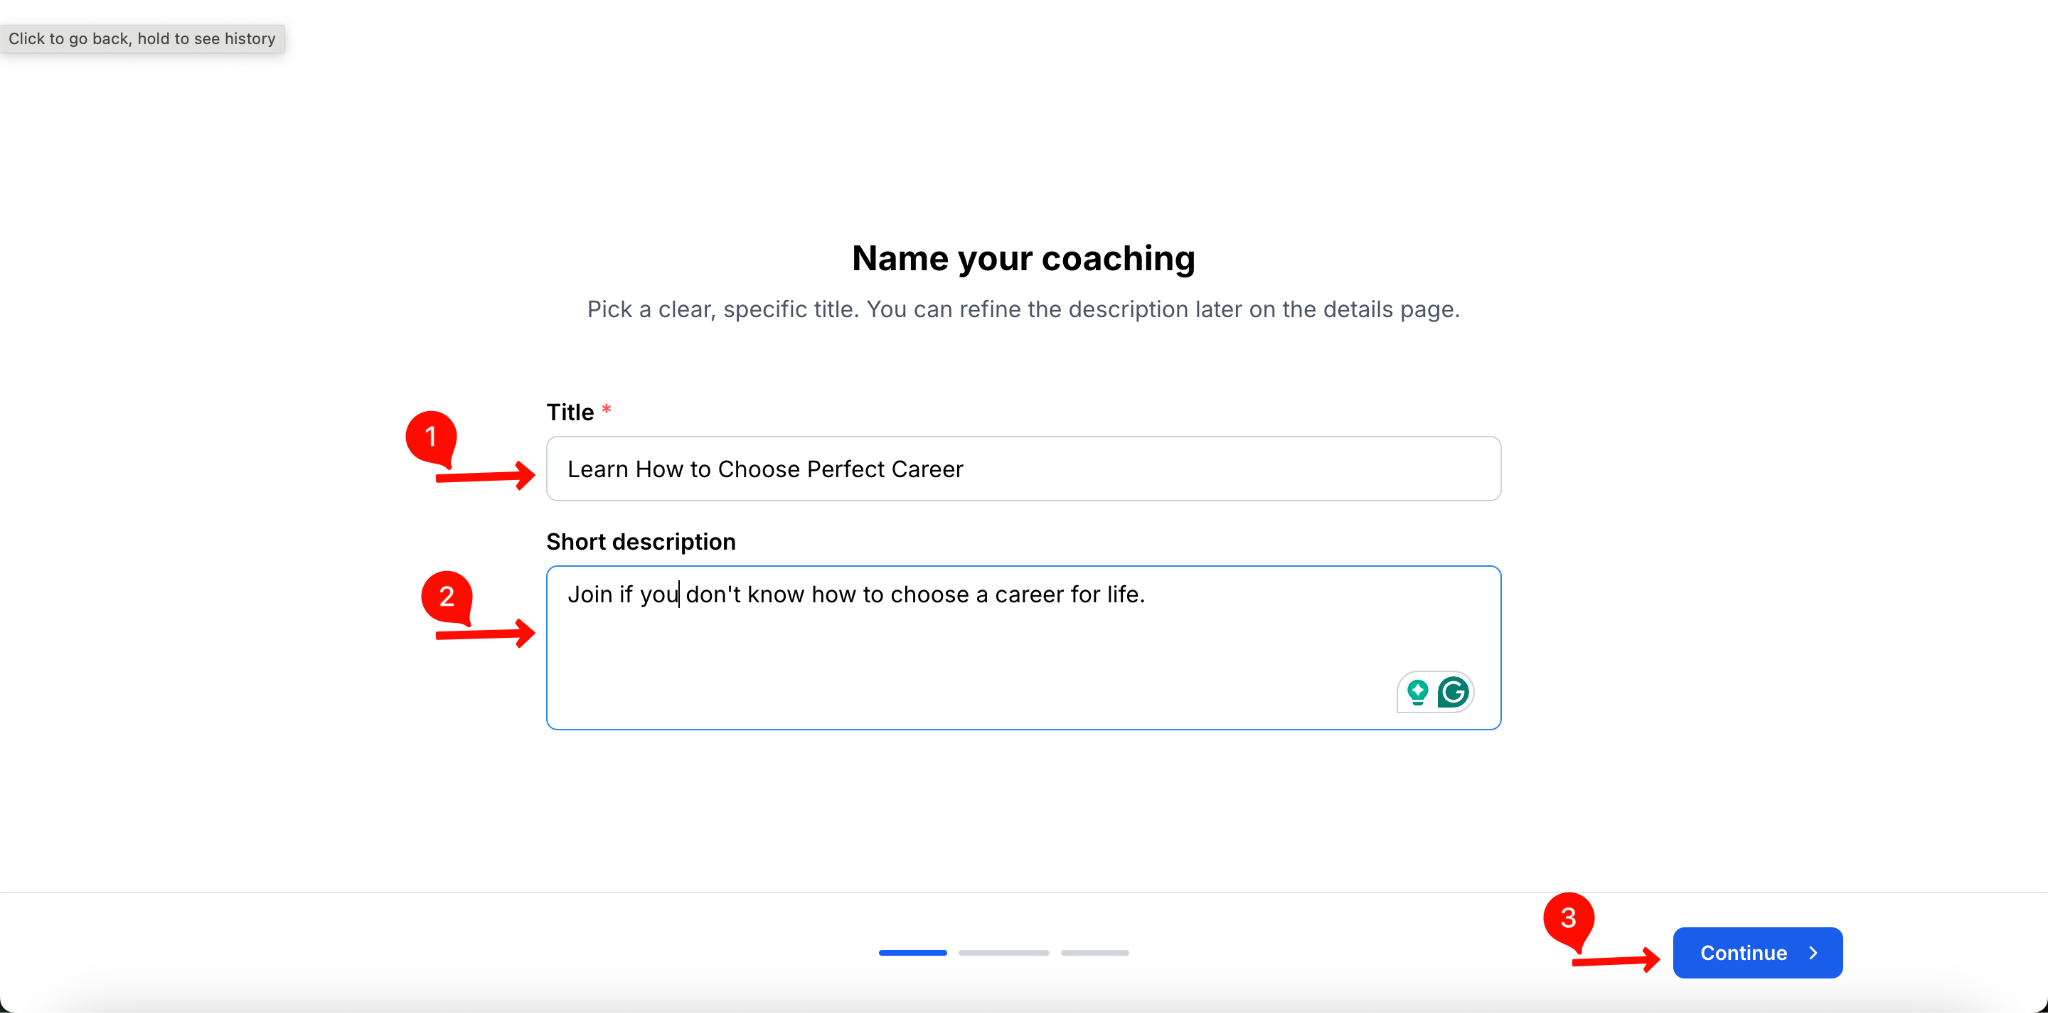
2. On the next screen, enter a Title for your coaching. Pick a clear, specific name that tells potential clients what the coaching is about.
You can also add a Short Description to briefly explain who this coaching is for and what clients will walk away with. This can be refined later from the details page.
Once you do that, click Continue.
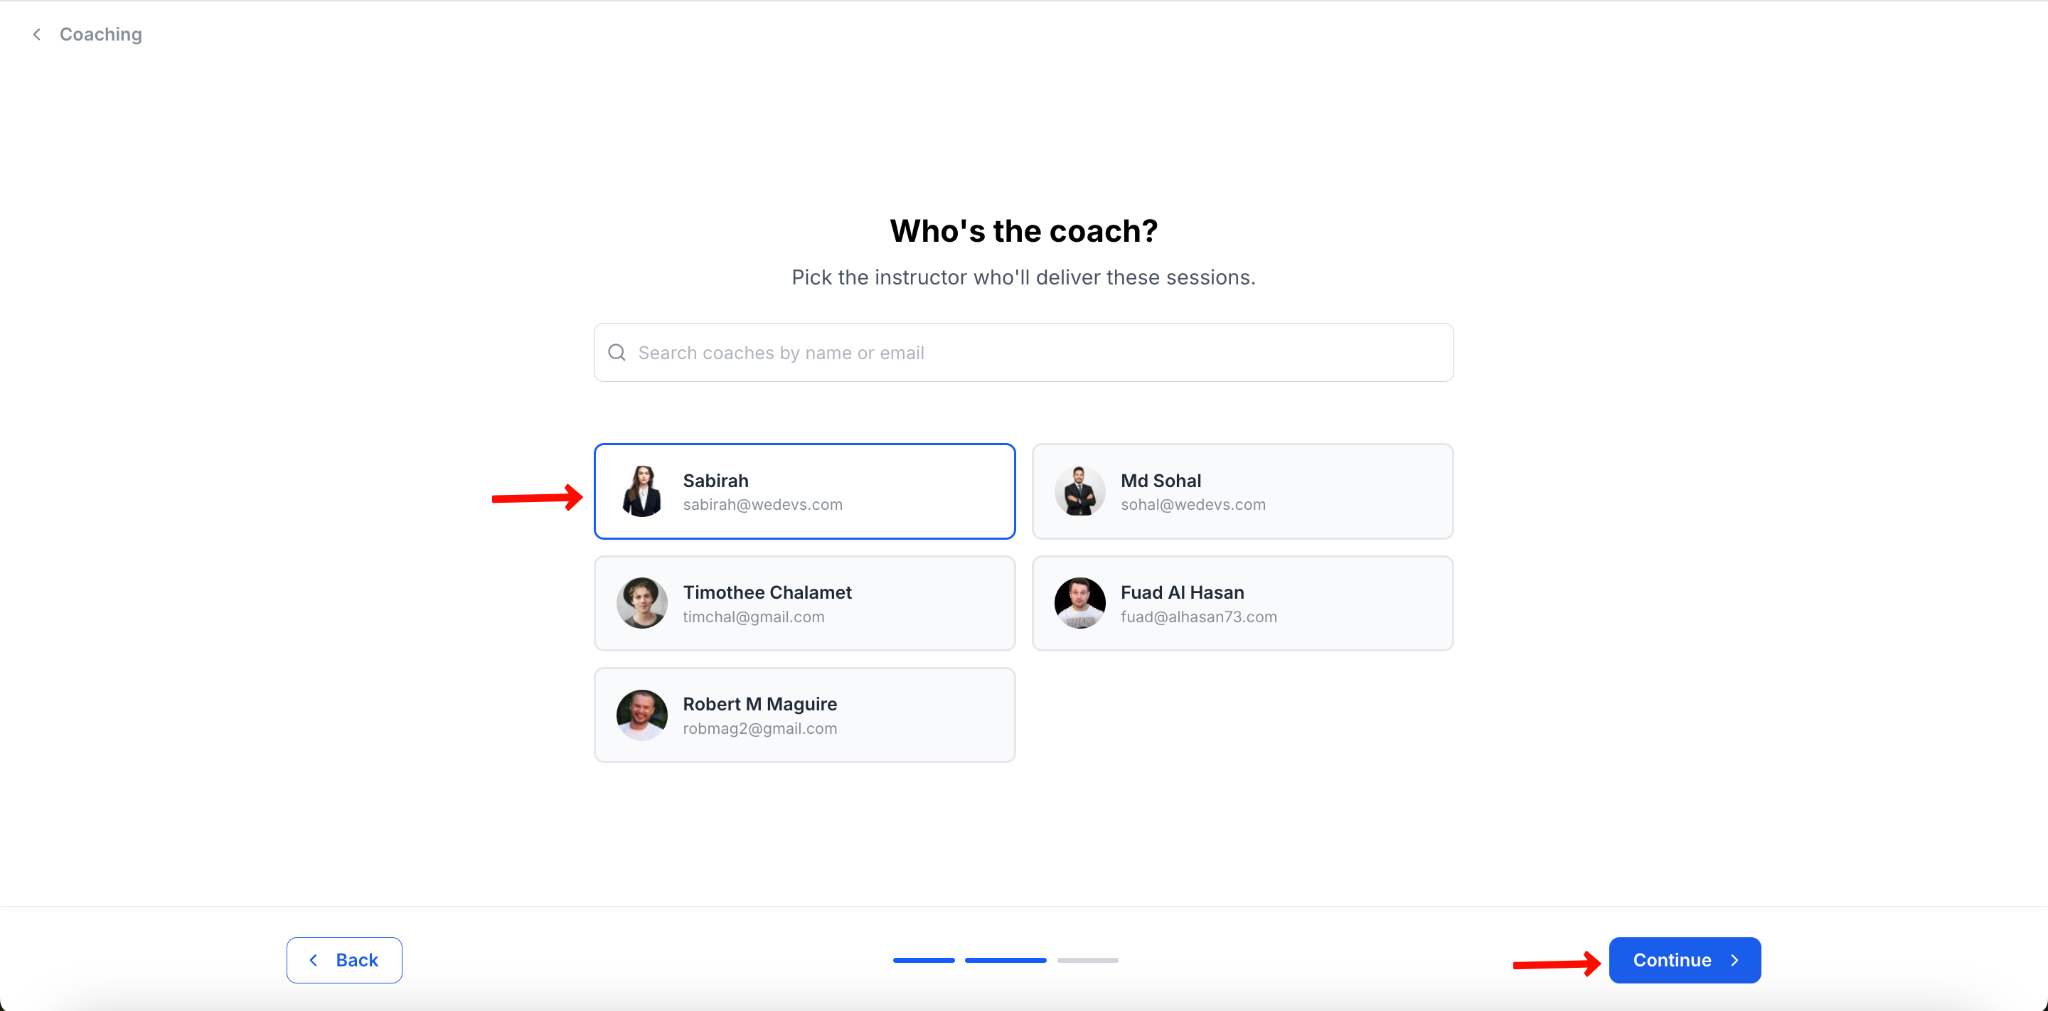
3. On the next screen, select who will deliver this coaching by choosing a coach from the list. You can also search by name or email.
The available coaches will be based on the instructors you have on your Klasio website. If you don’t see the appropriate coach, you will have to add a new instructor. Also, keep in mind that you can’t add multiple coaches for coaching.
After choosing the right coach, click on “Continue” to move forward.
4. After clicking Continue. You will now be taken to the coaching editor where you can complete setting up your coaching. The coaching editor has 4 tabs: Details, Sessions, Attendees, and Settings. We will go through each one of these to paint the complete picture.
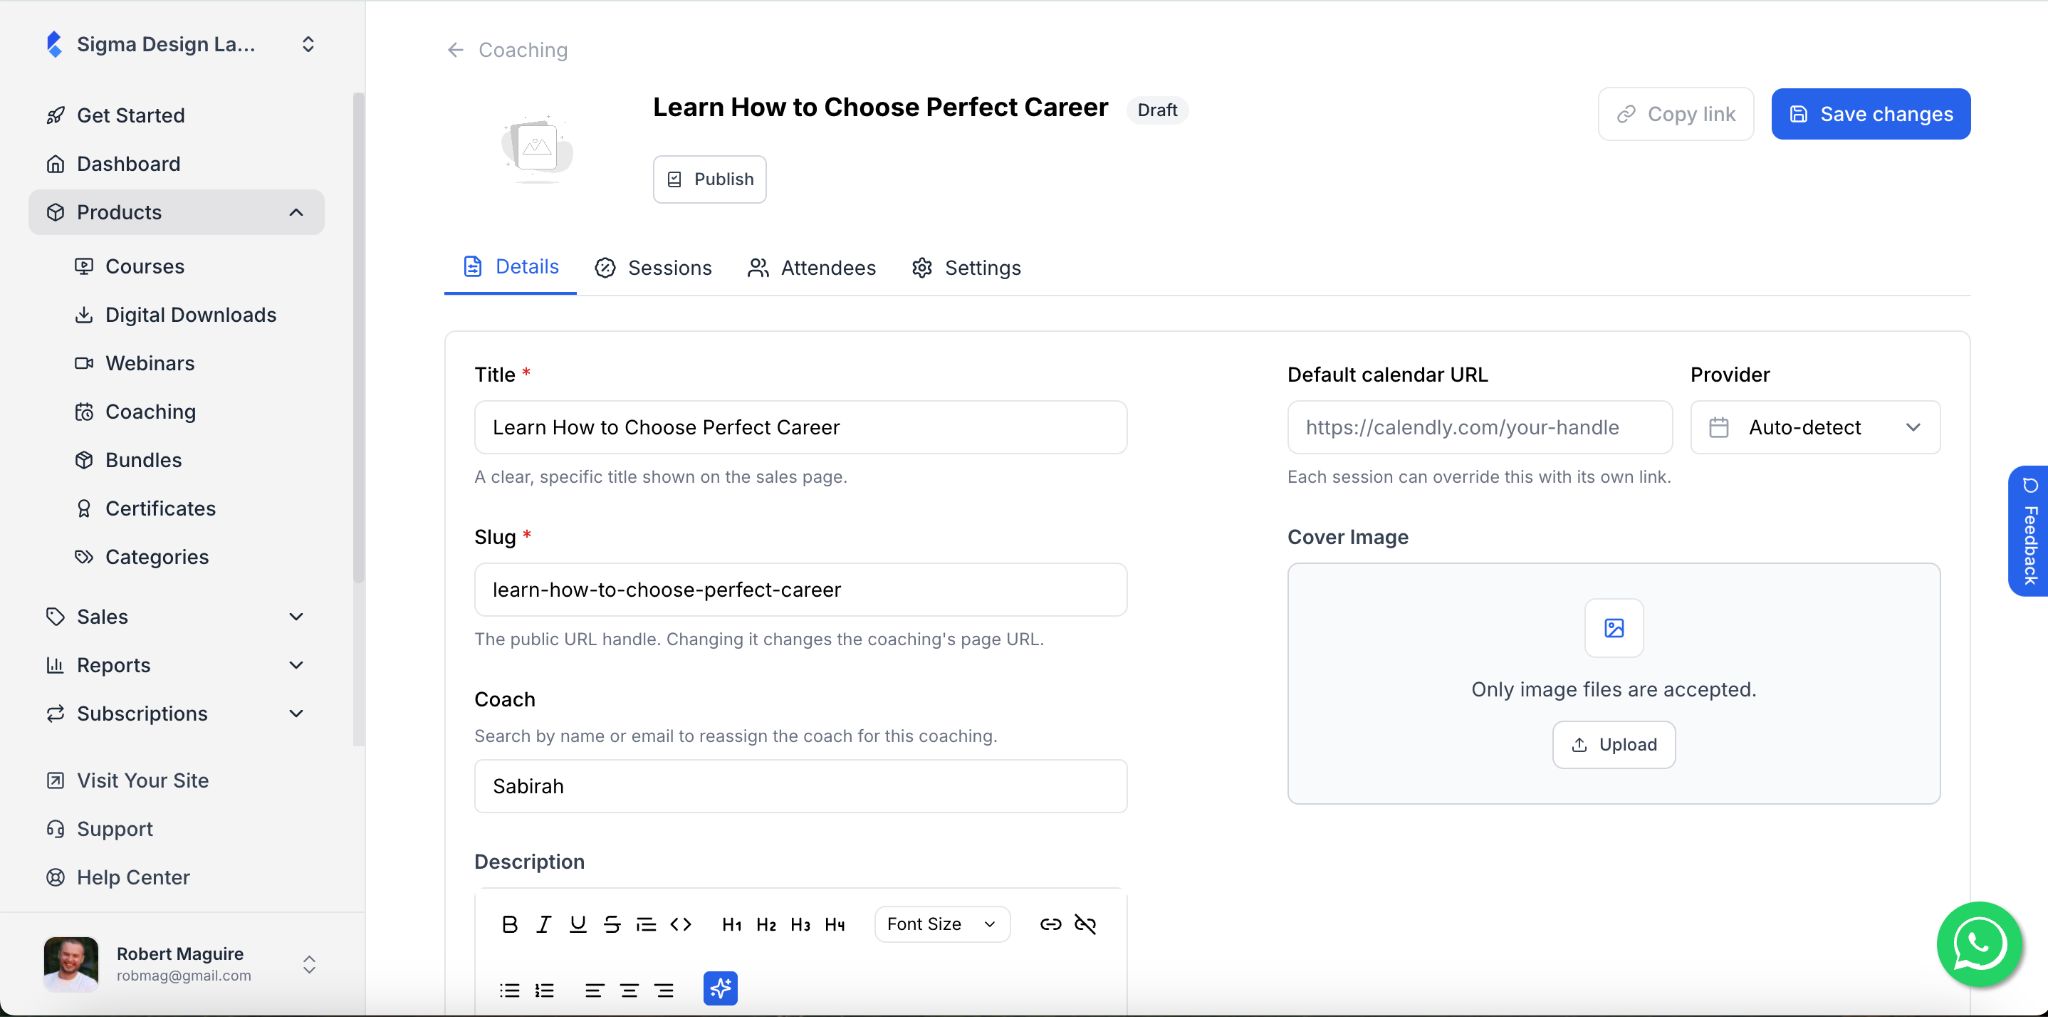
Details tab is where you set up the core information for your coaching page. Apart from the title, description, and coach that you have added earlier, you can also add the following information:
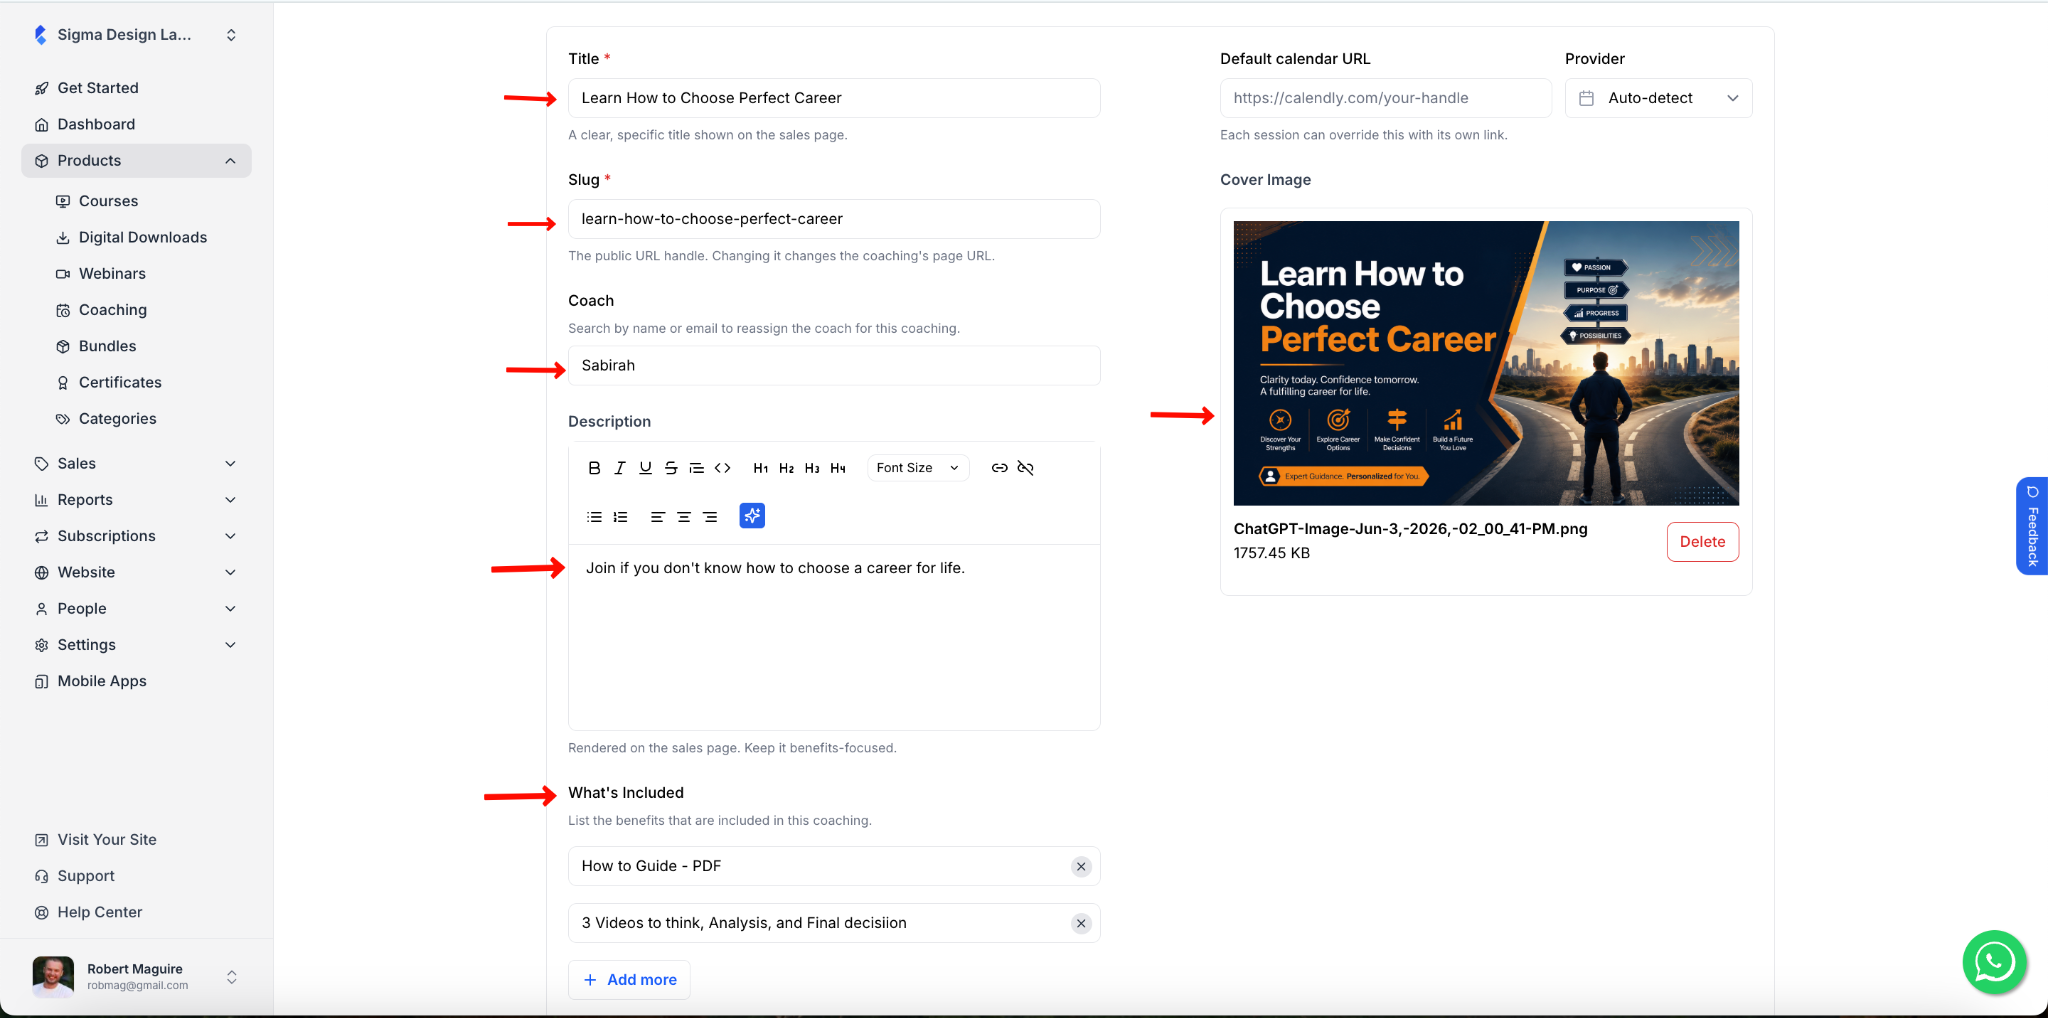
01. The Slug is automatically generated from the title. It sets the public URL for your coaching page. You can edit it if needed.
02. Under What’s Included, list the benefits that come with this coaching. Click + Add more to add additional items. You can add as many benefits as you want. Empty items will be ignored.
03. Upload a Cover Image for your coaching using the uploader. Only image files are accepted.
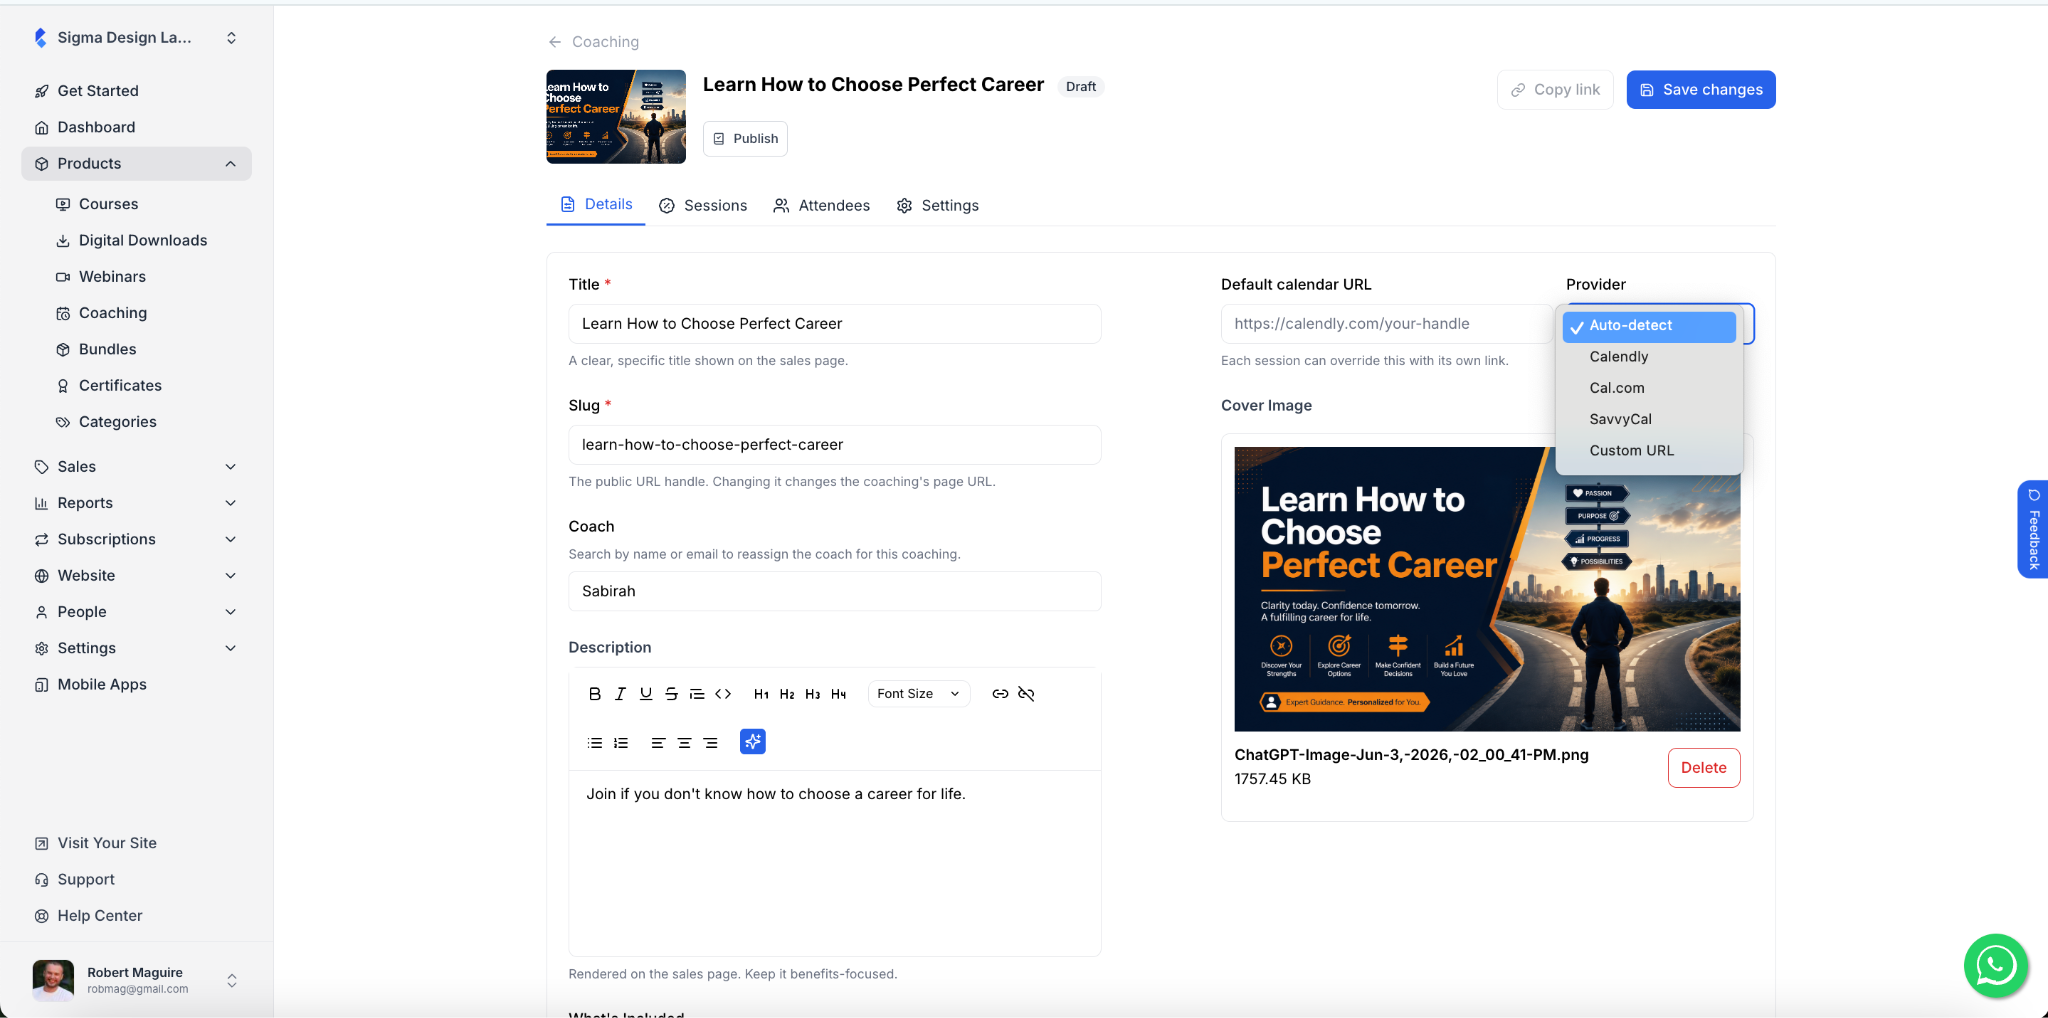
05. In the Default Calendar URL field, paste the booking link from your calendar tool. Then select the Provider from the dropdown. Available options are:
- Auto-detect – Klasio will identify the provider automatically
- Calendly
- Cal.com
- SavvyCal
- Custom URL – use this if you have a different booking tool
The default calendar URL that you provide here will be used for every session that you create unless you provide a separate URL for each session. If you provide a separate link for every session, in that case the default URL will be ignored.
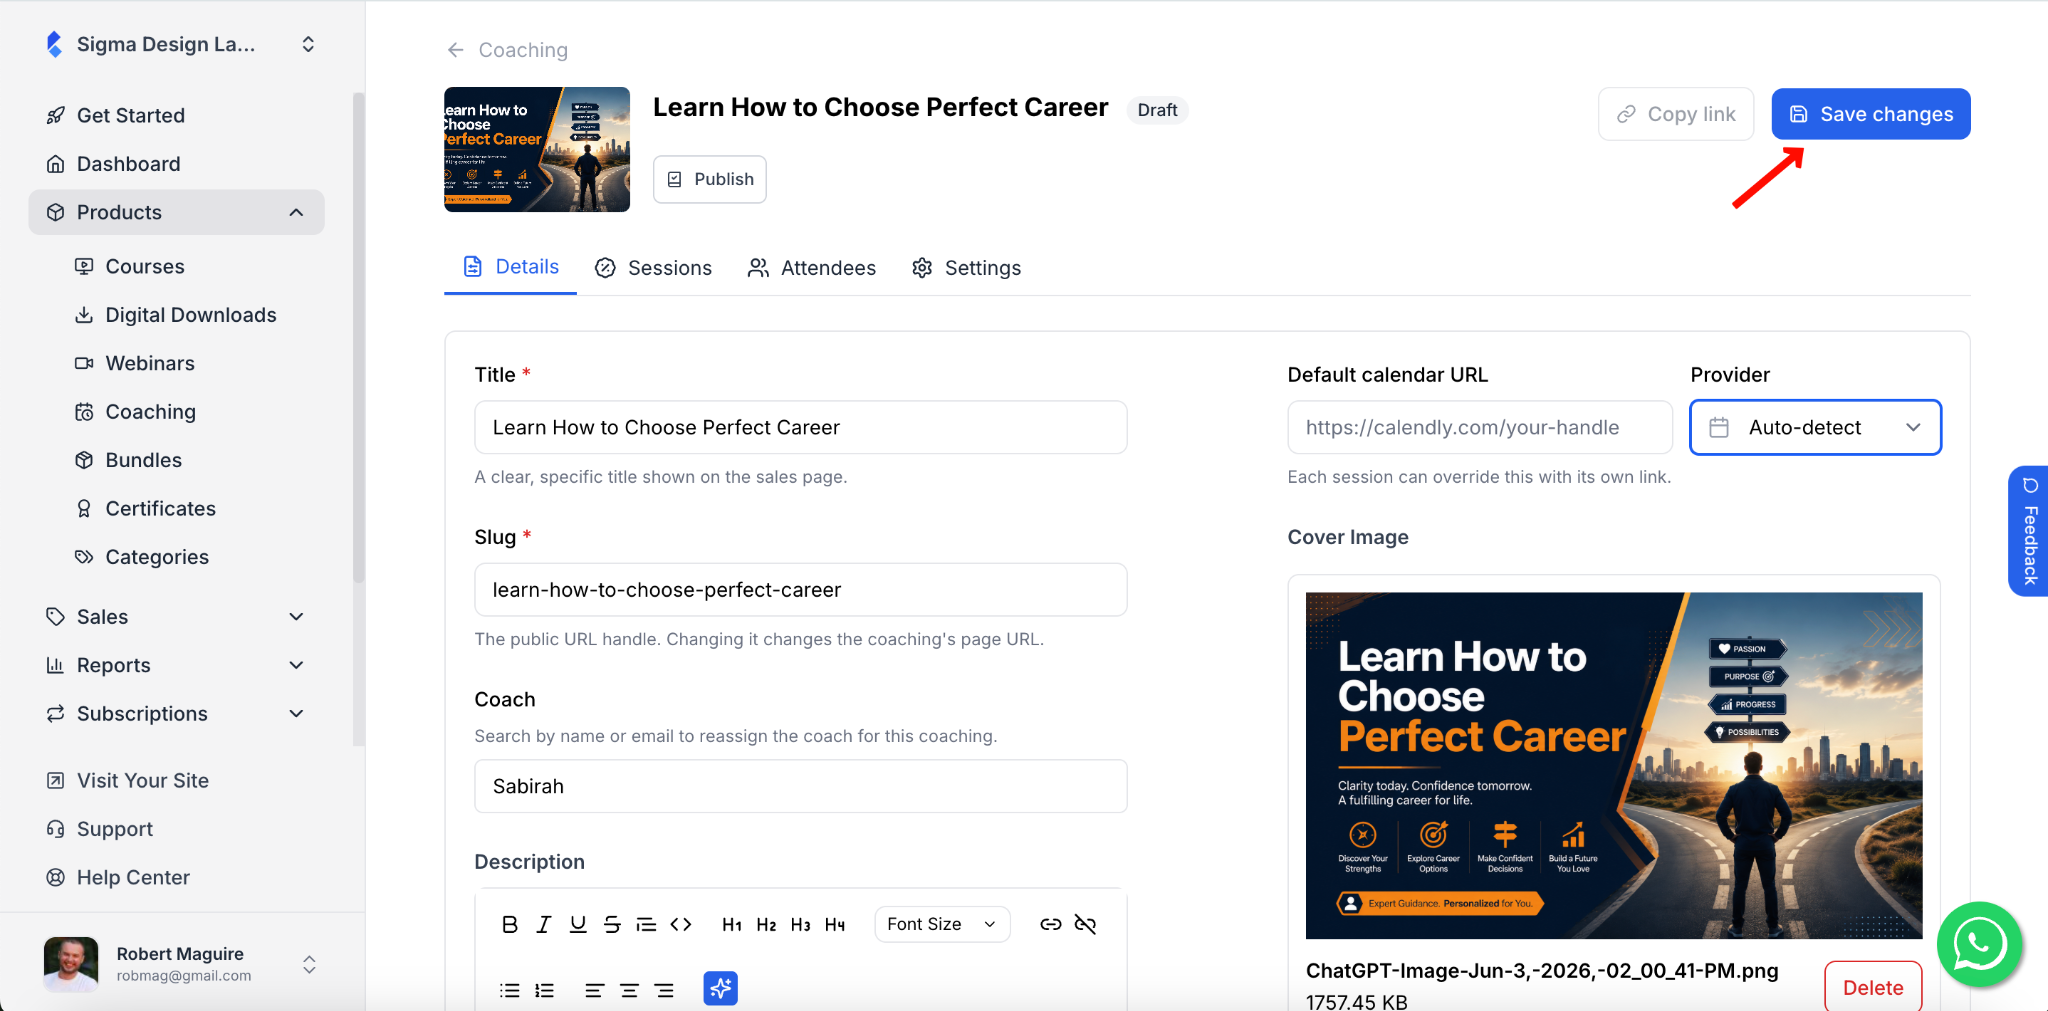
6. Once you are done, click Save changes in the top right corner.
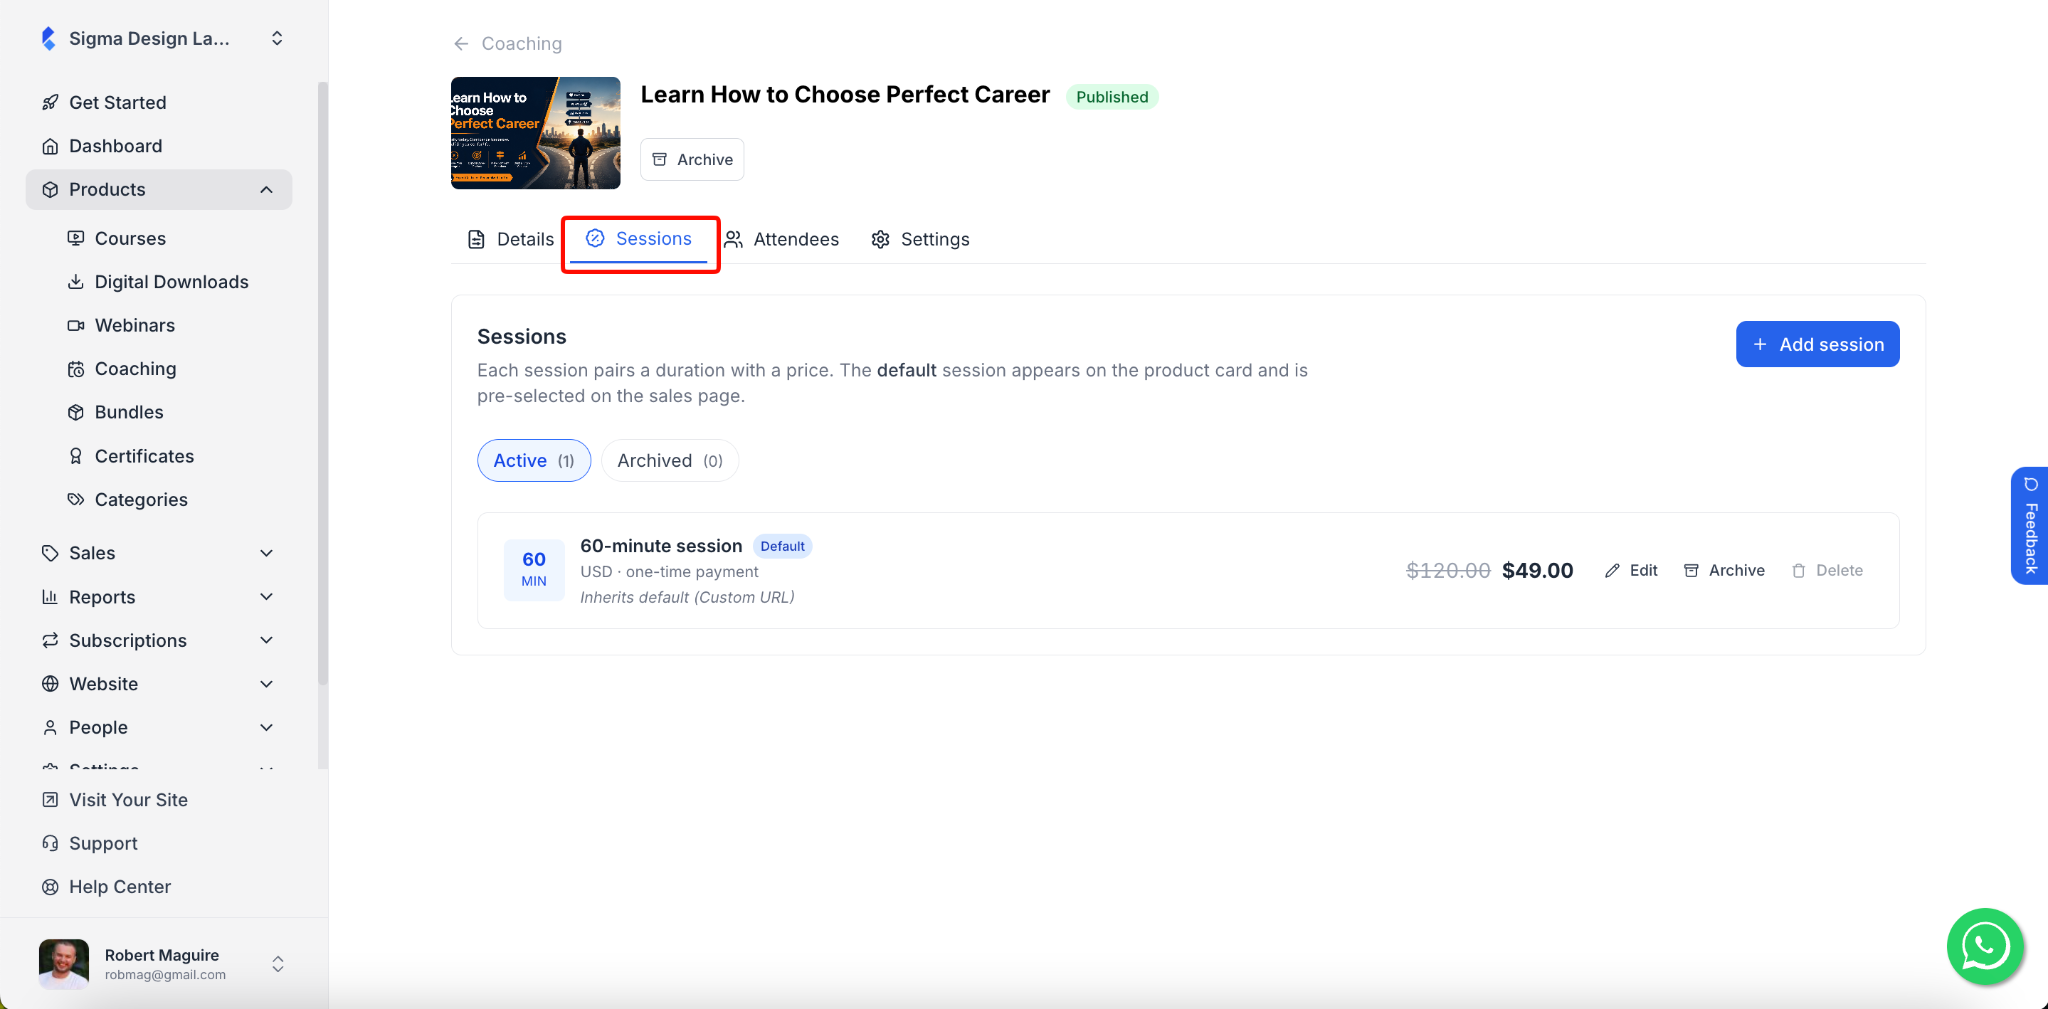
7. The next tab is Sessions, where you can add sessions to your coaching. A coaching can have multiple sessions with different pricing and times. The details of how to add sessions to your coaching will be covered in separate documentation.
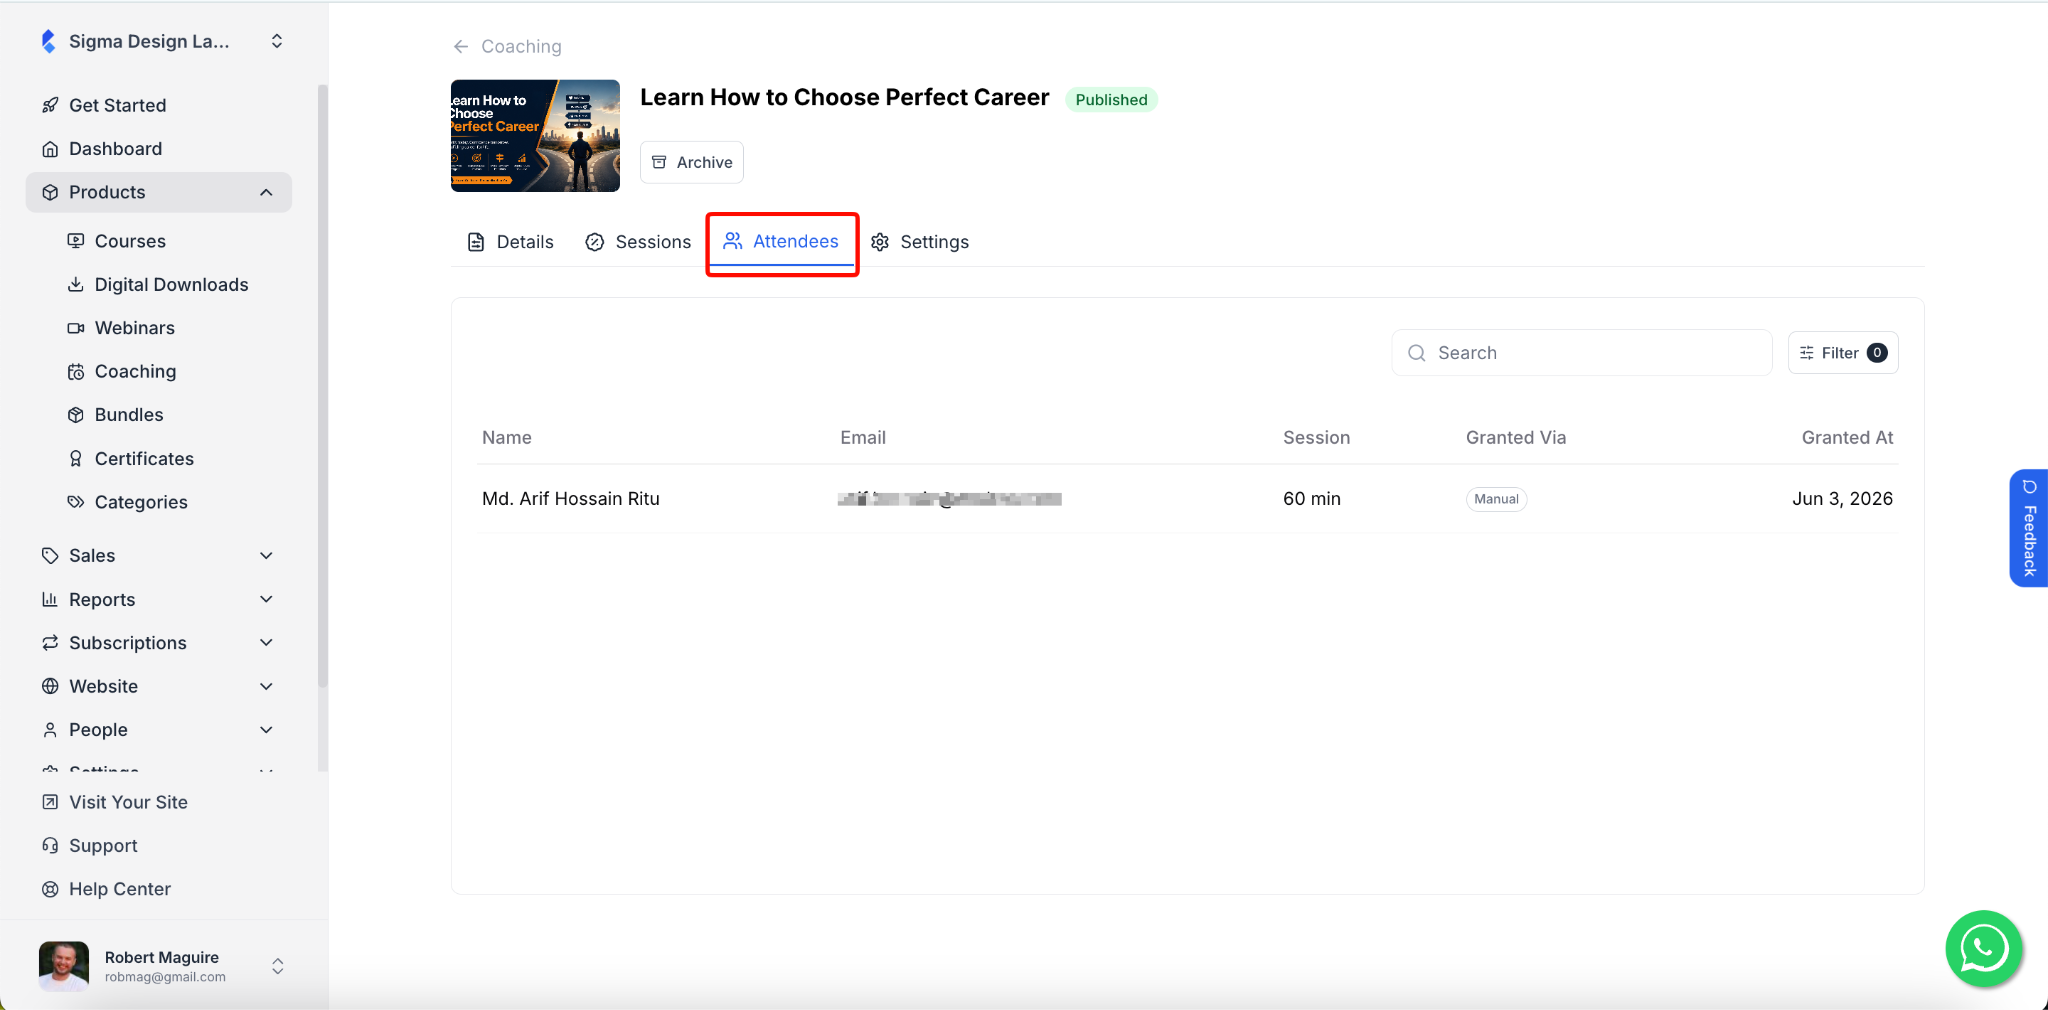
8. The third tab is Attendees. In this tab, you can see the list of everyone who purchased your coaching.
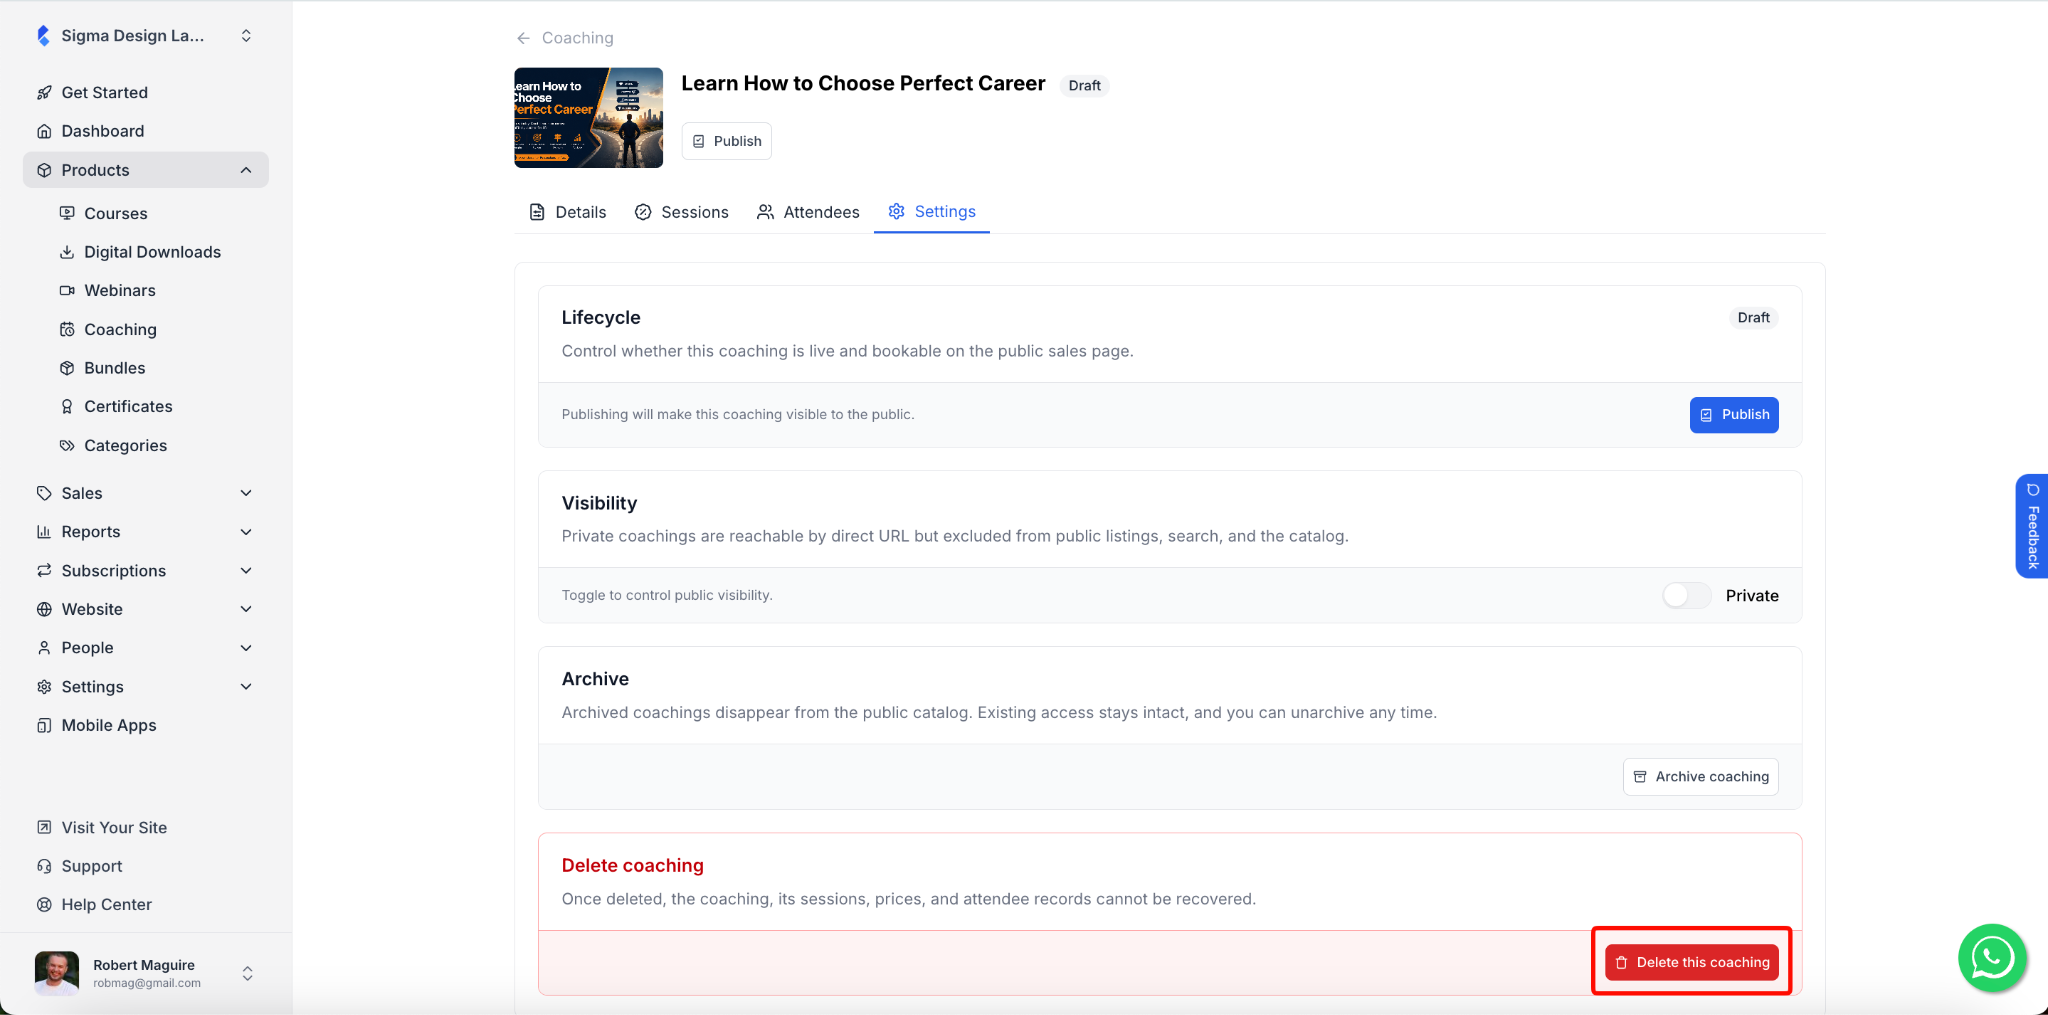
9. The final tab is the Settings tab. Click on the Settings tab inside the coaching editor.
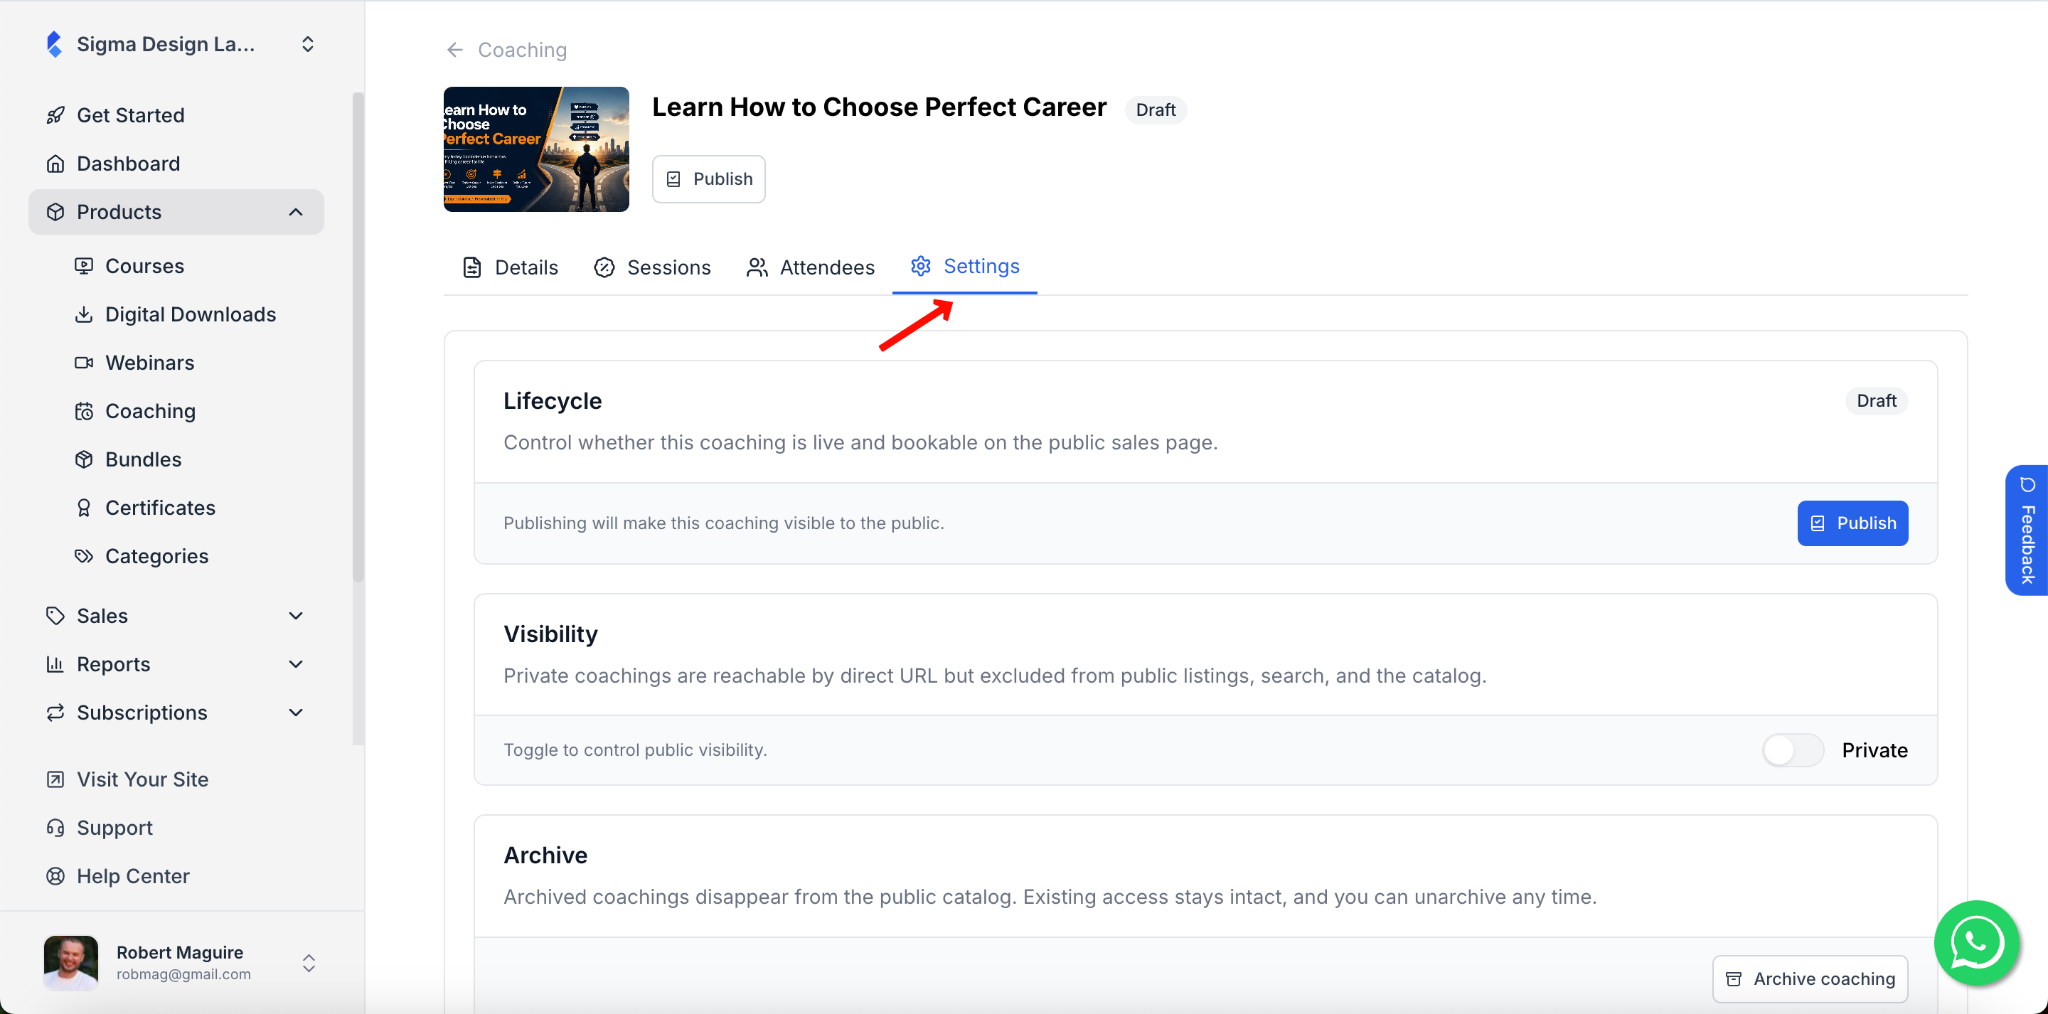
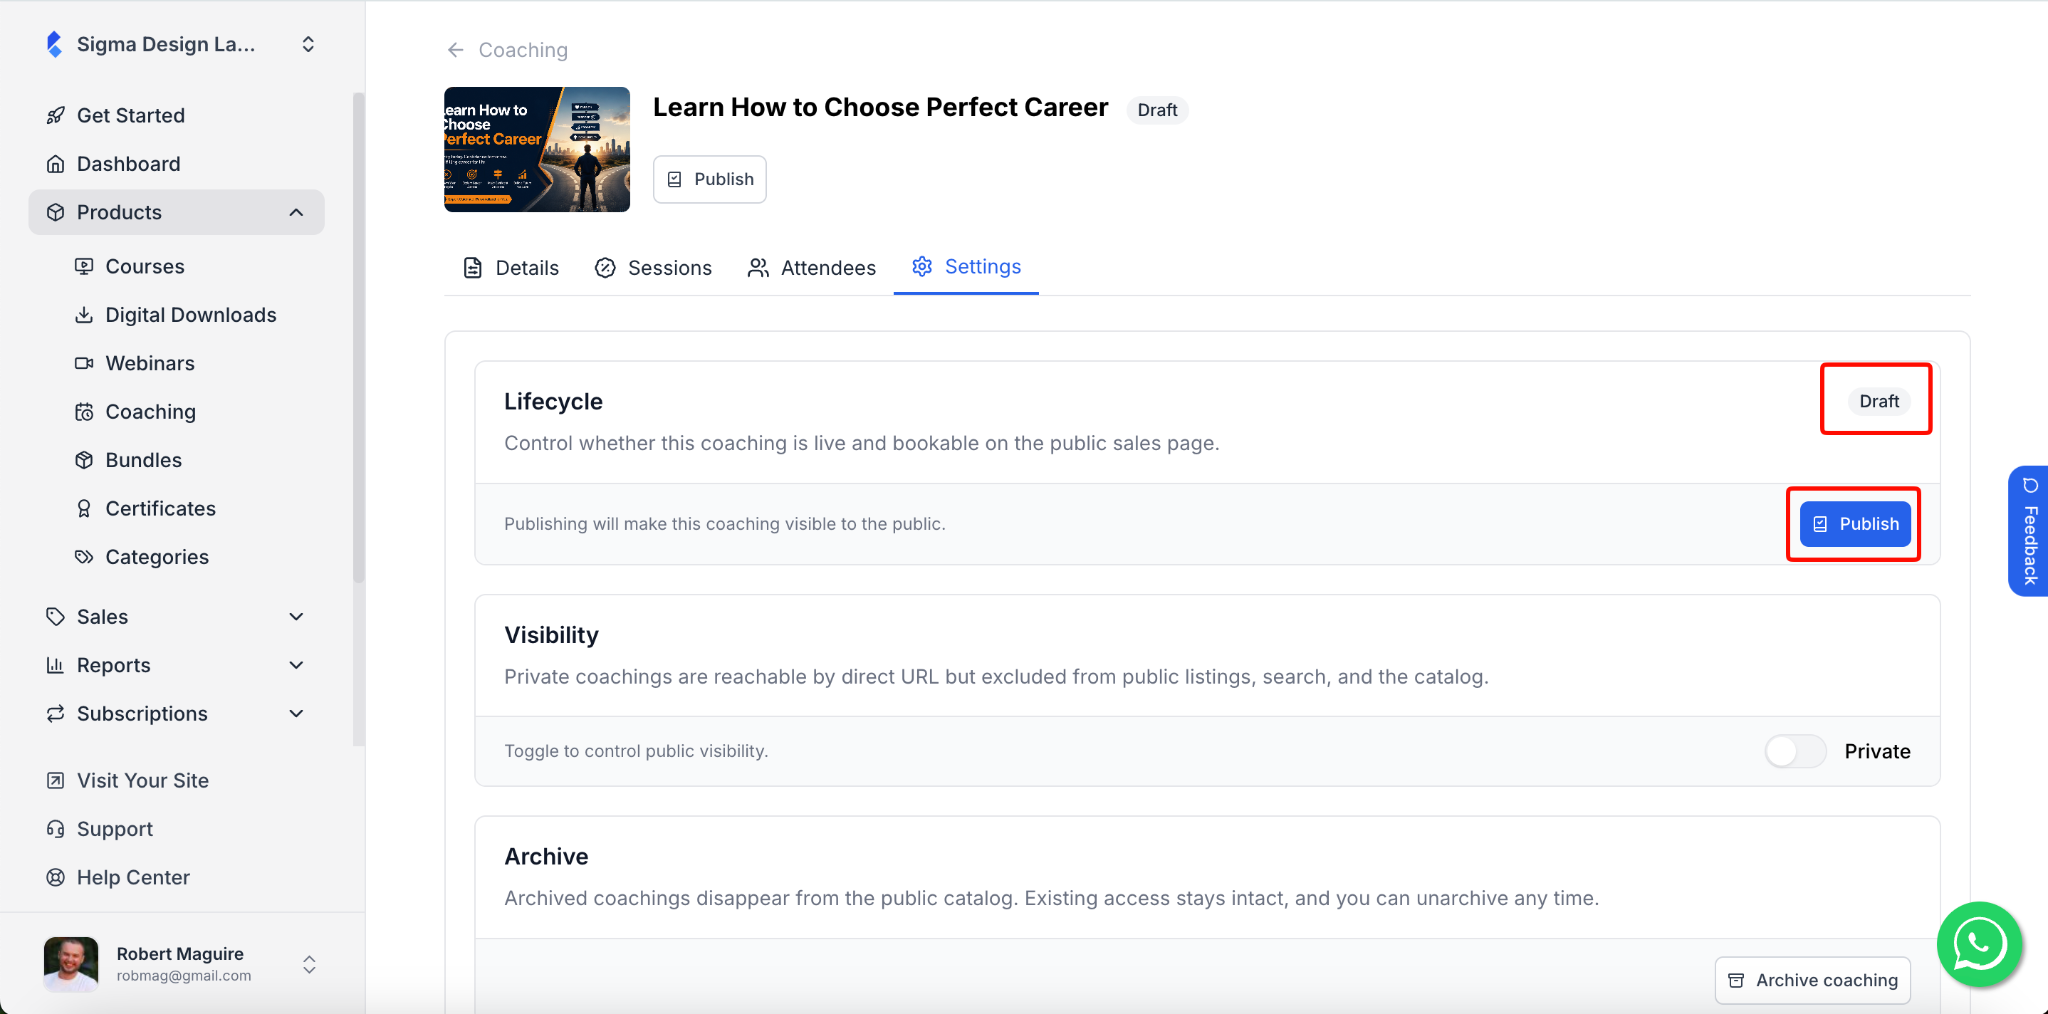
10. The Lifecycle section controls whether your coaching is live and bookable on the public sales page.
To make your coaching visible to the public, click the Publish button. Once published, clients can find and book your coaching. You can also publish directly from the top of the coaching editor using the Publish button next to the coaching title.
11. The Visibility setting lets you make a coaching private. Private coachings are still reachable by direct URL but are excluded from public listings, search, and the catalog.
Toggle the Private switch to control public visibility. When enabled, the coaching will not appear in your public catalog.
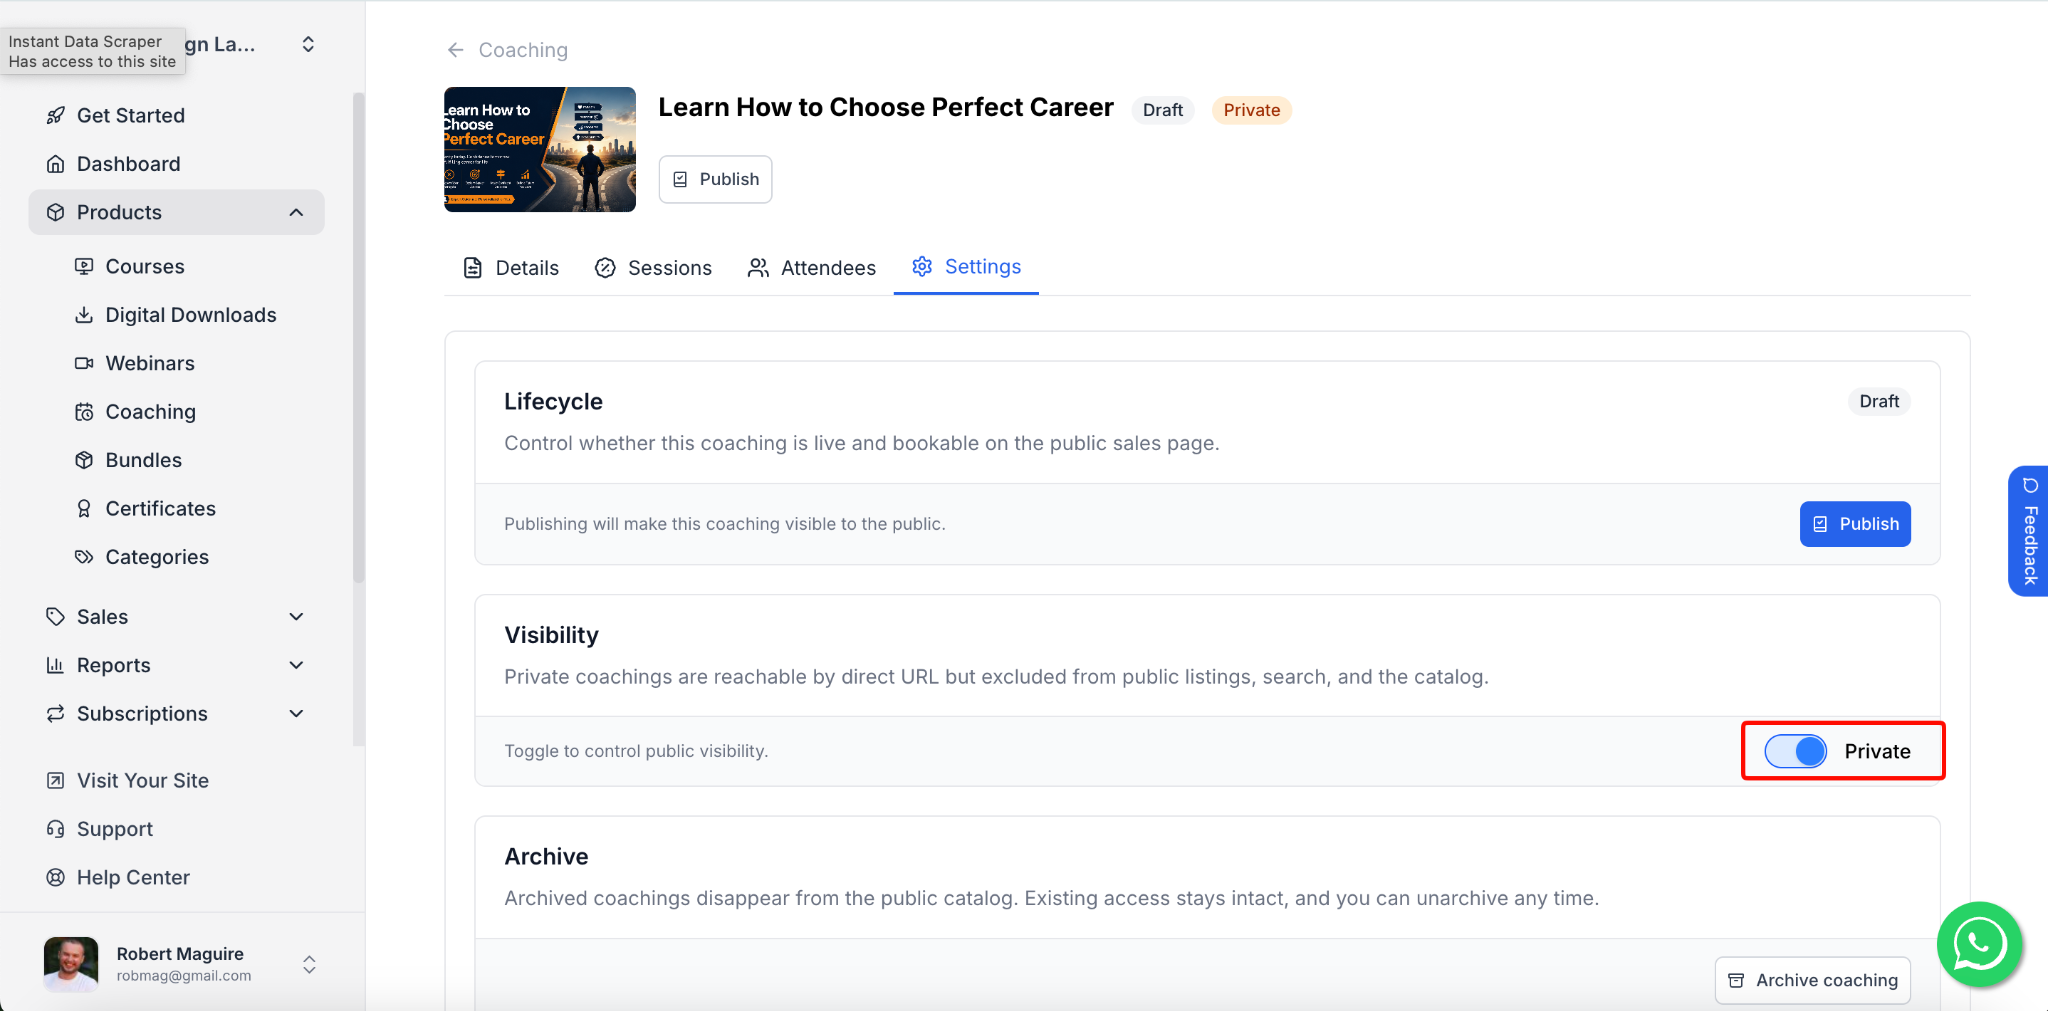
12. Archiving a coaching removes it from the public catalog. Existing client access stays intact, and you can unarchive at any time.
Click Archive coaching to archive it.
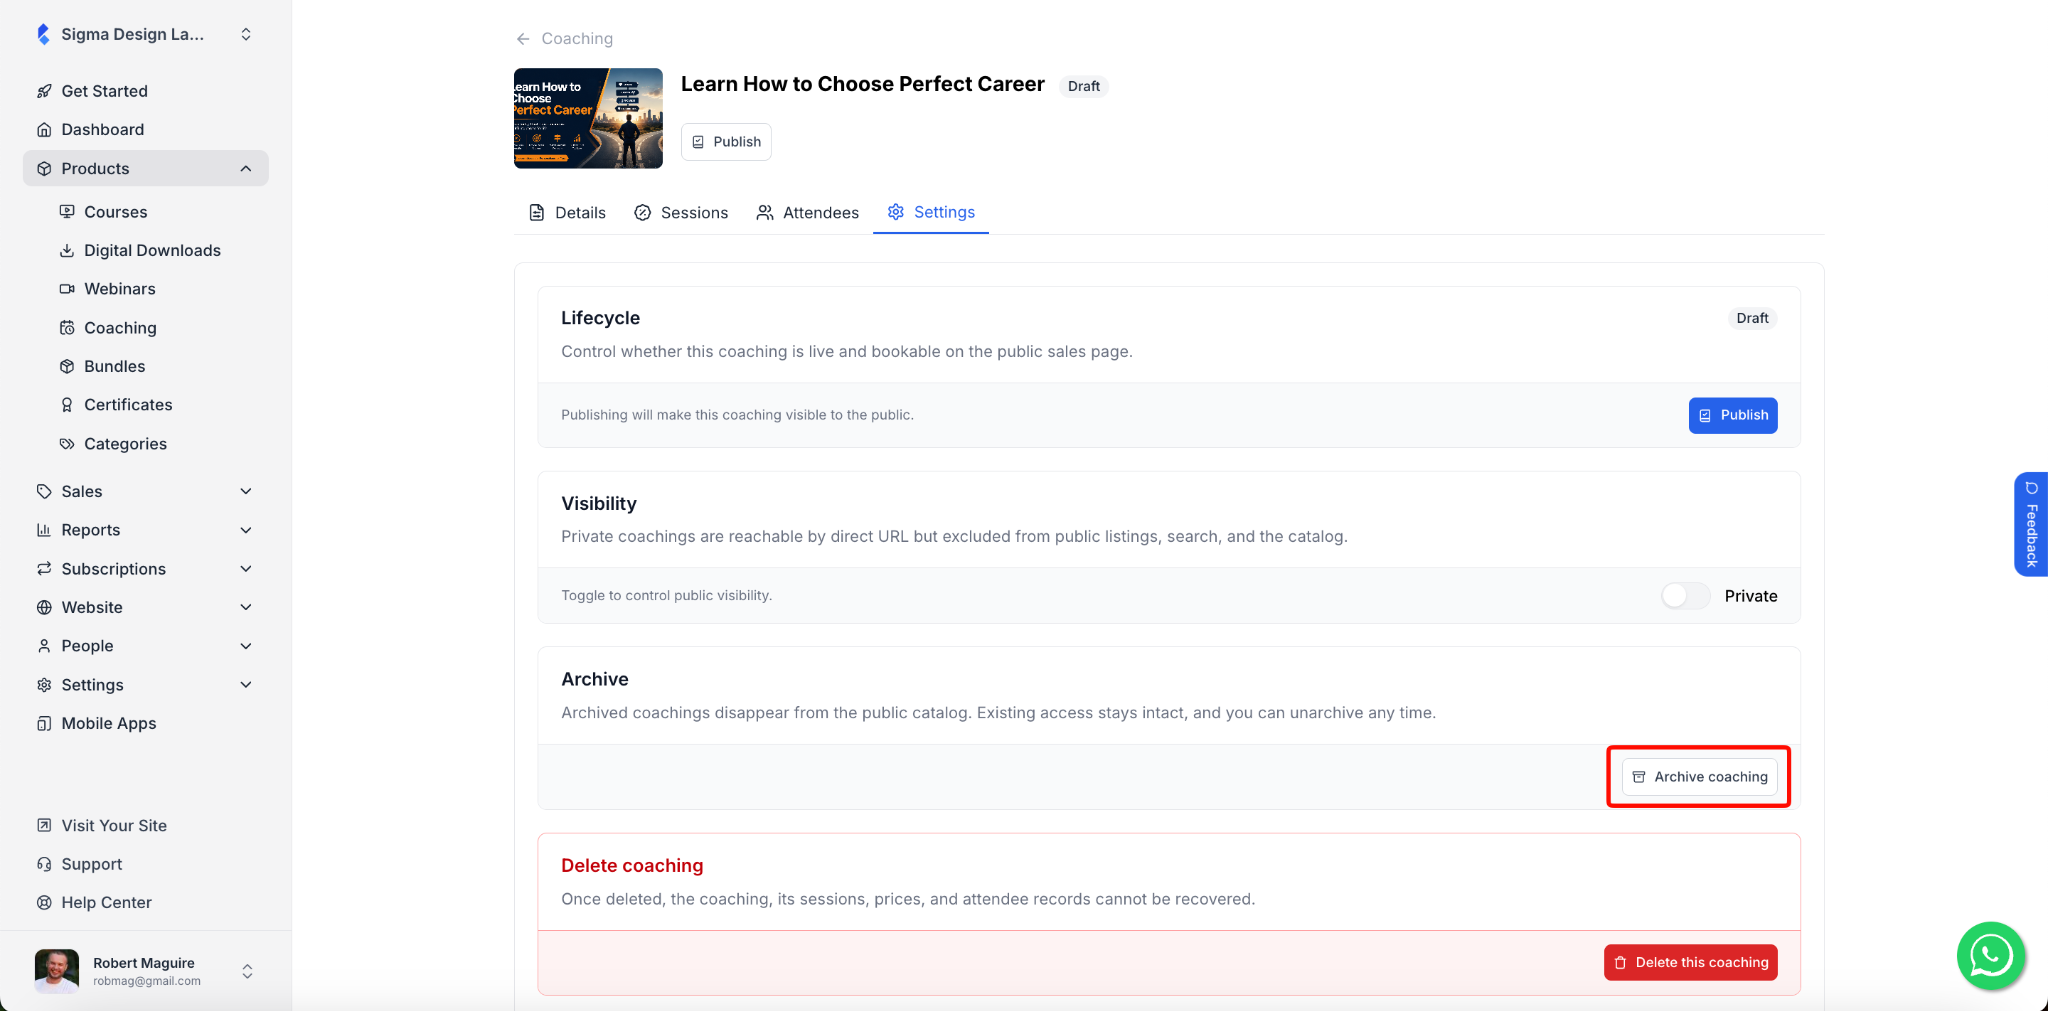
13. Deleting a coaching is permanent. Once deleted, the coaching, its sessions, prices, and attendee records cannot be recovered.
Click Delete this coaching to permanently delete it.