
PayFast is one of the most widely used payment gateways in South Africa. It lets your students pay for your courses with credit and debit cards, Instant EFT, QR codes, Mobicred, and more. If most of your students are in South Africa, PayFast gives them a checkout with payment methods they already know.
To connect PayFast with Klasio, you need three details from your PayFast account: your Merchant ID, your Merchant Key, and your Passphrase.
Before you get started, make sure you have a PayFast account. If you want to try PayFast before accepting real payments, you’ll also need a free PayFast Sandbox account. We cover testing later in this guide.
Step 01: Open the PayFast Settings in Klasio
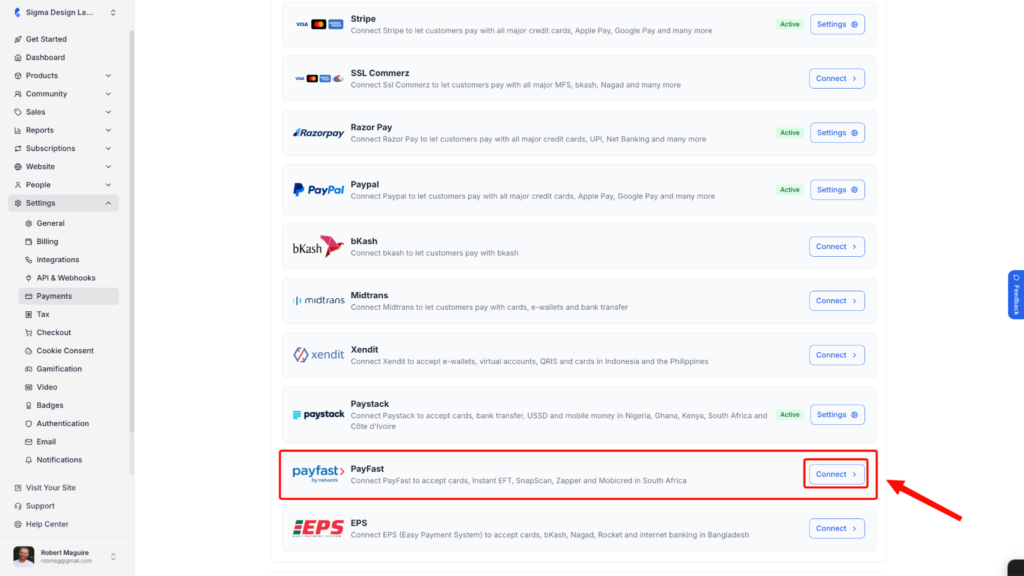
1. From the admin dashboard, go to Settings and then click Payments. Find PayFast in the list of payment gateways and click Connect. A popup titled PayFast Setting will open.
Step 02: Add a Name and Description
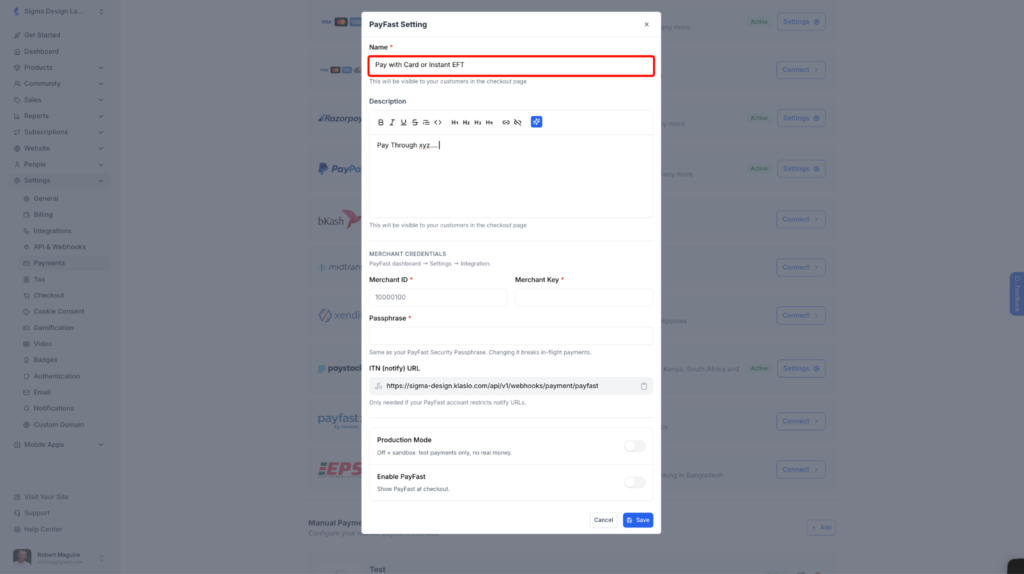
2. In the Name field, type the name your students will see at checkout, for example “PayFast” or “Pay with Card or Instant EFT.” This field is required. In the Description box, you can add a short note for your students. For example, you can tell them which payment methods they can use. This text also shows up on the checkout page.
The Description is optional.
Step 03: Copy Your Credentials from PayFast
All three details are on one page in your PayFast dashboard.
3. Log in to your PayFast and go to Settings > Developer Settings. Your Merchant ID and Merchant Key are in the top-right corner of the page. Your Security Passphrase is just below them.
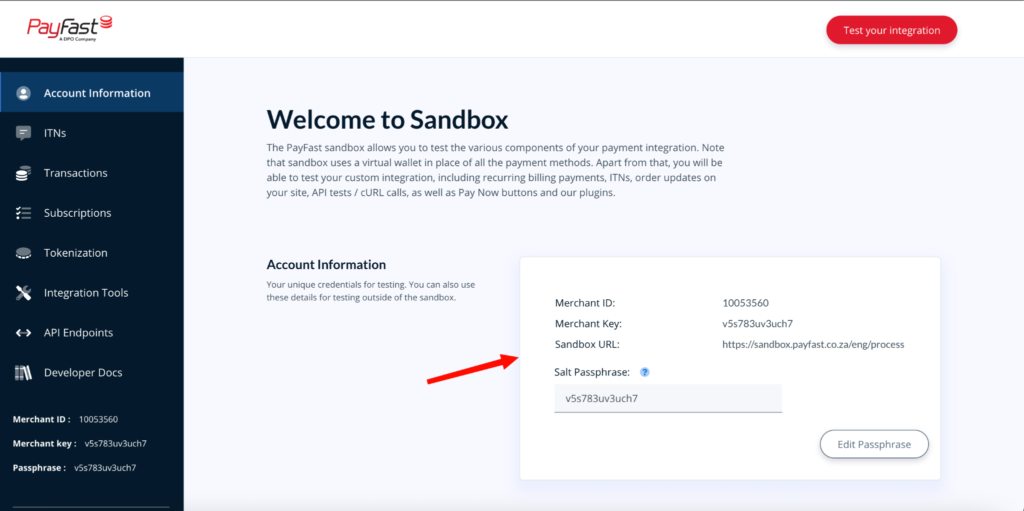
4. Copy each one into the matching field in the Klasio popup: Merchant ID, Merchant Key, and Passphrase.
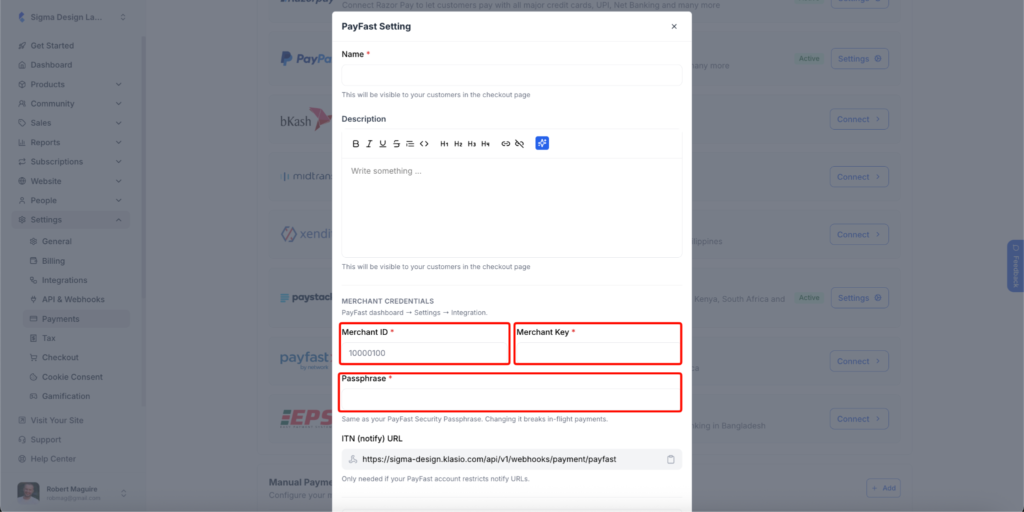
When you paste, make sure there are no extra spaces before or after any of these values. A single space is enough to make checkout fail.
The passphrase in Klasio must always match the one in PayFast. If you change it in PayFast later, update it in Klasio right away. Any payment a student has already started with the old passphrase will fail.
About the ITN (notify) URL: Klasio fills in this field and sends it to PayFast with every payment, so you don’t need to change it.
Step 04: Choose the Mode and Enable PayFast
5. Set the Production Mode toggle based on the credentials you added.
- Leave it off if you used your PayFast Sandbox credentials. This is sandbox mode, so you can make test payments and no real money moves.
- Turn it on if you used your live PayFast credentials. Your students will pay real money.
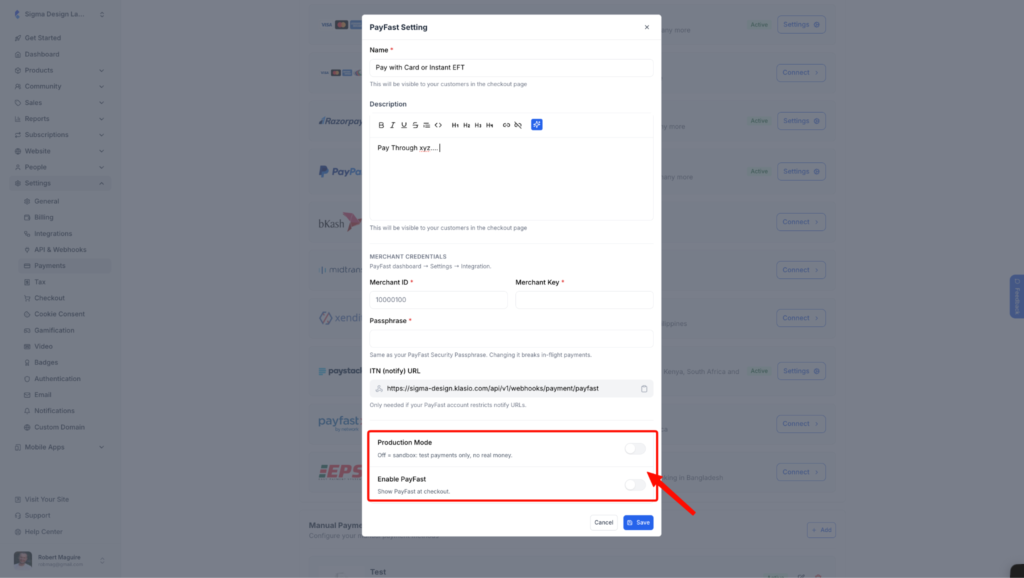
Your credentials and the mode must match. Sandbox credentials only work with Production Mode off. Live credentials only work with Production Mode on.
6. Turn on the Enable PayFast toggle. This shows PayFast as a payment option at checkout.
Then click Save.
With this, PayFast is connected to your academy. Your students can now choose PayFast at checkout.
Test Your Setup with PayFast Sandbox
Want to try it before accepting real payments? Use a free PayFast Sandbox account. It uses a virtual wallet, so no real money moves.
1. Log in at sandbox. Your Merchant ID, Merchant Key, and Salt Passphrase are on the Account Information page.
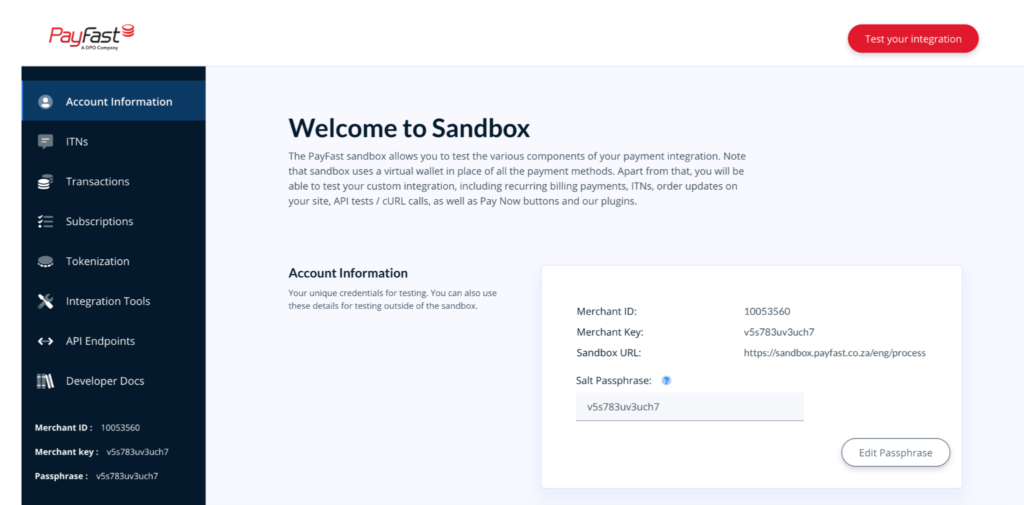
2. Add these details in Klasio with Production Mode off, turn on Enable PayFast, and click Save.
3. Buy one of your courses and pay with PayFast. Then, in the sandbox, scroll down the Account Information page to Last 5 ITNs. A Result of Success means PayFast notified Klasio and the student has access to the course.
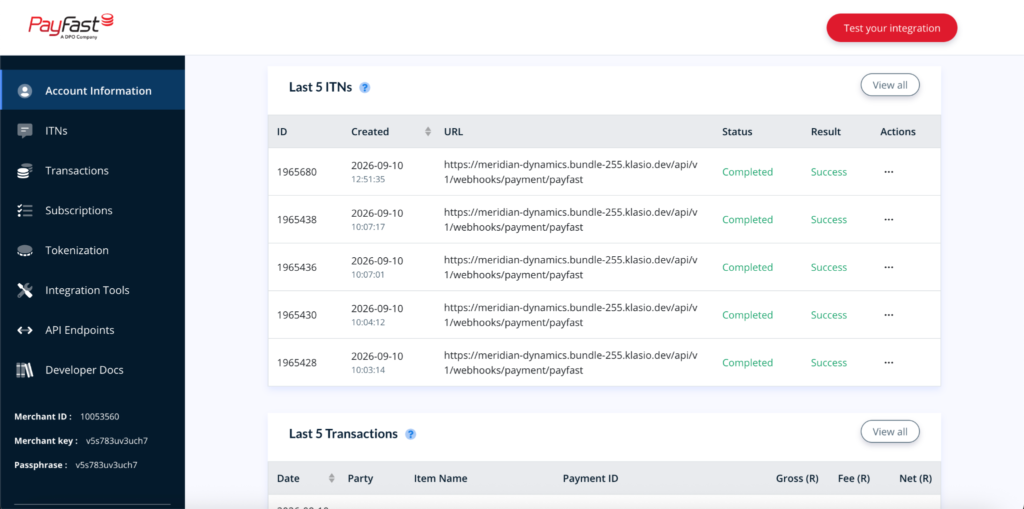
When the test works, switch to your live details and turn Production Mode on.
Things to Know
Klasio supports PayFast for regular course sales. Automatic recurring billing for subscriptions currently runs through Stripe. If you plan to sell subscriptions to students in South Africa, read our guide on the course subscription business model first. It covers your options when a local gateway doesn’t handle automatic renewal.
Turn Off PayFast Anytime
If you want to stop accepting payments through PayFast, go to Settings > Payments. Click on the Settings button on the PayFast row. Turn off the Enable PayFast toggle and click Save. Your details stay saved, so you can turn it back on later.
If you face any issues or can’t complete the integration, please contact us at [email protected].